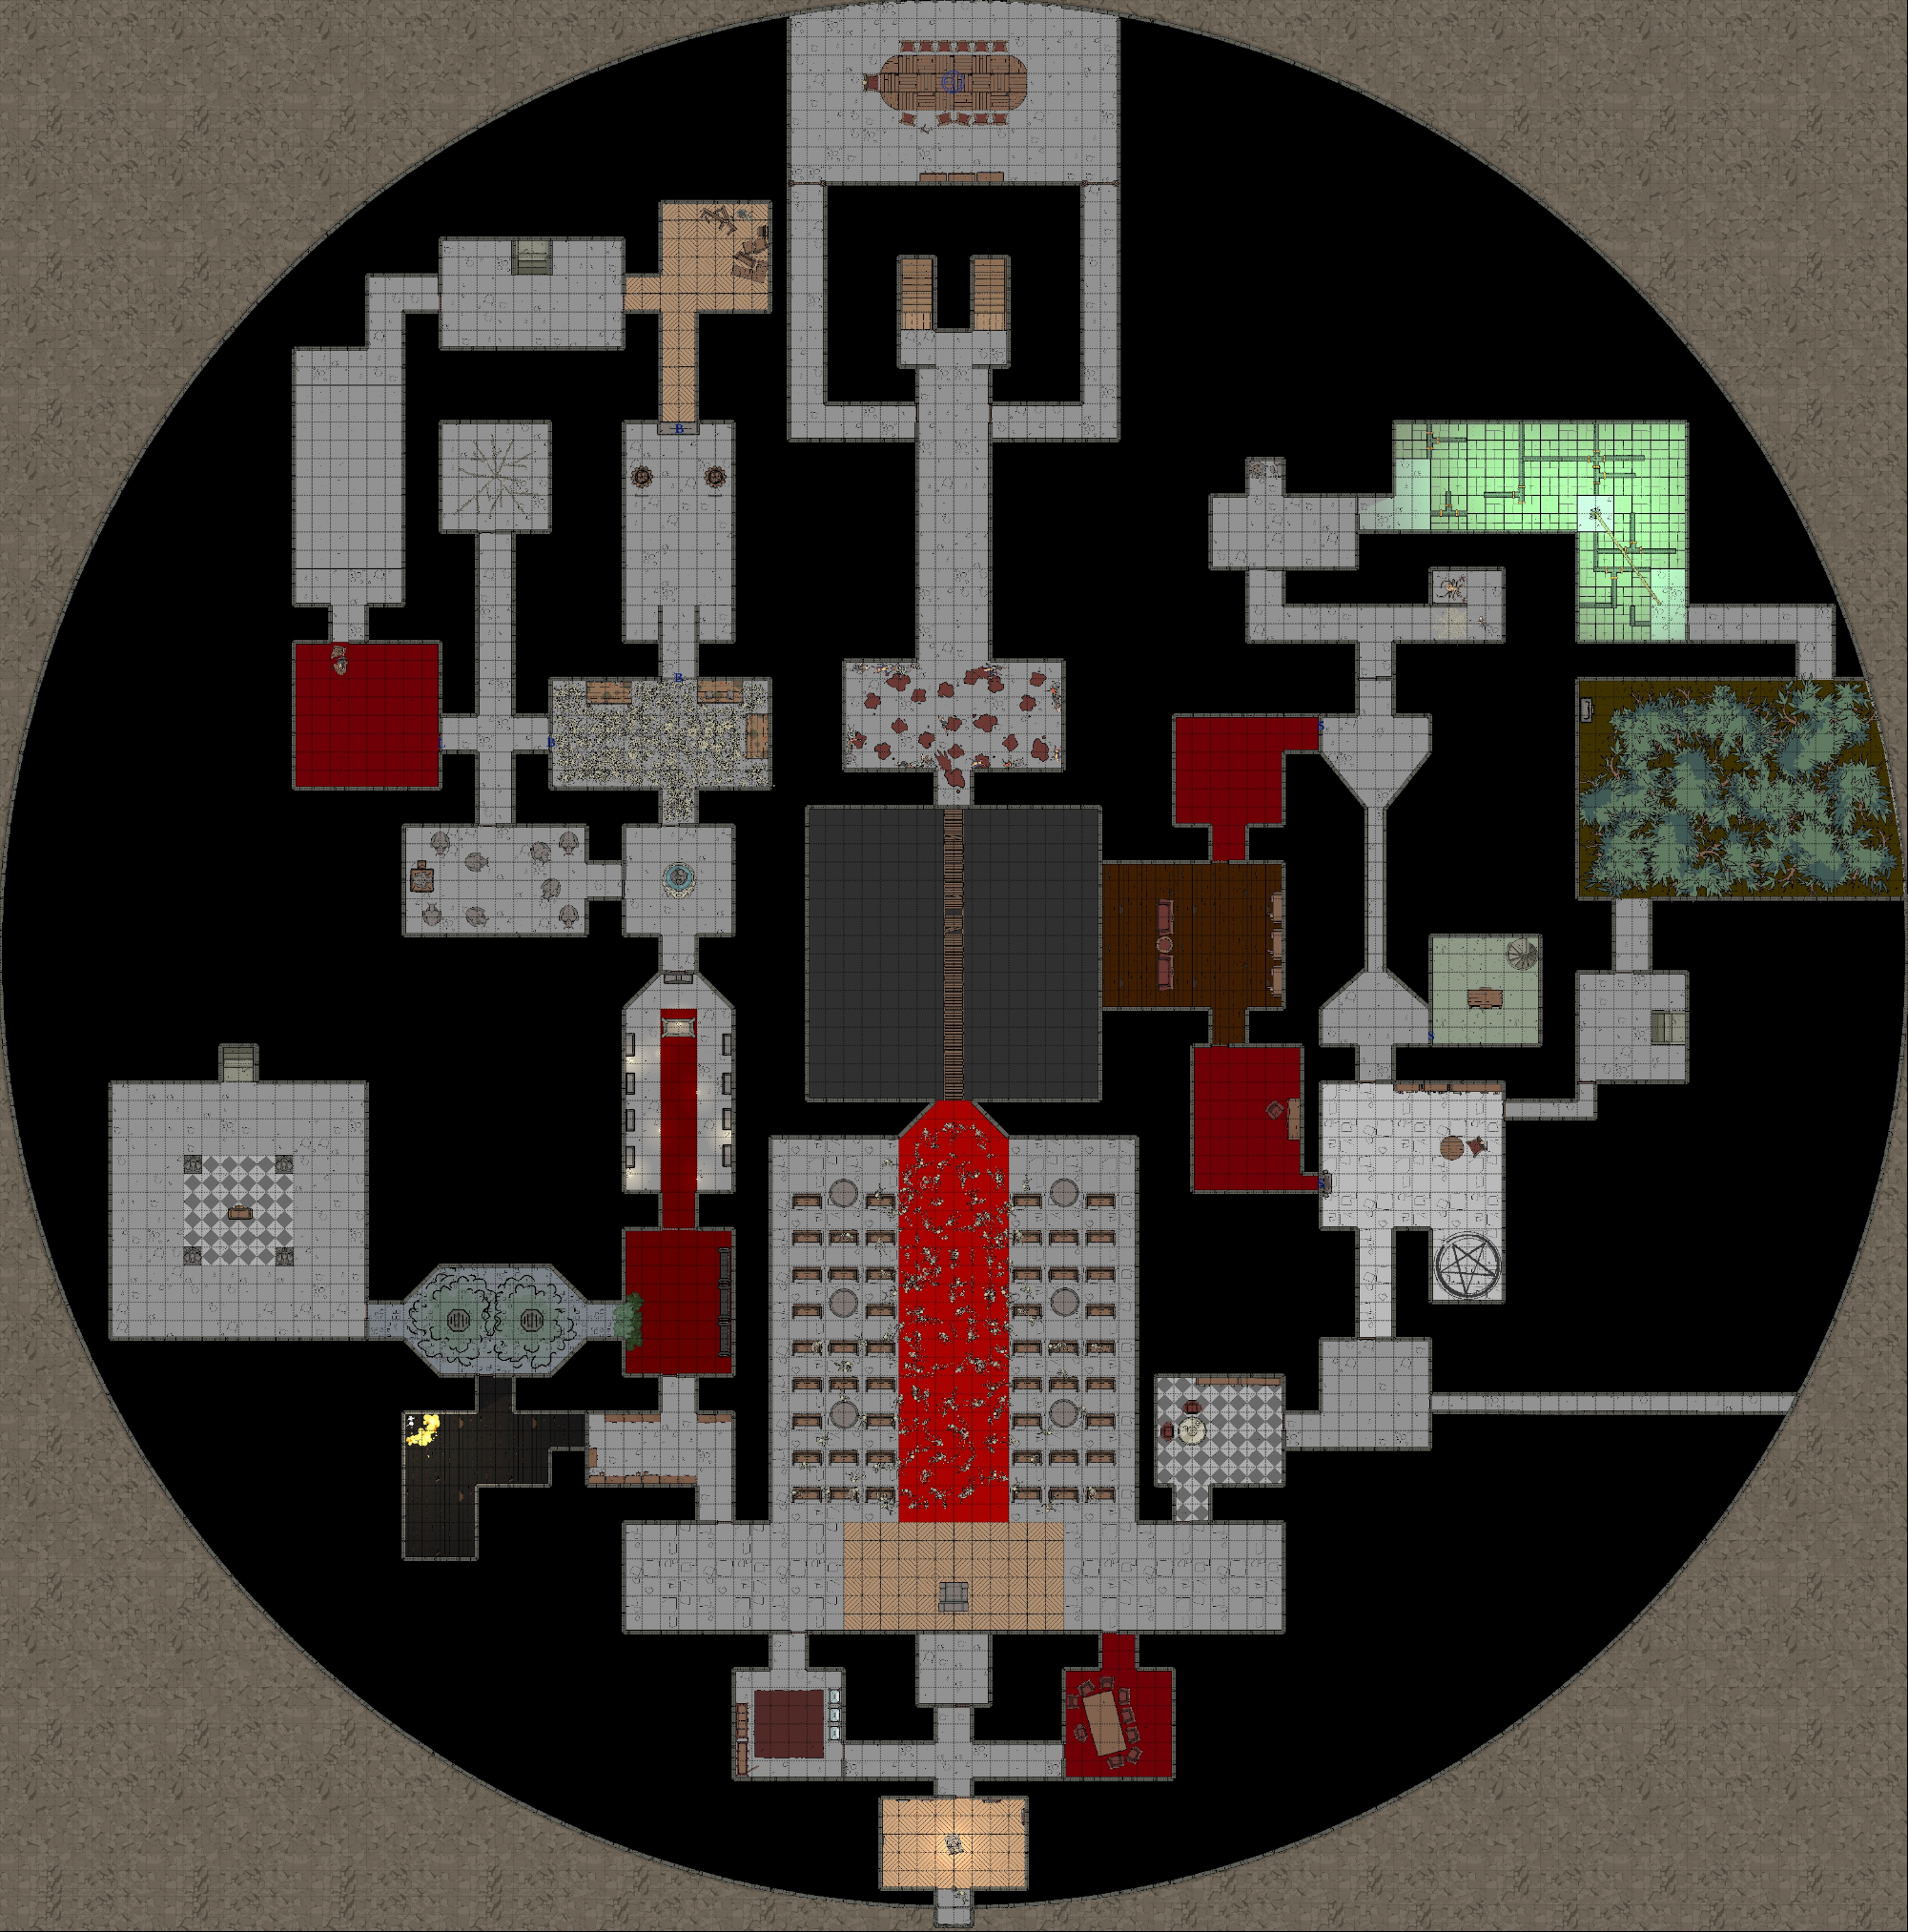
Rope Bridge - 3-1
Room Type: Trap
Light Level: Dark
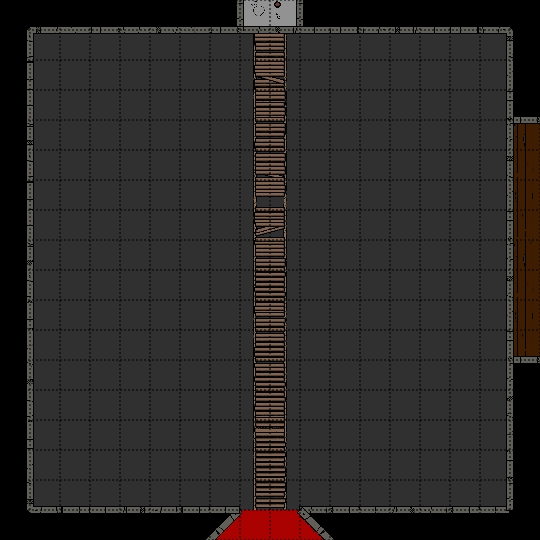
Through this part of The Drop (10-7), a rope bridge crosses from north to south. It sways when walked on, creating a creaking noise that's drowned out only by the clones' screams as they fall from above.
Looking up and down, the drop is complete darkness. One thing visible from the bridge is a skeletal leg protruding from a boot attached to the west wall, 10 feet up. This boot is a single Spider Climbing boot.
Trap!
When crossing the bridge with a light source, people who are falling will be able to see the bridge and will try to grab it. Anything that hits or grabs the bridge will cause it to swing widely or even break under full impact. Bodies fall every few rounds in different locations around the outside edge of the drop, so getting across quickly is the key.
If the bridge is broken, it will magically fix itself overnight.
Connected Rooms
Up - Darkness - The Drop 10-7
Down - Darkness - 1-7
North - Fancy wooden double doors - 3-33
South - Grand open archway - 3-2
Forgotten Throne Room - 3-2
Room Type: Special
Light Level: Dark
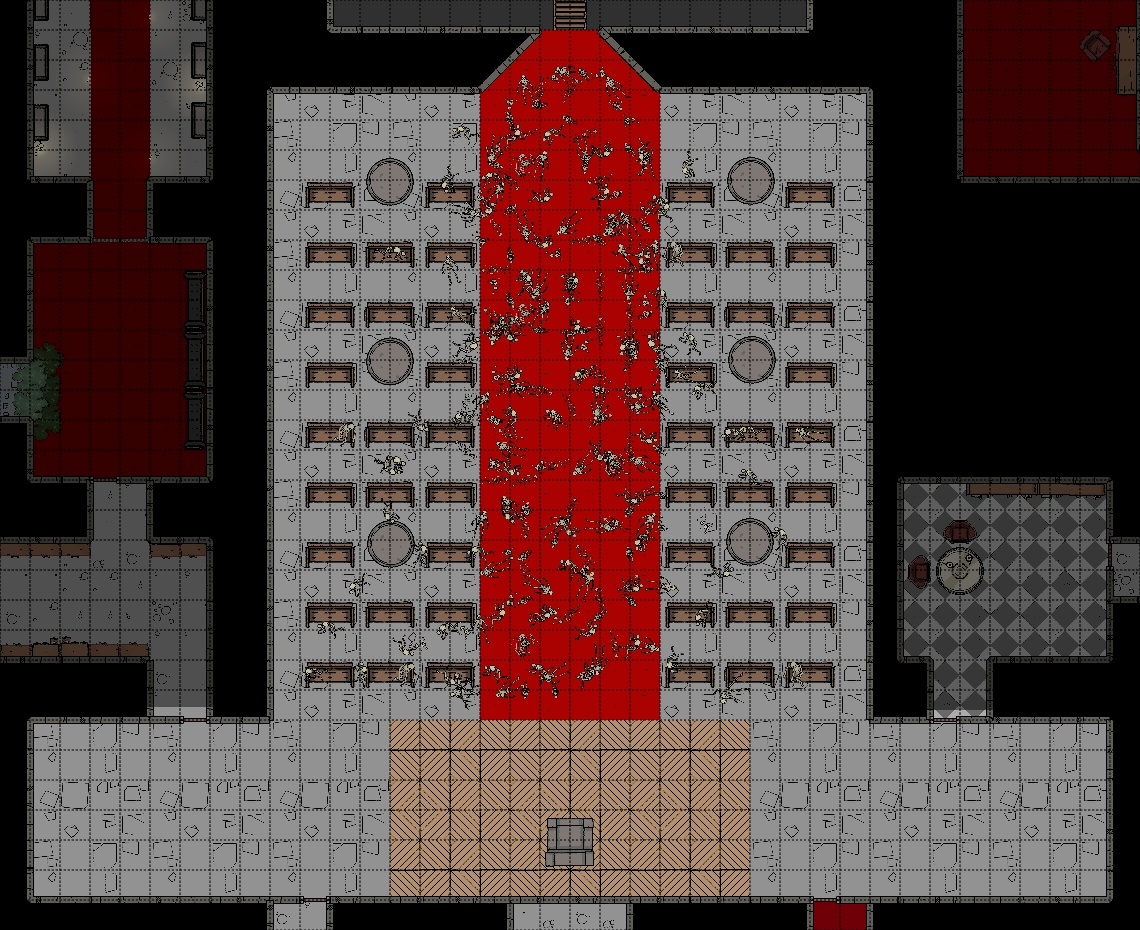
The room before you is incredible, with large pillars supporting arched ceilings and beautiful, smooth stone walls, lending it a sense of grandeur. This beauty and craftsmanship are contradicted by the corpses that fill this room.
This throne room used to be the hub of activity on the floor, where the different groups of researchers and workers would speak with Alistair. Now the room is full of hundreds of skeletal remains. This chamber is where Alistair gave the village of Grimrest their ultimatum before killing them; their bodies still lay where they died.
There are rows of pews in this room facing a small platform with a throne atop it. The pews are full of skeletons, a few with flakes of papery skin still attached. These remains are thousands of years old. Many of the skeletons are filling the aisles and the main centre aisle as if they were running away when they died.
On the raised platform is a dark, twisted metal throne with well-made red cushions now coated in a thick layer of dust.
Loot! Distributed amongst the bodies, this will take a long time to collect.
- 1000 gp worth of random small jewellery, such as wedding rings.
- 200cp
- 50sp
- 10gp
Connected Rooms
North - Grand open archway - 3-1
East - Well-made decorative wooden door - 3-3
South East - Thick wooden door snug to the frame - 3-29
South West - Reinforced wooden door (locked) - 3-30
West - Simple wooden door - 3-10
Pristine Room - 3-3
Room Type: Trap
Light Level: Dark
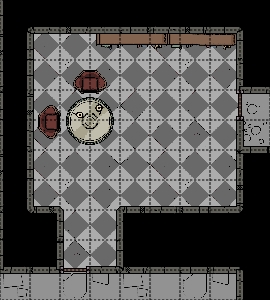
A beautiful sitting area featuring a small library. Everything is perfectly in place, like a showroom; not even a speck of dust spoils the setting.
TRAP!
If anything is moved in the room, it will return to its original location 1 turn later, moving along a direct path at high speed. These fast-moving objects will rip through bags and pin people to things. An object's impact depends on its size. 1d4 for being hit with a fast-moving book seems fair.
Throughout the room, there are many valuable objects, but they must be magically dispelled before they can be taken out.
Bookshelves: Colourful books in an ancient language fill the shelves; they are all old novels and poetry. 5gp each. 987 books in total.
Paintings: There are two photorealistic oil paintings in the room.
- Painting of a Pseudragon coiled up next to a large group of multicoloured dragon eggs from many different colours of dragon.
- A strange painting of this room with everything in the same locations it currently is in.
Other valuable objects include the very nice reading chairs that are around a central coffee table. Set out on the coffee table is a stunning tea set made of electrum, worth 1500 gp.
Connected Rooms
East - Well-made decorative wooden door - 3-11
South - Well-made decorative wooden door - 3-2
The Hungry Balcony - 3-4
Room Type: Trap
Light Level: Sunlight/Dark
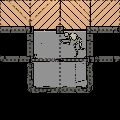
Clinging to the outside of the tower is this small balcony with a stone railing at knee height. The tower's dark stone arches surround a set of tall metal double doors. These doors are beautifully decorated with hammered imagery of birds flying from the point where the two doors meet.
The southern part of the stone railing has more scratches and damage than the east and west sides. This is even more so on the inside edge.
There are two ways this trap can get you.
Way 1
The balcony floor is a pressure plate; stepping on it triggers the metal doors to swing open violently, striking everything on the balcony. From this point, the fall is a 40ft drop.
Way 2
If someone forces the doors open or jumps through them as they close, they will be trapped. There is a small area on the other side of the door with dark glass walls, big enough for 2 people to stand. This dark box is a trap for anyone dumb enough to get themselves closed in behind the moving doors. There is nothing to kill the trapped individual, just time.
The glass in this small area can be smashed, but it's very hard to swing something heavy if you have no room.
Loot!
Turns out an acrobat was the last person to get stuck in here. All that is left are bones and a few items:
- Extendable metal 10ft pole (2ft to 10ft)
- 10gp
- Sling and rocks
Connected Rooms
Down - Off the balcony - Outside The Tower
North - Smash Glass - 3-32
Grand Dining Room - 3-5
Room Type: Special
Light Level: Sunlight
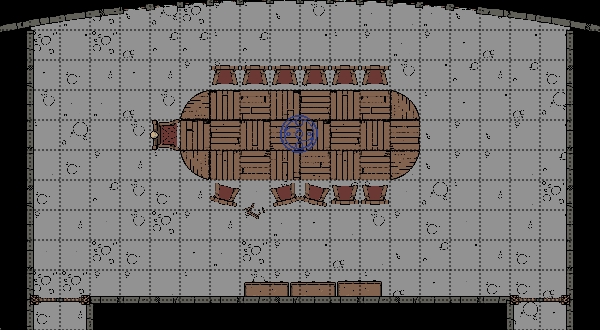
It's been a long time since this dining room was used for dining, but its grandeur and beauty remain evident. Tall windows at the north end bring in light and views from the nearby mountains. A large oval dining table stretches from east to west, covered in smashed plates and scattered cutlery.
In the middle of the table, a magical sigil is inlaid into the wood, its pattern somewhat disguised by the table's design. A wizard would spot this from a mile away. This is a teleportation sigil to the lazy waiter in B1-2. You will only be teleported if you can fit in the lazy waiter on the other end, no guests getting crushed or split in half!
Loot!
- 200Gp worth of silverware
- 6 Everlasting Tankards
- 5 Everlasting Wine Glasses
Connected Rooms
South East - Engraved wooden doors - 3-35
South West - Engraved wooden doors - 3-35
Treasure Guardians - 3-6
Room Type: Trap
Light Level: Dark
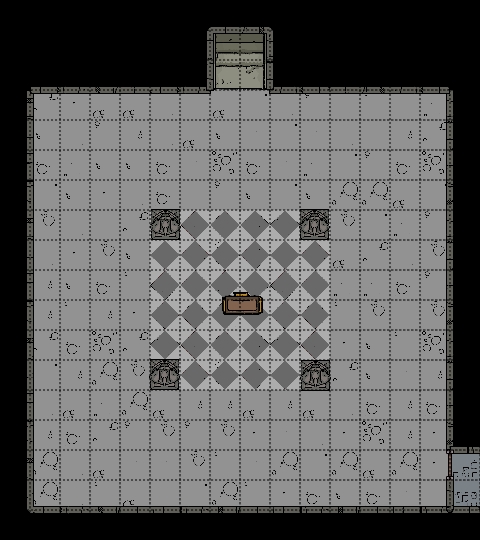
This beautiful white marble room features 4 statues of menacing warriors and a large metal chest in the middle. These marble figures are constructs (Stats of Crystal Living Statue) focused on protecting the chest in the middle of the room. They have a procedure for dealing with anyone entering the room, as they don't attack automatically:
Step 1: If someone enters the room, all 4 statues will draw their swords and face them.
Step 2: As a person approaches the statues, they will move horizontally to block them with their shields.
Step 3: If someone moves past the statues into their protective box, they will attack.
Step 4: If the chest somehow leaves the room, they will follow it, attacking anything they see along the way.
These constructs are incapable of thought, so they can't be bargained with.
This large metal chest is beautifully made and is considered treasure.
Loot!
- 600gp valued Chest
- 500sp
- Shortsword +1 buried under the silver
Connected Rooms
Down - Stone stairs down - 2-18
East - Swollen, mouldy wooden door - 3-7
Fog Chamber - 3-7
Room Type: Trap?
Light Level: Dark
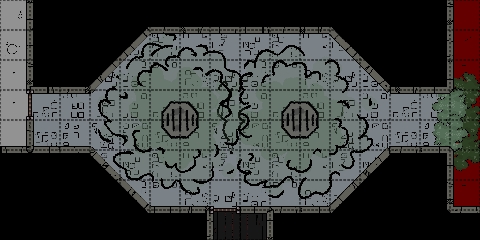
Thick green fog flows out of rusted metal grates on the floor of this dank chamber. The walls are made of dark stone brick that glistens in the light because the entire chamber is damp. Everything in this room looks damp and worn.
The fog that flows out of the floor looks deadly, but is in fact just coloured steam. Walking through it will be warm but will not hurt. This illusion is used to deter people, but the water damage and dampness suggest it's not dangerous. This fog does make it hard to see through the room. Ideal for ambushing monsters.
Once the players realise they can just walk through this room, it becomes a great place for enemies to ambush!
Loot!
- 600gp valued Chest
- 500sp
- Shortsword +1 buried under the silver
Connected Rooms
East - Open doorway (Door rotted away) - 3-8
South - Swollen, mouldy wooden door - 3-34
West - Swollen, mouldy wooden door - 3-6
Mouldy Lobby - 3-8
Room Type: Empty
Light Level: Dark
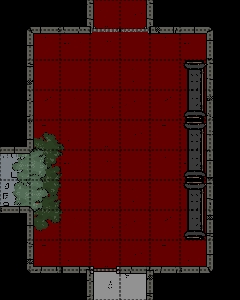
This small room is furnished with a few chairs and side tables along the east wall. The once-lush, deep-red carpet is now a swirling mess of mould and green dye, radiating from the west door.
Connected Rooms
North - Open doorway (Door rotted away) - 3-18
South - Swollen, mouldy wooden door - 3-10
West - Swollen, mouldy wooden door - 3-7
Temple to Tower Heroes - 3-9
Room Type: Trap/Lair
Light Level: Dim Light
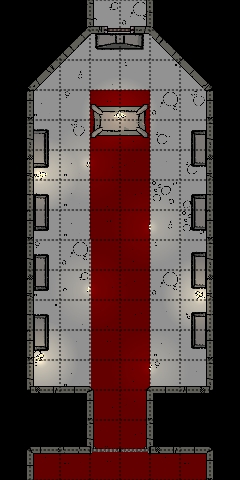
Stepping through the double doors, you are greeted by an incredible temple with arched ceilings and gently burning candles to light the way. A central red carpet runs from the double doors to the south to a central plinth at the north end featuring a lever.
Evenly distributed around the room are 9 vertical metal caskets featuring an embossed image of a very tall, resting warrior with weapons and armour. Engravings state: “My breath is spent, my duty is not”. Chains can be seen attached to the lids of these caskets, which disappear into holes in the ceiling.
The north wall has a single casket; clearly, the leader of these men is depicted on the front, wielding two longswords, his eyes open; they seem to follow you around the room.
When the lever is pulled, all the chains are pulled up into the ceiling, releasing the 8 Thouls that are resting in the caskets to the east and west. The north casket is actually a secret passage. The casket lids can be pulled off individually, or smart adventurers can cut the chains.
Killing the Thouls is possible, but overnight, the Children of the Tower will drag the corpses back into the coffins to regenerate, resetting the trap.
Connected Rooms
North - Secret thin passage inside the casket - 3-20
South - Ominous engravings on a dark metal door - 3-8
Vestry - 3-10
Room Type: Empty
Light Level: Dark
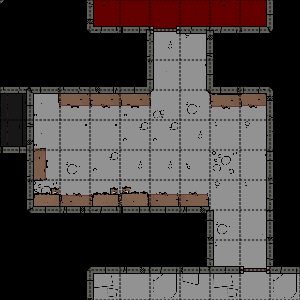
This small storage space is filled with drawers from floor to ceiling, each made of beautiful dark wood. Most of the drawers are empty or have been pulled out during the search.
What can be found in the drawers:
- Lots of candles - Clearly, what is being used in 3-9 and 1-2
- Small amount of incense - 10 gold worth (Not treasure)
- Small ritual cups and bowls
Connected Rooms
North - Reinforced wooden door - 3-8
South - Finely made wooden door - 3-2
West - Simple wooden door - 3-34
Quick Way Down - 3-11
Room Type: Trap
Light Level: Dark
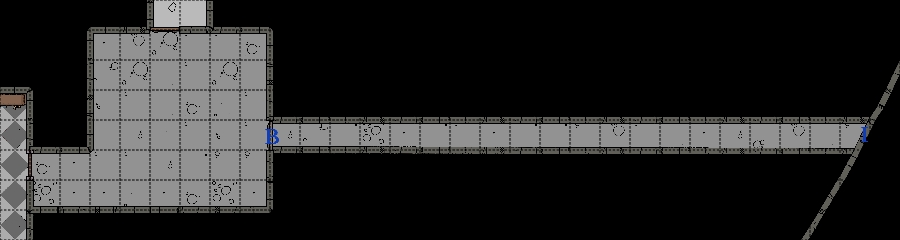
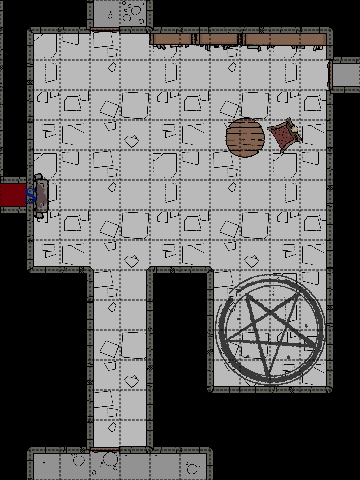
The simple room before you looks as if it were in the process of being decorated, then abandoned. The room's floors are dark stone, but its walls are covered in white plaster.
Trap!
Against the east wall is a tall metal door that curves at the top. It features hammered metal imagery of birds flying away from the middle of the door.
This door matches the one on the outside of the tower (3-4
). This door won't open, it seems to be blocked.
A close inspection of the door reveals that it is resting on the floor rather than being hinged to the wall. It is held in place by weight from above.
If someone bashes the door down, it will fall flat, and another door above will fall into place, blocking the opening. The poor person lying on the door they hit will now slide down a ramp and out of a hatch, free-falling down to their deaths on the outside of the tower (40ft drop).
Connected Rooms
North - Fancy wooden door - 3-12
East - Trapped decorated metal door - Outside
West - Well-made decorative wooden door - 3-3
Crossroads Study - 3-12
Room Type: Special
Light Level: Light from a fireplace
Entering his room, you are greeted by warm light from a fireplace illuminating a regal study. The walls are panelled wood, and the floors are white marble with shining black veins running through them. There is a small seating area for one, bookshelves on the walls and an 8-foot skeletal devil in the corner.
This room was once used to draw secrets from this devil; whilst being as comfortable as possible, it's now left to mock the creature.
Once known as “His Abyssal Magnificence, Zalalzar the Soul-Archivist, Keeper of the Crimson Quill, Lord of the Infinite Ledger, and High Auditor of Mortal Folly”, he now has no recollection of who he was due to the thousands of years spent in this trap. All he knows is that he wants the Lord of the Tower dead, that he can't do it himself, and how to escape.
Zalalzar is unable to move from this 20ft by 20ft prison and is starving, but unable to die; he is truly having a horrible time. The floor under him is the same white marble, but the black veins that run through it create an incredibly complex magical sigil. This sigil is a devil trap that blocks his exit but does not stop non-devils from crossing.
Zalazar's Stats
None of my players was stupid enough to release Zalazar. If they had and they had not signed a deal with him prior, he would have killed all of them. I would have made him an unstoppable force rather than a balanced challenge.
To escape, all he needs to do is pull a lever to deactivate the circle, which is hidden as a book in the bookshelf opposite him. The book has no title on its spine but is bright red. He is unable to reach this himself, so he must convince others to do it for him.
The rest of the books in this room are stories and studies about devils, demons and fay, useful for research but not worth much to the average person.
The fireplace to the west is very grand. The fire gives off light and warmth but never burns, as it's an illusion! The fire hides a secret passage into 3-14. Above the fireplace is a jagged, dark glass blade in a glass-and-wood case.
Loot!
- Zalalzar's Infernal Blade of the Traitor. (Short sword)
- Alistair's Tobacco box and pipe - 50gp
Connected Rooms
North - Padded wooden door (unable to hear through) - 3-13
East - Fancy wooden door - 3-38
South - Fancy wooden door - 3-11
West - Hidden passage through fireplace - 3-14
Swinging Blade Hallway - 3-13
Room Type: Trap
Light Level: Dark
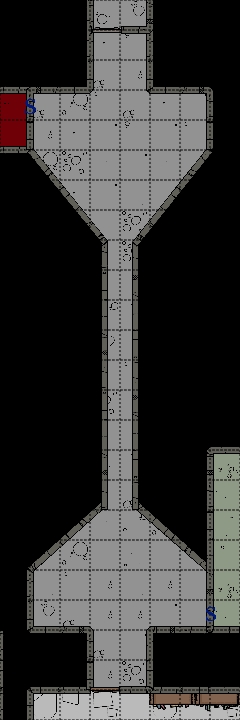
The hallway walls before you quickly converge into a very thin hallway, thick enough for one person. This would not be too much of an issue except for the large blade that swings backwards and forwards like a pendulum in this thin section.
This blade will deal 2d8 damage!
In the middle of this hallway, on the floor, is an obvious button. This button will stop the blade in its current position as long as it's held down.
Connected Rooms
North - Metal door - 3-18
East - Hidden door - 3-15
South - Wooden door (Padded on other side) - 3-12
West - Hidden door - 3-17
Secret Study - 3-14
Room Type: Empty
Light Level: Dark
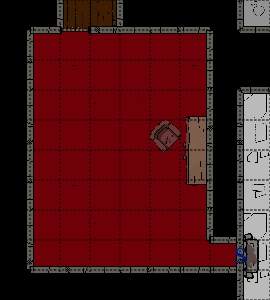
This chamber is far more regal than other secret chambers. Its lush, thick red carpet extends up the walls and along the ceiling, creating a comfortable sitting room. The comfortable chairs and chesloung really make this a warm and inviting place, especially compared to the rest of the dungeon.
Against the east wall is a writing table, covered and locked.
Loot!
Inside the locked table:
- Scroll of Water Breathing
- Scroll of Polymorph Self
Connected Rooms
North - Fine wooden door - 3-16
East - Short archway full of fire (illusion) - 3-12
Cults Hidden Highway - 3-15
Room Type: Empty
Light Level: Dim Light
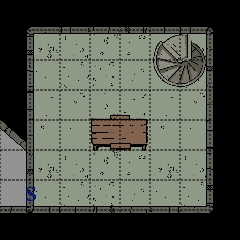
This simple stone room is very plain, as if it were never meant to be seen by anyone except the staff. Large stone blocks make up the walls and floors; the only standout feature is an enclosed spiral staircase built into the corner of the room. This staircase is the quickest way to travel between Floor 4 and Basement 2, but is always heavily guarded by The Cult of the Tower.
Guards and Procedure
Each floor of this Hidden Highway has 1d6 cultists who can often be found around a table playing cards or relaxing. They don't usually get visitors. If anyone outside the cult comes in through the secret doors, they will be killed. This secret passageway can't be discovered, as it leads directly to the cult's home. Once combat starts, they have a procedure:
- Engage the invaders
- Shout up and down the stairs to alert the floors above and below.
- These floors then shout up and down again.
- Every floor will then go up to the 4th floor, fighting any invaders along the way.
If the invaders survive and learn of this secret passage, the cult will utilise its Magic Users to lock the highway entrances with Wizard Lock (Level 3). They then use a secret knock to gain entrance through these doors.
Connected Rooms
Up - Spiral Staircase - 4-1
Down - Spiral Staircase - 2-32
West - Back of secret door - 3-13
Falling Man Theatre - 3-16
Room Type: Special
Light Level: Dim Light
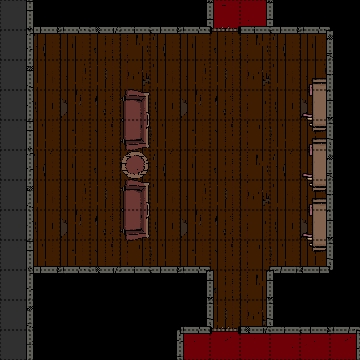
Stepping into this chamber, you are greeted by the smells of fine tobacco and lush furnishings. This room is set up like a personal theatre, with a few comfortable chairs facing a huge glass window that spans the entire west wall. The east wall features a drinks cabinet full of empty glasses.
The glass wall is one-way; on the other side, it appears to be a stone wall. From here, you can sit comfortably and watch people cross the rope bridge (3-1) or just watch the screaming bodies fall past.
Loot!
Side Table
- Box of Magical Cigars
- 3 Pink label
- 3 Blue label
- 3 Red label
Drinks Cabinet
Connected Rooms
North - Fine wooden door - 3-17
South - Fine wooden door - 3-14
Cleared Chamber - 3-17
Room Type: Empty
Light Level: Dark
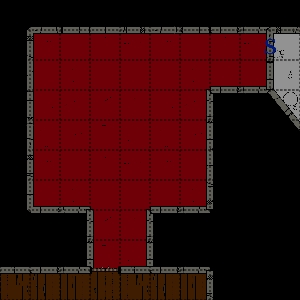
This chamber was once used for something, but the only things that remain are the scuffs and marks where furniture once stood. Discoloured walls show where paintings used to hang. The walls still have the dark wood panelling, and the floors are covered in fine, thick carpet.
Connected Rooms
East - Back of secret door - 3-13
South - Fine wooden door - 3-16
Spider Puppet Ally - 3-18
Room Type: Trap
Light Level: Dark
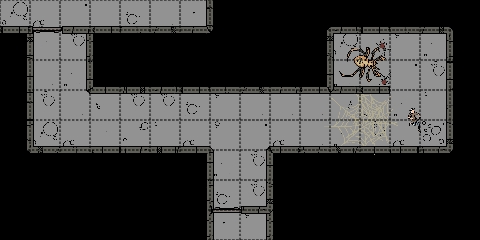
This dark corridor has been taken over by a Tarantella that is much smarter than the regular spider. They, along with several smaller spiders, have set up a trap to catch their prey as it travels through.
The walls are covered with the same white plaster seen elsewhere on the floor, but damp has turned it into a kaleidoscope of moulds and fungi.
Trap!
Towards the east are nearly invisible spider webs, waiting to catch anyone who walks into them. Behind the webs lies a cultist's corpse, puppeted by spider silk. When someone walks within the puppet's line of sight, it puts its finger to its mouth in a hushing motion, then beckons people over. This puppetry hopefully lures people into the web so the spiders can ambush them.
Webs - Creatures caught in webs become entangled and unable to move. Breaking free depends on Strength: 2d4 turns for strength in the normal human range; 4 rounds for strength above 18; 2 rounds for creatures with giant strength. The webs can be destroyed by fire in two rounds. All creatures in a flaming web suffer 1d6 points of damage.
Around the hidden corner are the remains of previous hunts and the loot they have collected from them.
Ambush:
- 1 Spider, Tarantella (With Band of Beastial Intellect)
- 3 Crab Spiders
Loot!
- 200sp
- gem (50gp)
- gem (100gp)
- gem (500gp)
- Potion of Flying
- Band of Beastial Intellect
Connected Rooms
Dismantled Stairs Up - 3-19
Room Type: Empty
Light Level: Dark
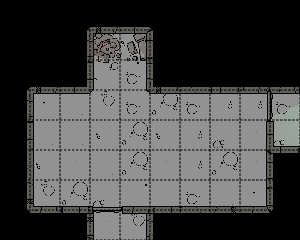
Entering this chamber, you are greeted with smooth marble floors and painted walls, but everything is covered in a thick layer of white dust. This room once contained a staircase up to floor 4, but someone has destroyed it. All that is left of the stairs is a void leading up and smashed stone filling the room.
Investigating the smashed staircase shows it was done by humanoids using tools. Footprints wearing shoes can be seen in the dust.
Connected Rooms
Up - Hole in ceiling - 4-9
East - Metal door - 3-19
South - Metal door - 3-13
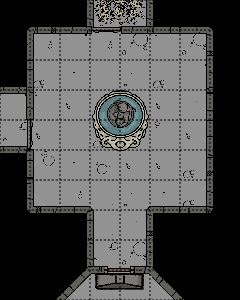
Impossible Statue - 3-20
Room Type: Special
Light Level: Dark
This small square chamber is lined with fine marble, and a matching marble raised pool stands in the middle. Around the north door, the floor is stained brown by a liquid that dried long ago.
This pool features a statue of a young man walking joyfully on the water. There does not seem to be any connection between the statue and the rest of the pool; he is floating effortlessly on the surface. A golden ring is visible on the statue's hand. The water contains numerous coins, as if it were once a wishing well.
Removing the ring from the statue will cause it to crash into the water below, making a lot of noise. Roll for an encounter with a 2 in 6 chance.
Loot!
- 400sp
- 600gp
- Ring of Water Walking (On the statue's hand)
Connected Rooms
North - Metal door (Blocked) - 3-21
South - Inside of a coffin (Blocked) - 3-9
West - Metal door - 3-22
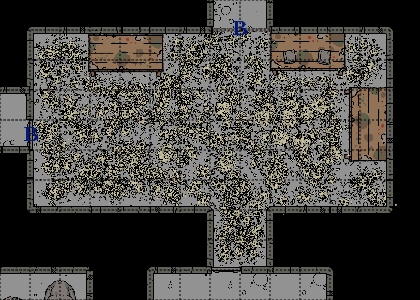
Abandoned Cloning Lab - 3-21
Room Type: Special
Light Level: Dark
Upon opening the doors to this room, you are greeted by a wave of rat bones that tumble out of the room. This lab was once used to test cloning technology on rats and seems to have been left on for a very long time.
This room (before the doors open) has rat bones up to waist height. There are furniture and lab benches around the room, and even several small jars that open like clamshells, containing the remains of a restrained rat. These are the cloning chambers and all that is left of their original occupants.
Any signs of notes or documentation have been eaten or spoiled by starving cannibalistic rat clones that are now all dead.
Connected Rooms
North - Metal double door (Blocked by weight of rat bones) - 3-24
South - Metal door (Not blocked, opens out) - 3-20
West - Metal door - Corridor
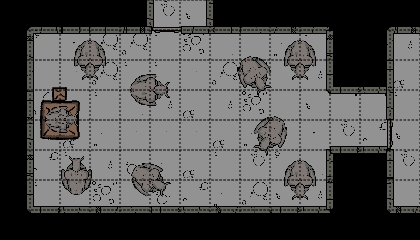
Gargoyle Workshop - 3-22
Room Type: Special/Lair
Light Level: Dark
This large workshop is a strange mix of a mason's and an arcane laboratory. Stone dust covers every surface in a thick white layer, with no sign of footprints here. Throughout this room are large gargoyle statues at various stages of completion, matching those outside the tower, though less eroded. This workshop is where all Gargoyles are crafted and enchanted.
1d6 completed Gargoyles are in the room, ready to ambush, hiding amongst their incomplete brethren. They will attack when the time is right.
Against the west wall is a strange, arcane setup with a large podium with a nearly complete Gargoyle resting on top of it. On a small connected podium is a large bowl and a Ring of Protection inside it. On a small table next to it is research on how to enchant a gargoyle, and all information suggests this one is ready to enchant.
Enchanting a Gargoyle
A magic user must be the one to enchant a gargoyle, and it needs this enchanting podium to do so.
- A magical item must be sacrificed to give life to the statue
- If they provide a weak item, GM, feel free to make the ritual fail
- Ritual must take place to bind the gargoyle to your commands
Repairing the gargoyle requires 100 gp of material per hp and 1 hour. This ritual also requires the lab notes.
Loot!
Sacrificial Bowl
Locked Wooden Chest
- 11,000cp
- Piece of jewellery (1500gp) - Platinum Ring with multiple large diamonds. (Buried under the coin)
- Thunder Hammer + 1 (Buried under the coin)
Connected Rooms
North - Metal door - Corridor
East - Metal door - 3-20
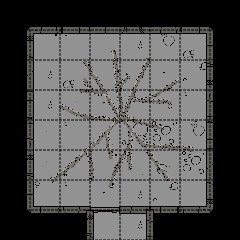
Trapped Medusa - 3-23
Room Type: Special
Light Level: Dark
The floor of this square chamber looks like it's been shattered like a window; large cracks radiate from a tiny hole in the middle. These cracks act as channels for poison to flow before dripping onto the floor below. The floor looks incredibly unstable, but is, in fact, perfectly safe and just designed to look unsafe.
A Medusa can be seen attached to the ceiling by hundreds of small metal spikes, her eyes covered with a band of metal. Her snake hair separated and pinned down, looking like vines across the ceiling, slowly dripping poison down to the floor.
This poor creature is in no pain but in a stasis created by a curse. Removing her from this prison won't wake her, but all her powers are still in effect.
Connected Rooms
South - Metal door - Corridor
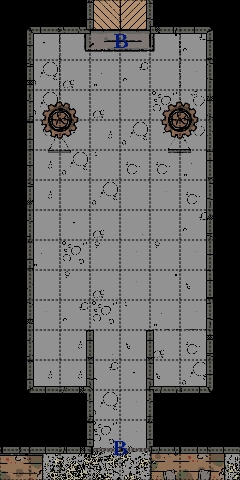
Slow Guardians - 3-24
Room Type: Trap
Light Level: Dark
This long, dark room looks like it was originally a library converted into this trap. There are signs that shelves were once attached to the walls, and the wooden floor has been ripped up.
This arched-roofed room contains an obvious mechanism for progressing further north. The heavy metal door to the north can only be opened from inside this room, unless you are strong enough to lift it. There are two large capstans with chains around them. One end has a handle the other is connected to the top of the door via complex gears on the ceiling. Finally, against the south wall are two strange glass-doored cages.
This trap is reasonably simple. To open the north door, you must pull both of the chains south. Pulling the chains south also opens the cages there, releasing their occupants.
- Releasing the chain will slam both doors shut.
- Pulling a chain requires the effort of a single person
- Both chains must be pulled together; otherwise, the door can twist and get stuck.
Inside each cage is a Flail Snail ready to charge! The glass doors to their cages are magically enchanted and can't be broken by them, only by magical weapons or being dispelled.
Connected Rooms
North - Metal Slab Door - 3-25
South - Metal Double Door (Blocked) - 3-21
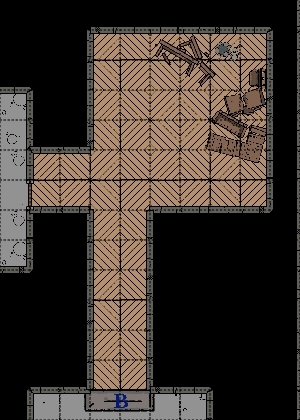
Abandoned Camp - 3-25
Room Type: Empty
Light Level: Dark
A small chamber has been rearranged to make a simple, defensible camp; no signs of its occupants remain. This room was once a lounge of some sort, but furniture has been moved and destroyed to make a small barricade and a campfire.
Some notes in a tattered journal can be made out.
- This group was trapped here between monsters on the 5th floor and a lack of rope to escape.
- The 4th floor seems not to exist, just small rooms before the stairs up to the 5th.
- Found a secret room on floor 3 where people could watch bodies drop down the middle of the tower. Who would want to watch that?!
Connected Rooms
South - Metal slab door (Blocked) - 3-24
West - Simple wooden door - 3-26
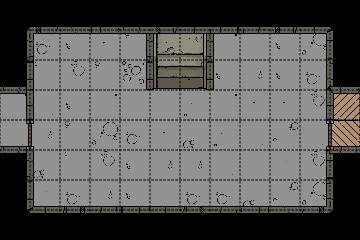
Stairs up - 3-26
Room Type: Empty
Light Level: Dark
This simple chamber hosts stone stairs up to the 4th floor. Any other decorations or furniture seem to have been moved away; all that remains are the marks on the floor where they used to be.
The stone stairs have gaps in between the steps that look like they might move, but no mechanism or trap can be found on this level.
Connected Rooms
Up - Stone Stairs - 4-15
East - Simple wooden door - 3-25
West - Simple wooden door - 3-27
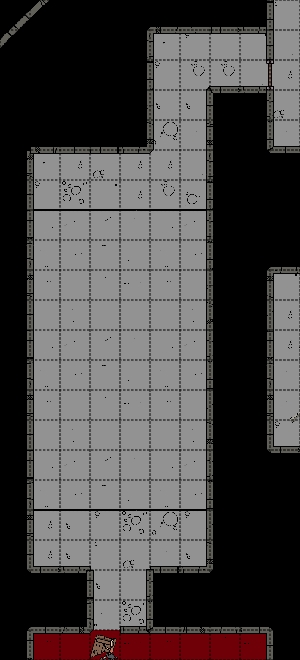
Climbing floor - 3-27
Room Type: Trap
Light Level: Dark
This long room features two platforms at either end, with a 5-ft drop between them. A few pitons can be seen hammered into this sunken floor. On the inner edges of these platforms, magical runes can be seen affecting the gravity between them.
The south door of this room is off its hinges, and a body is crumpled on top. It seems to have hit the door at high speed.
Climbing Wall
Between these two platforms, the gravity shifts from north to south, creating a very difficult, smooth climbing wall. Stepping off the south platform feels strange as the gravity switches, but stepping off the north platform is a big drop.
- 50ft drop between platforms
- If you are running off the top platform, you might miss the south platform and just hit the back wall or doorway like the poor fellow before.
Connected Rooms
Shattered Door - 3-28
Room Type: Special/Empty
Light Level: Dark
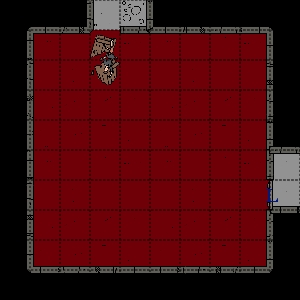
This empty chamber features dark stone walls and a lush red carpet, but no furniture to hint at its purpose. The thick wooden door to the north is off its hinges, and a body is crumpled on it.
This body must have hit the door with some force to damage it in this way. The person looks like a fighter of some sort, but all his positions have been picked clean. All that remains are some sections of damaged chainmail. It even looks like some creatures have had a nibble of him.
Connected Rooms
North - Open doorway - 3-27
East - Metal Door (locked) - Corridor
Privacy Chamber - 3-29
Room Type: Special
Light Level: Dark
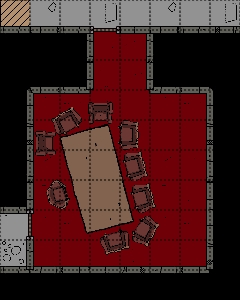
The chamber is luxurious but cramped. So many chairs huddle around a table too large for the space, as if there were an important meeting and this were the only place to host it. The walls are lined with curtains, and the floors with thick carpet; sound does not resonate at all.
Behind the curtains, magical sigils can be found. These sigils are ones of protection, preventing anything or anyone from listening or seeing into this room. This protective magic includes all spells and even just listening at the door.
The magical sigils use gold as part of the magic; this can be removed, destroying the magical effect.
Loot!
- Gold powder from walls 400gp (100gp worth of gold per wall)
Connected Rooms
North - Thick wooden door snug to the frame - 3-2
West - Thick wooden door snug to the frame - Corridor
Lord’s Closet - 3-30
Room Type: Trap
Light Level: Dark
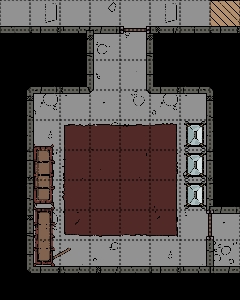
This clean dressing room is well-lit, but from an unknown source; no torches can be seen or shadows cast. The walls are lined with wallpaper, and the floors are stone, covered with soft, patterned rugs. Glass display cases line the east wall, with wardrobes opposite.
In the middle of the room is a manikin with an incredible robe resting on its shoulders. These are the Robes of the Tower Court. The robe has pockets that have some items in them.
The three locked display cases are made of metal, attached to the ground, and have glass tops. The glass has tiny sigils engraved into it, providing the magic for this trap.
TRAP!
If the glass on these display cases is smashed rather than unlocked, the bell in 3-31 will ring. This bell will alert the 2d4 Phase Spiders in 4-13 that will rush out and attack.
Loot!
Clothing Manakin
- Robes of the Tower Court
- In Pockets
- 2 Spell scroll cases containing the spells: chromatic orb, phantasmal killer, fear, invisibility, false aura
- Scraps of a used scroll (Cloudkill)
Display Cases
- Necklace with large red rubies (1200gp)
- Simple thin gold crown (1300gp)
- Brooch featuring a cluster of small black diamonds (1500gp)
Connected Rooms
North - Reinforced wooden door (locked) - 3-2
East - Reinforced wooden door (locked) - Corridor
Bell Tower - 3-31
Room Type: Special
Light Level: Dark
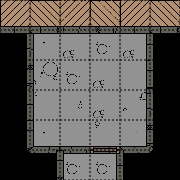
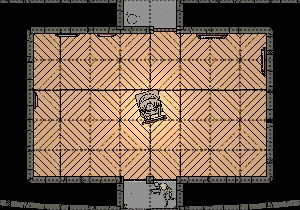
This chamber is dark with no decoration to be seen. Looking up, you can see that the room opens onto a higher floor, with a large brass bell attached to the ceiling. A large chain runs from the bell's clapper to the ground, where it enters the floor and connects to some sort of hidden mechanism. There does not seem to be any switch or way to ring the bell from this room; it would also be deafening to hear it from inside.
A door is also visible near the bell, with no stairs or other way up. There are holes in the stonework around this room that suggest stairs once ran here, but they were removed long ago.
Connected Rooms
Up North - Simple wooden door - 4-13
South - Simple wooden door - Corridor
Morbid Gallery - 3-32
Room Type: Special
Light Level: Light
Stepping into this space, you are greeted with a comfortable gallery and the smell of paint. The walls are lined with fine wallpaper and artwork, all lit by a central chandelier.
The south wall hosts a window that looks into the trap for the hungry balcony 3-4. This window has no tint on this side and is practically invisible, giving you the perfect view of anyone trapped inside.
Placed centrally in the room is a construct with a jar body, arms, and a head, all painted to look like a person. Where the construct's legs would be, it twists into the form of a chair and easel. This painter paints anything it sees behind the glass to photo-precision, before the painting magically finds a place on the wall. A person pilots this construct, but anything human about it has long since gone. They won't respond to anything; just paint what they see.
The paintings on the walls are horrific. Paintings show the progress from a scared, trapped person to them giving up, then the progress of their body rotting away.
Loot?
- Many horrific paintings that might be worth something to someone?
- Endless paints (small tins of primary colours that slowly refill)
Connected Rooms
North - Simple wooden door - Corridor
South - Glass window - 3-4
Meat Storage - 3-33
Room Type: Lair
Light Level: Dark
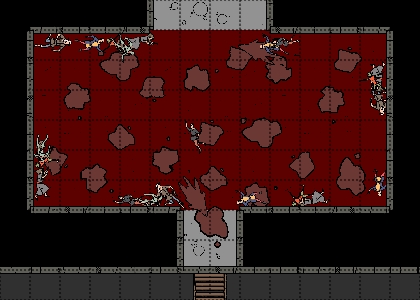
You can smell this room before you can see it. Once a waiting room for guests before they reach the throne room, this room is now full of half-eaten corpses. Bodies line the walls and floors, making this room difficult to traverse. Hidden amongst the bodies is a Ghast waiting in ambush.
Ghast will hide among the bodies until it can grab someone, then hide again if the fight is not going well.
Some artwork and furnishings remain in this room, but they have been destroyed by hundreds of years of gore and rot.
Loot!
- Dark metal two-handed sword +2 (mounted on wall)
- +2 vs Divine Spell casters
- On a 20 to hit, it stops the target from casting healing spells for 1d4 turns.
- Ceremonial Plate Mail 1000gp (gold inlay with crest of the tower)
- Fully functional, but will lose value if damaged
- 1000cp amongst the dead (Slow to loot)
- 3000gp amongst the dead (Slow to loot)
Connected Rooms
Burning Chapple - 3-34
Room Type: Special
Light Level: Fire Light
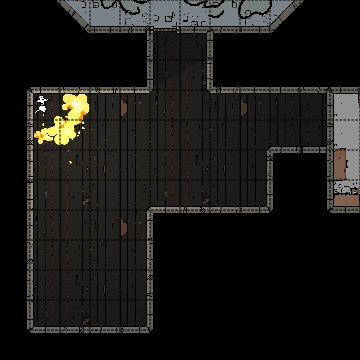
Everything within this room is black with ash, apart from the raging fire in the north-west corner. The smell of burnt wood fills this old chapel. It looks like an inferno raged through this space, destroying everything.
In the northwest corner of the room is a skeleton in a cleric's robe, surrounded by raging fire. The skeletal remains still hold up its arm in defiance of the fire, a golden mace in its hand.
The raging fire is magical and was intended to burn everything in the room, but the divine power of the mace is holding it back. Dispelling the fire or removing the mace is the only way to extinguish it. Once the mace is gone, the fire will finish burning the room, then go out. 2d6 fire damage from touching the magical fire, and be set on fire.
Loot!
- +2 Mace of the Protector (Can cast Resist Fire once per day)
Connected Rooms
North - Swollen, mouldy wooden door - 3-7
East - Simple wooden door - 3-10
Grand Corridor - 3-35
Room Type: Empty
Light Level: Dark
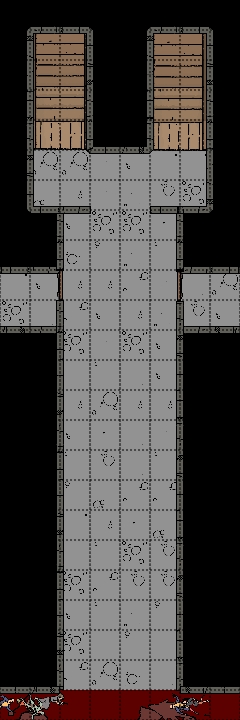
This corridor is the main entrance to the floor. The floors are well-polished marble, and the walls are decorated with hanging fabrics and artwork. This was made to impress guests, but time has diminished its appeal.
The artwork on the walls is very damaged by time, most of it is missing. The only ones that remain are landscape artworks; no portraits, all heavily damaged.
Connected Rooms
Down - Grand wooden staircase - 2-1
East - Fancy wooden door - 3-5
South - Open archway - 3-33
West - Fancy wooden door - 3-5
Fay Greenhouse - 3-36
Room Type: Lair
Light Level: Dark (blocked light)
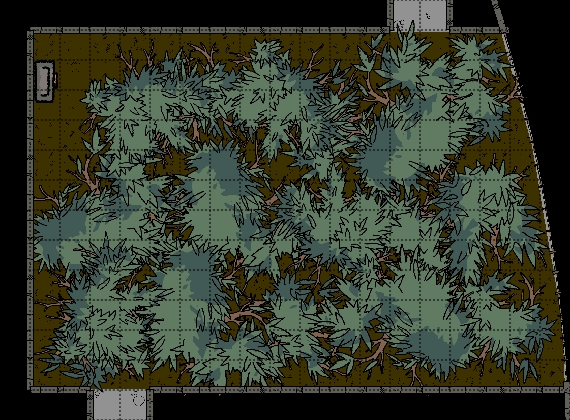
The overgrown fairy plants completely obscure the chambers' reflective walls and large windows. This room was once used to study plants from other planes, and before it was abandoned, it had a range of fairy plants.
Since the greenhouse was abandoned, a single species has taken over; this plant acts like giant kelp, defying gravity and swaying on an unfelt breeze. There is barely enough room to squeeze between these plants to traverse the room, slowing movement greatly. These plants are completely harmless, just an obstruction.
Cutting the plants is possible, but it is very time-consuming. The plants are strong but vulnerable to iron. Hidden inside this room are 1d6
The entire east wall is a window that would light up the room, but the plants block it fully.
Loot!
Hidden Chest:
- 3,000sp
- 2,000ep
- Sling of Snow
Connected Rooms
North - Cold iron door - 3-37
South - Cold iron door - 3-38
Transport Trap - 3-37
Room Type: Trap
Light Level: Dim green light
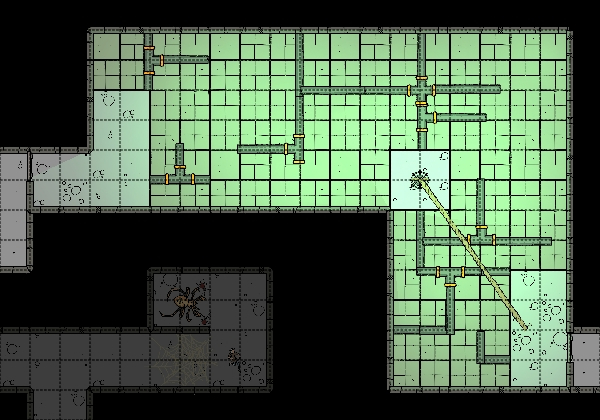
This room shines with dim green energy you can almost taste in the air. The walls are blackened stone, and the floor quickly drops 5ft into a pit of twisting metalic vines that give off green light.
In the middle of this sunken area is a small section of ground held up by hundreds of bone legs. This platform has a post sticking out of the middle and a thick rope attached to it. The other end of this rope is fixed to the east side via a piton. This rope looks like a tightrope that could be crossed, but doing so would be disastrous.
The central platform can be moved by pulling the post in the direction you need, helping you navigate the room. The legs on the bottom of the platform skitter in the required direction, energised by the corrupting energy under it. So if someone attempts to walk or climb across the rope, the platform will be moved southeast, creating slack and sending the person into the corrupting energy.
Touching the sunken area is considered a Severe Source of corruption.
Connected Rooms
Simple Stairs Down - 3-38
Room Type: Empty
Light Level: Dark
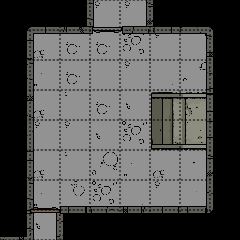
This room contains stairs going down to room 2-31. The walls are plain grey stone, matching the floor.
Connected Rooms
Down - Stone stairs - 2-31
North - Cold iron door - 3-36
South - Metal door - 3-12