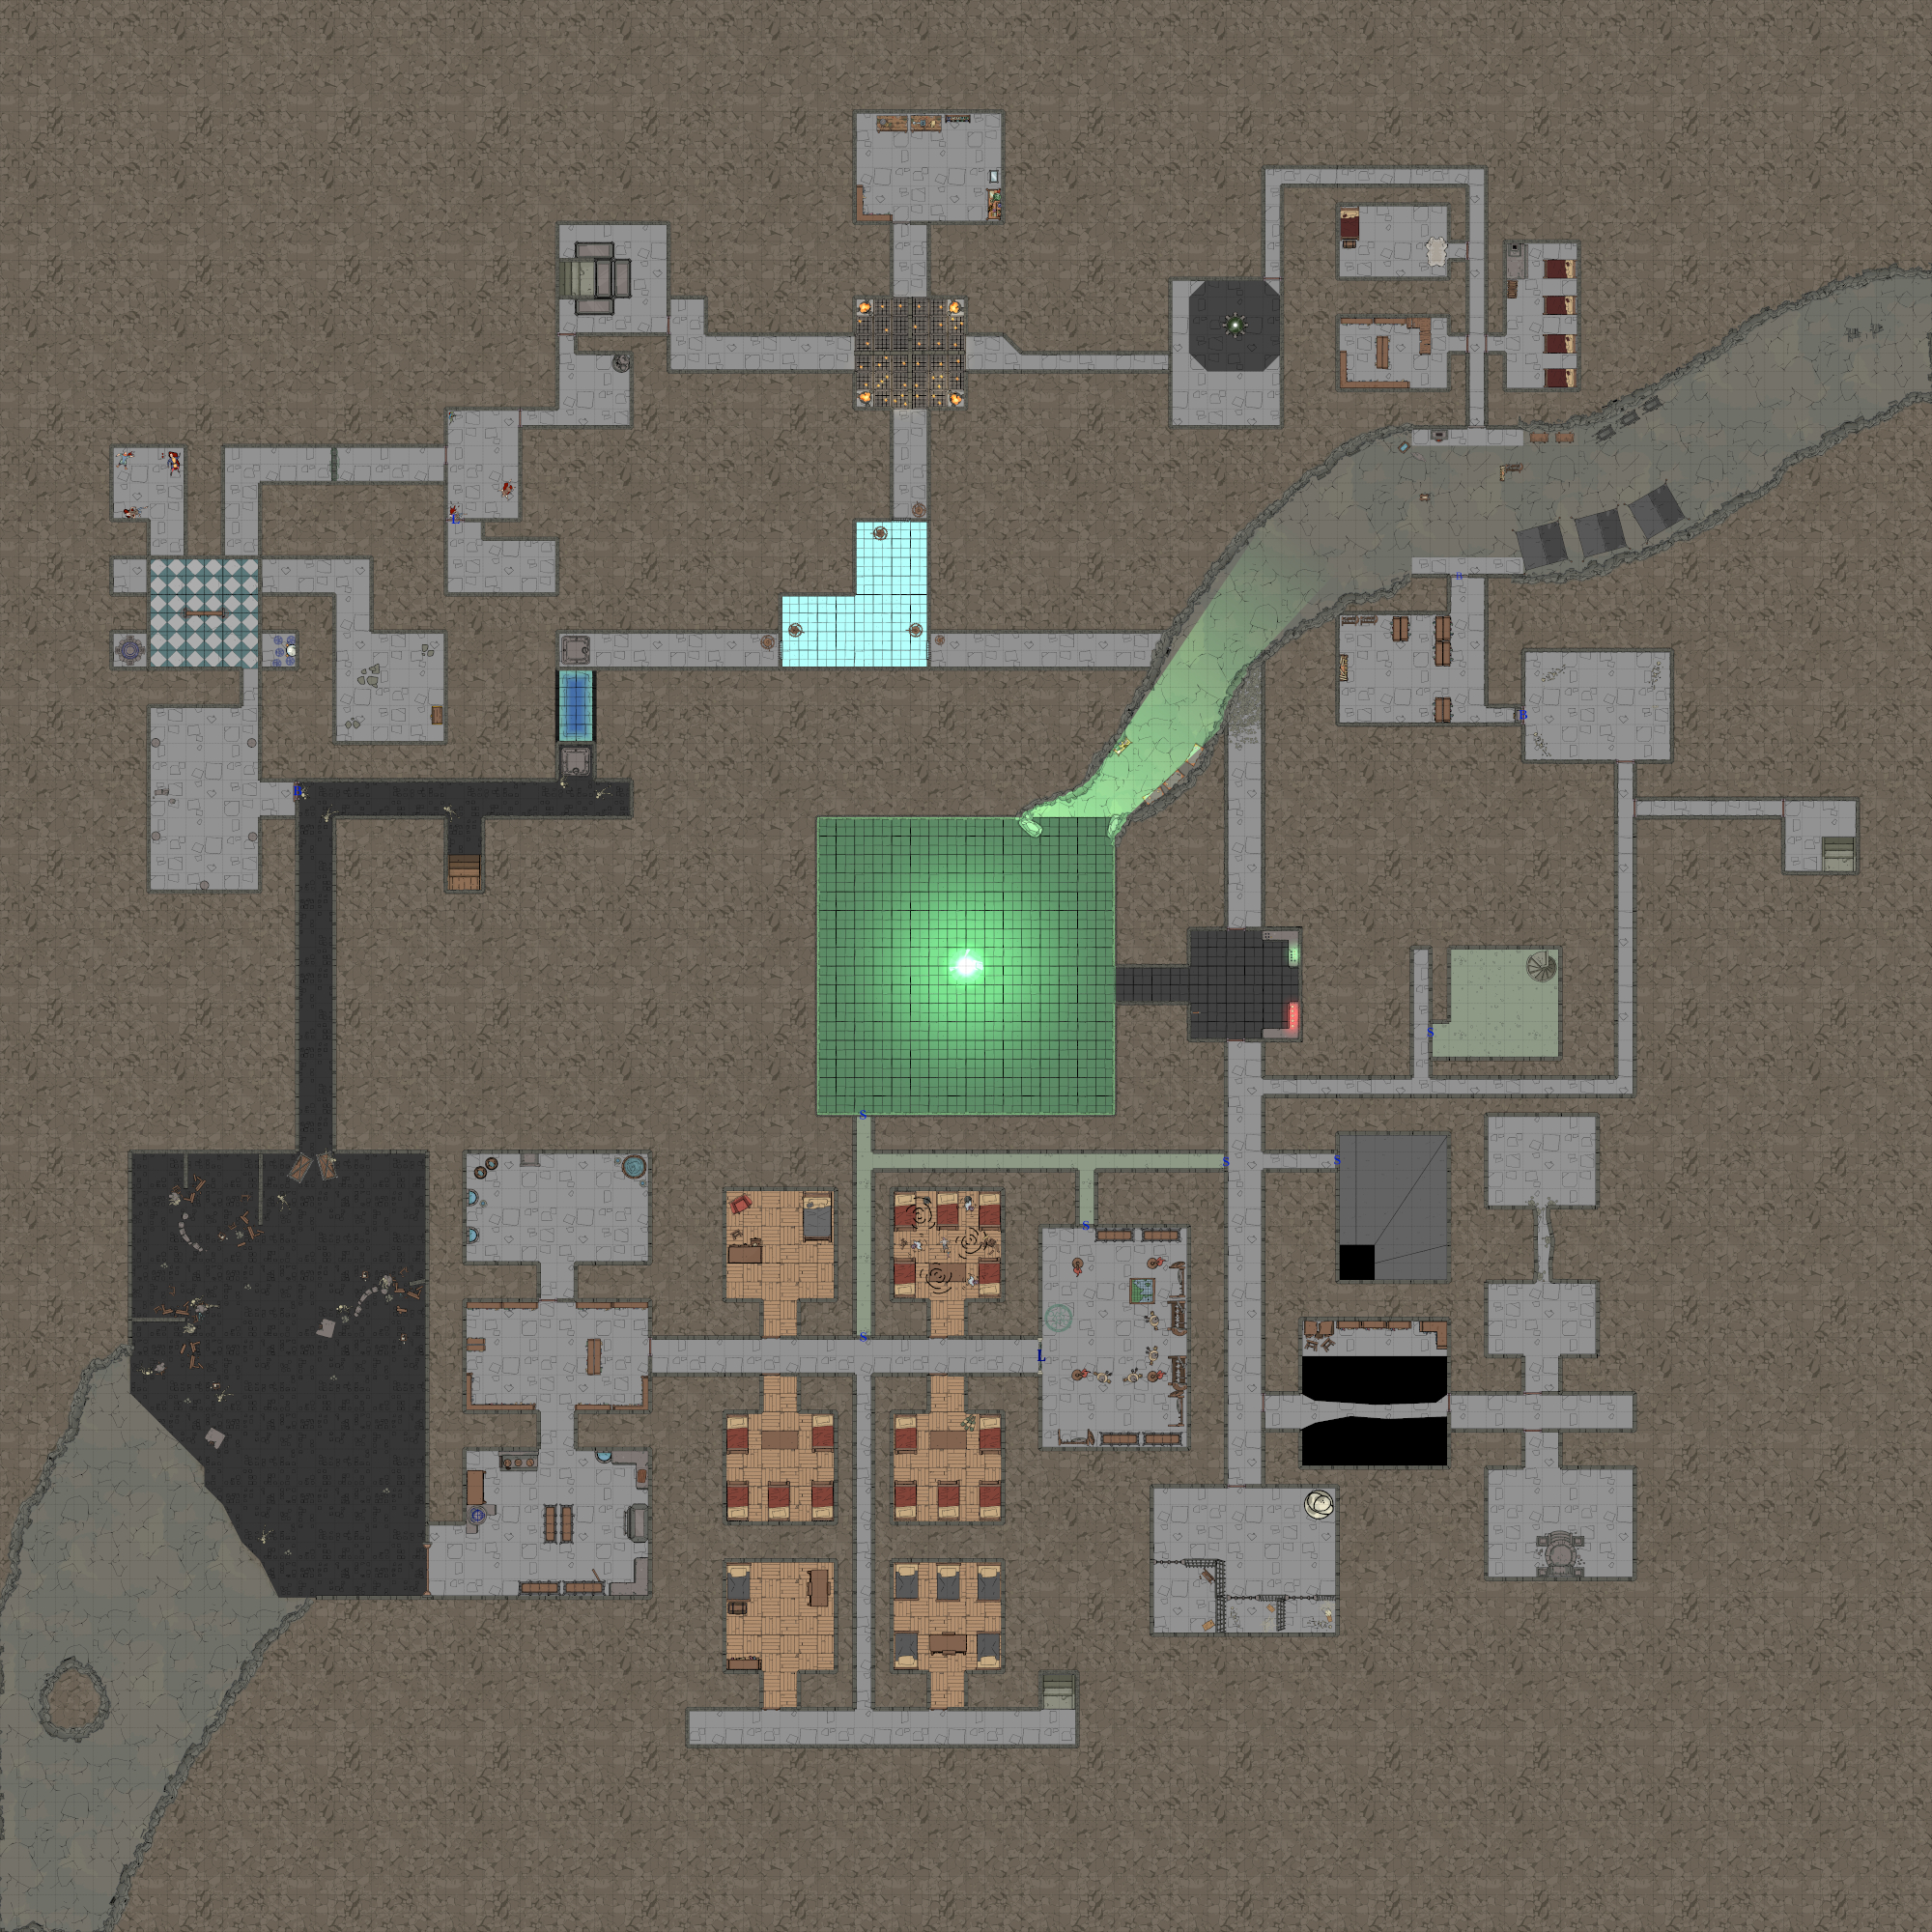
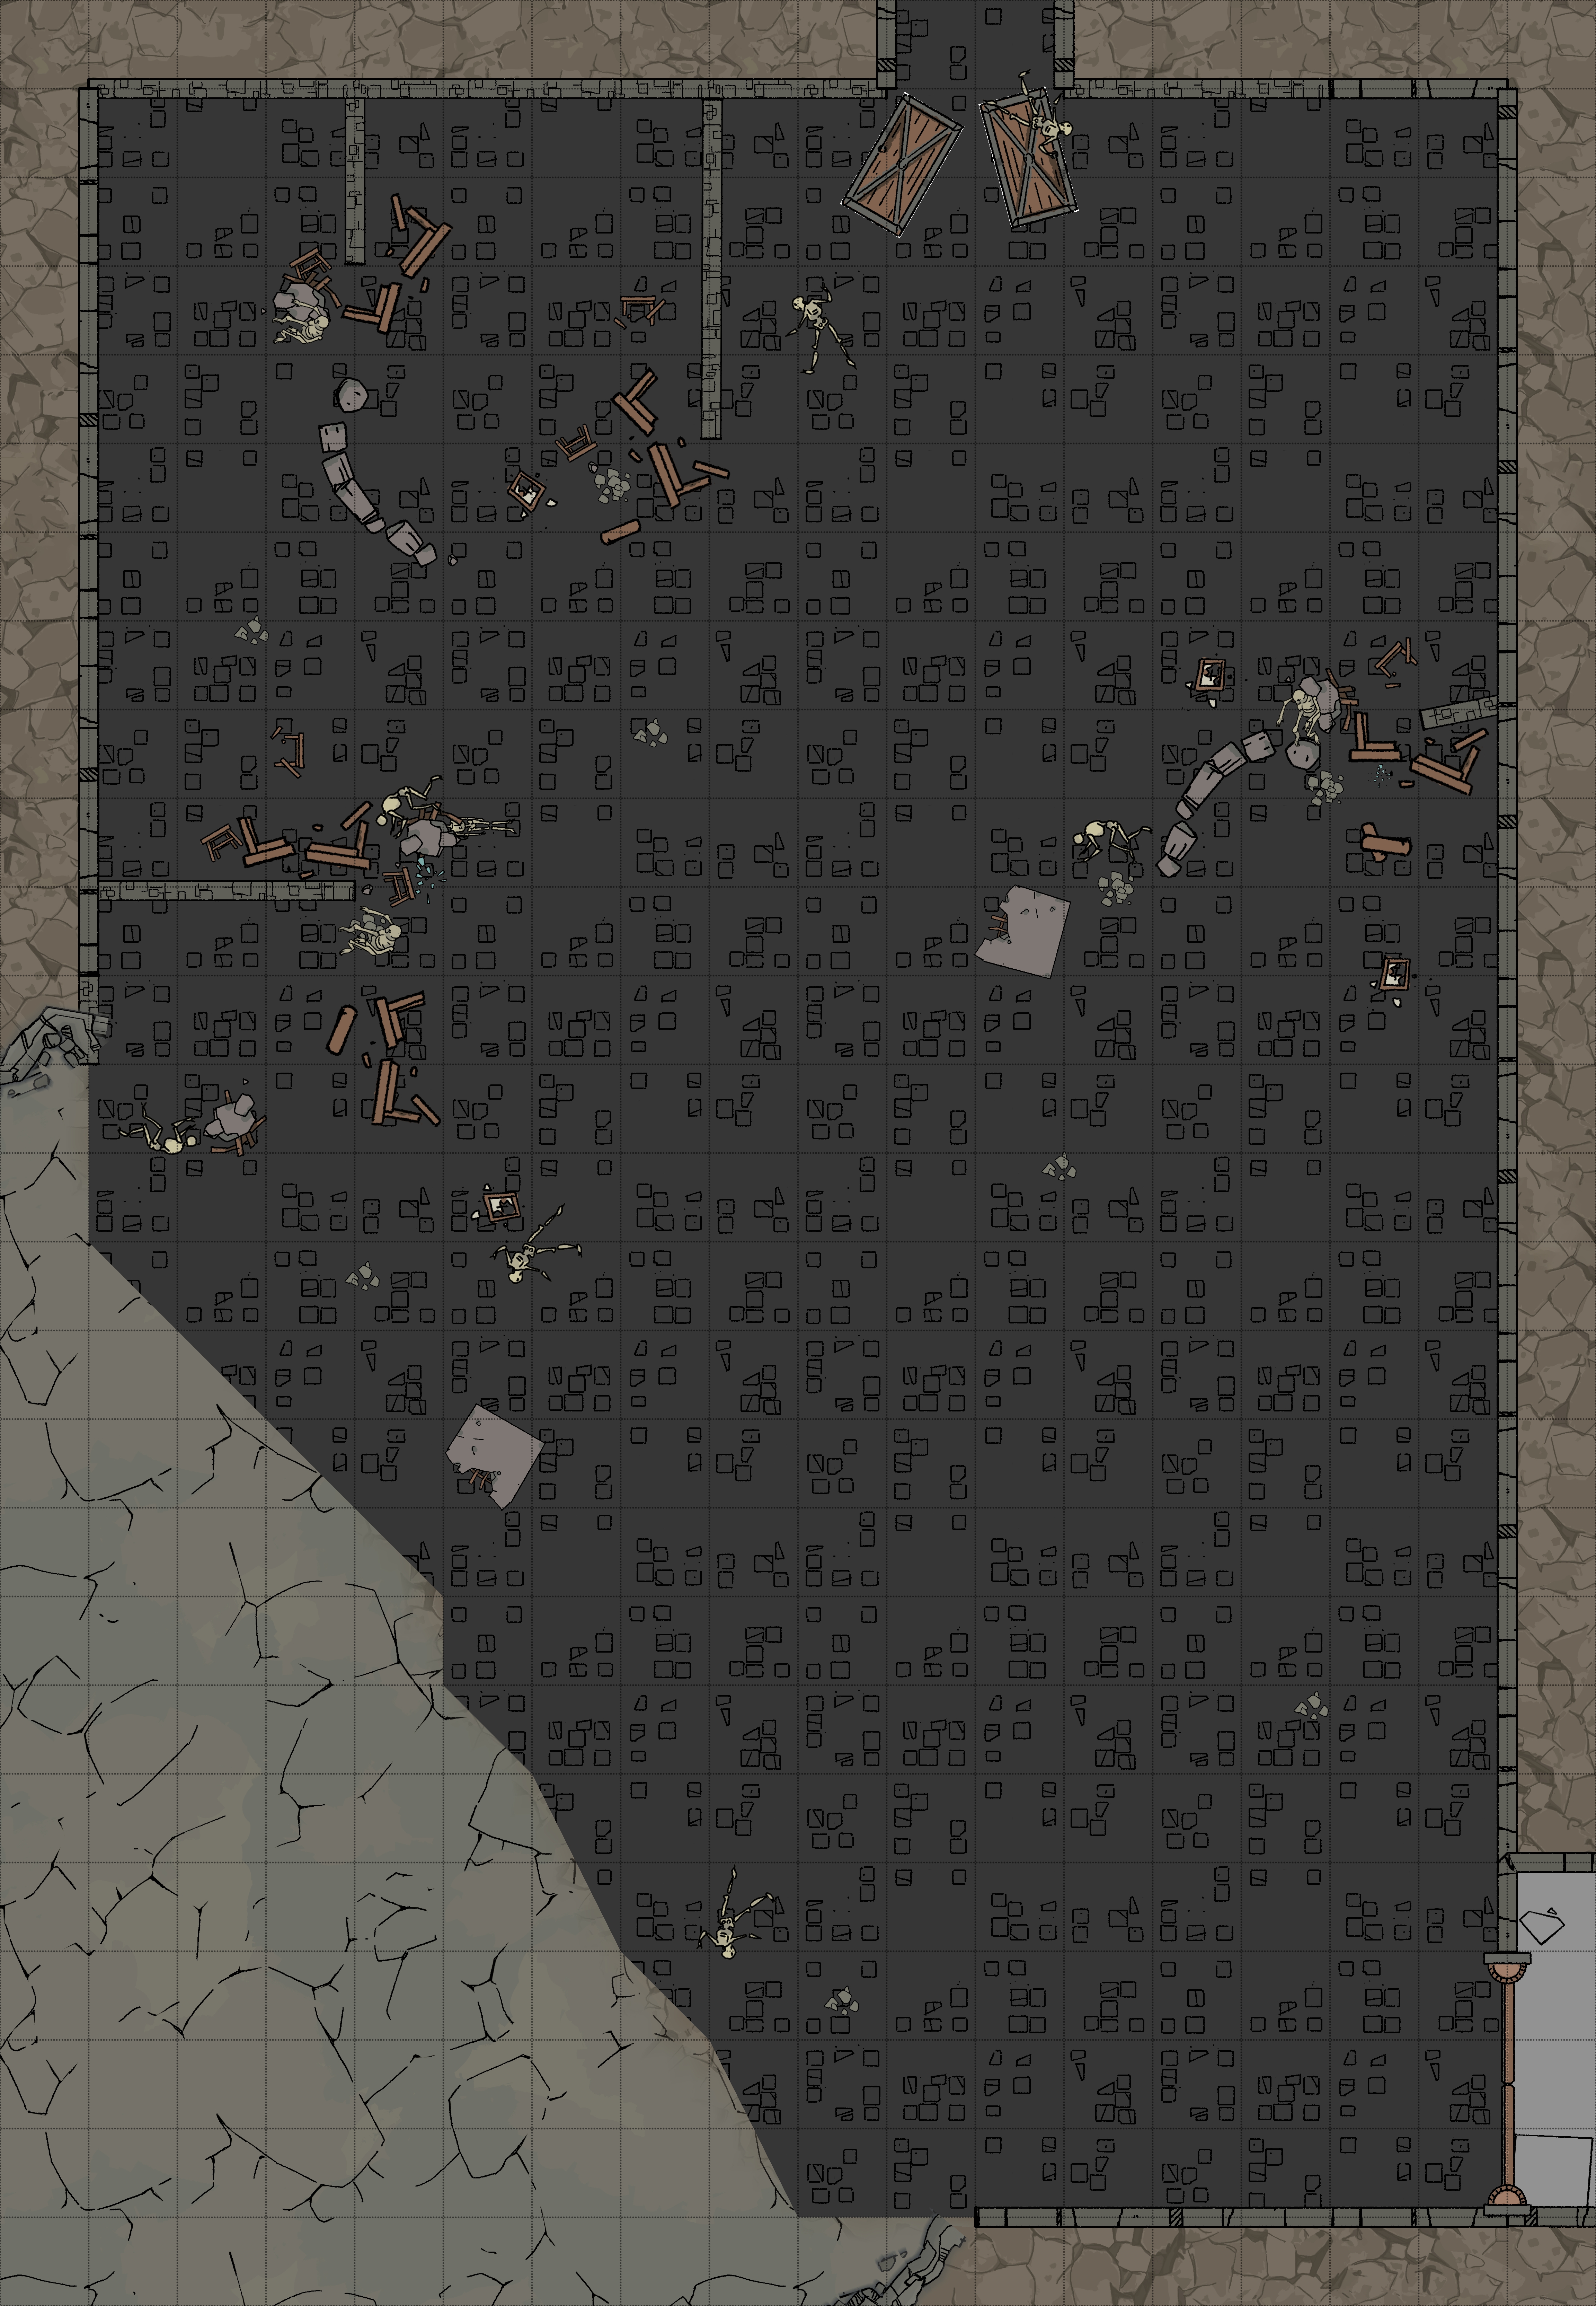
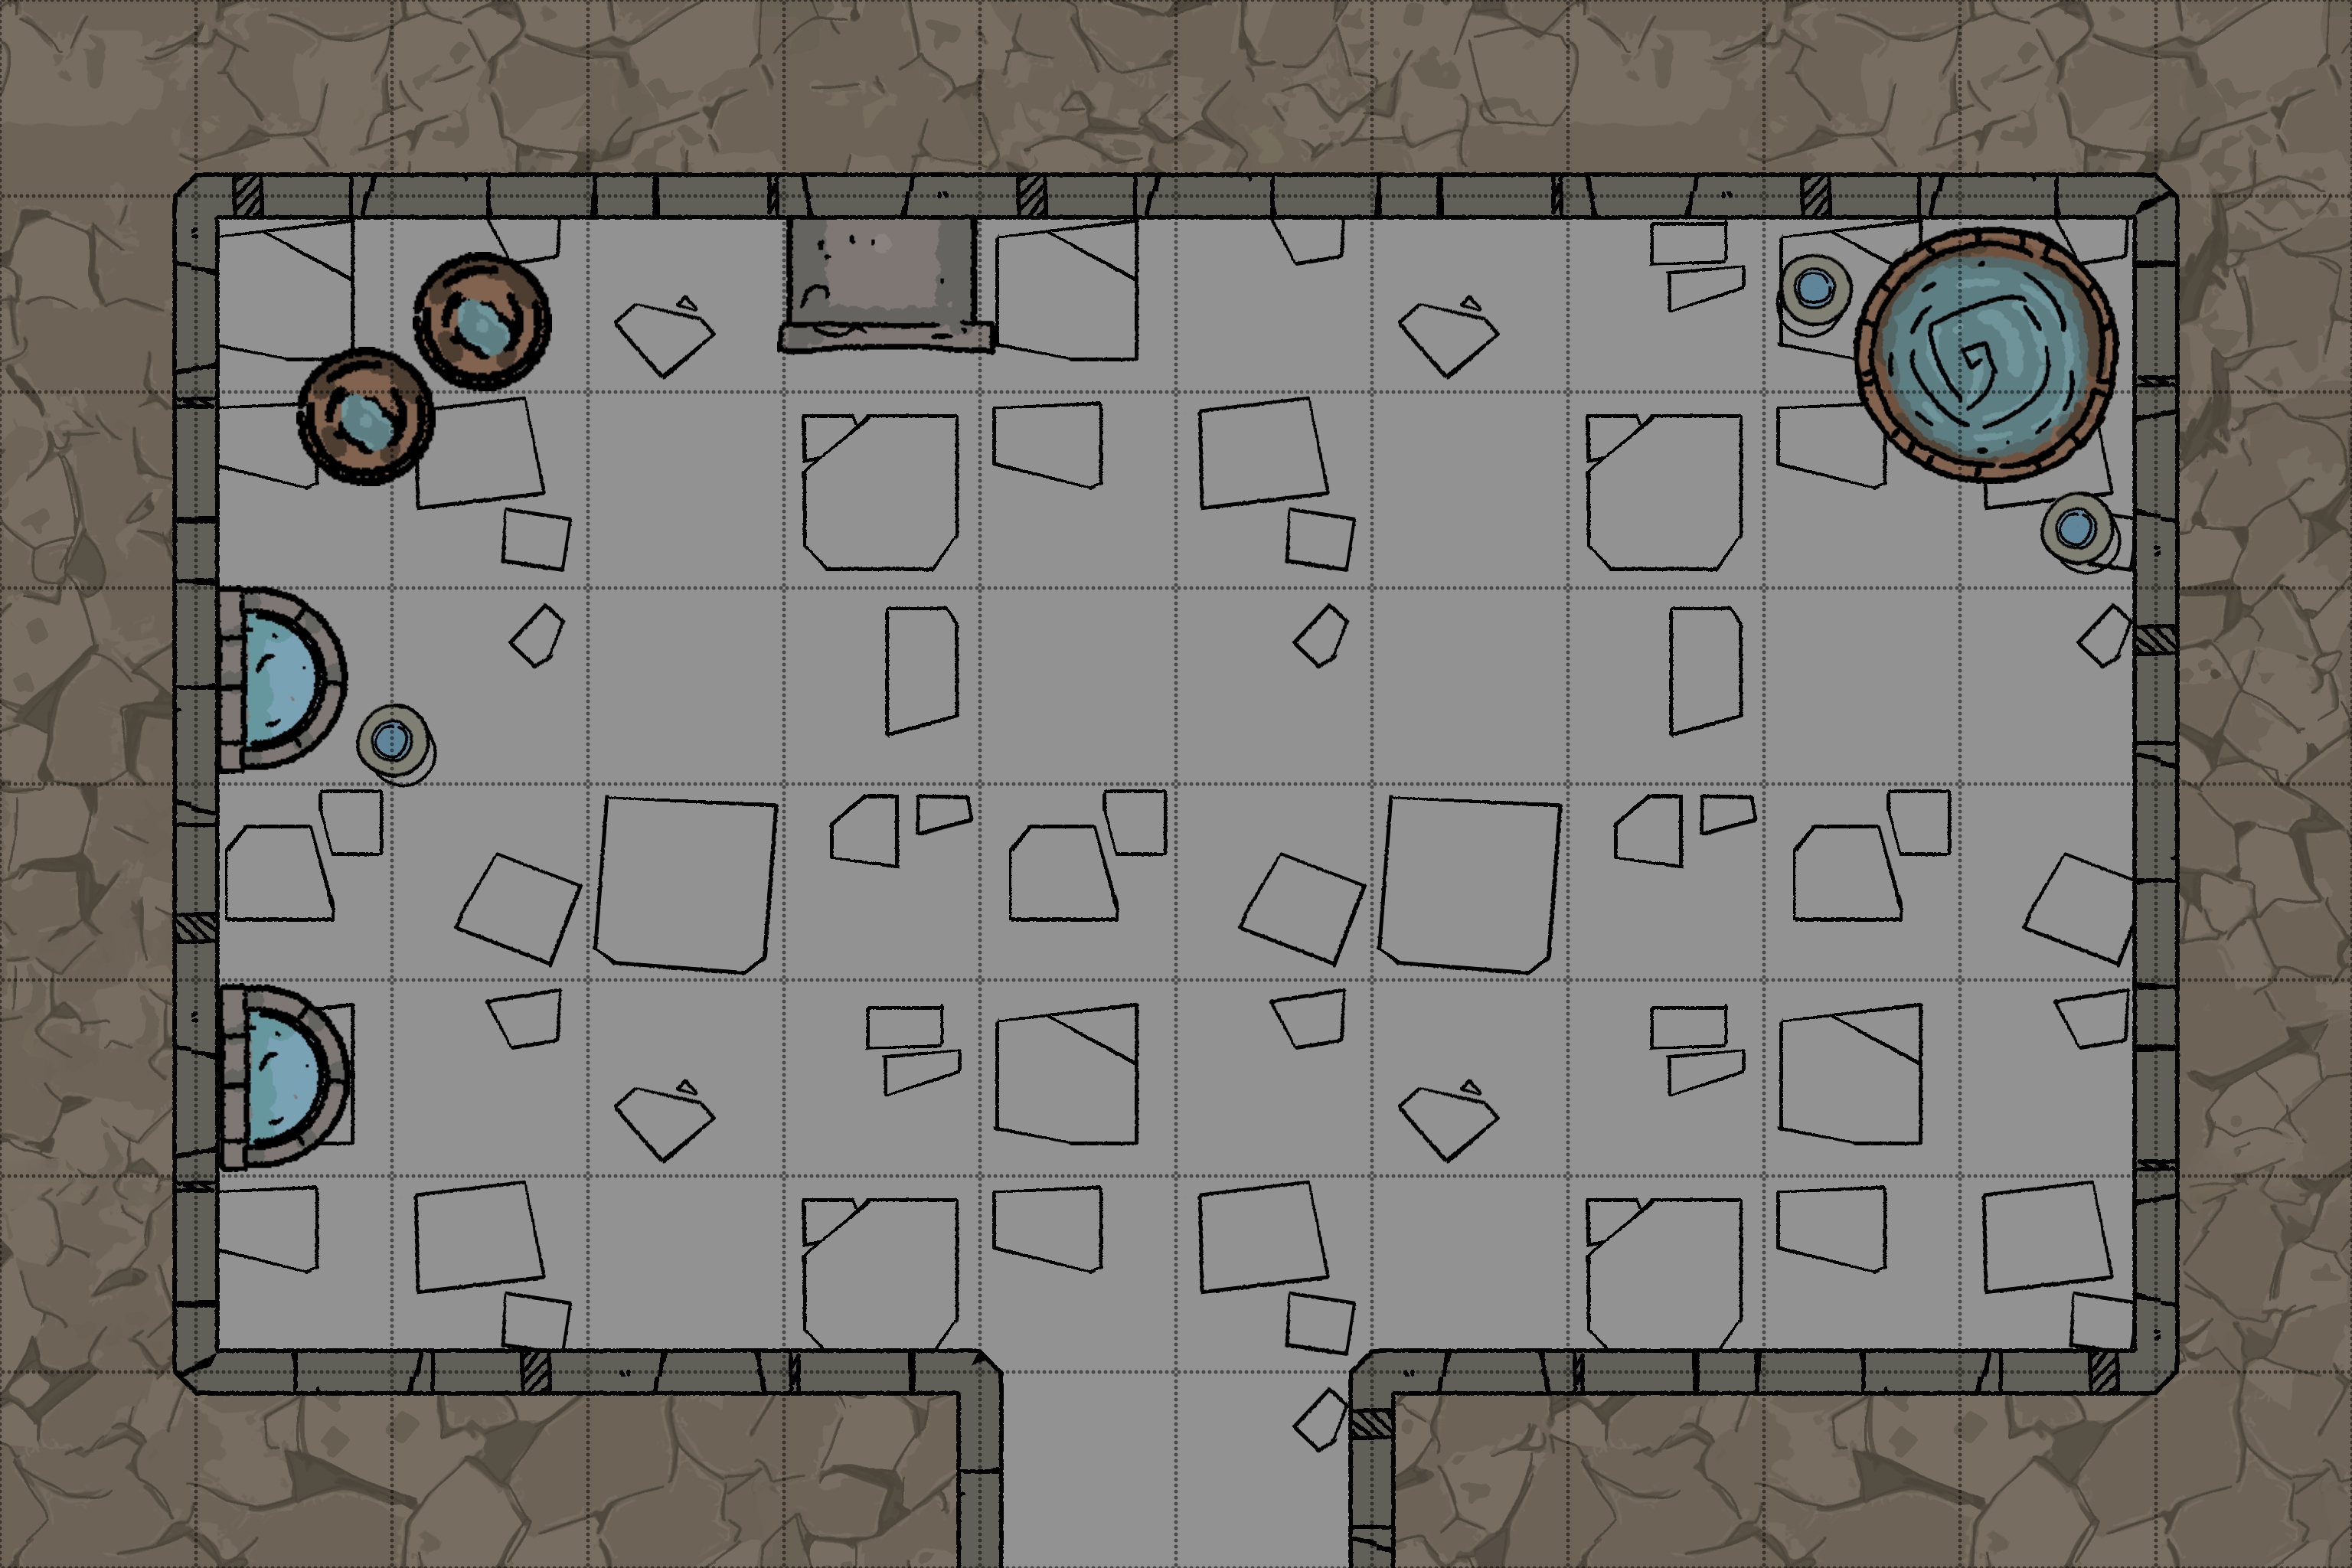
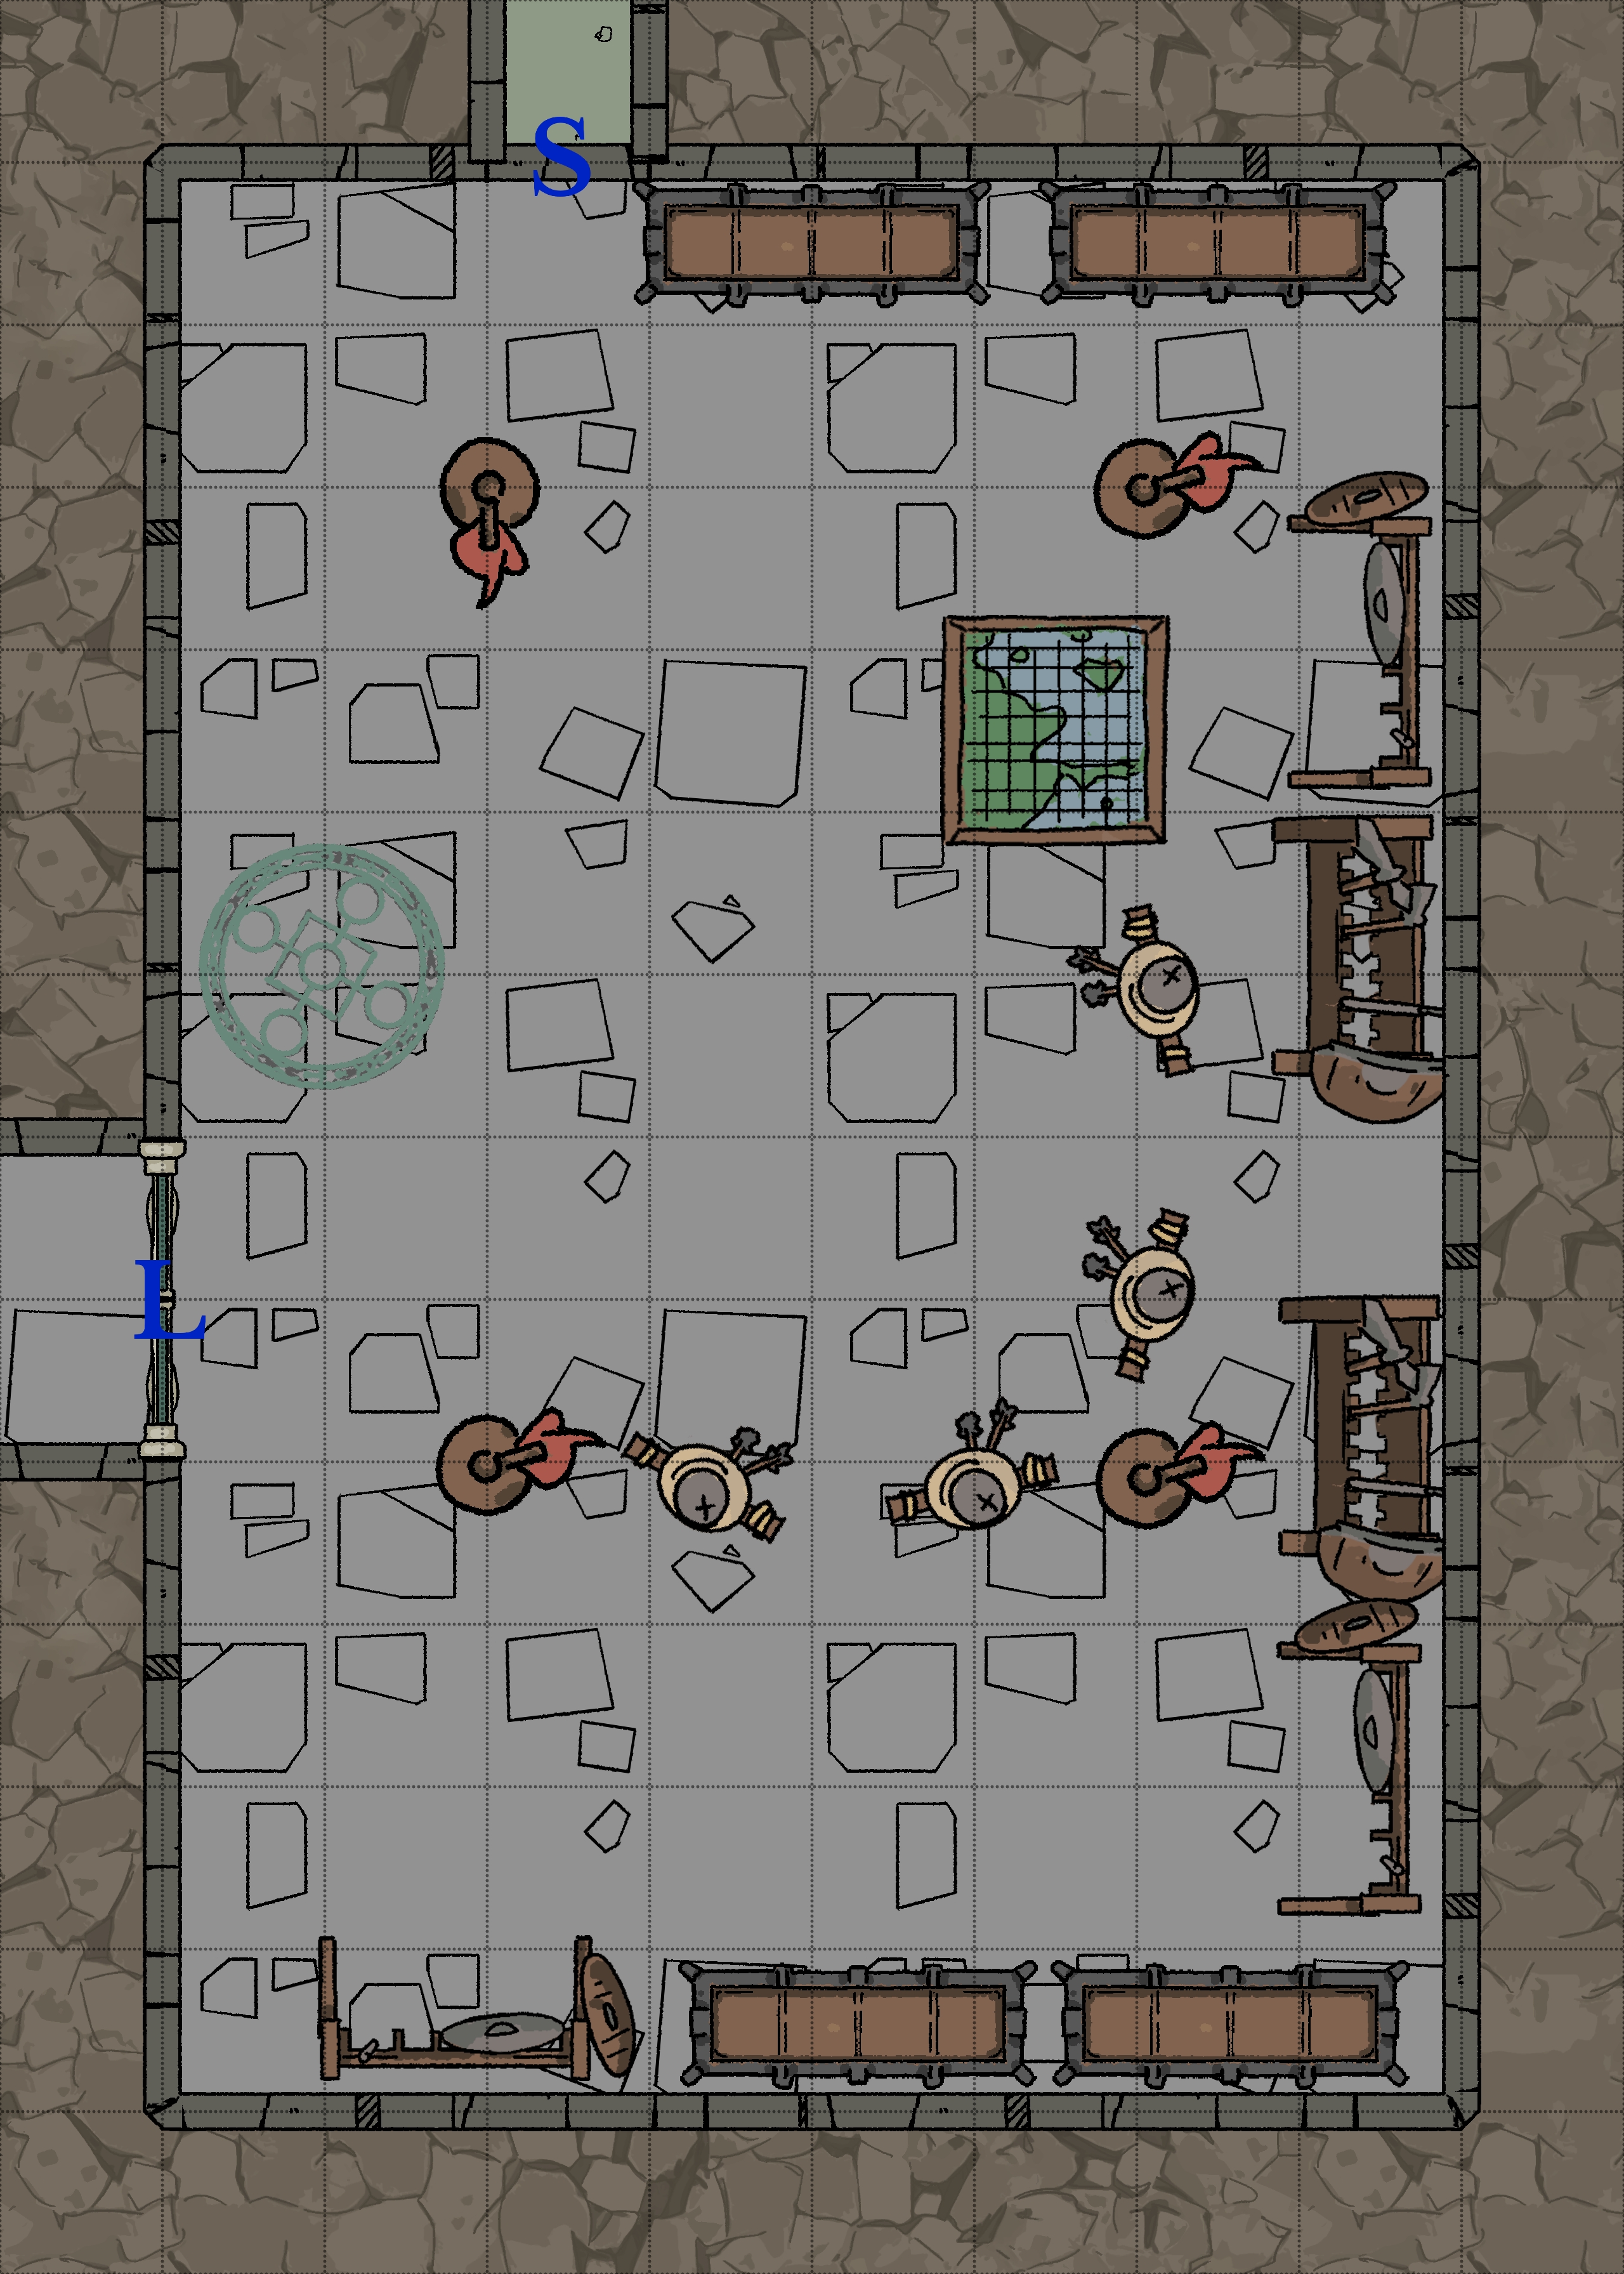
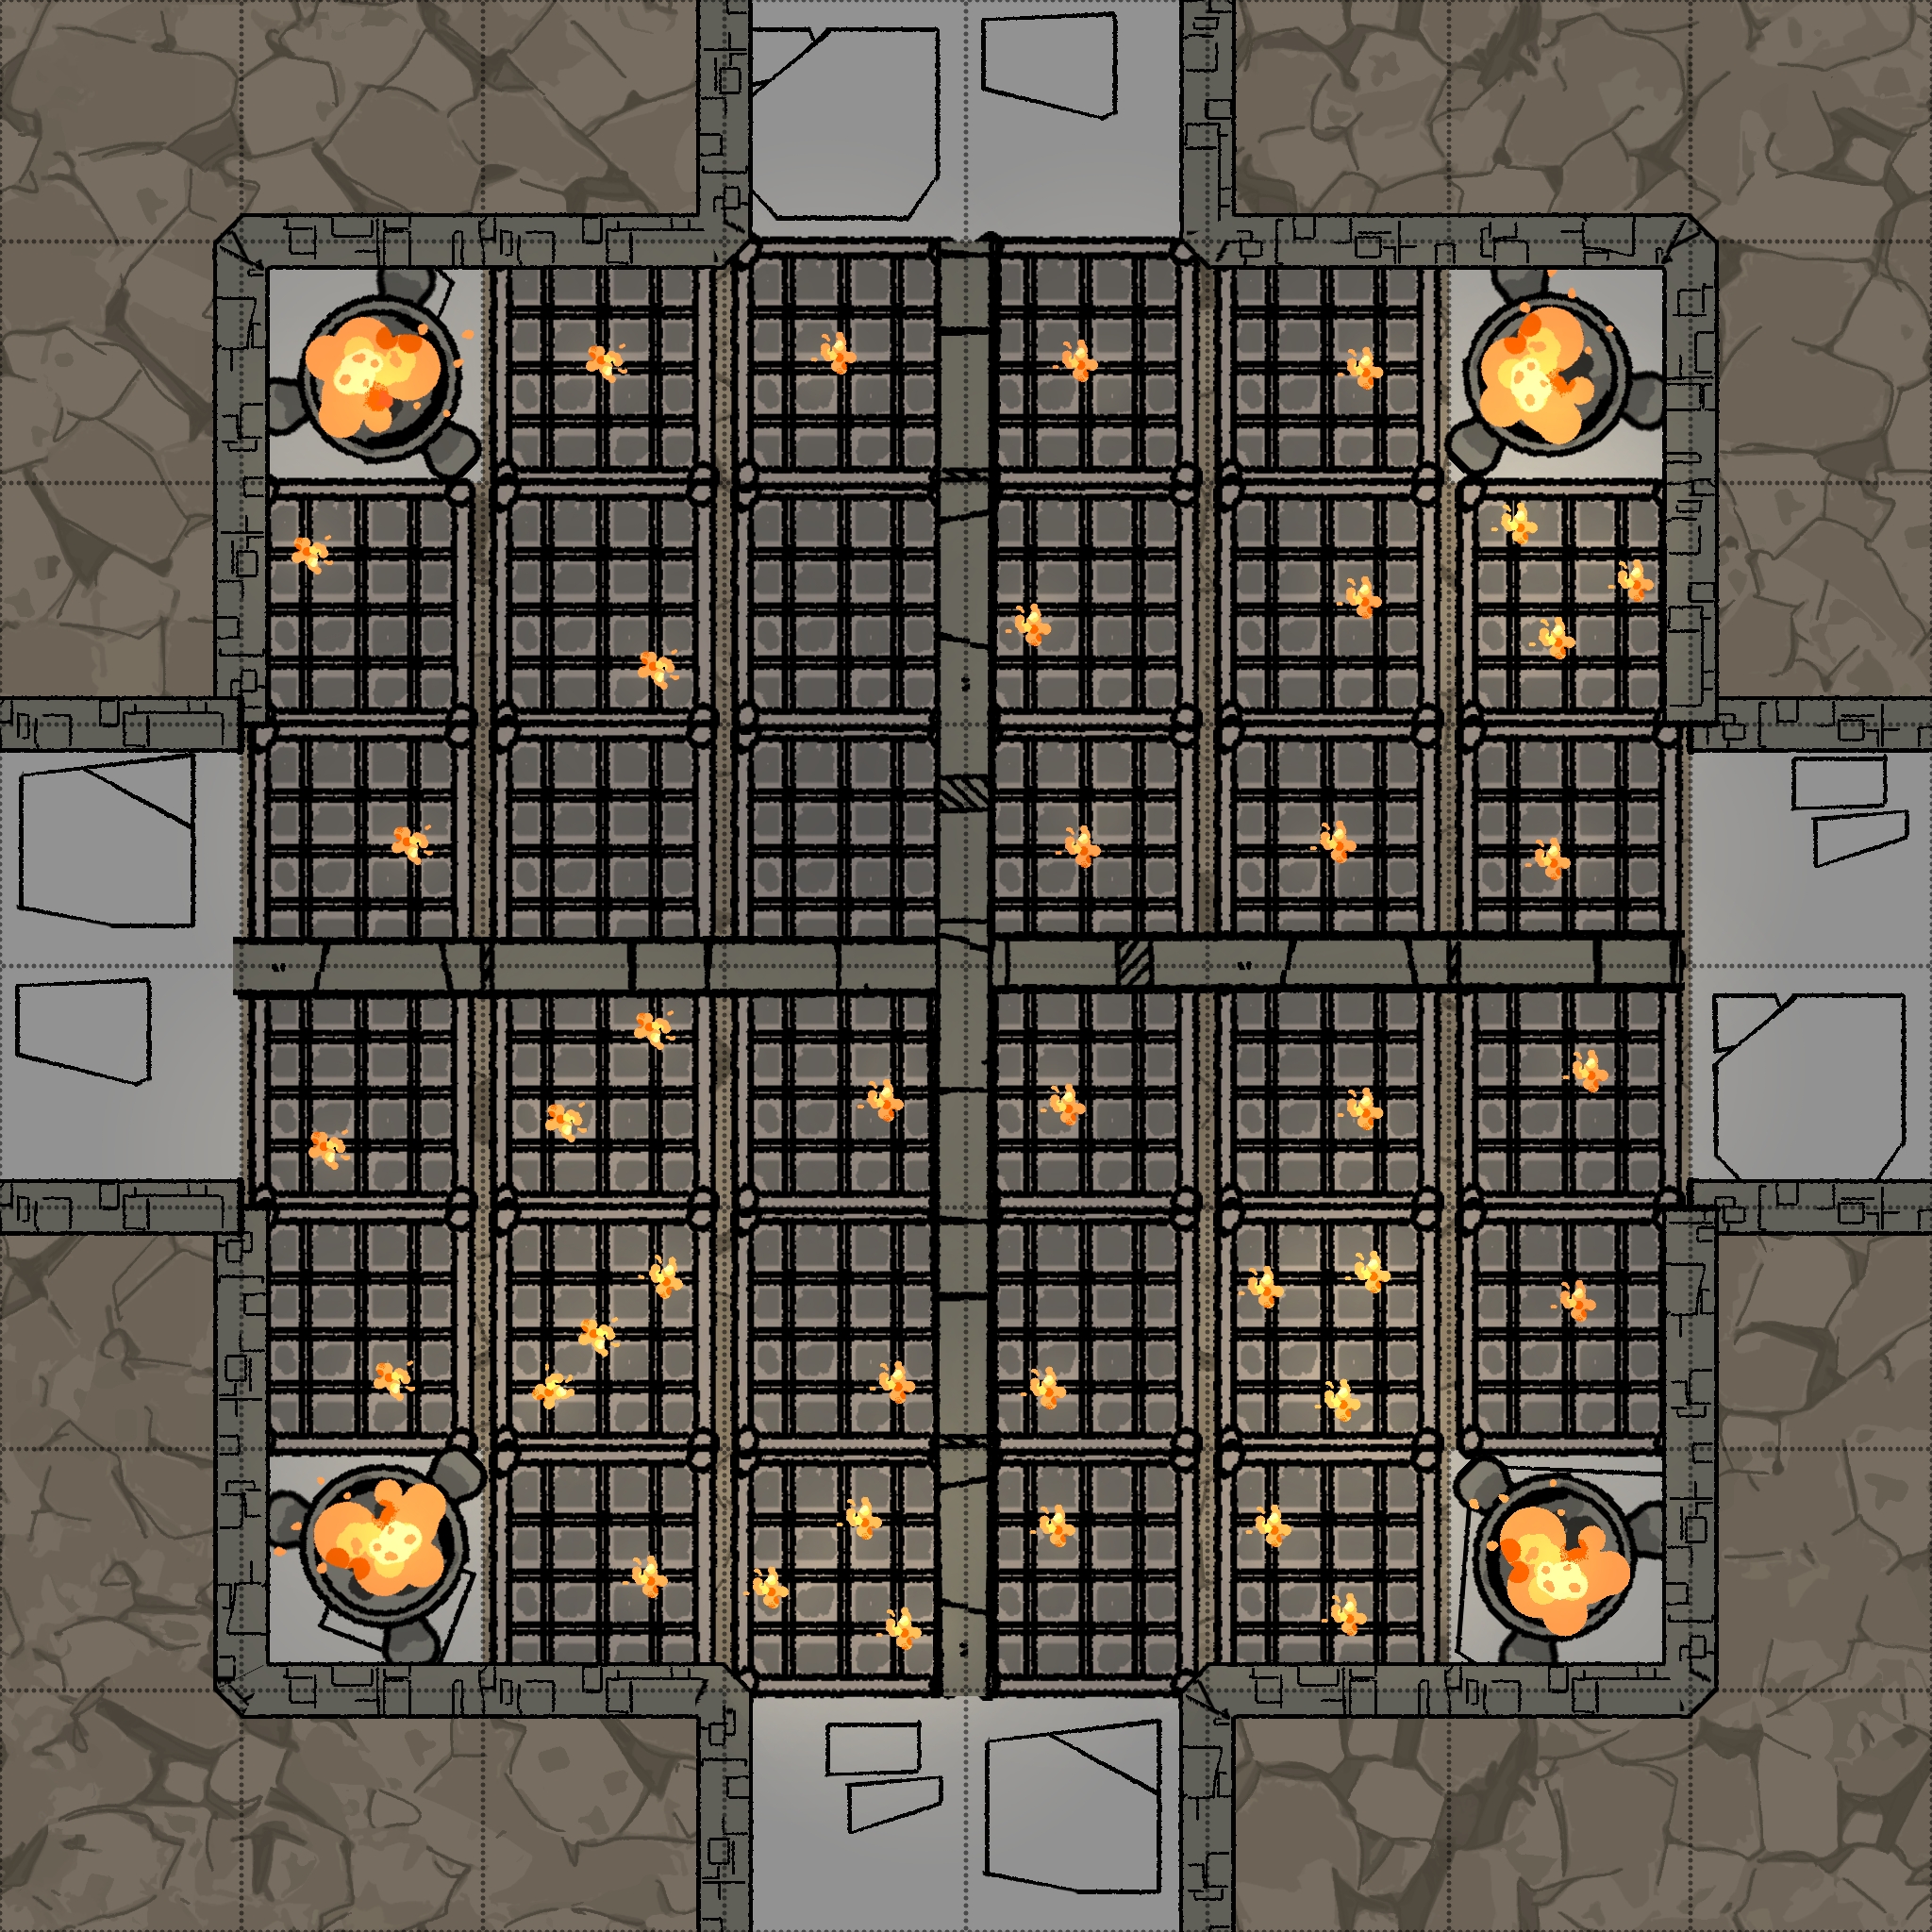
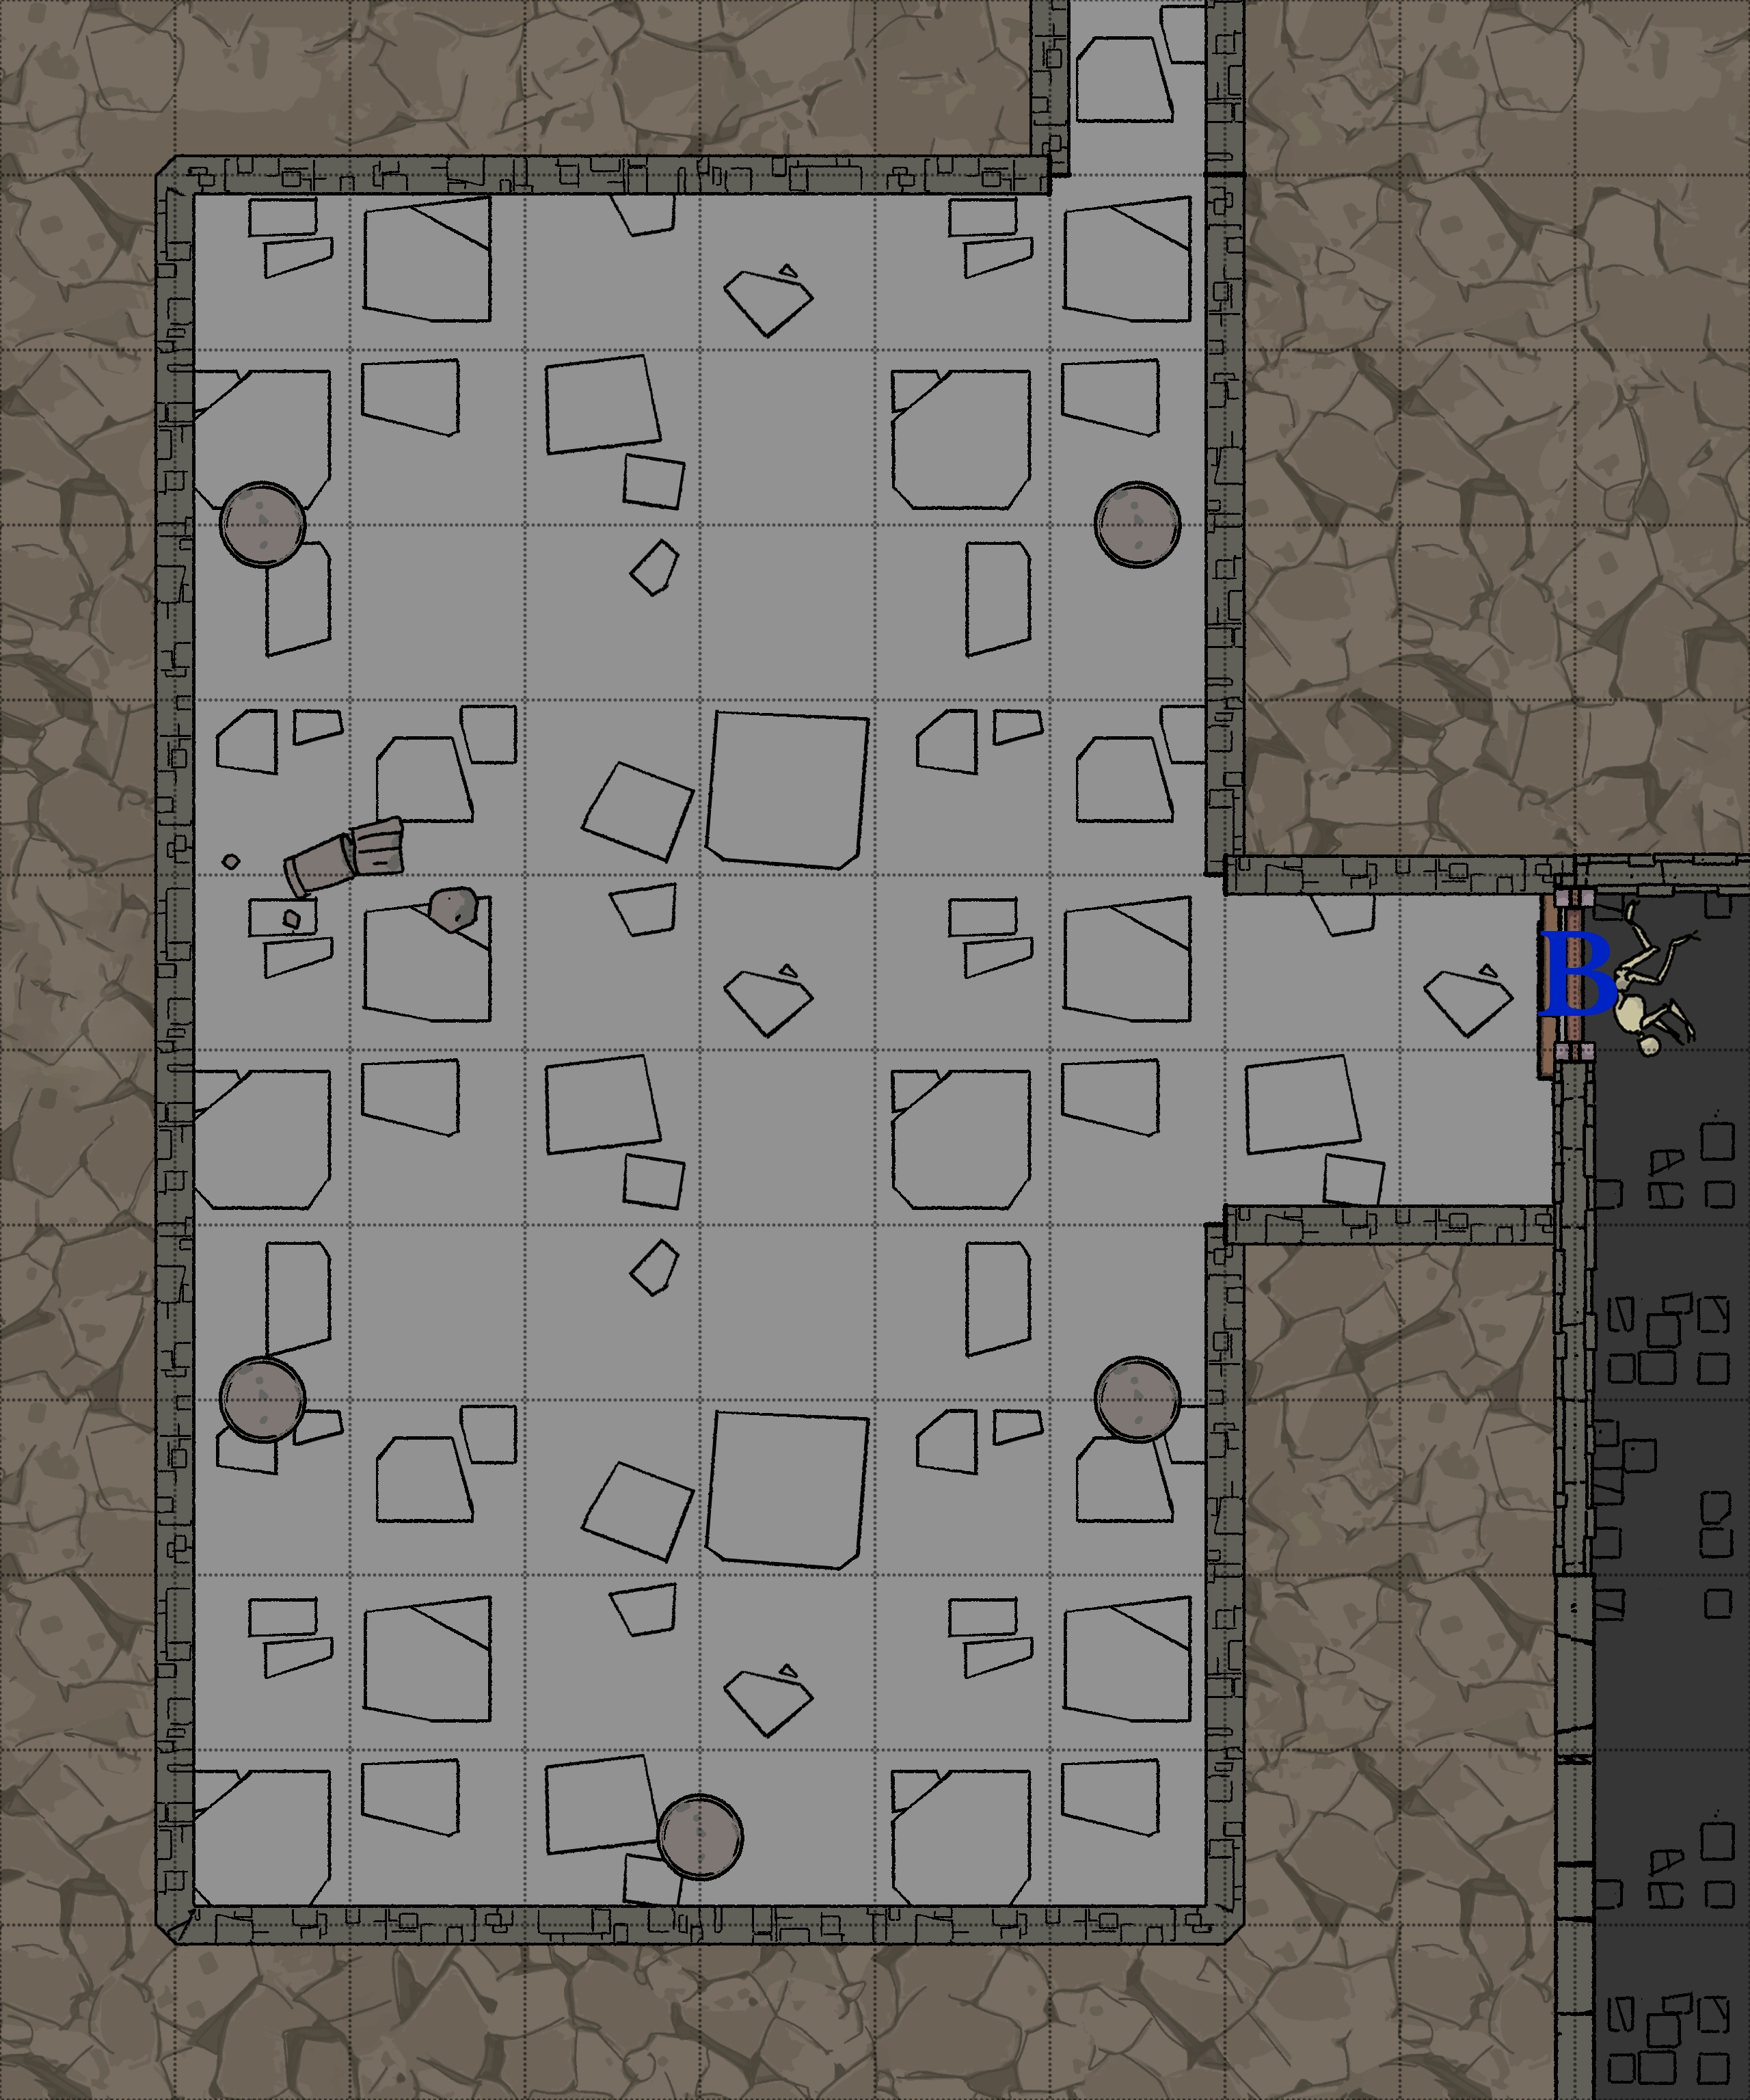
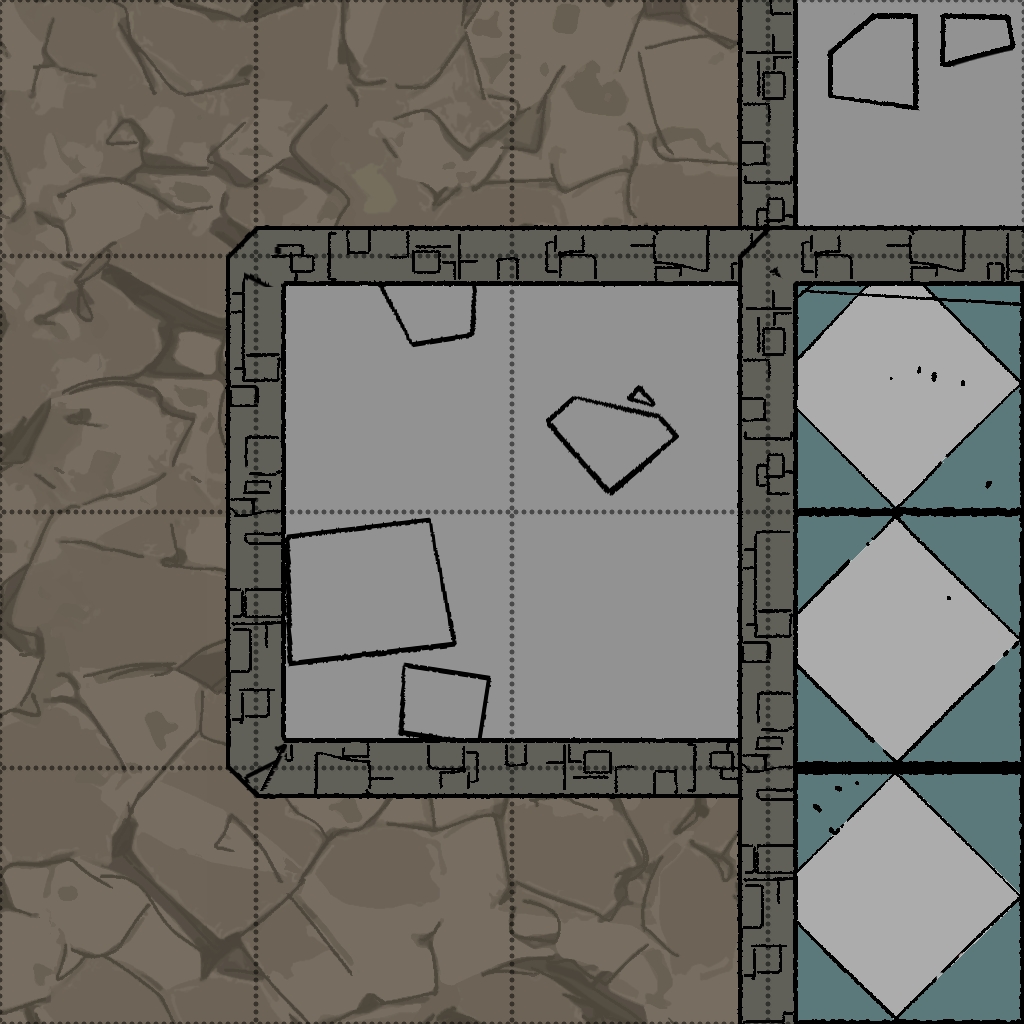
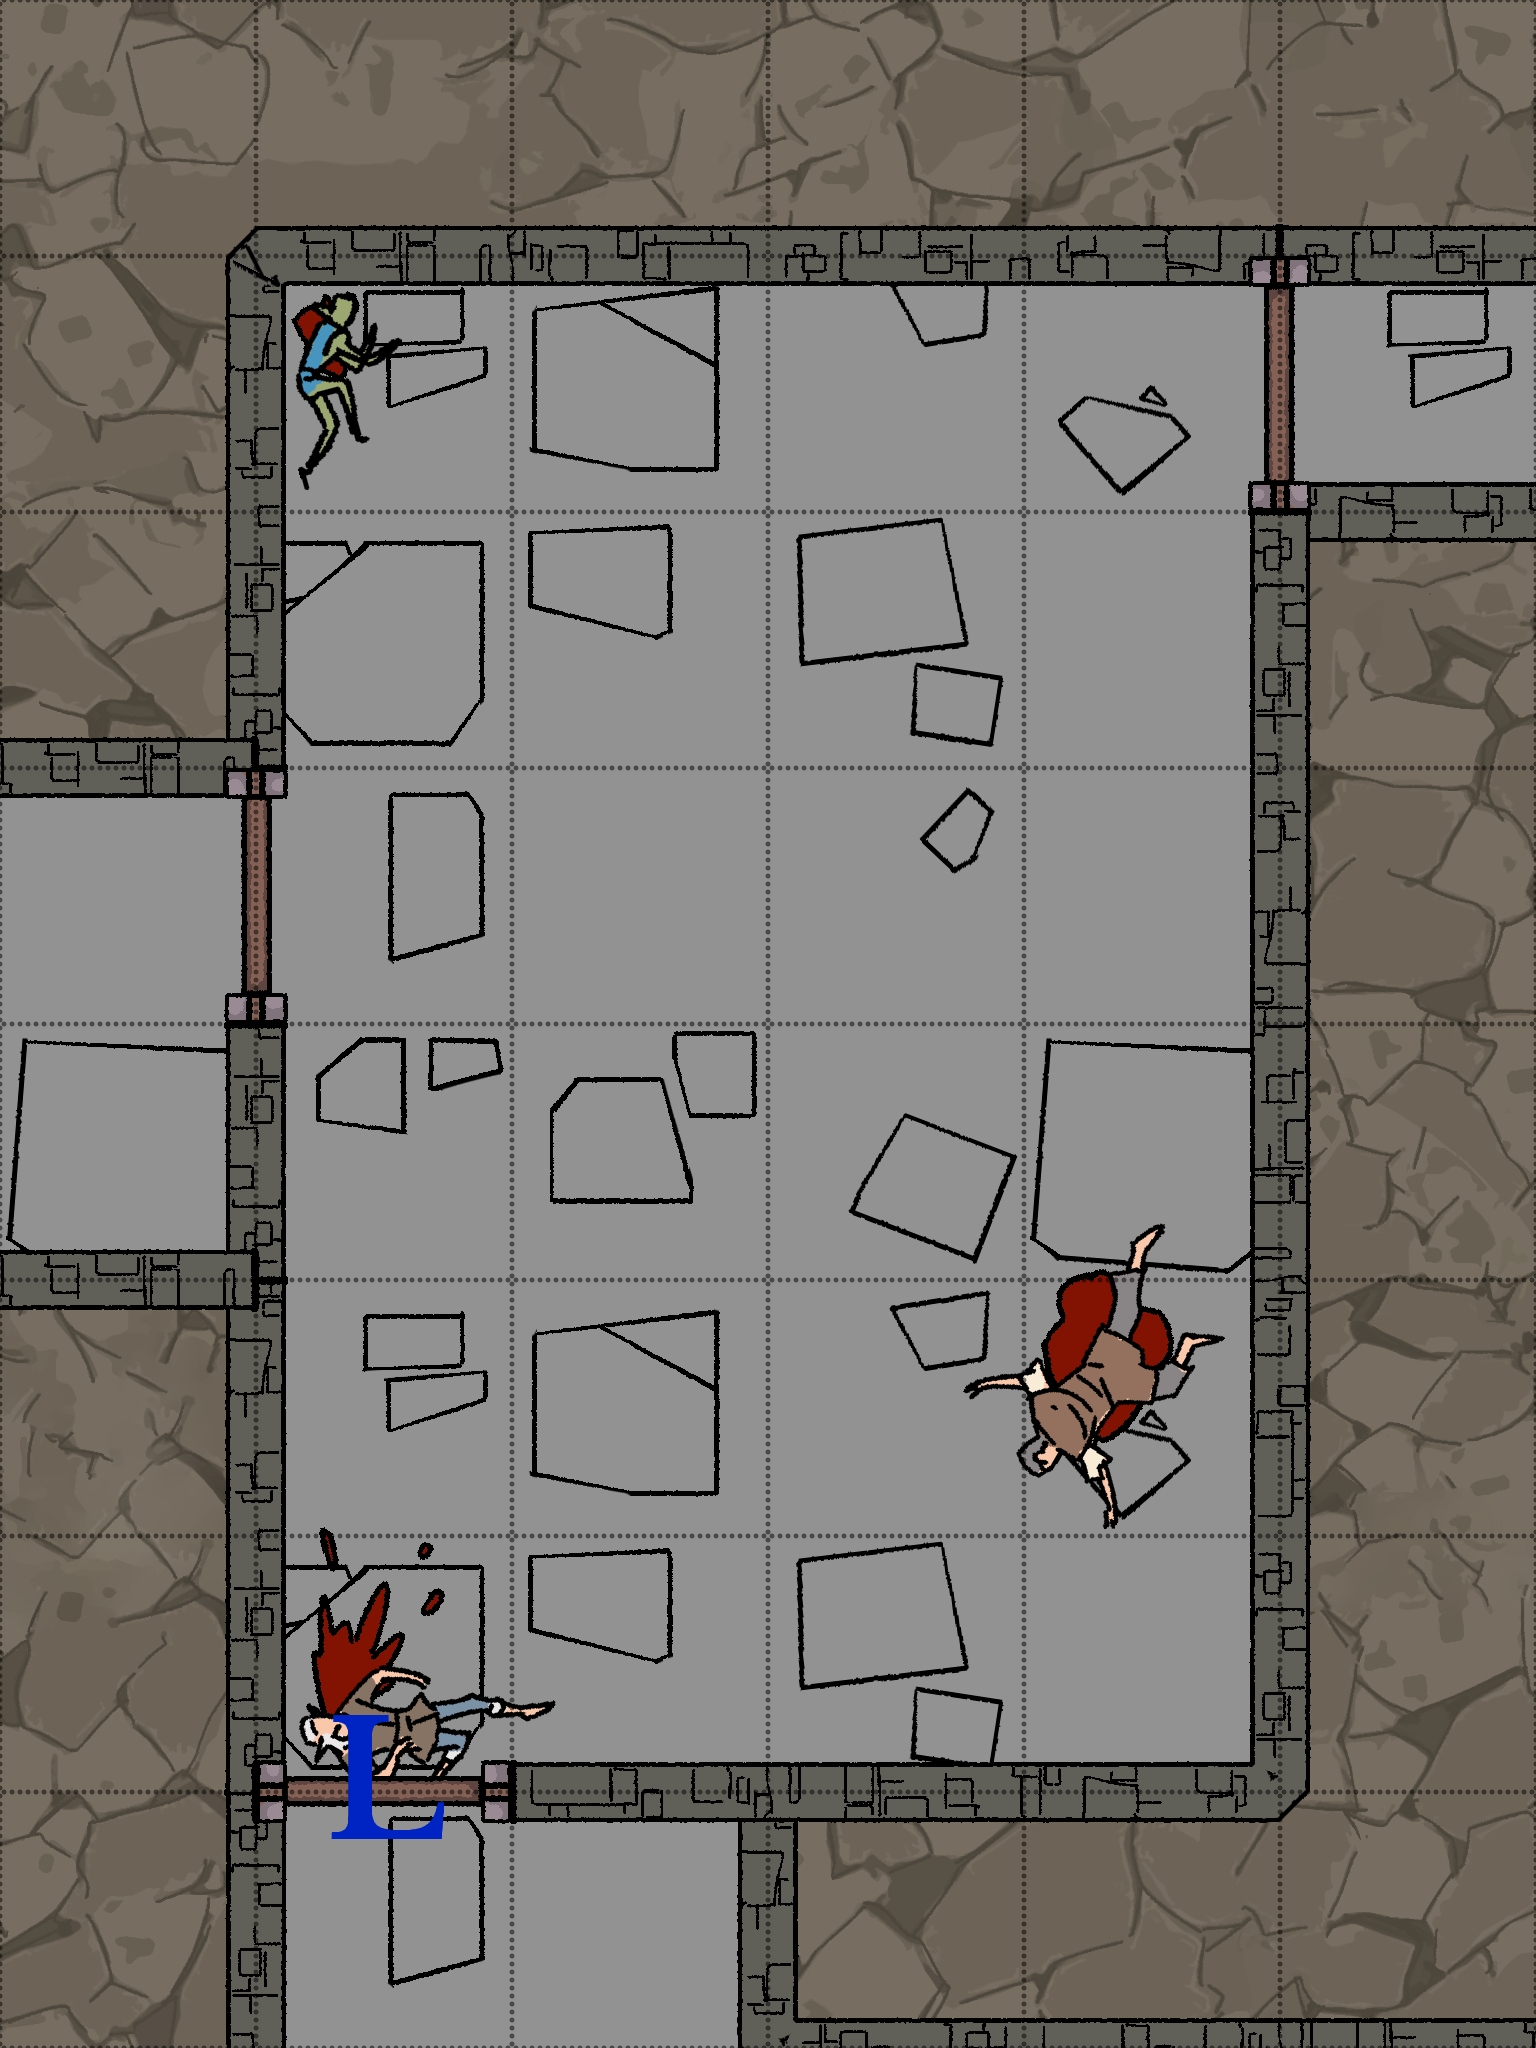
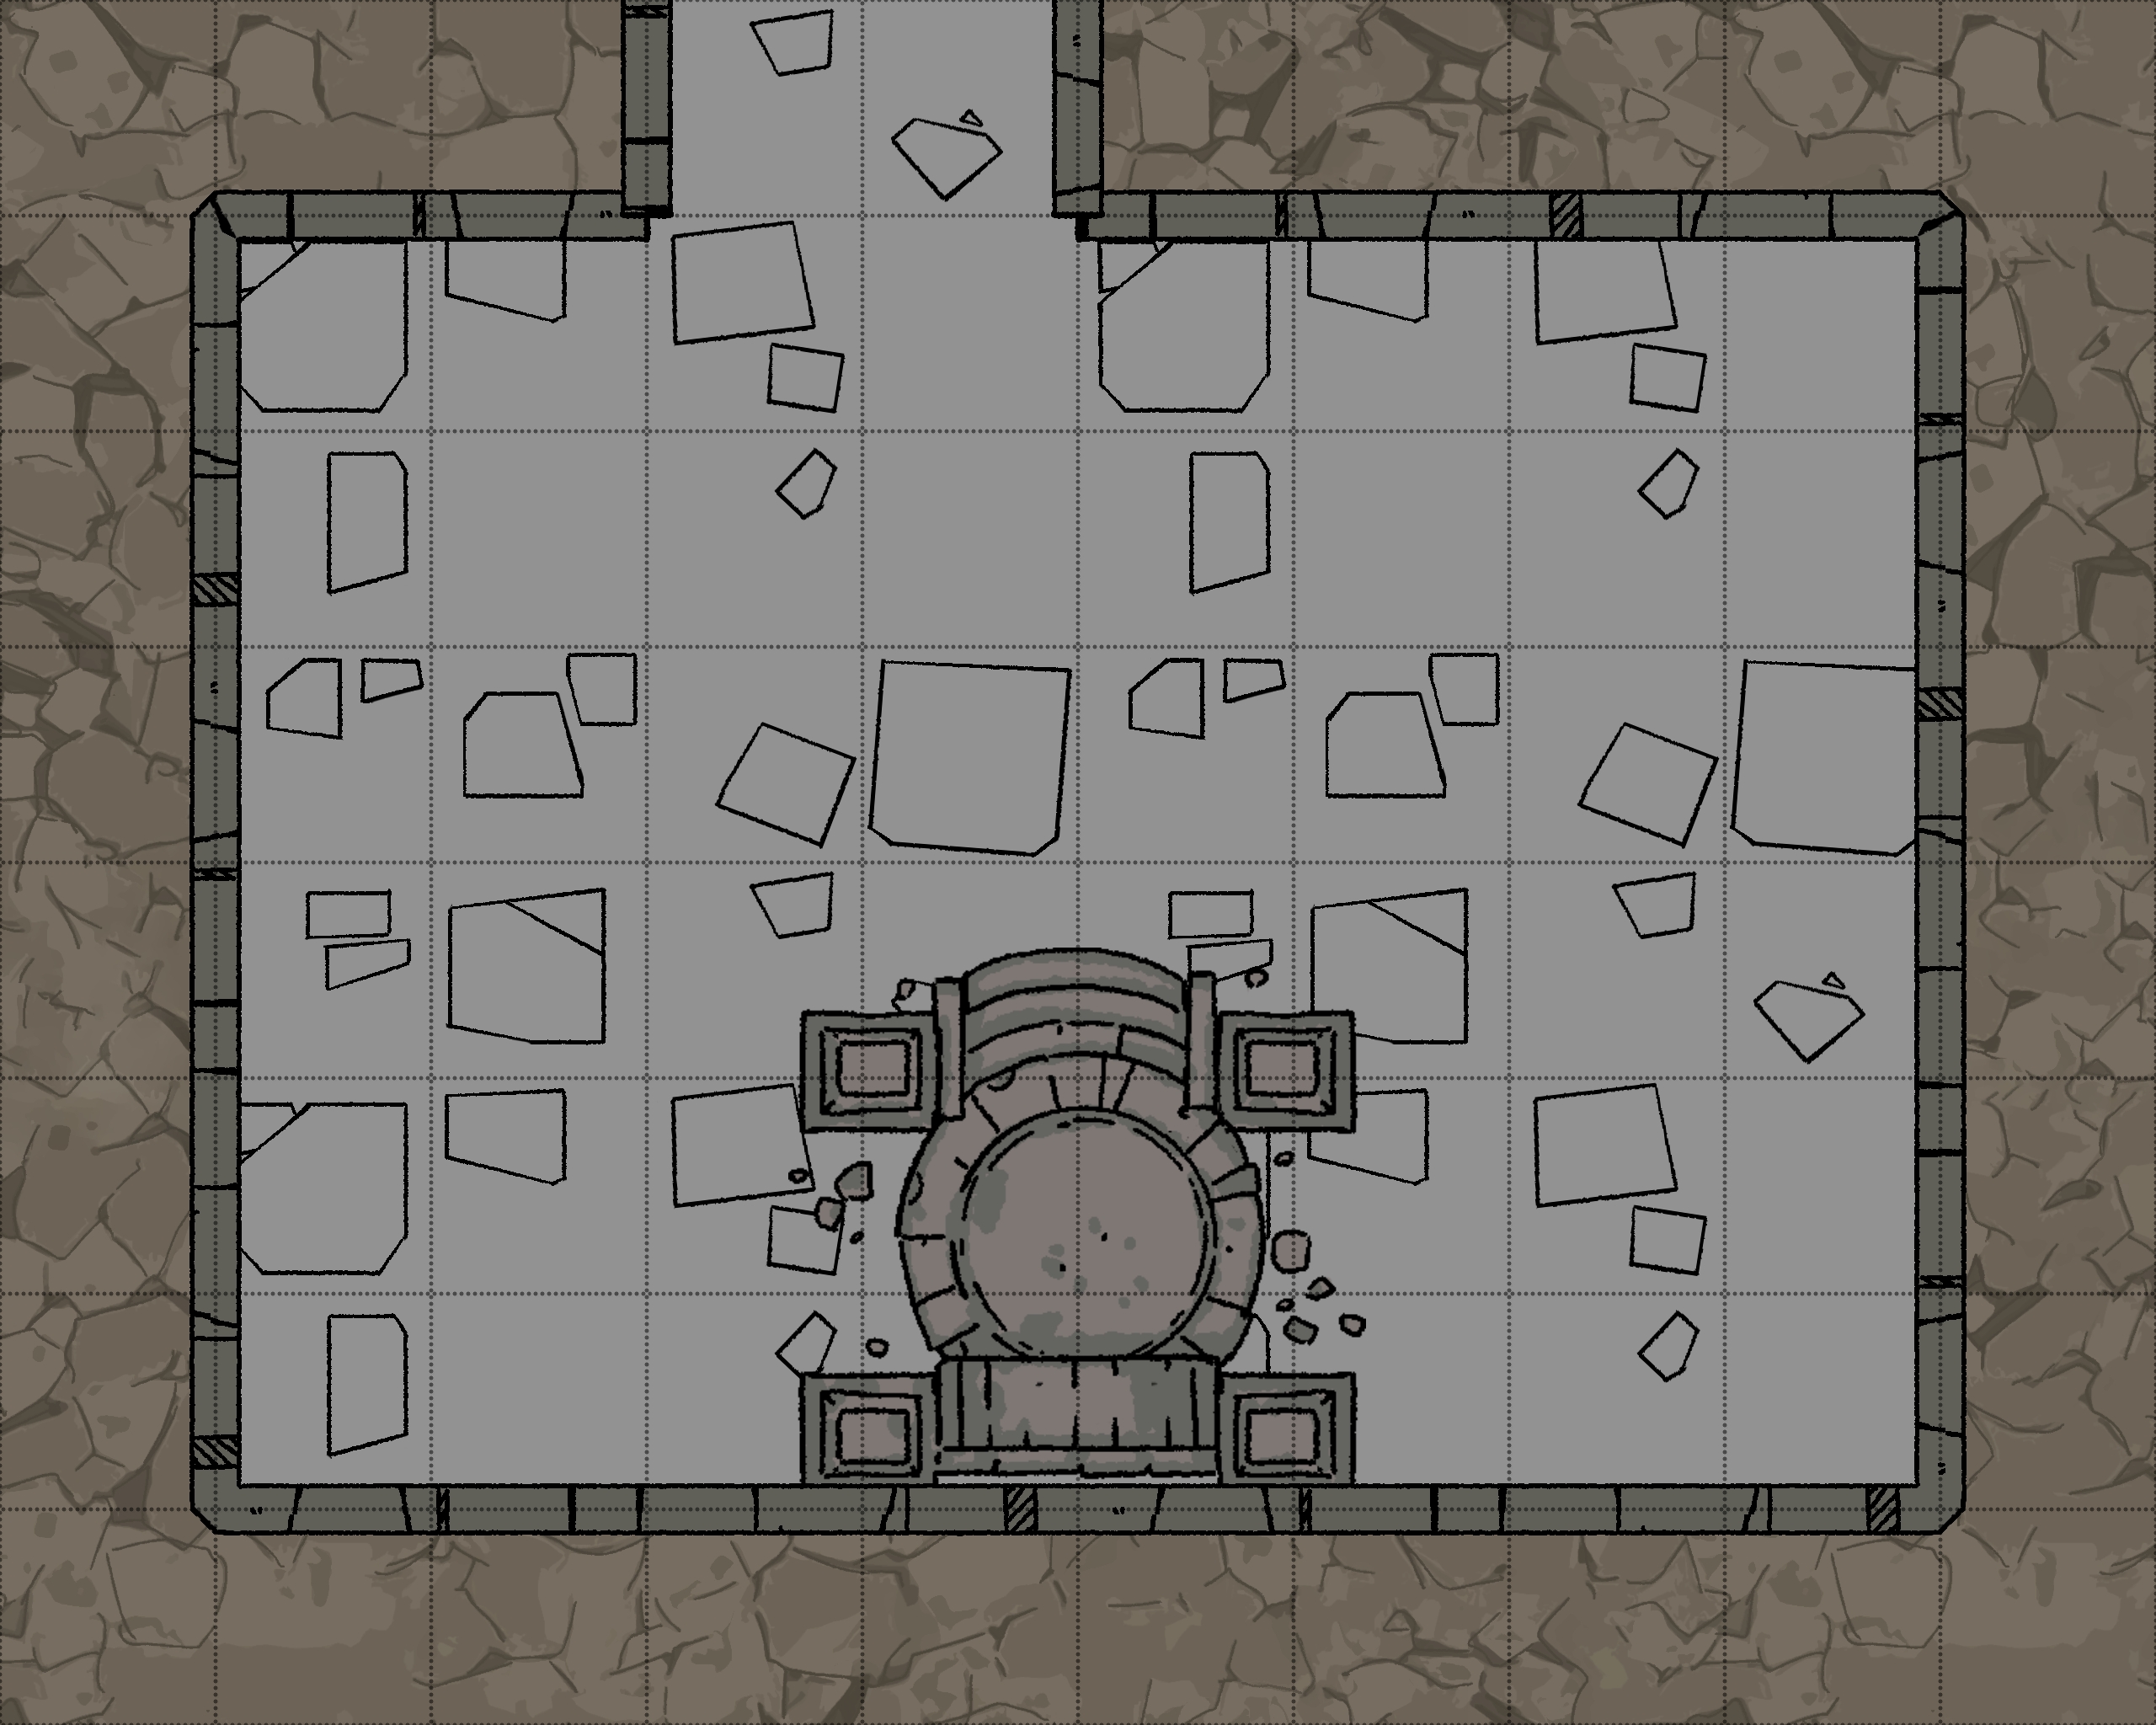
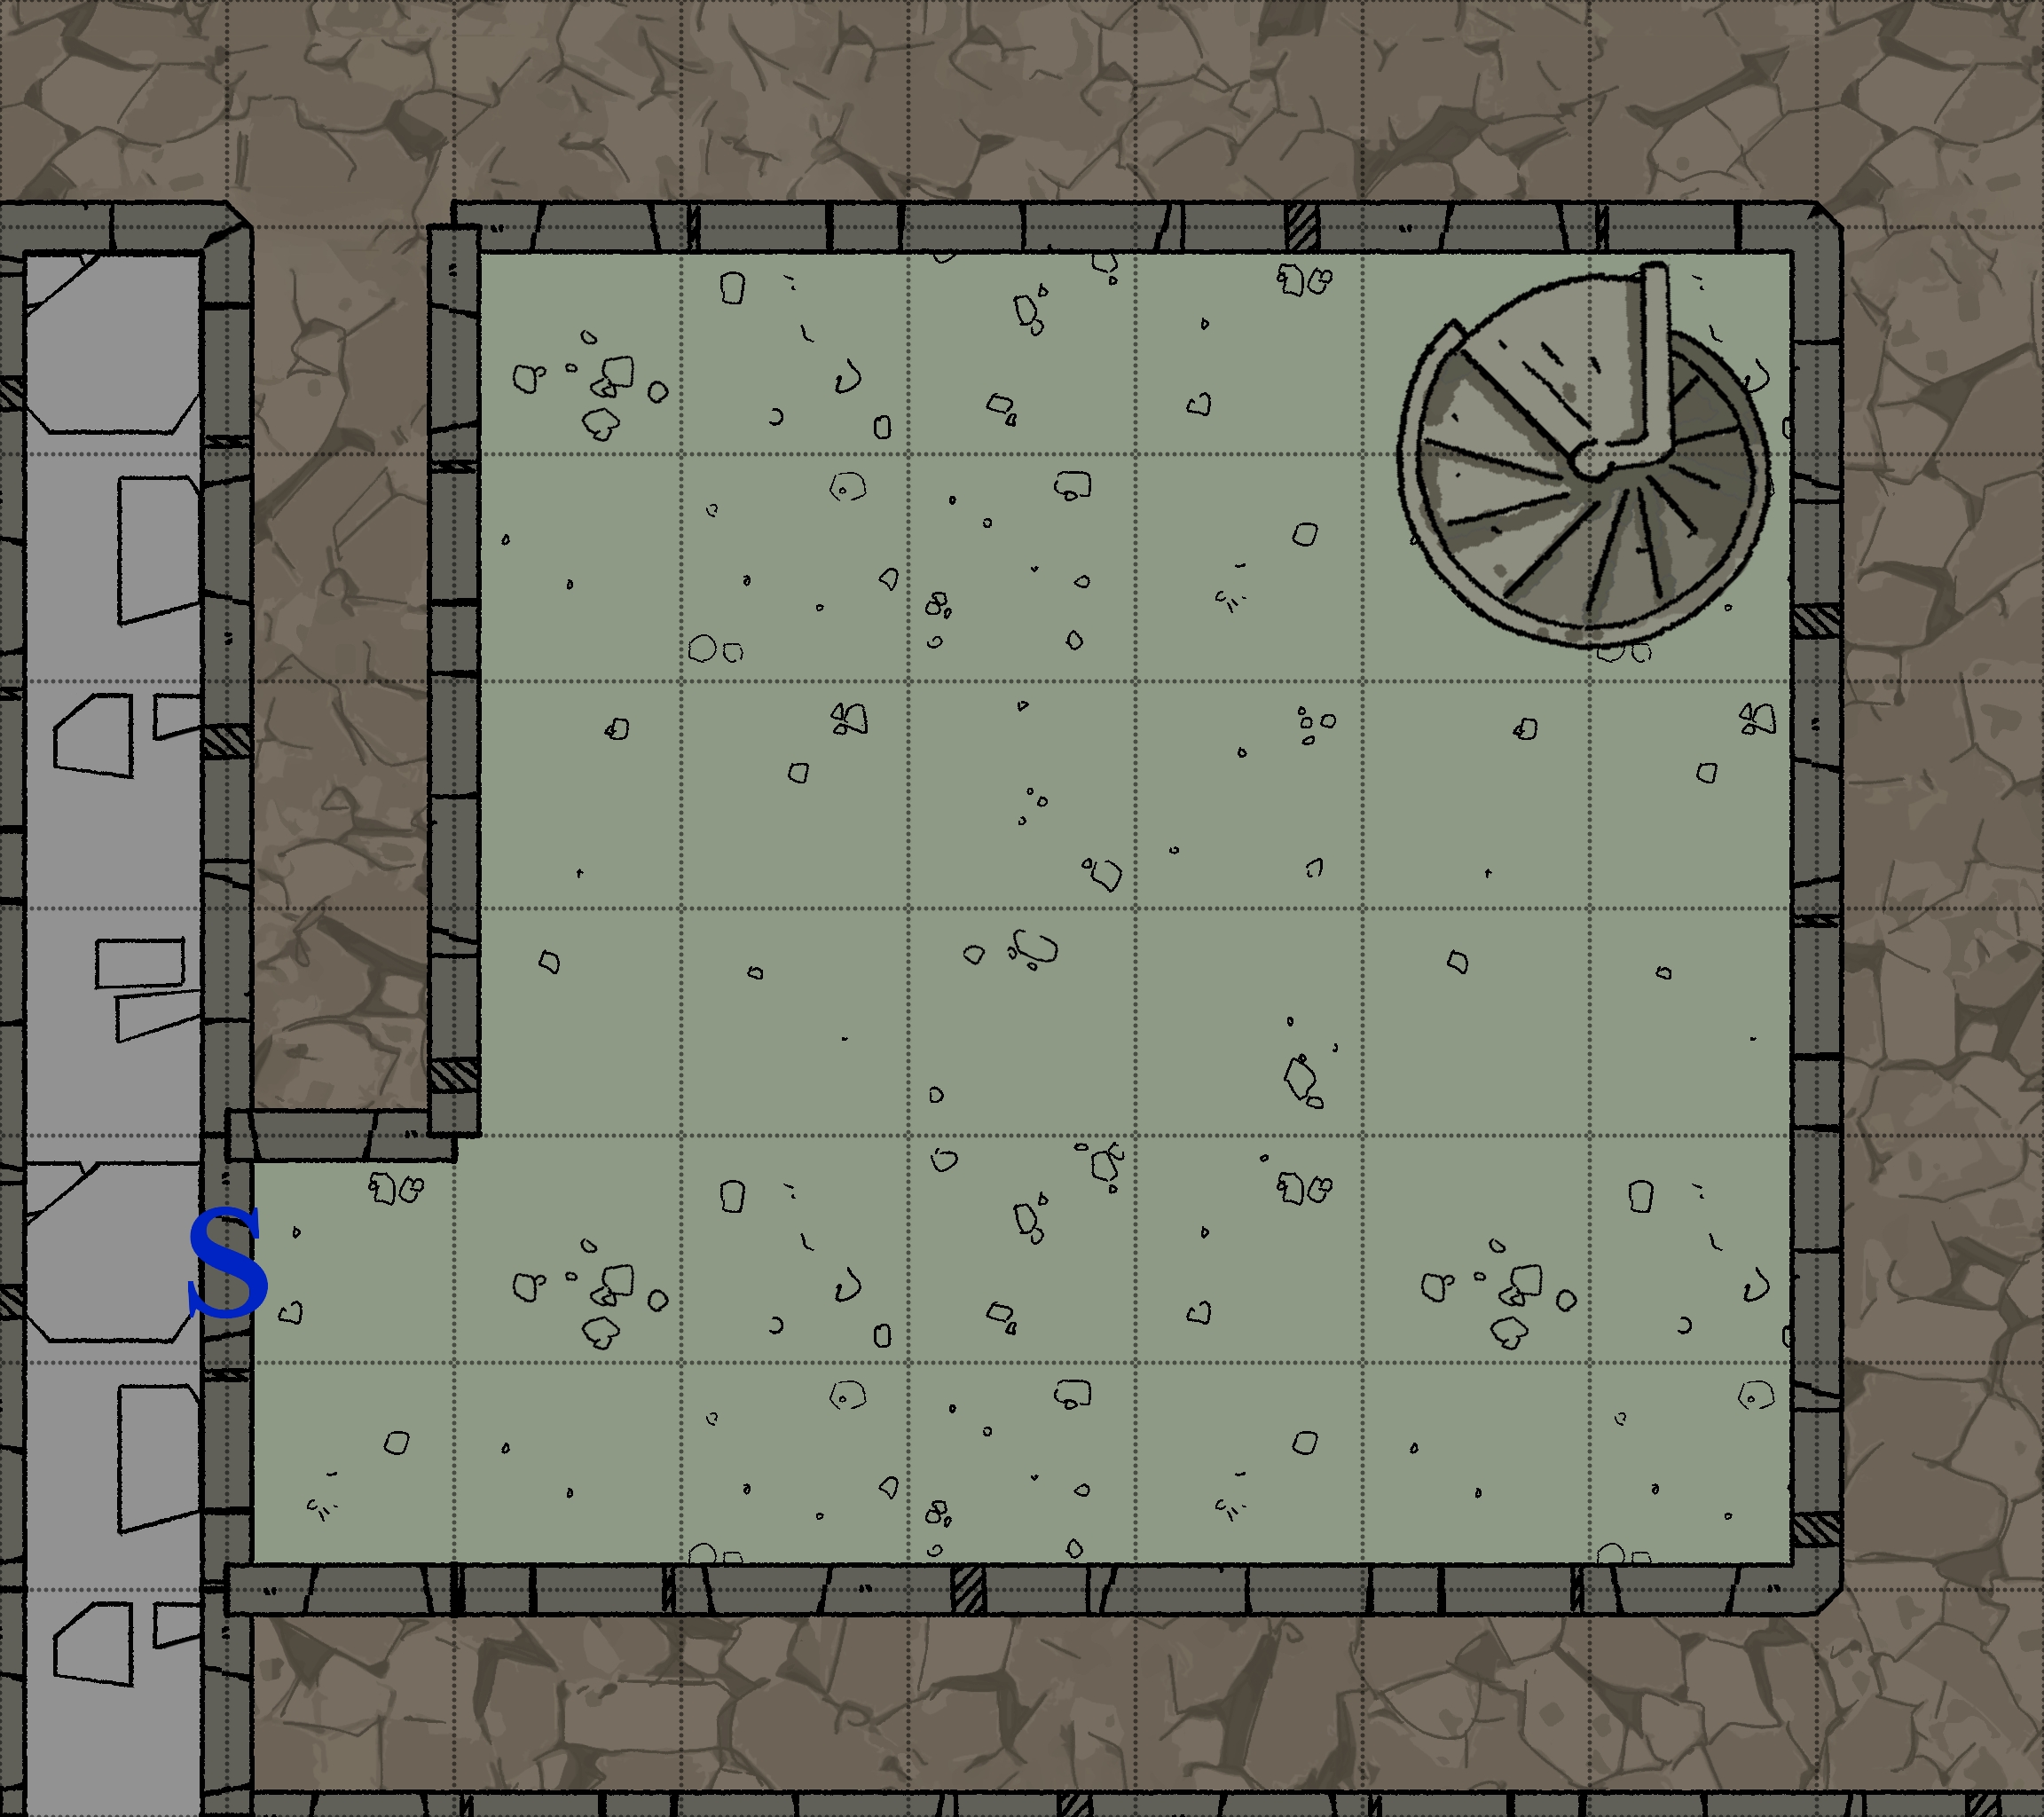
Total Mess Hall - B1-1
Room Type: Empty
Light Level: Dark
This large, open space used to be several rooms, including a staff mess hall. Now all that is left is rubble and bones from the millions of undead that have dragged themselves through this space. They come from the north door, and the vast majority follow the sound of the river out of the dead gate.
Undead are still here in huge numbers, lying silent next to fallen walls and the actual dead, always 2d10 Crawling Zombies .
In the southwest corner of the room, there used to be a secret exit through some natural caves, but over the years, flooding has taken down this wall, exposing the caves that lead to the Dead Gate.
Connected Rooms
North - Open corridor - Corridor
East - Large metal double door - B1-2
South West - Cave opening - Dead Gate
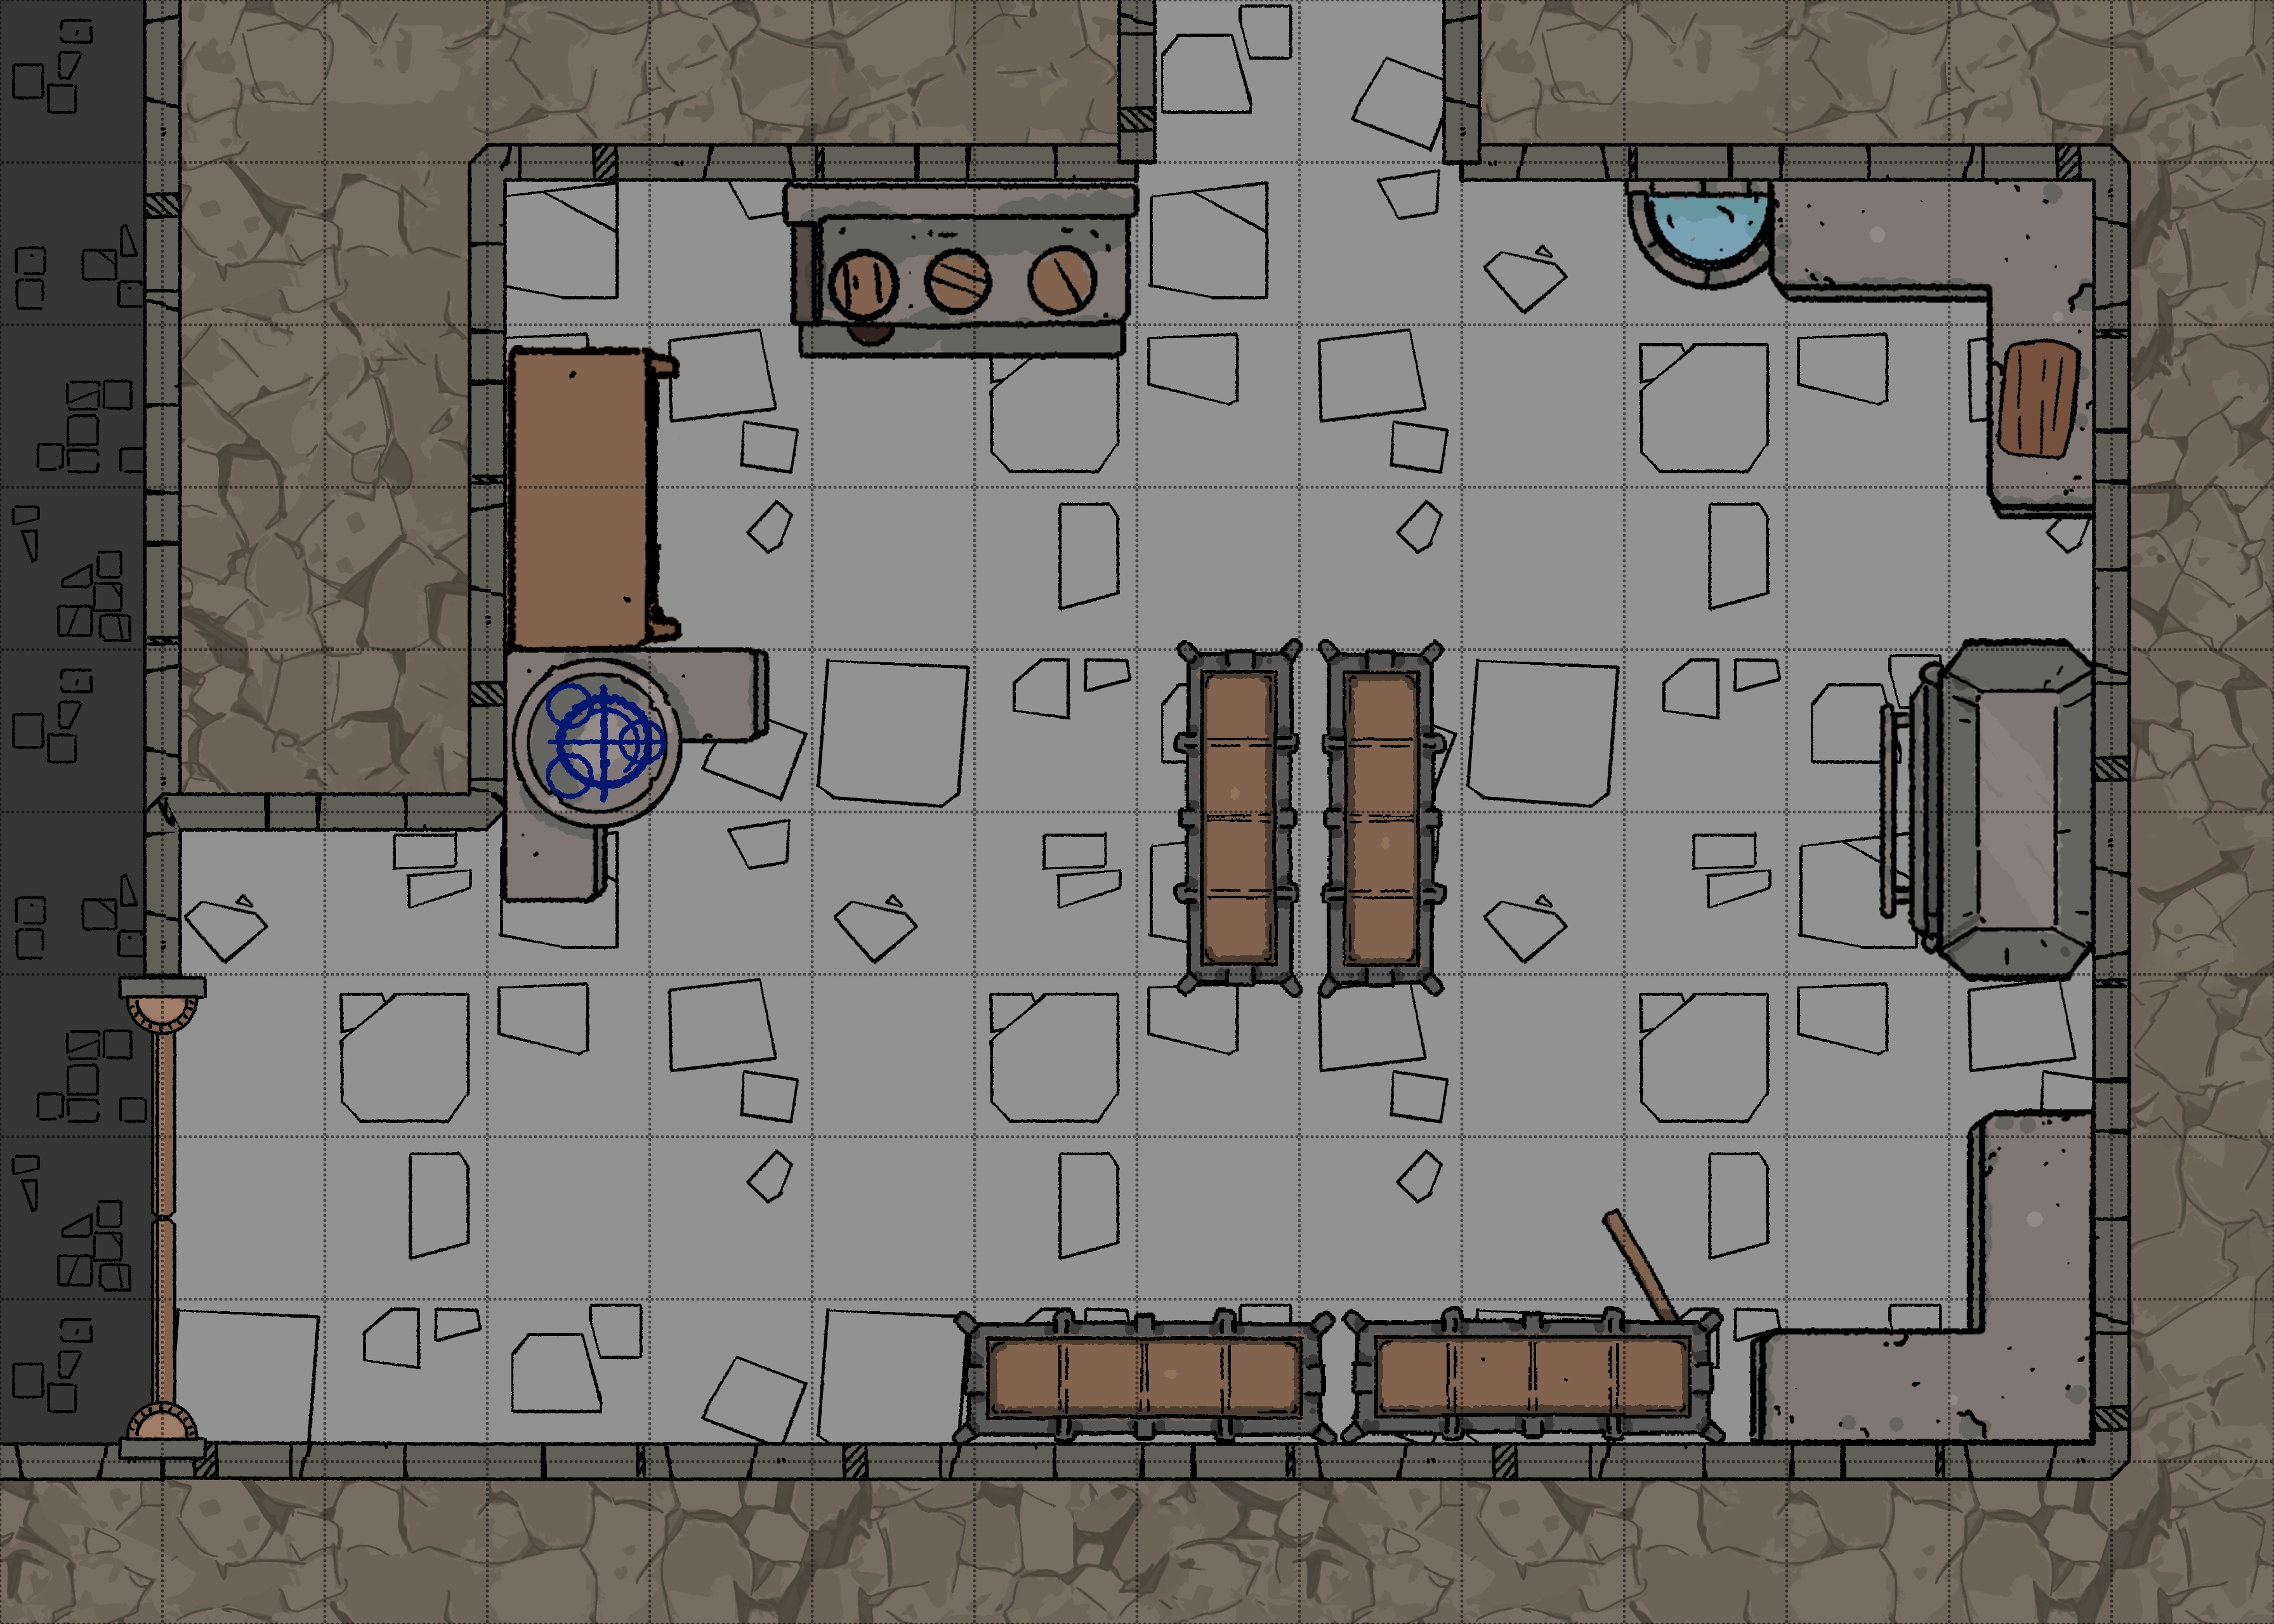
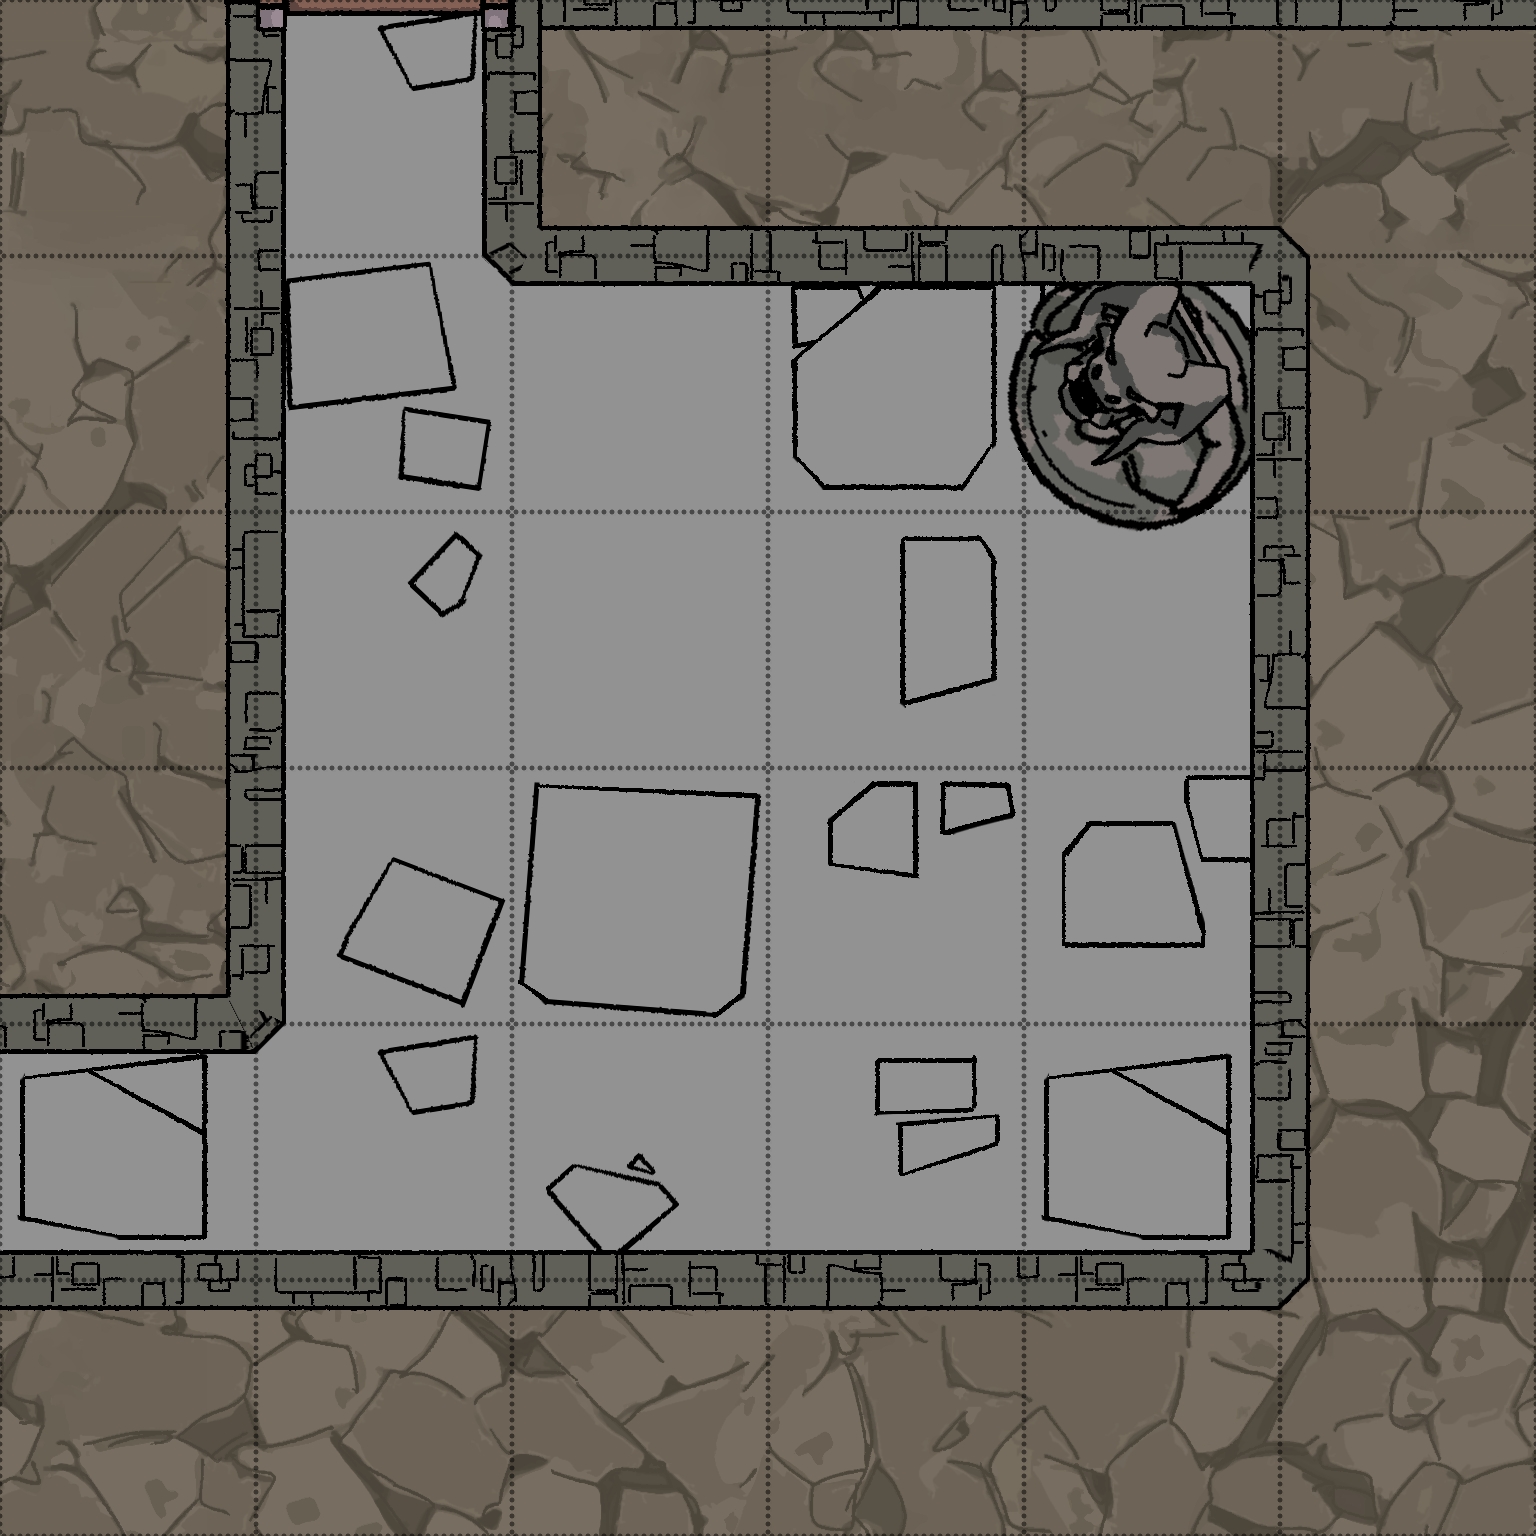
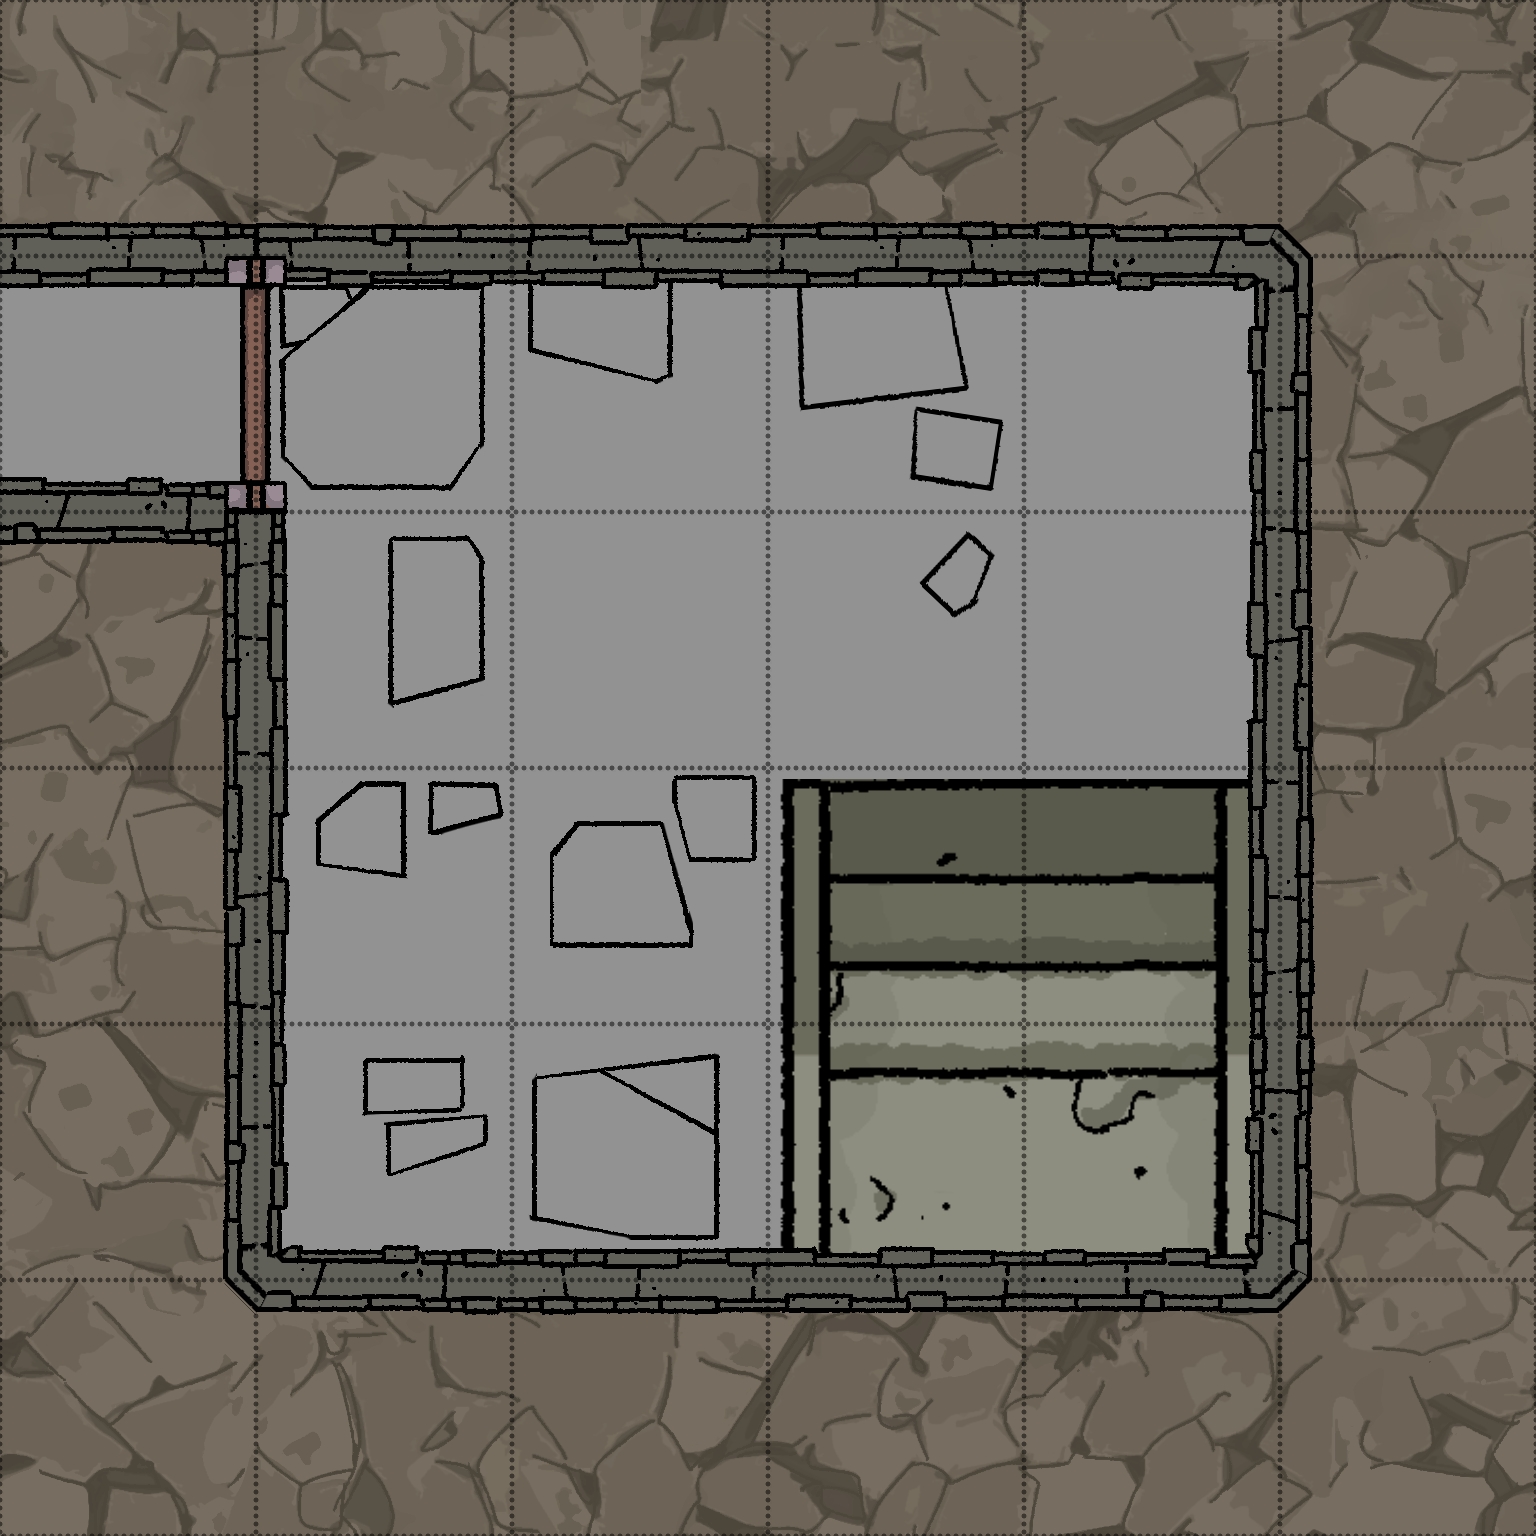
Tower Kitchens - B1-2
Room Type: Special
Light Level: Dark
This kitchen is huge, clearly designed to feed both staff and the Mortayne family. There are many ovens and ranges to cook on. Fresh water is available, but the tiny storage spaces that are here are all empty.
Against the west wall is a strange cupboard with a teliportation sigil inside. This is a magical dumb waiter that will teleport anything inside when the door is shut; it appears in the middle of the dining table in 3-5.
Connected Rooms
North - Open corridor - B1-3
West - Large metal double door - B1-1
Pantry - B1-3
Room Type: Empty
Light Level: Dark
This pantry matches the adjacent kitchen in scale, with shelves and cupboards lining the walls and hanging places for herbs. There is not much of use in this place; anything that was left here by its previous owners has long since rotted or petrified.
There are, however, two large cupboards that are magically enchanted to keep their contents cold. These are worth 1000gp each but are incredibly heavy and large. Good luck getting them out of here.
Connected Rooms
North - Wooden door - B1-4
East - Wooden door - Barraks corridor
South - Open corridor - B1-2
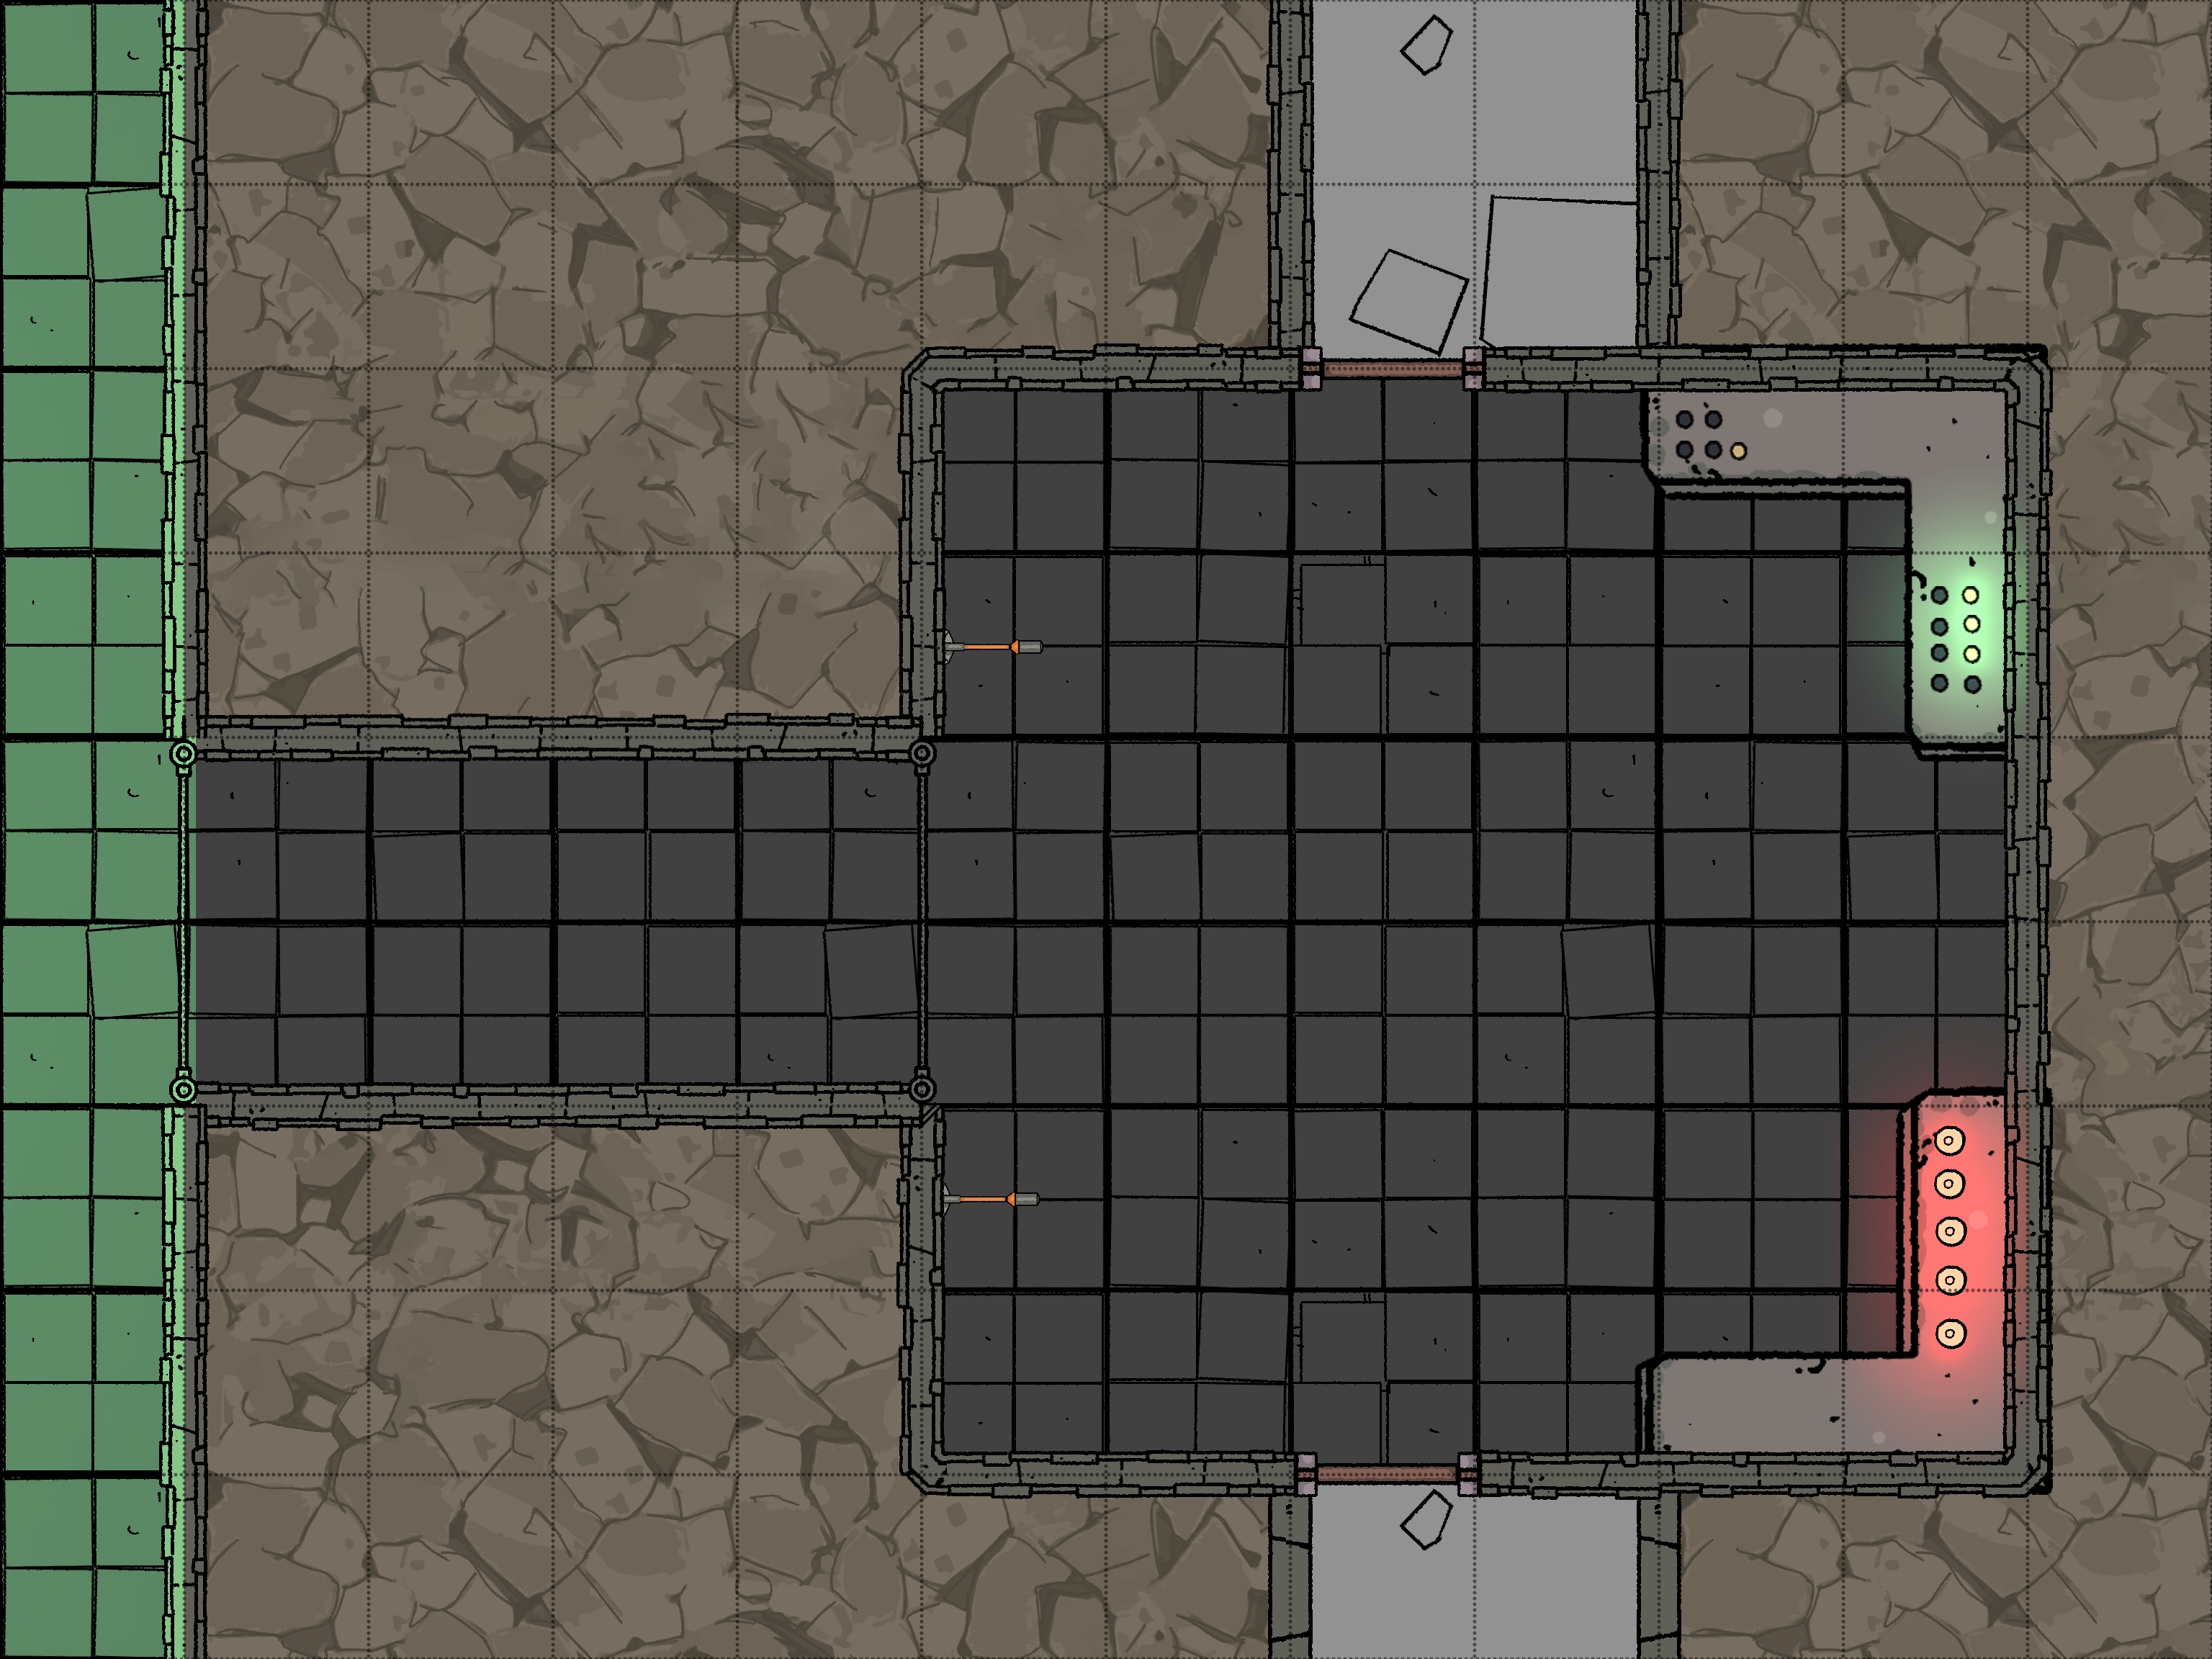
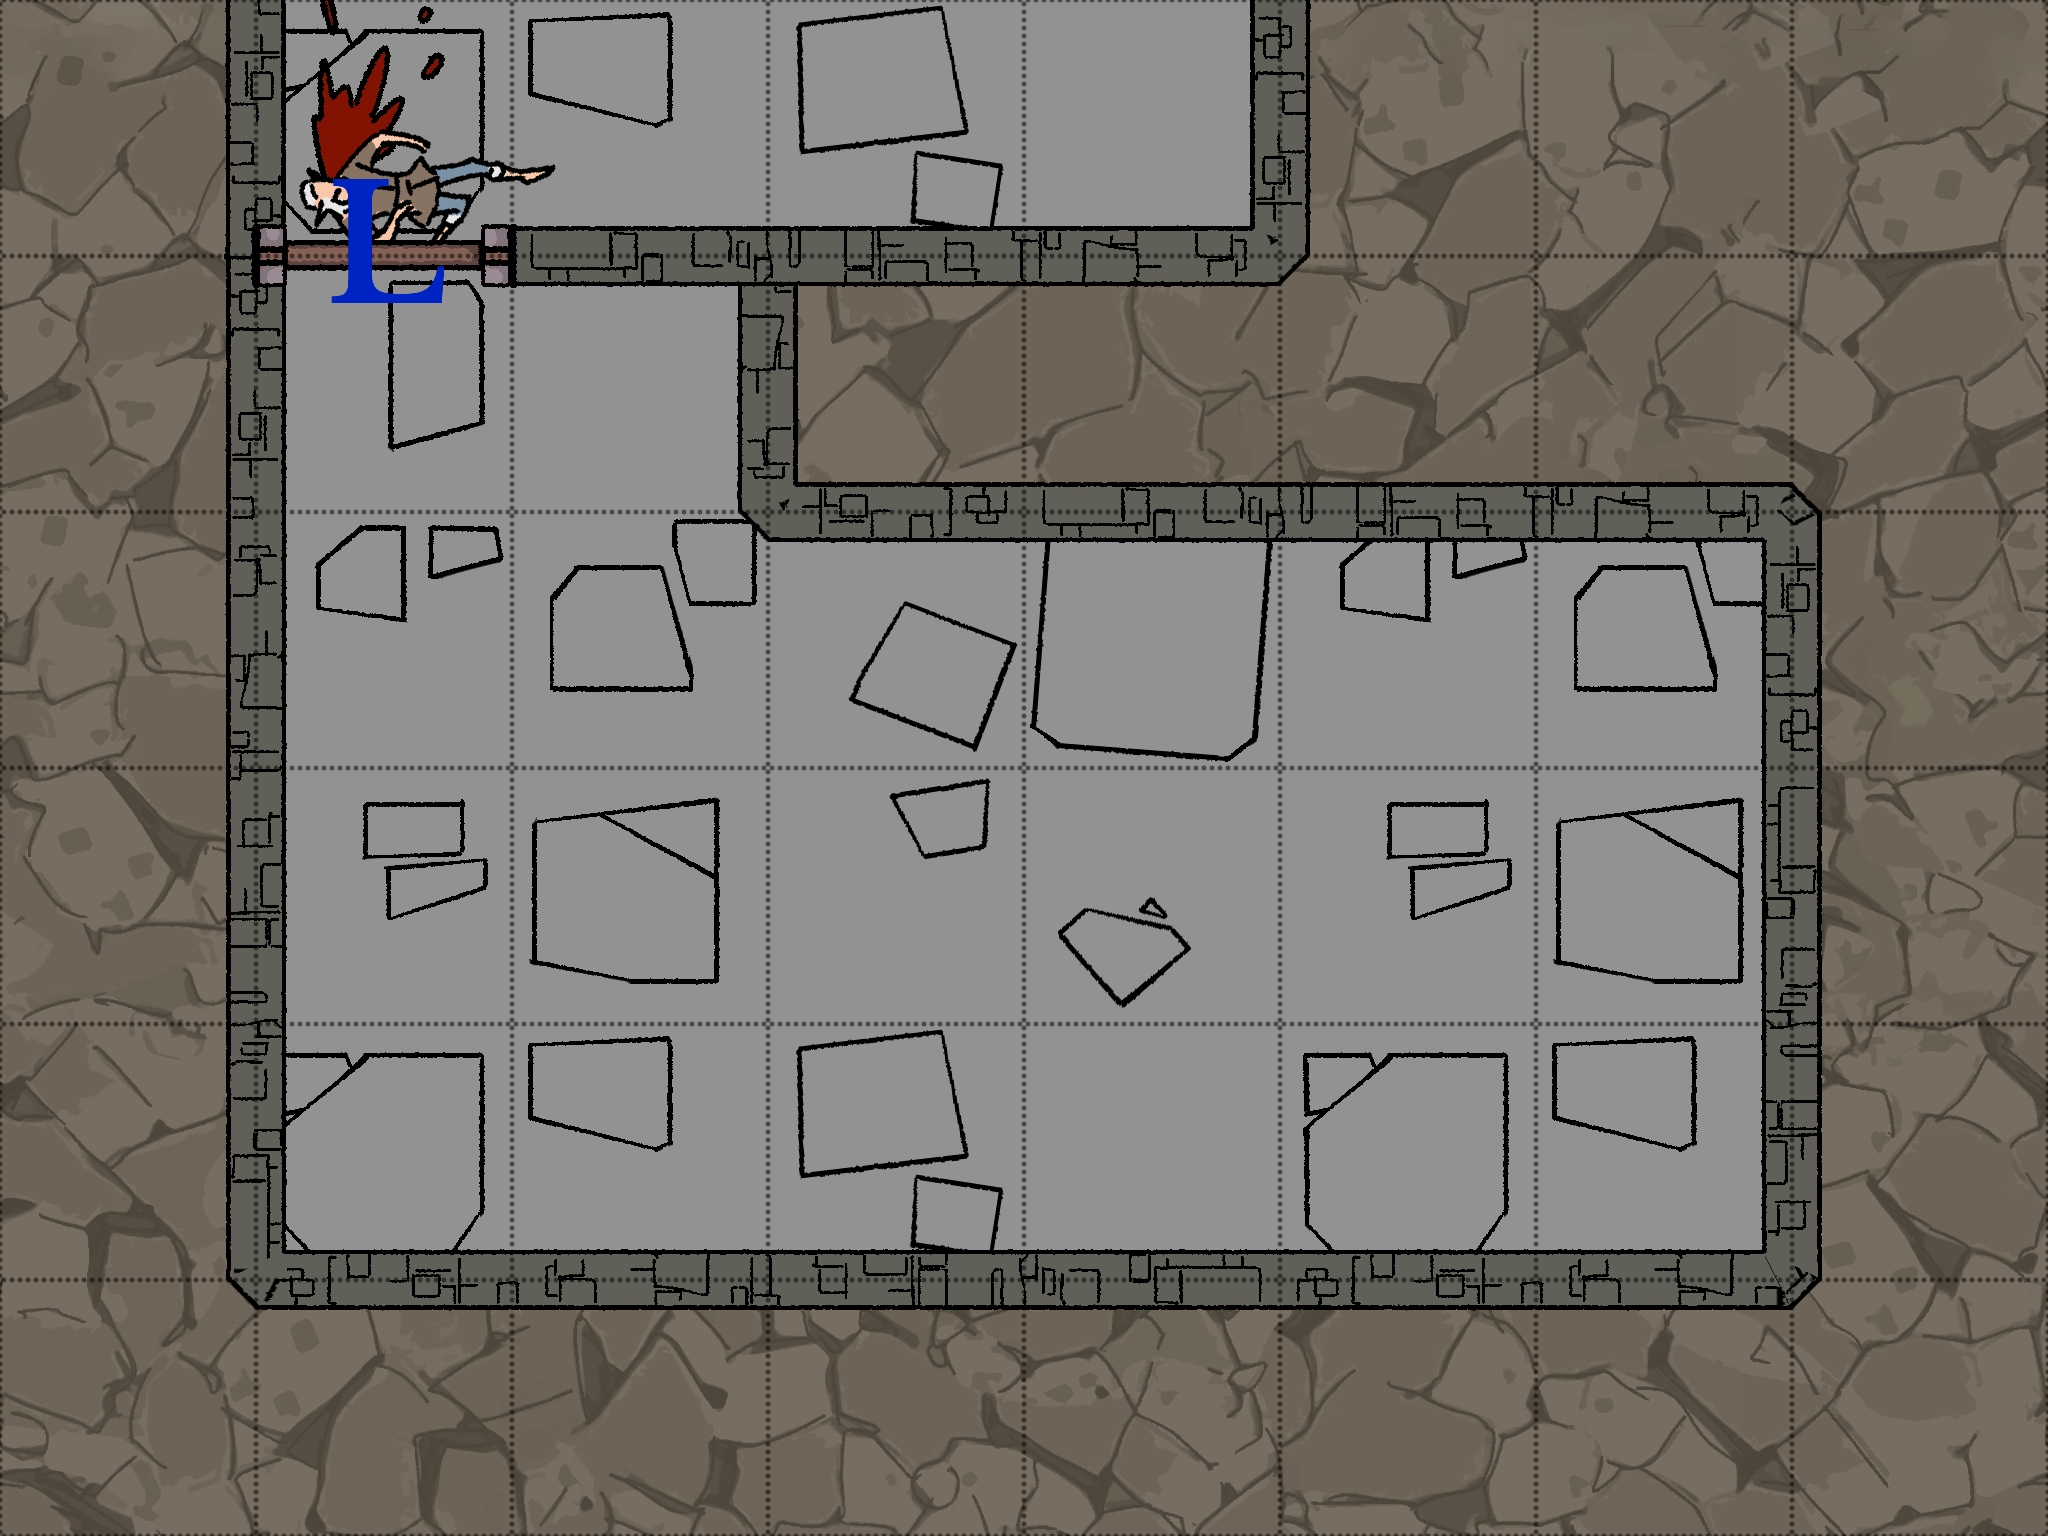
Laundry - B1-4
Room Type: Special
Light Level: Dark
This chamber smells of damp, but the stone floors and walls look reasonably clean compared to the rest of the floor. There are several basins around the chamber, some of which are filled with stagnant water. These basins can provide both hot and cold water and can be drained.
There is also a large metal trash shoot that empties into B2-15.
Connected Rooms
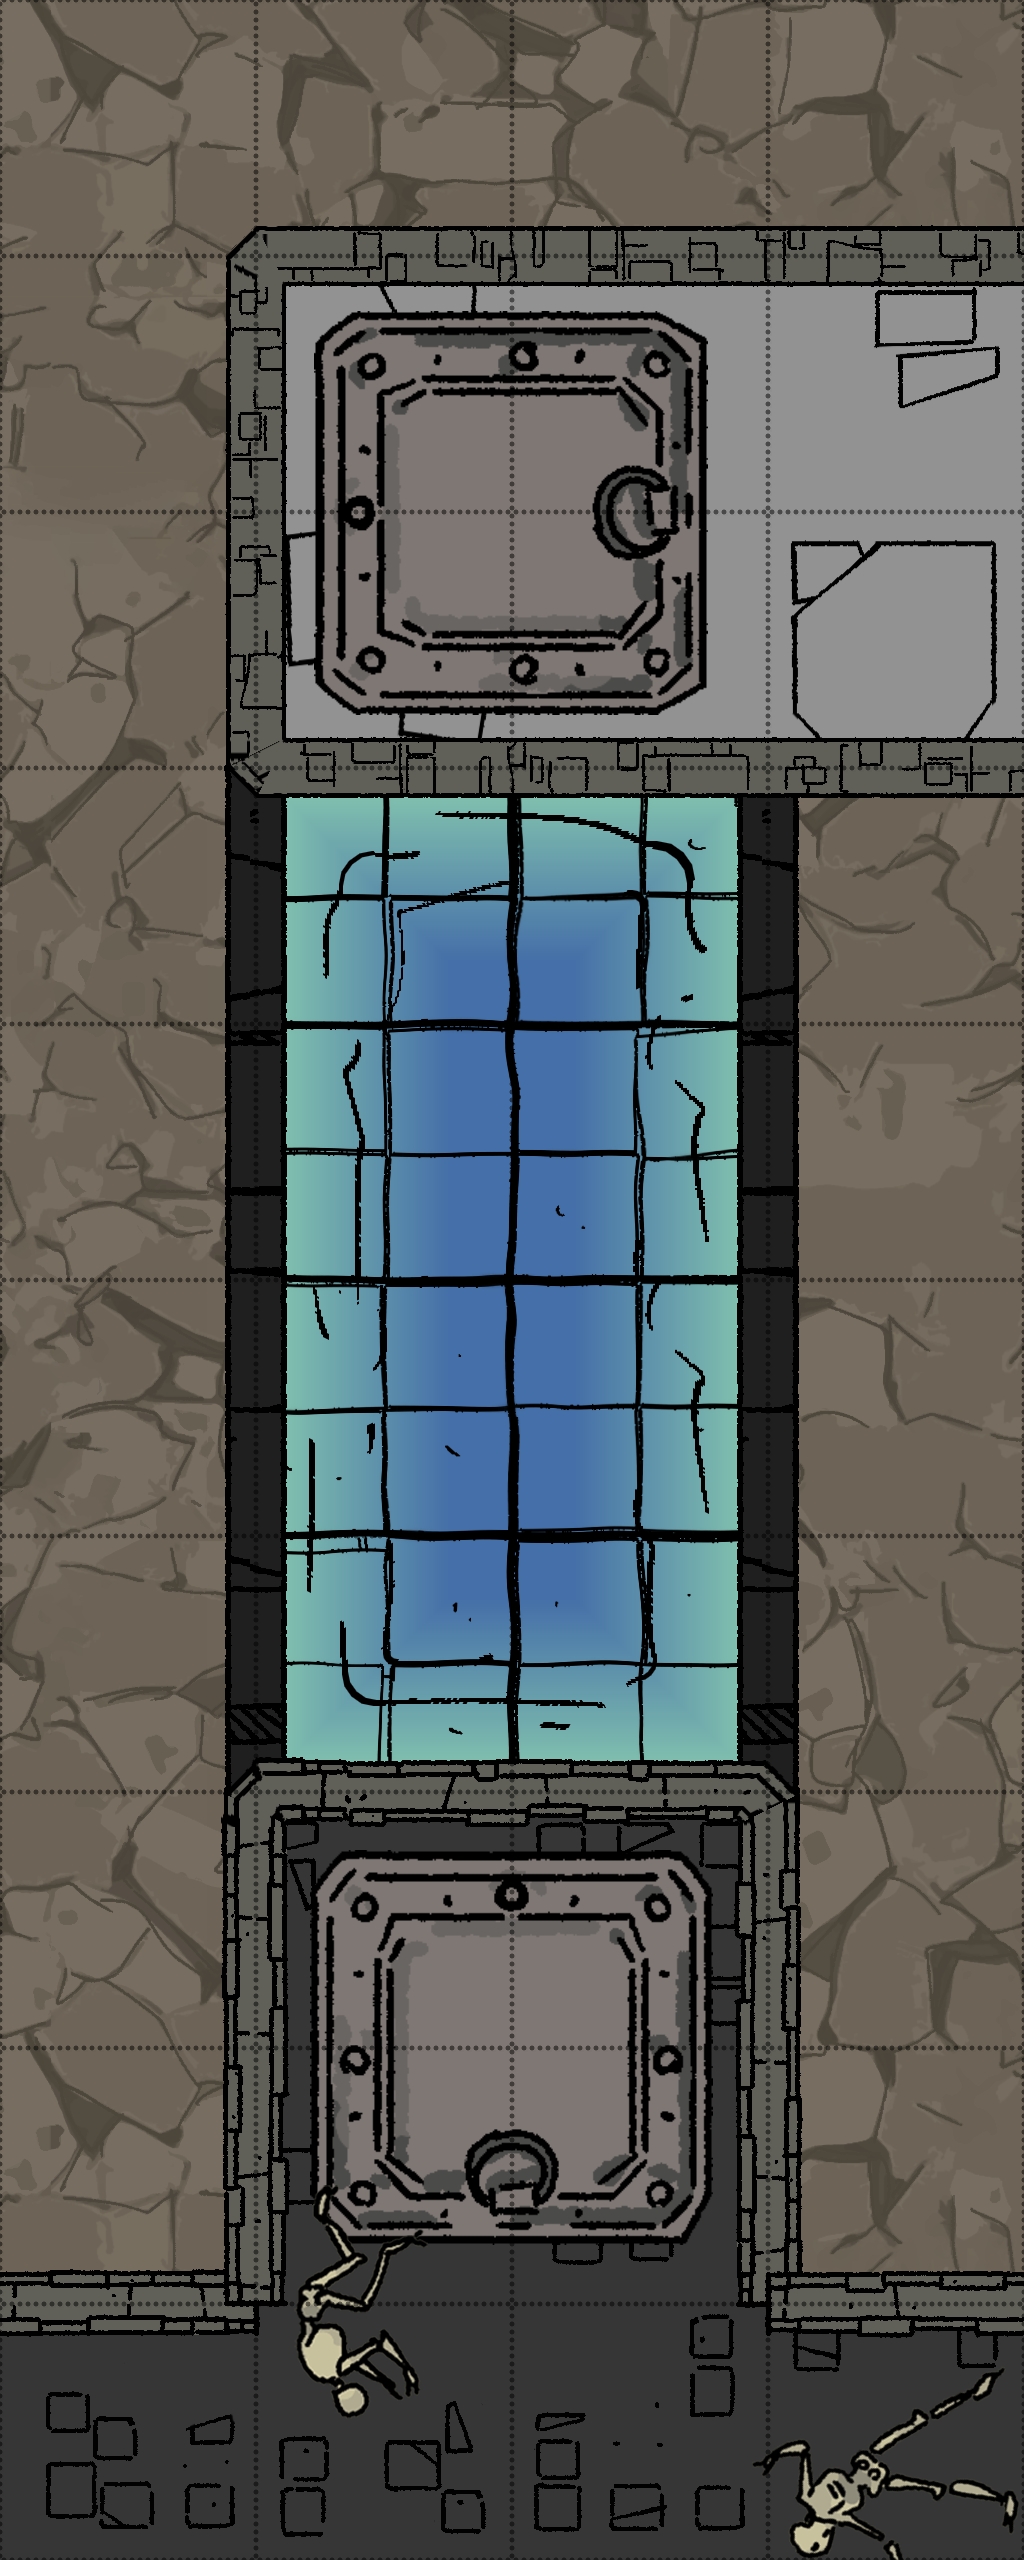
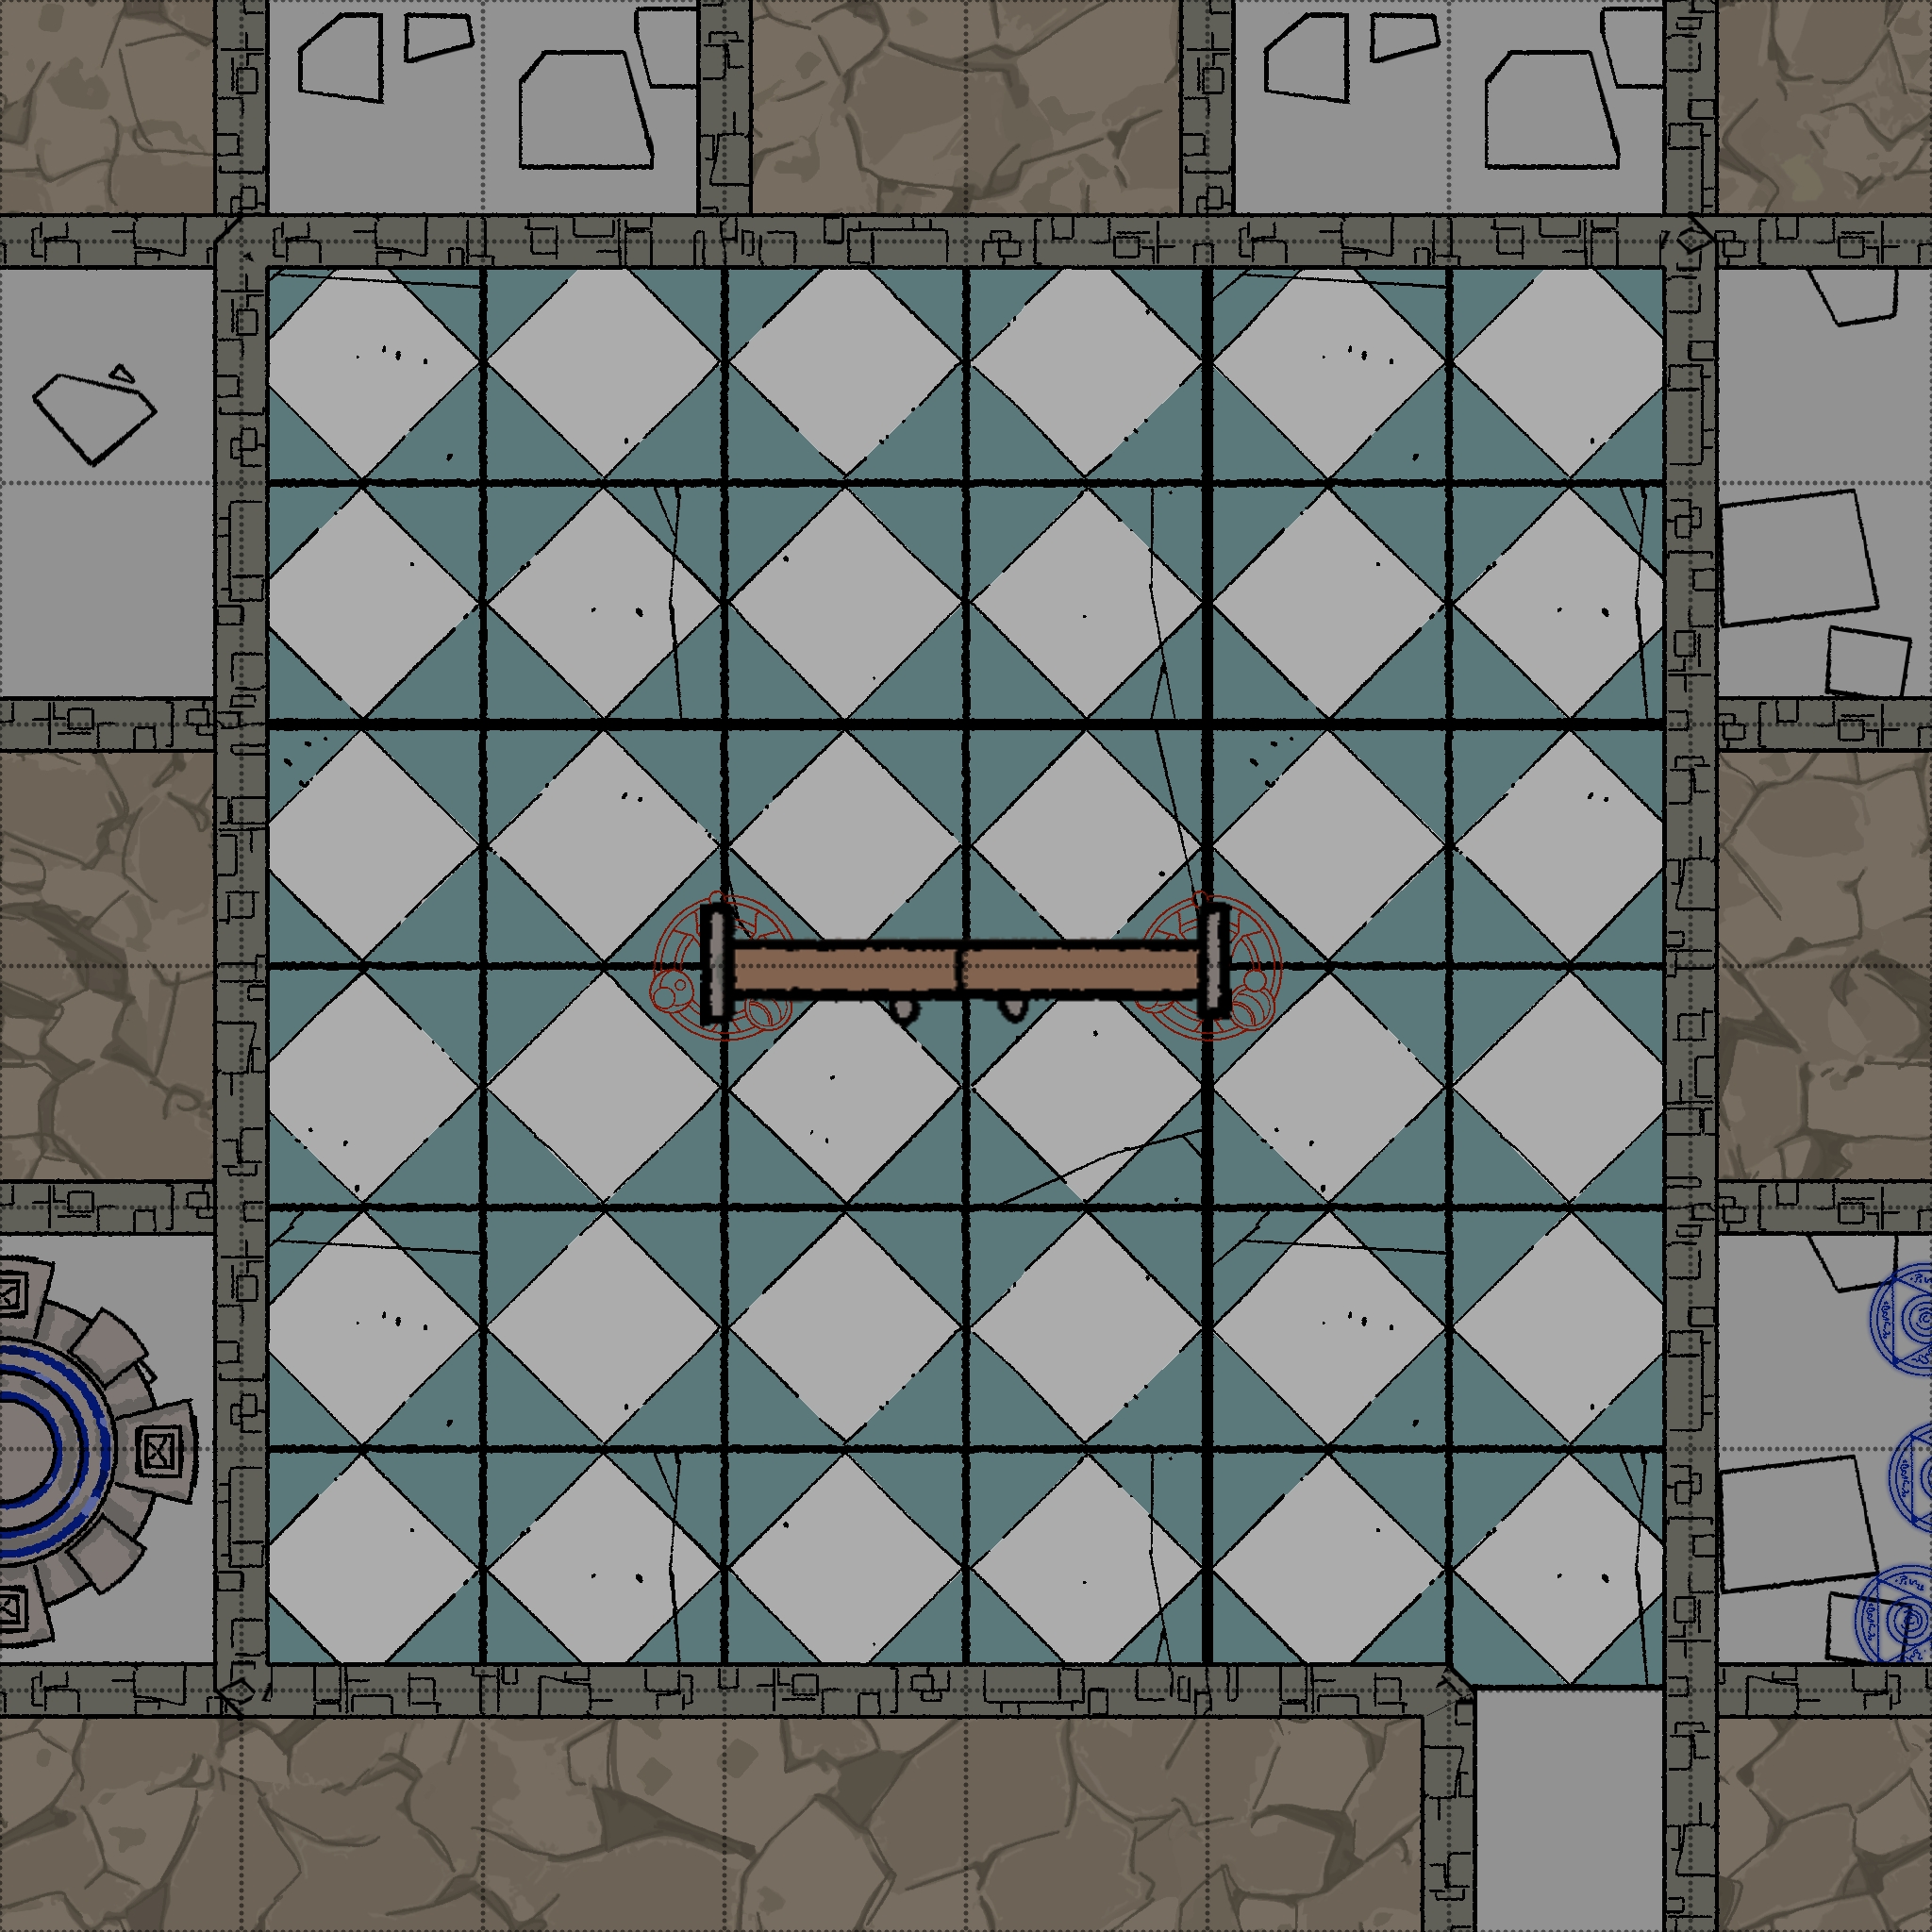
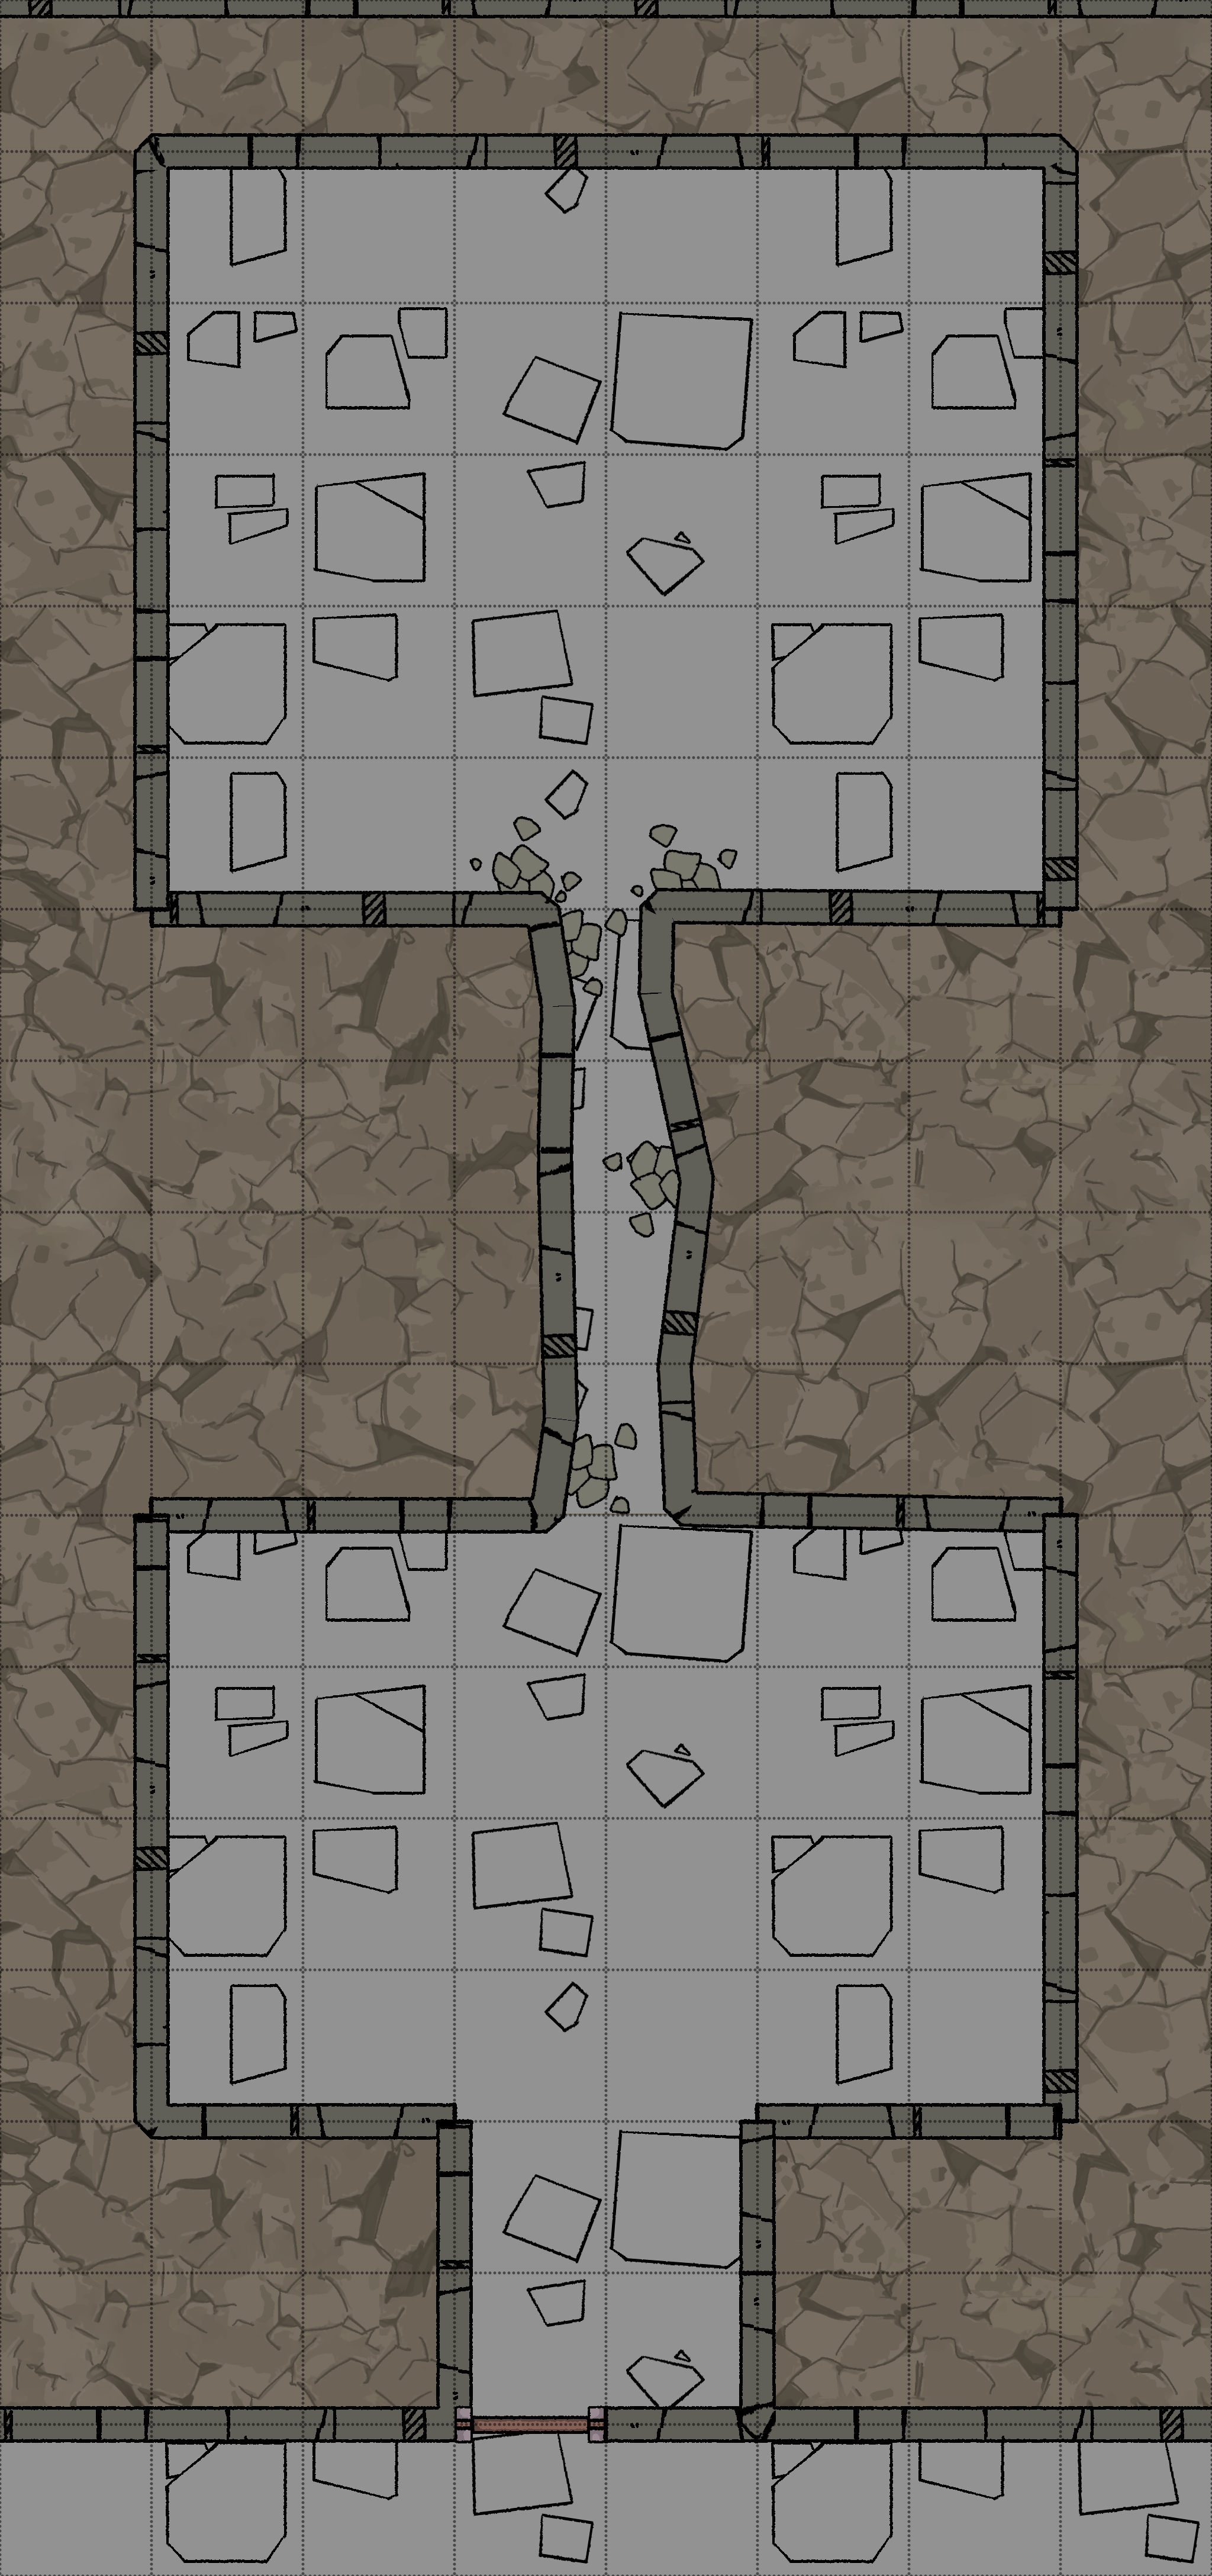
Underwater Hallway - B1-5
Room Type: Trap
Light Level: Dark
This section of hallway stops, and all that is available is a hatch on the ground. This sliding hatch on the floor opens to reveal a dark, water-filled hallway that continues in the same direction. There is no space for air.
This is designed to get anyone passing through, soaking wet, including their torches and spellbooks. There is also a trap component to the hatches. Only one hatch can be opened at a time; if one is closed, the other will open. So if a group uses a rope safety line, their hatch will not fully close. Or if the person scouting attempts to open the hatch on the other side, their friends might start fighting to keep it open on their end.
Connected Rooms
East - Open corridor - B1-16
South - Open corridor - Open corridor
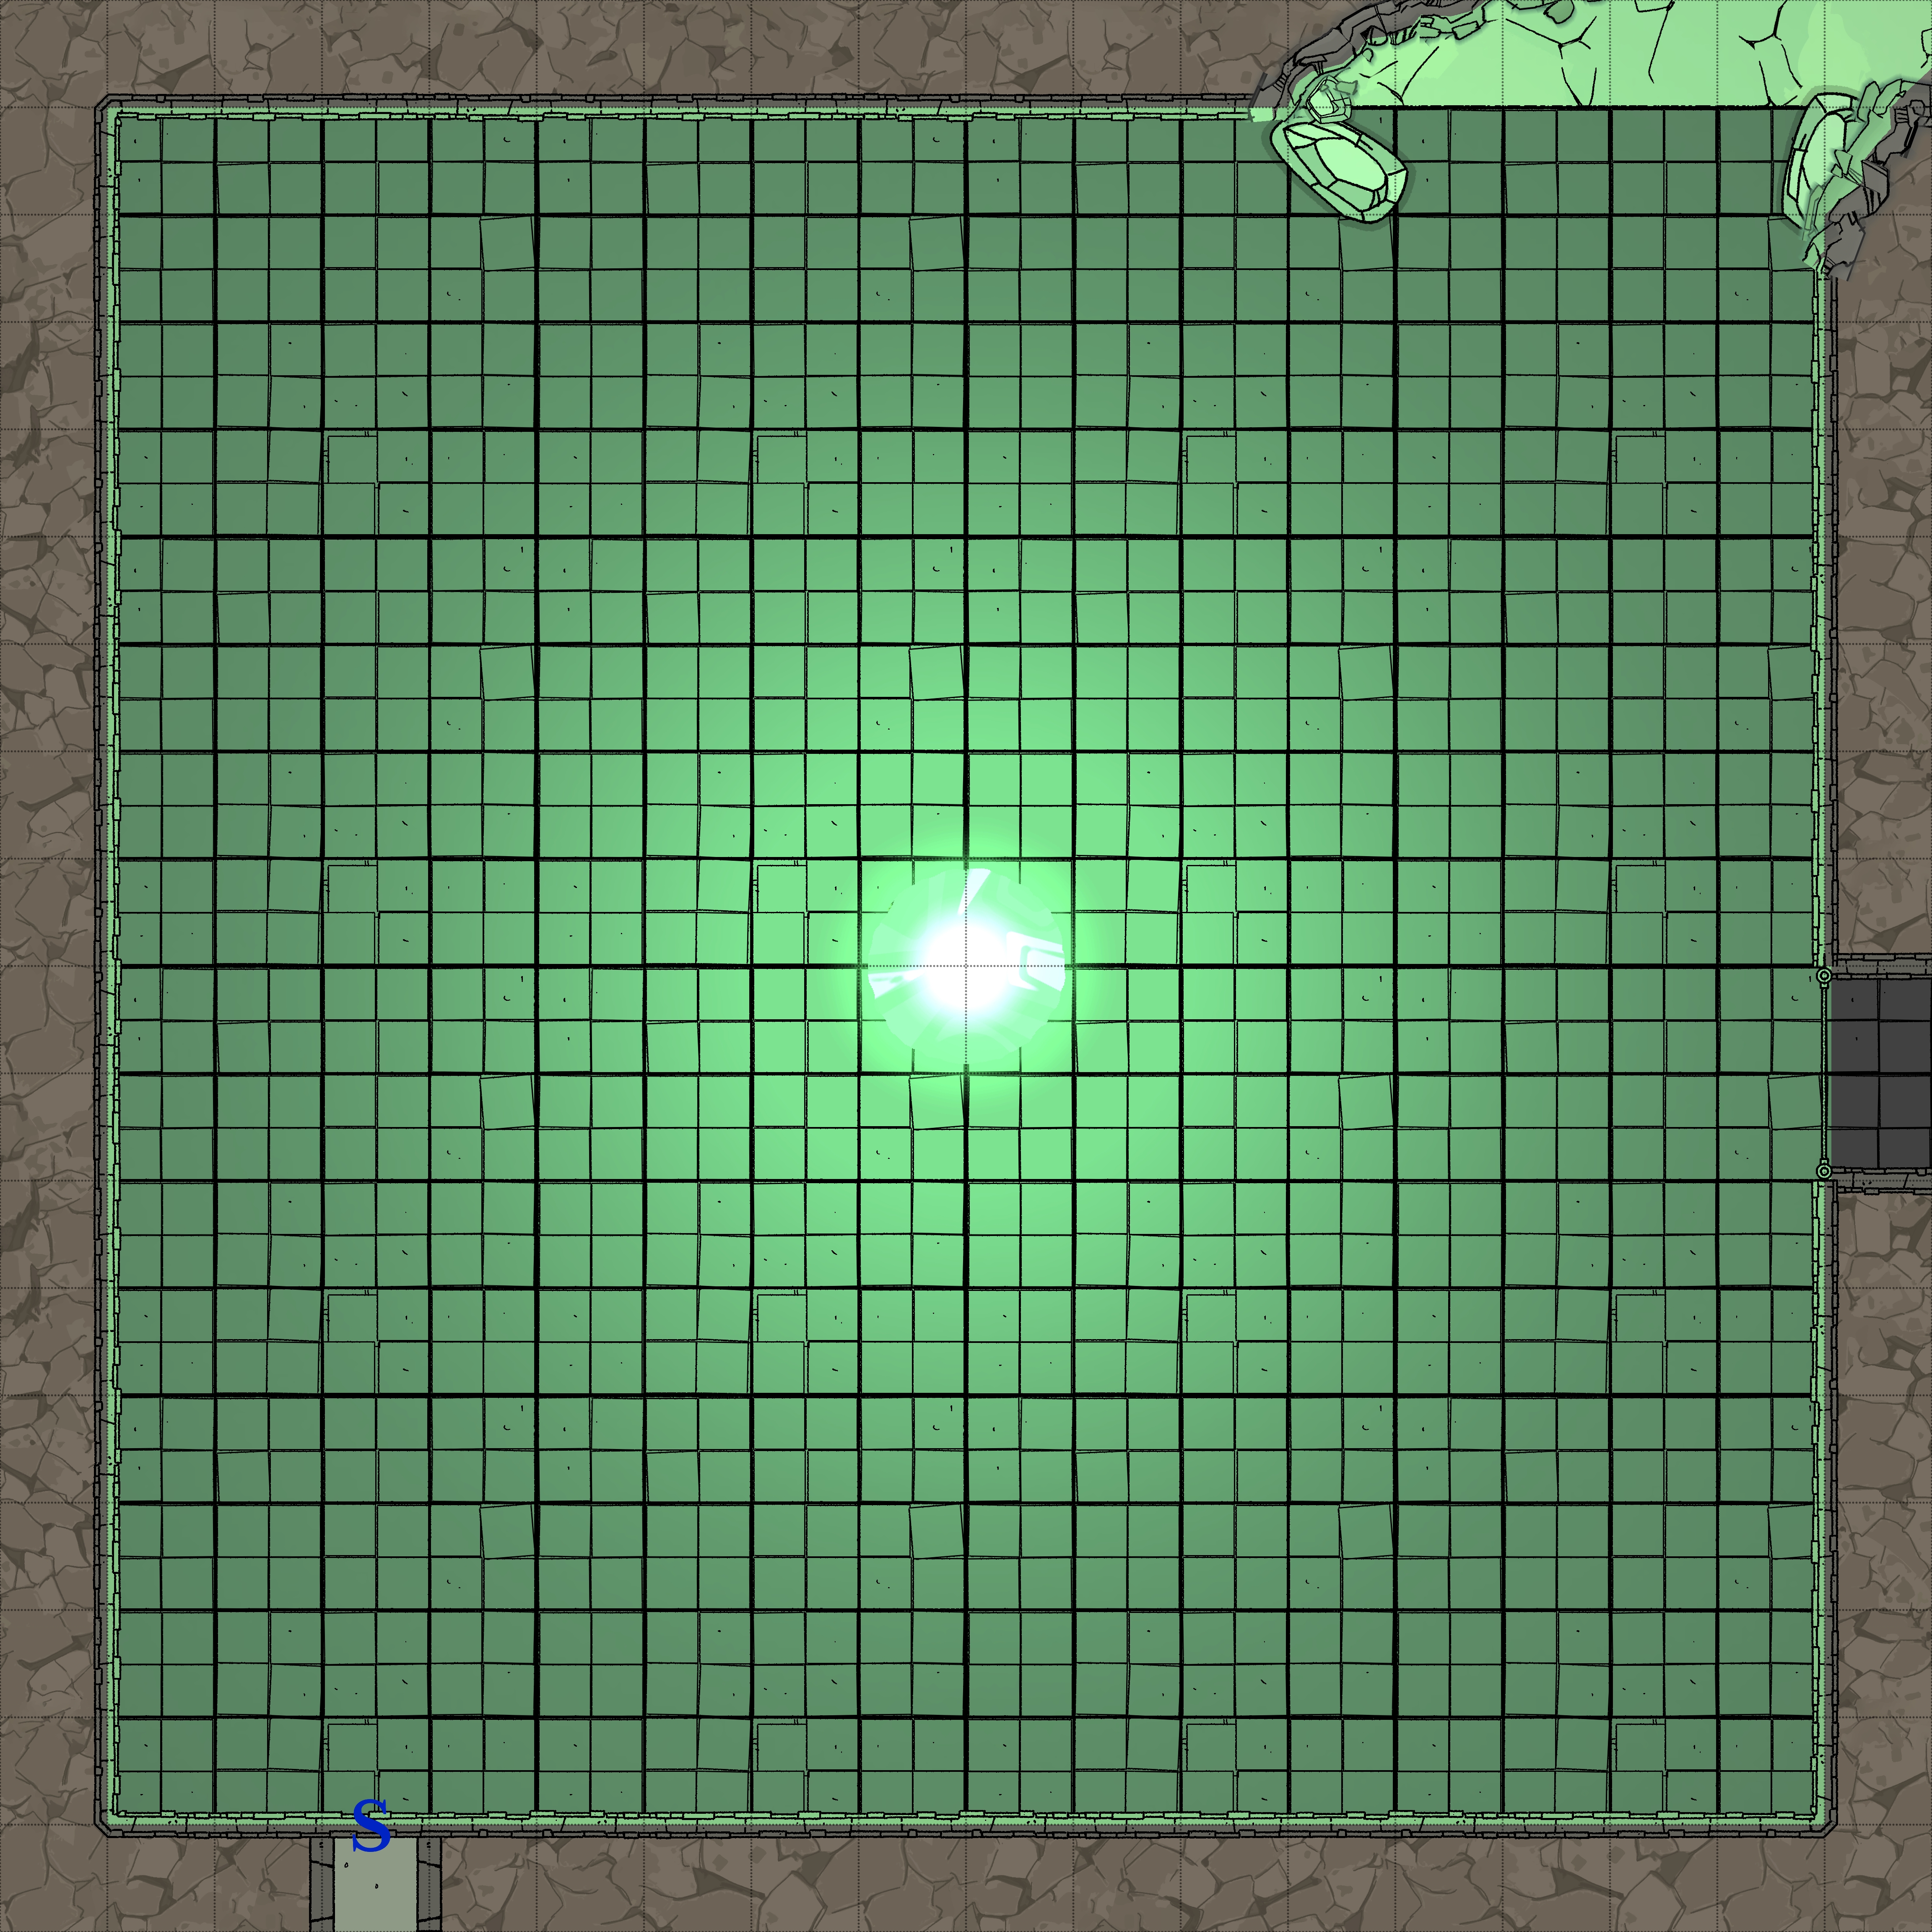
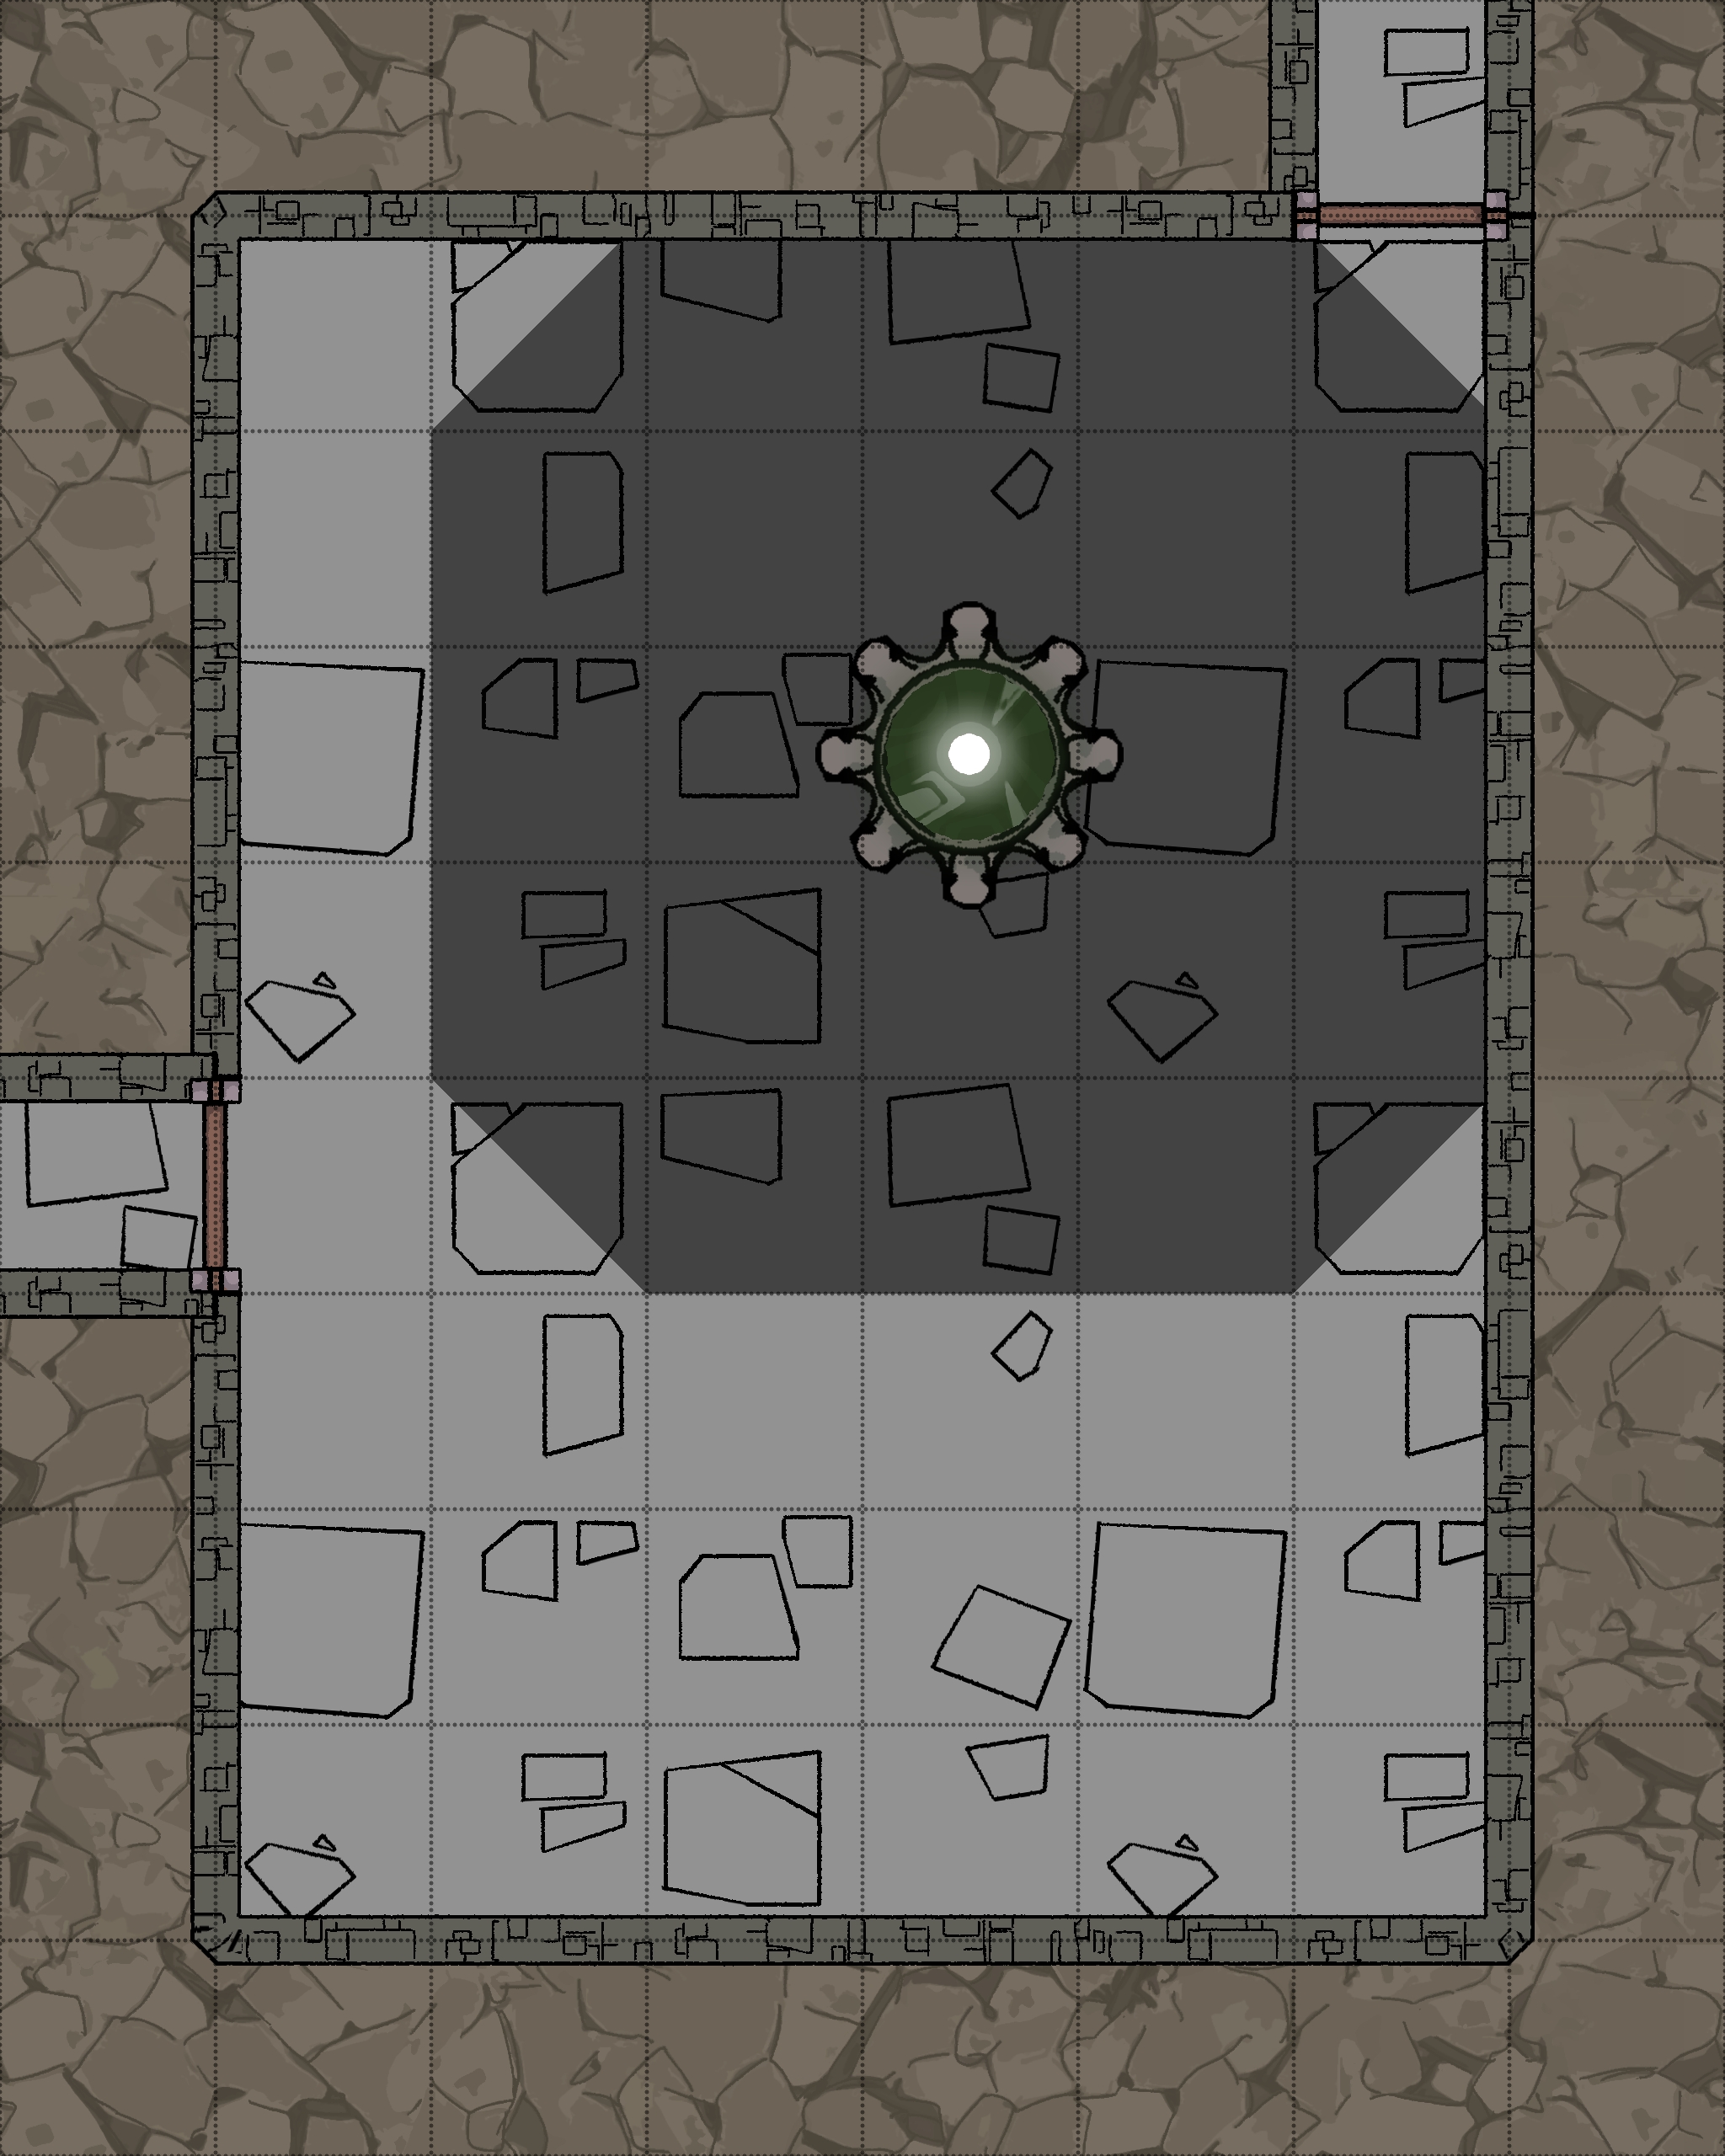
Heart Chamber - B1-6
Room Type: Special
Light Level: Bright Green Light
This huge, lead-lined room contains the Heart of the Tower . Anyone in this room or even looking into it is heavily impacted by Corruption. This room is deadly for long-term exposure, but the Mountain Men have dug into the chamber and are running experiments on the device.
Sounds of thudding can be heard from the room above, and the heart gives a flair in response to these impacts. These are new souls entering the device.
There are no controls to open the eastern “Blast Doors” from this side.
Connected Rooms
North East - Cave tunnel - B1-24
East - Large thick lead blast doors (only opened from other side) - B1-18
South - Secret door behind lead panels - Secret passage

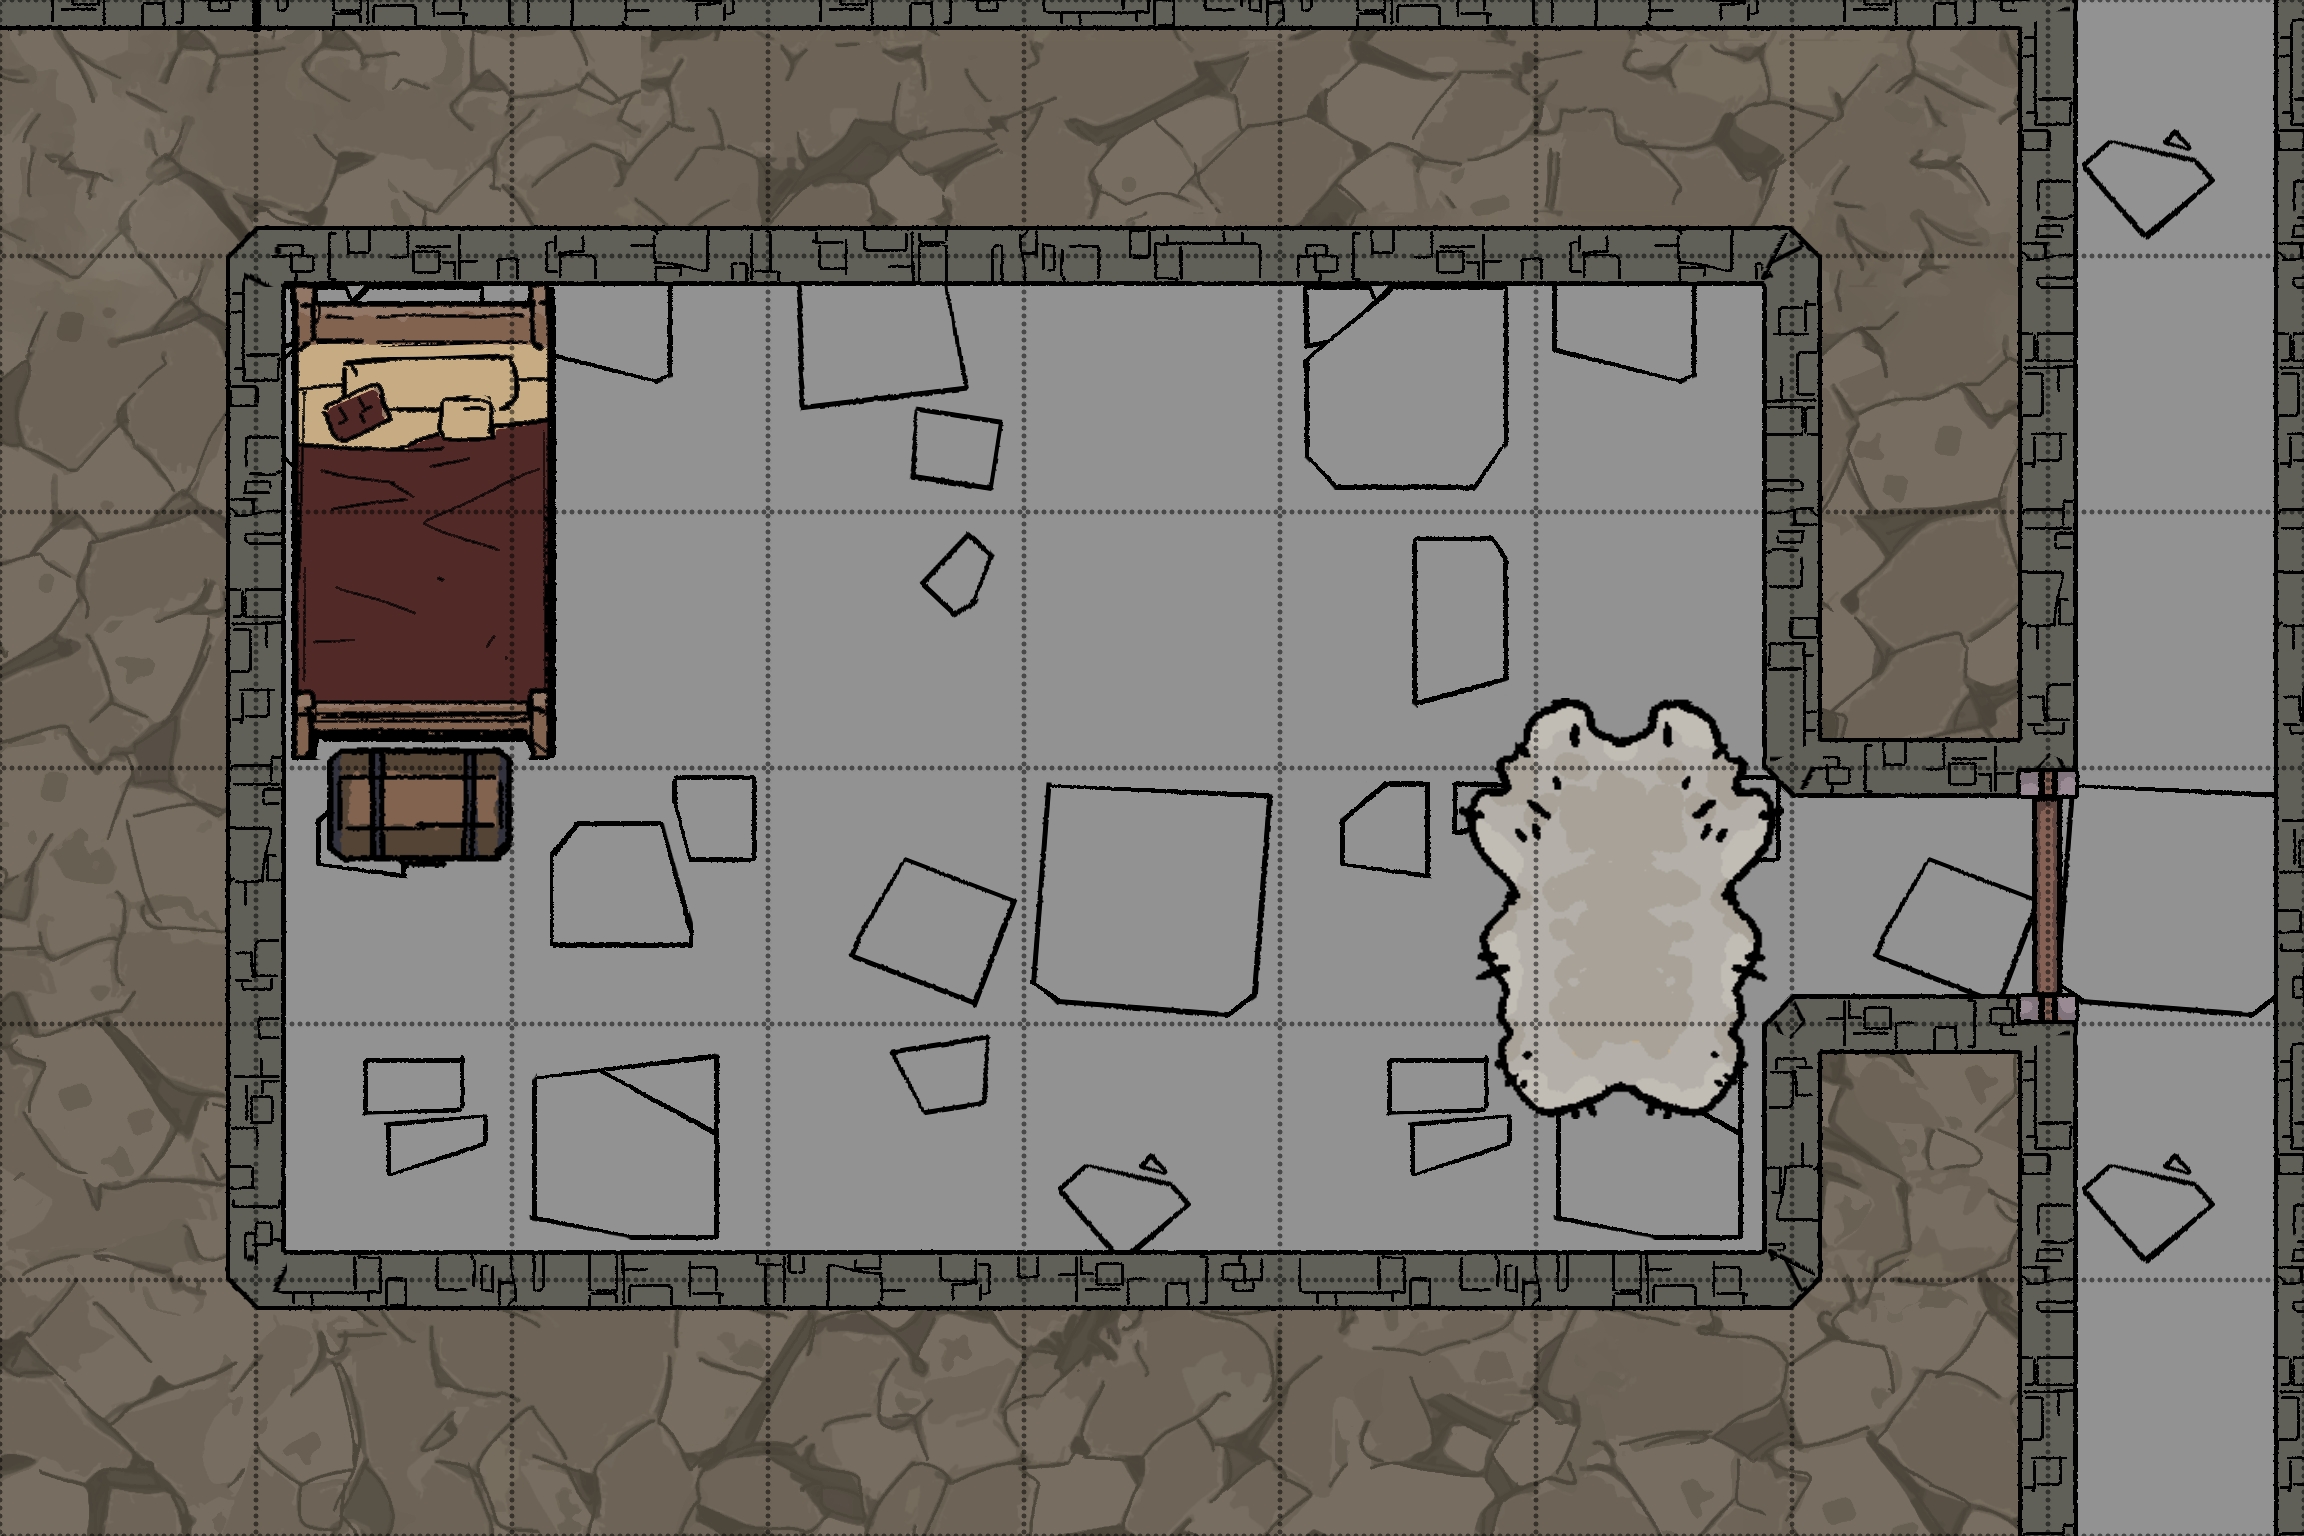
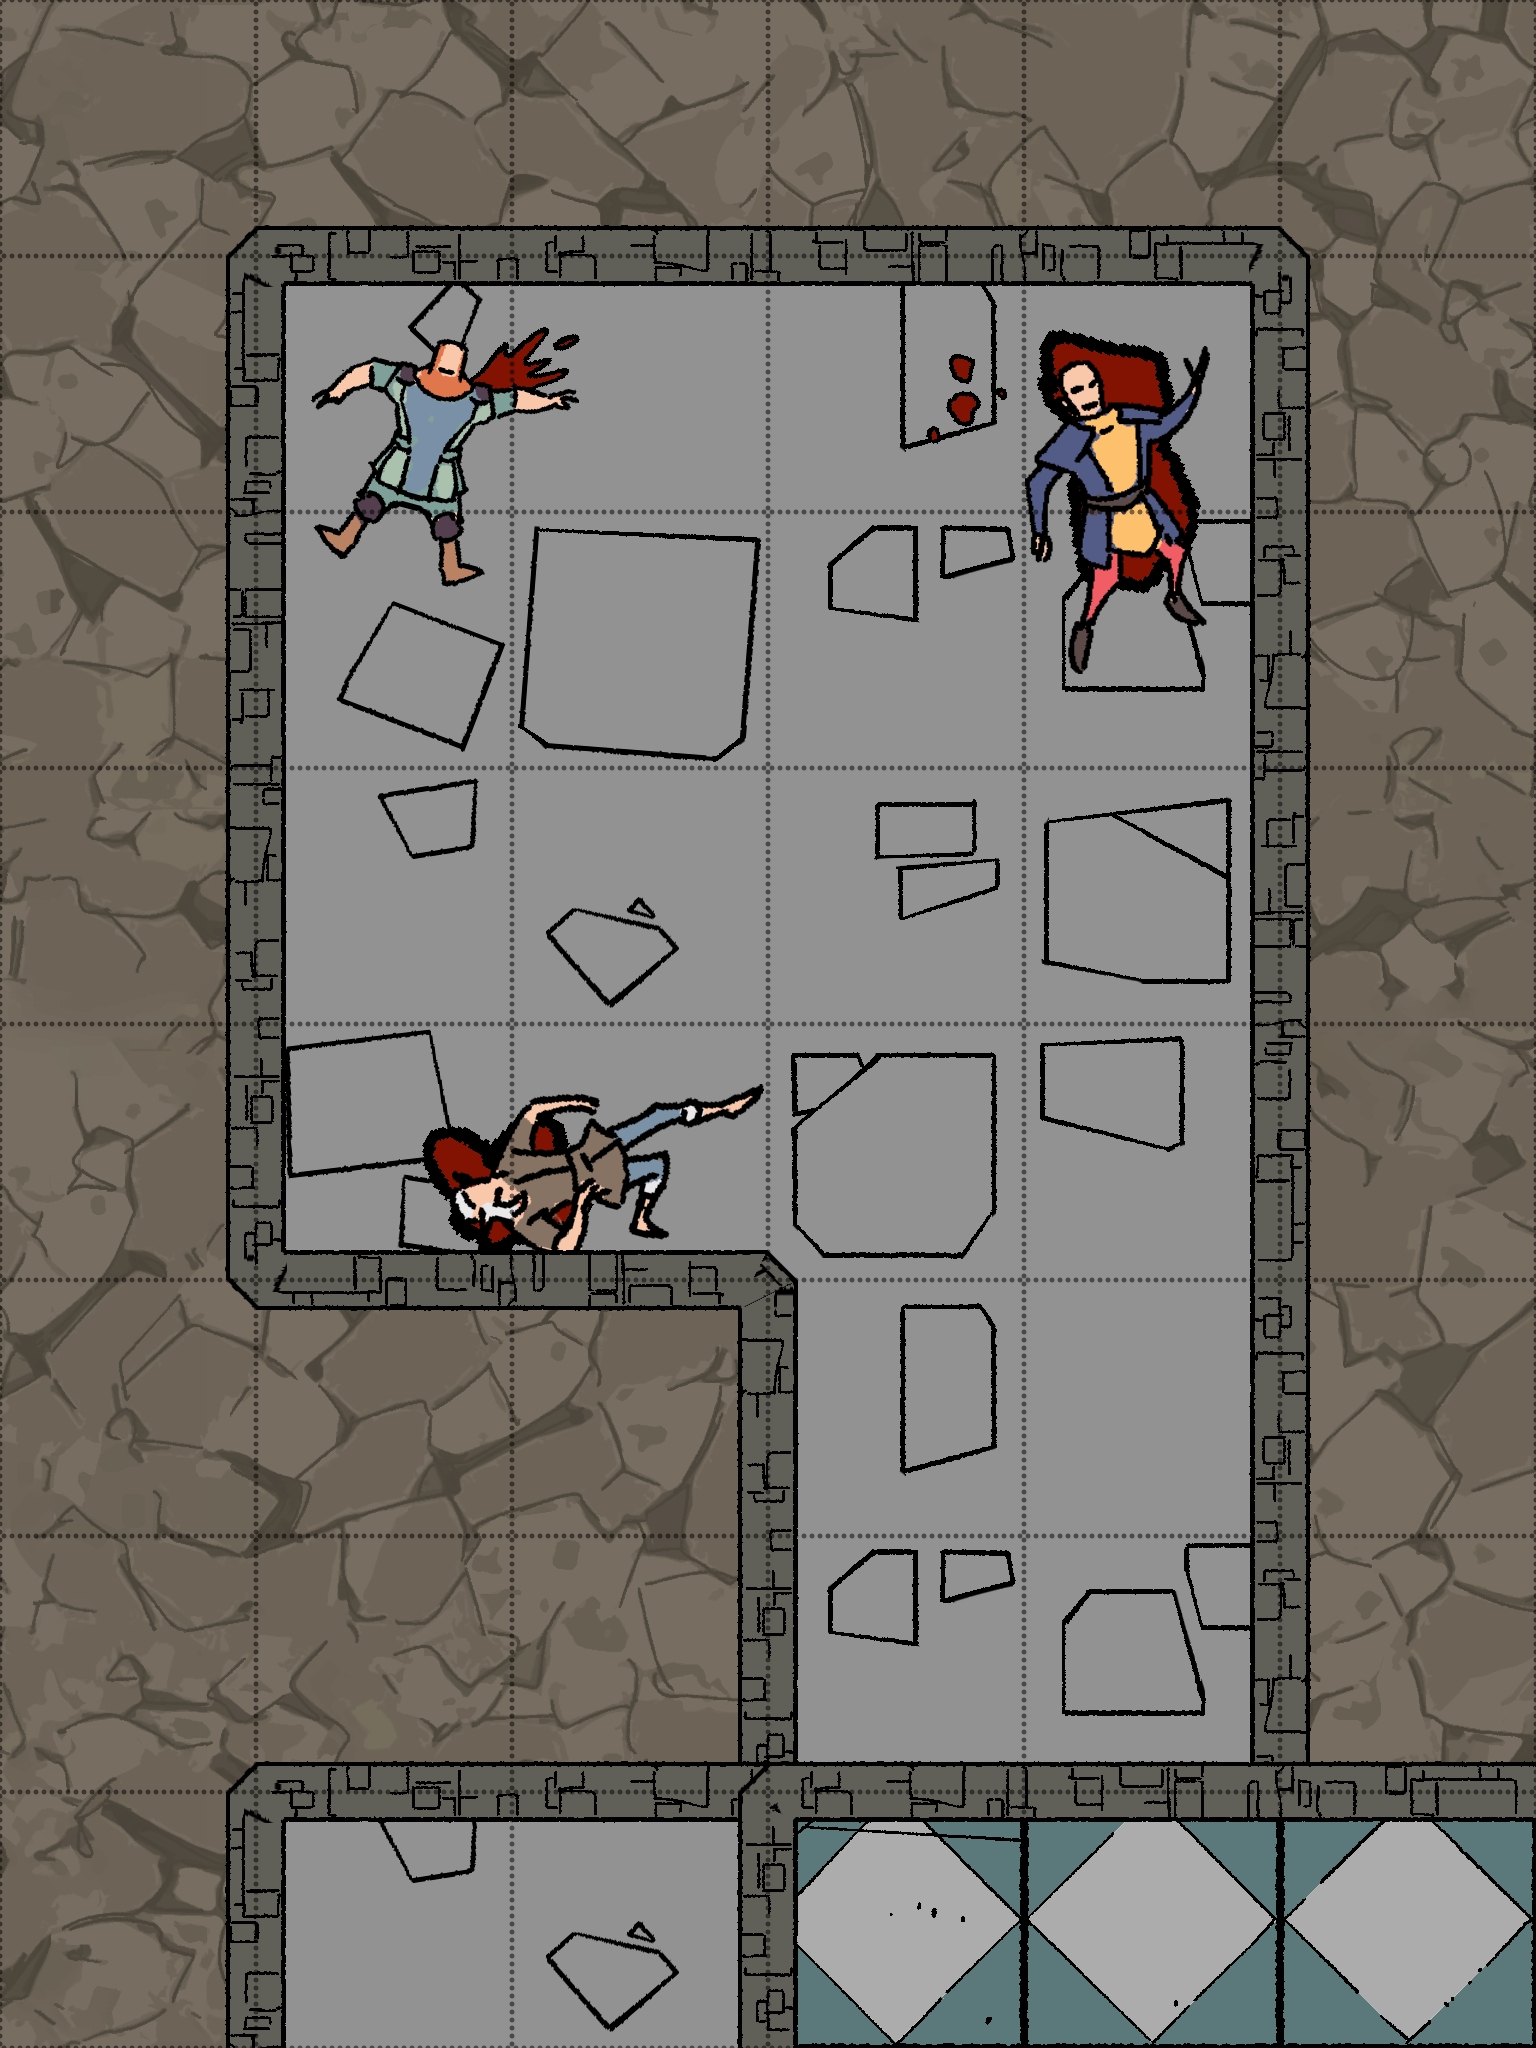
Officers Room - B1-7
Room Type: Trap
Light Level: Dark
This room is a large single-person bedroom with a double bed and a desk. The floors are decorated with fine wood, and the walls are painted to give it a homely feel. There are no signs that anyone has been living here.
On the desk, there is a very old letter with a wax seal depicting the tower. This letter is between management at the tower and a guard captain they recently hired. It seems they have been arguing over payment, but they finally settled on a larger amount. The final words mention a gift being left for them.
In the middle of the room sits a pair of beautiful elven boots. These are, in fact, Boots of Devouring.
Connected Rooms
South - Wooden door with window - Barraks corridor
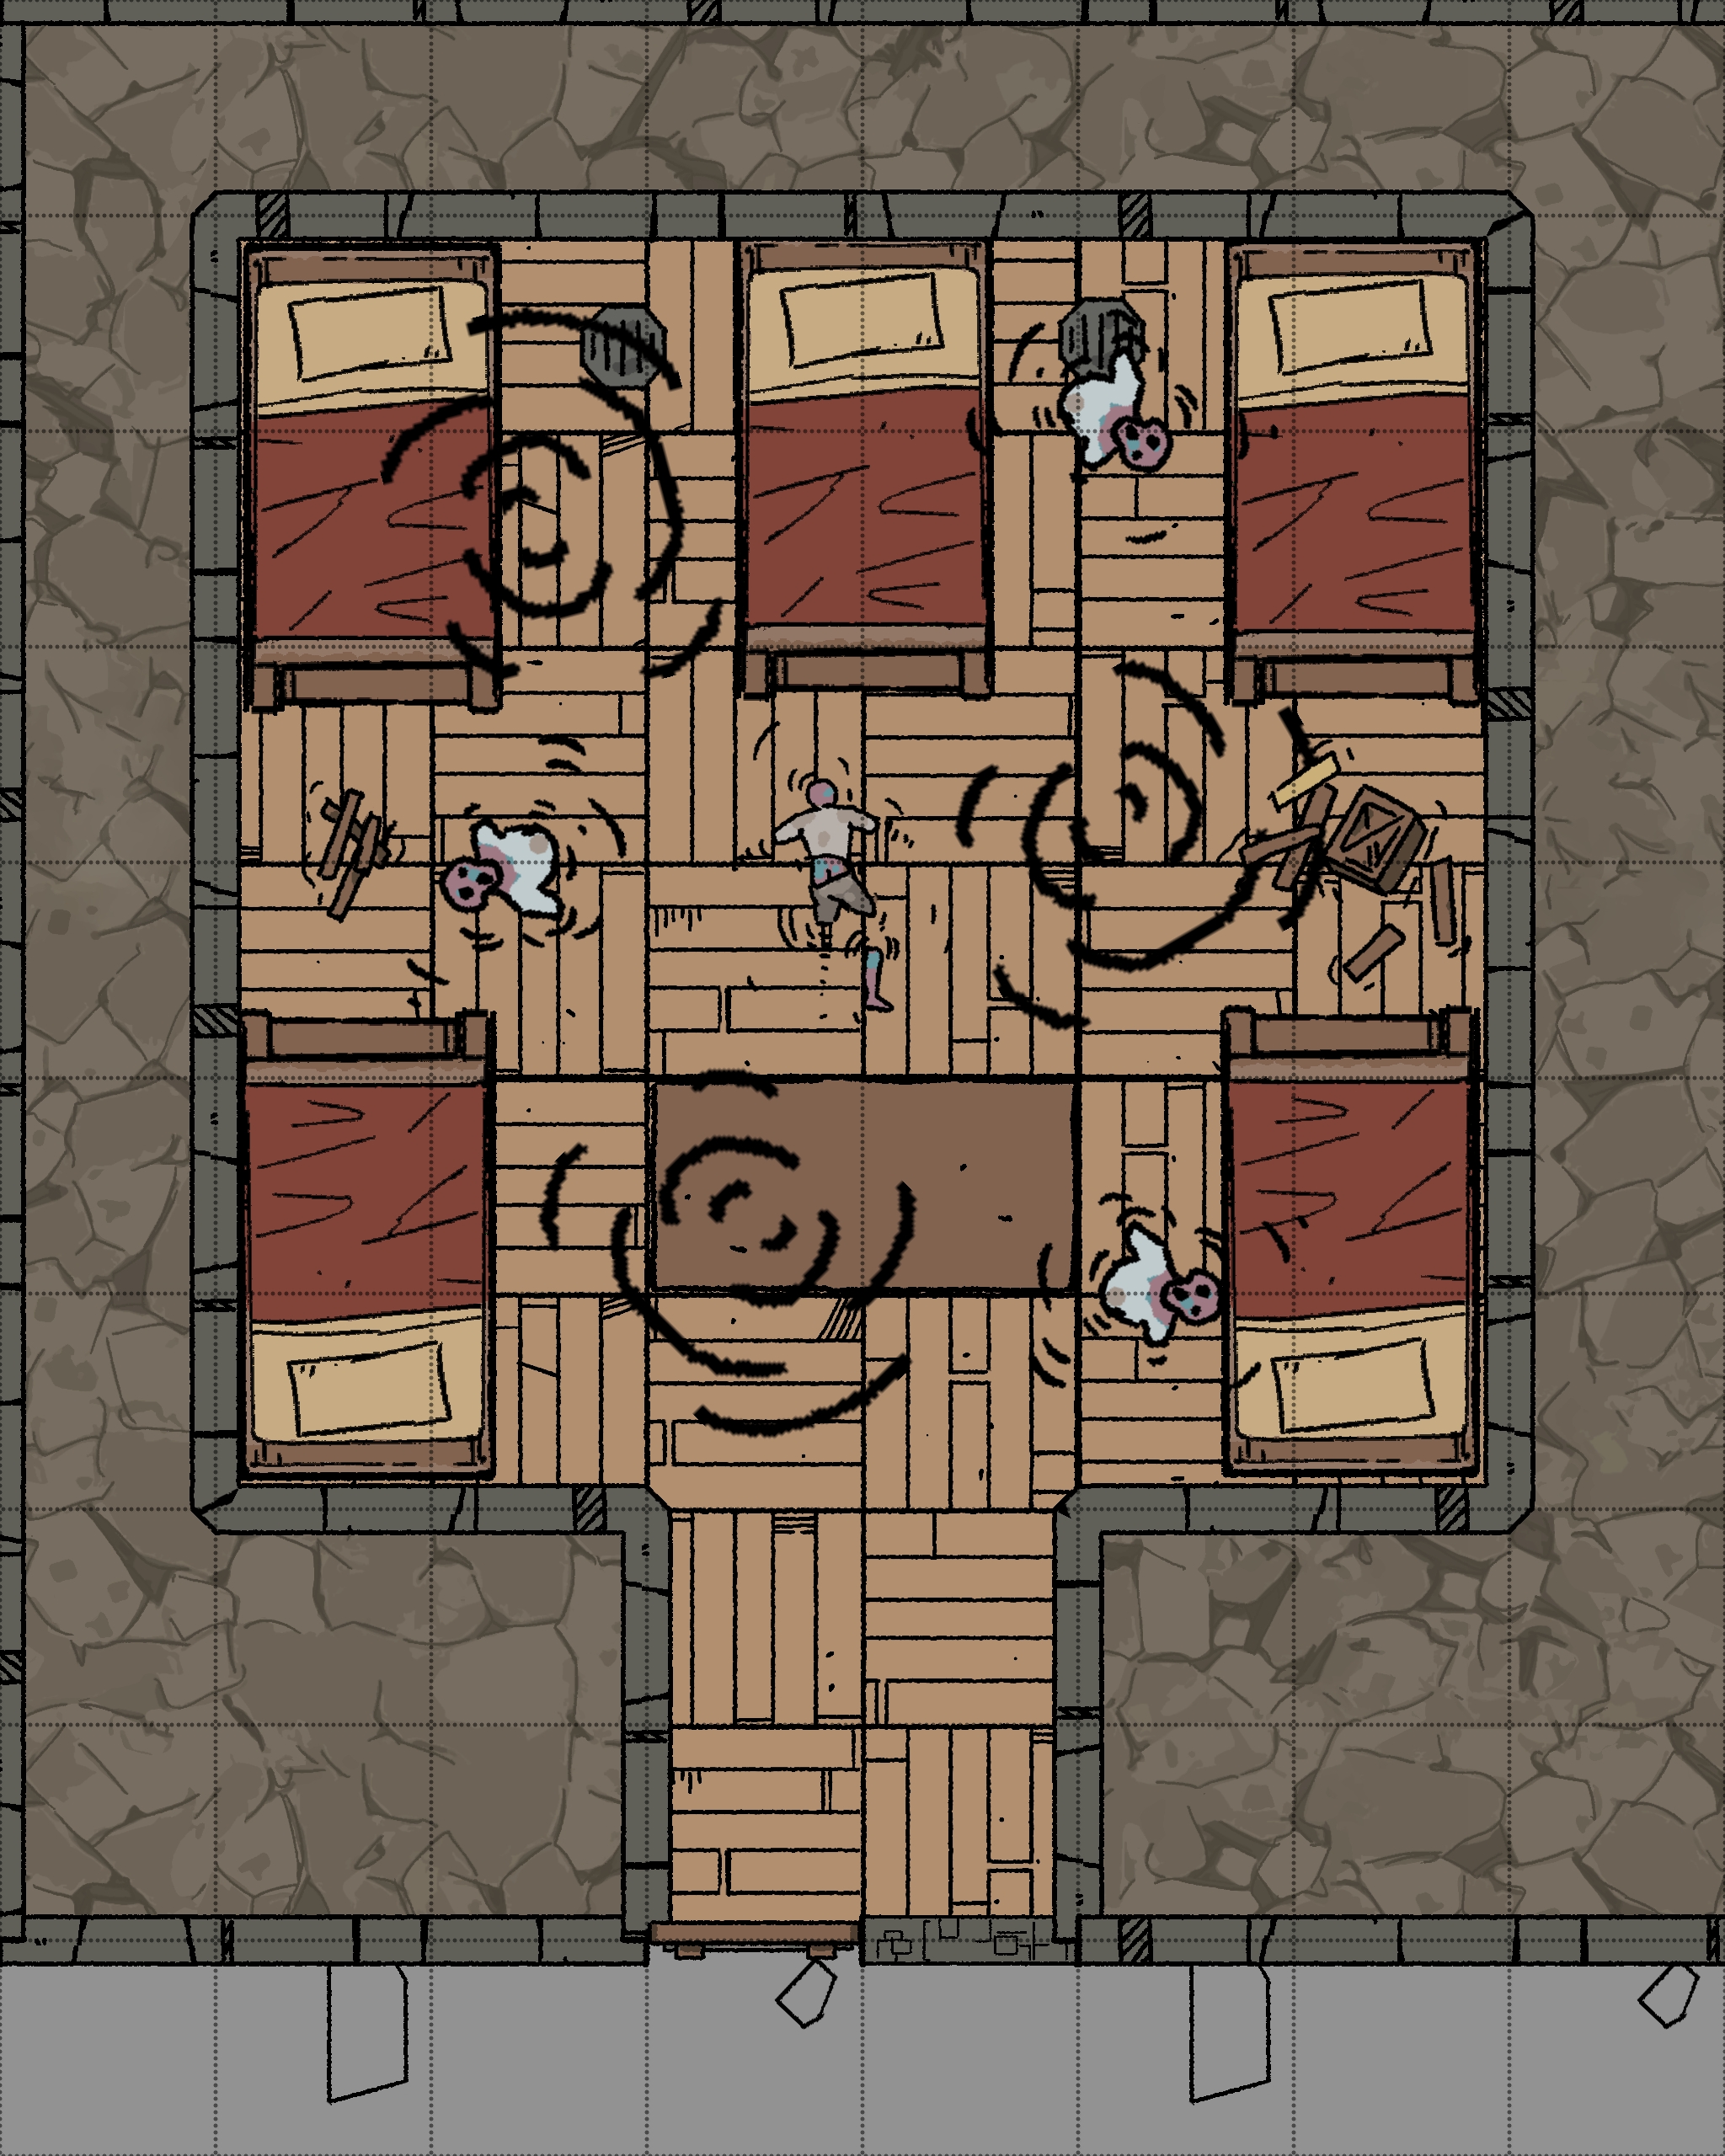
Drowned Barracks - B1-8
Room Type: Special
Light Level: Dark
This room is set up to house guards. It has 4 bunk beds and a small seating area. The room is full of cloudy water, held back only by the high-quality door with a window. The walls and floors are decorated with wood that is swollen and twisted due to being submerged for so long.
This room is designed to fill up with water when triggered. This has been left like this for a long time, as the water is murky, and all that is left is rusted equipment at the bottom.
Opening the door will release the water, and it will fill up again overnight.
Connected Rooms
South - Swollen wooden door with window - Barraks corridor
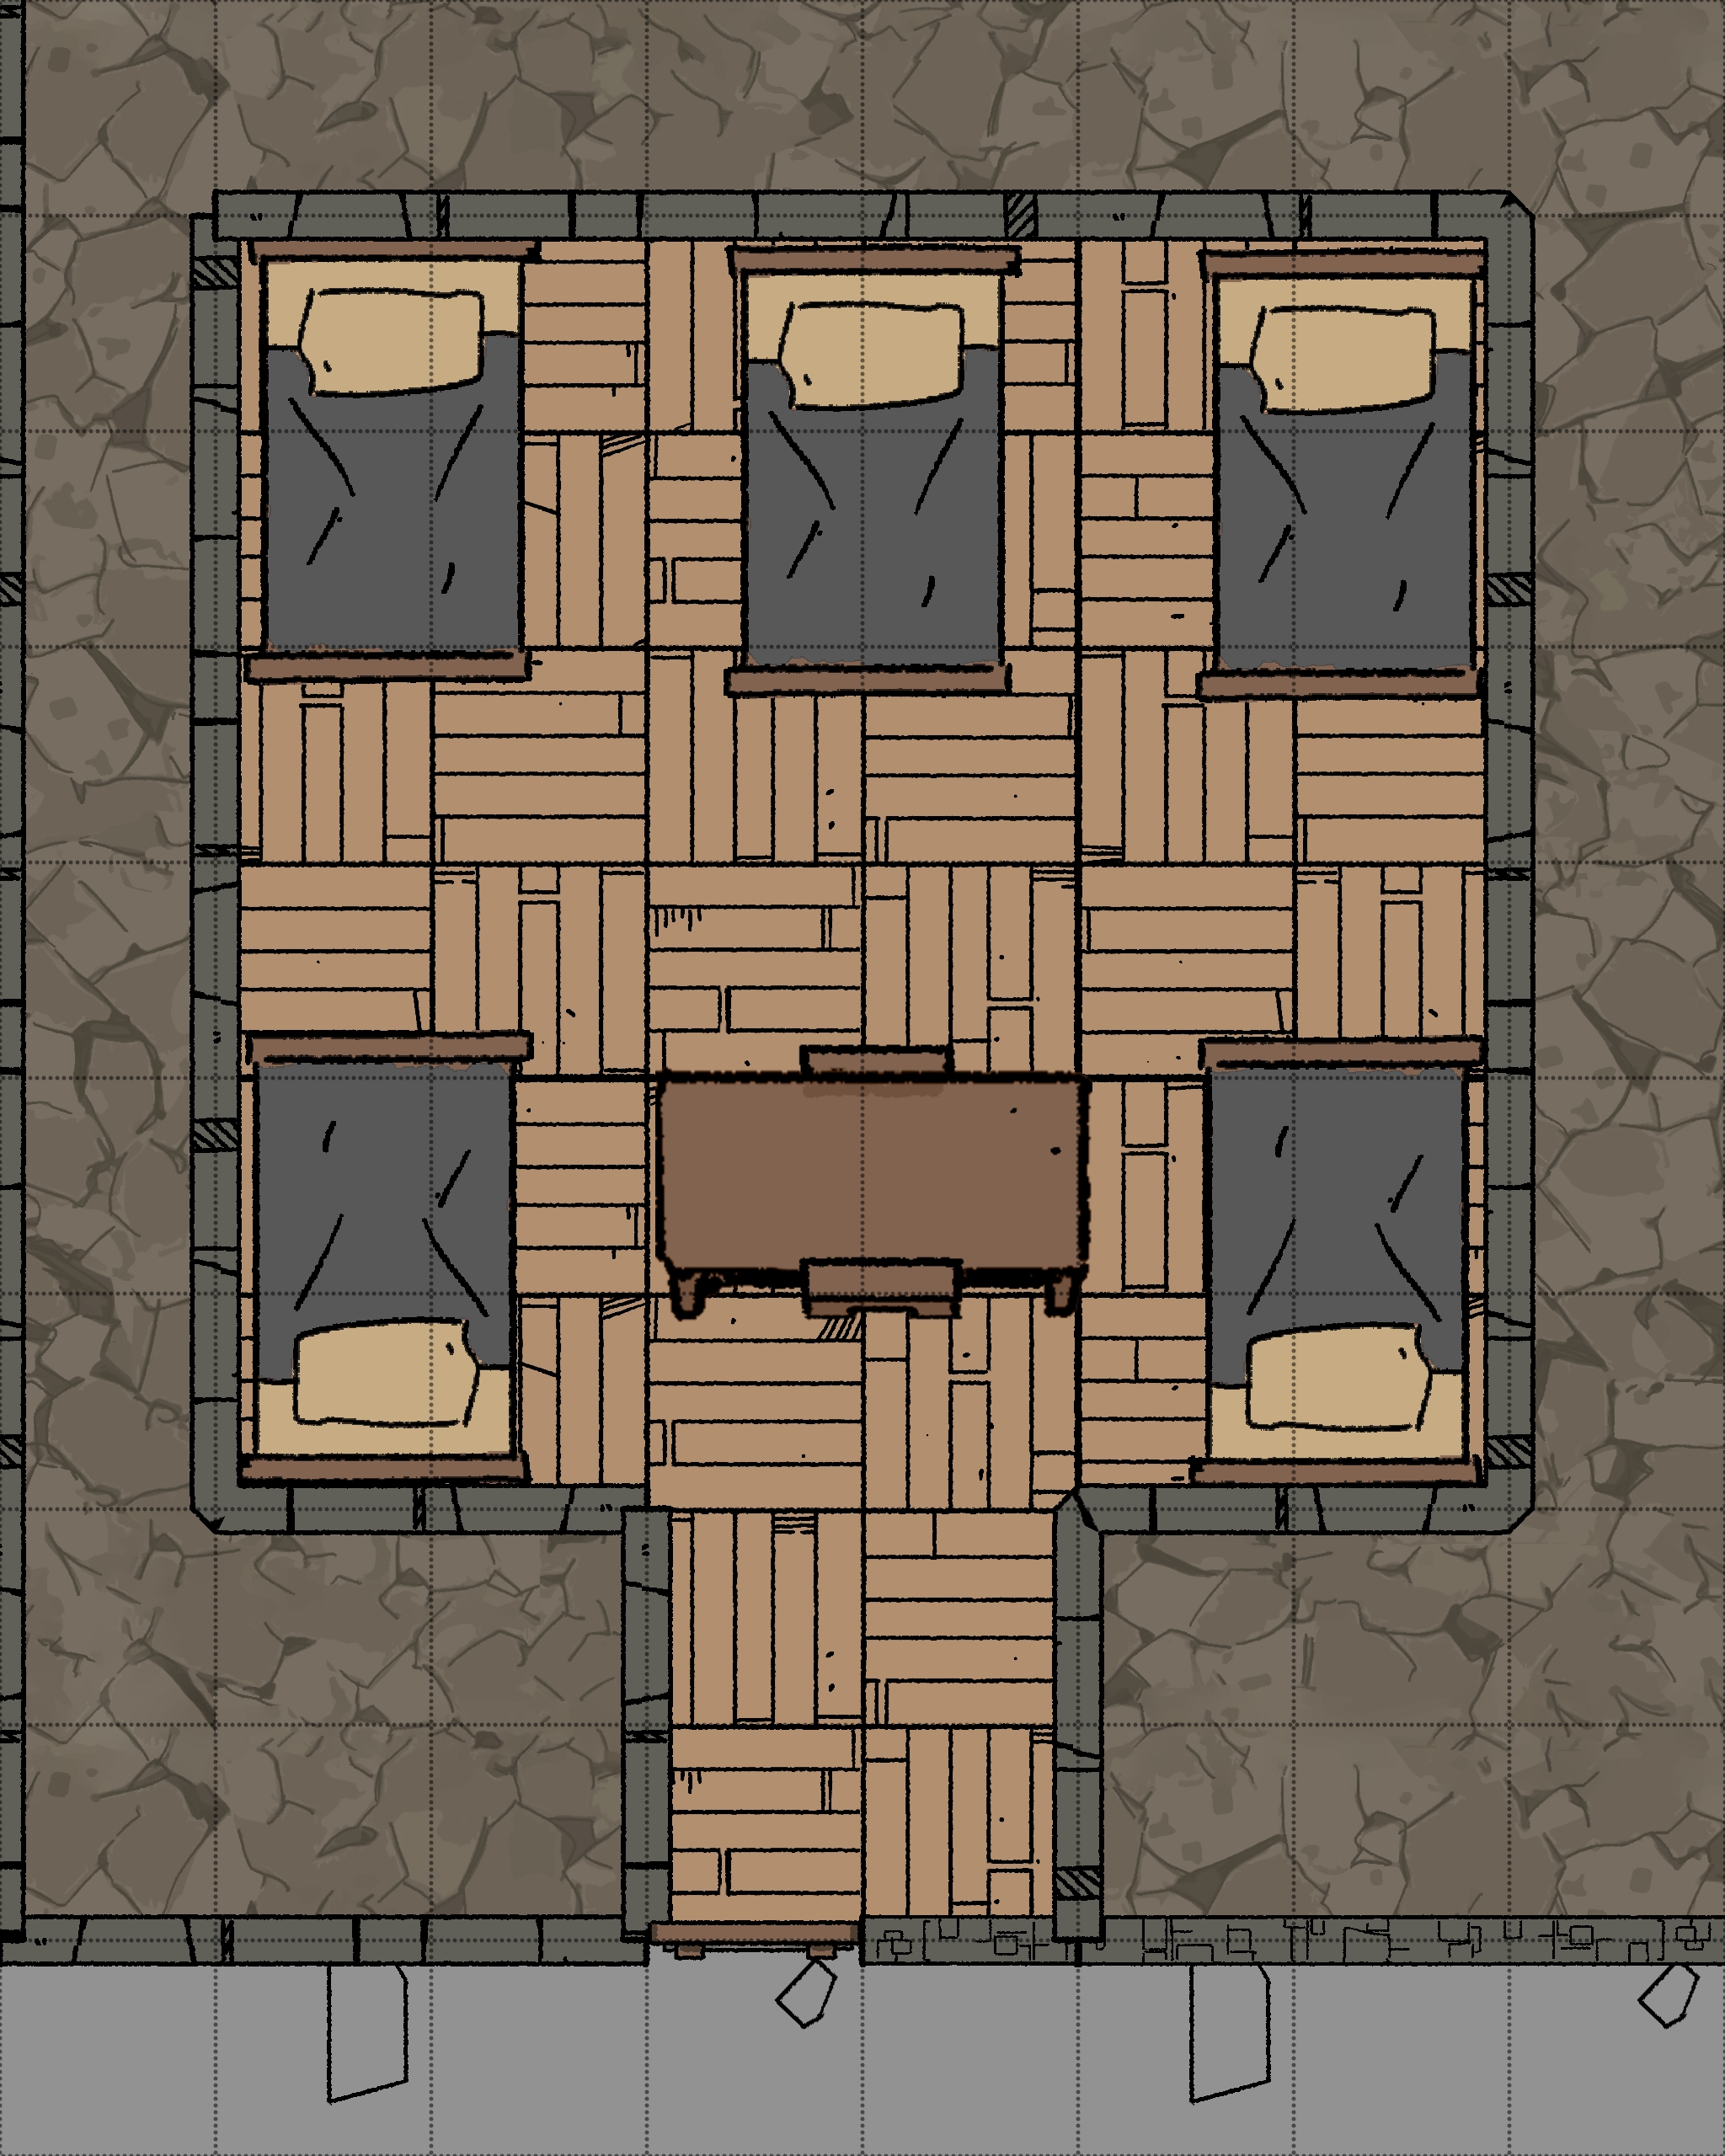
Mundane Barracks - B1-9
Room Type: Empty
Light Level: Dark
Similar to the other barracks, this chamber has nice wooden floors and walls, making it feel warmer and more inviting than the usual dark stone walls of the tower. This room features 6 bunk beds and a small sitting area.
Unlike the other chambers, this has not been trapped. A layer of dust sits on every surface. Mundane items can be found here, such as bedding, empty water skins, and the like.
Connected Rooms
North - Wooden door with window - Barraks corridor
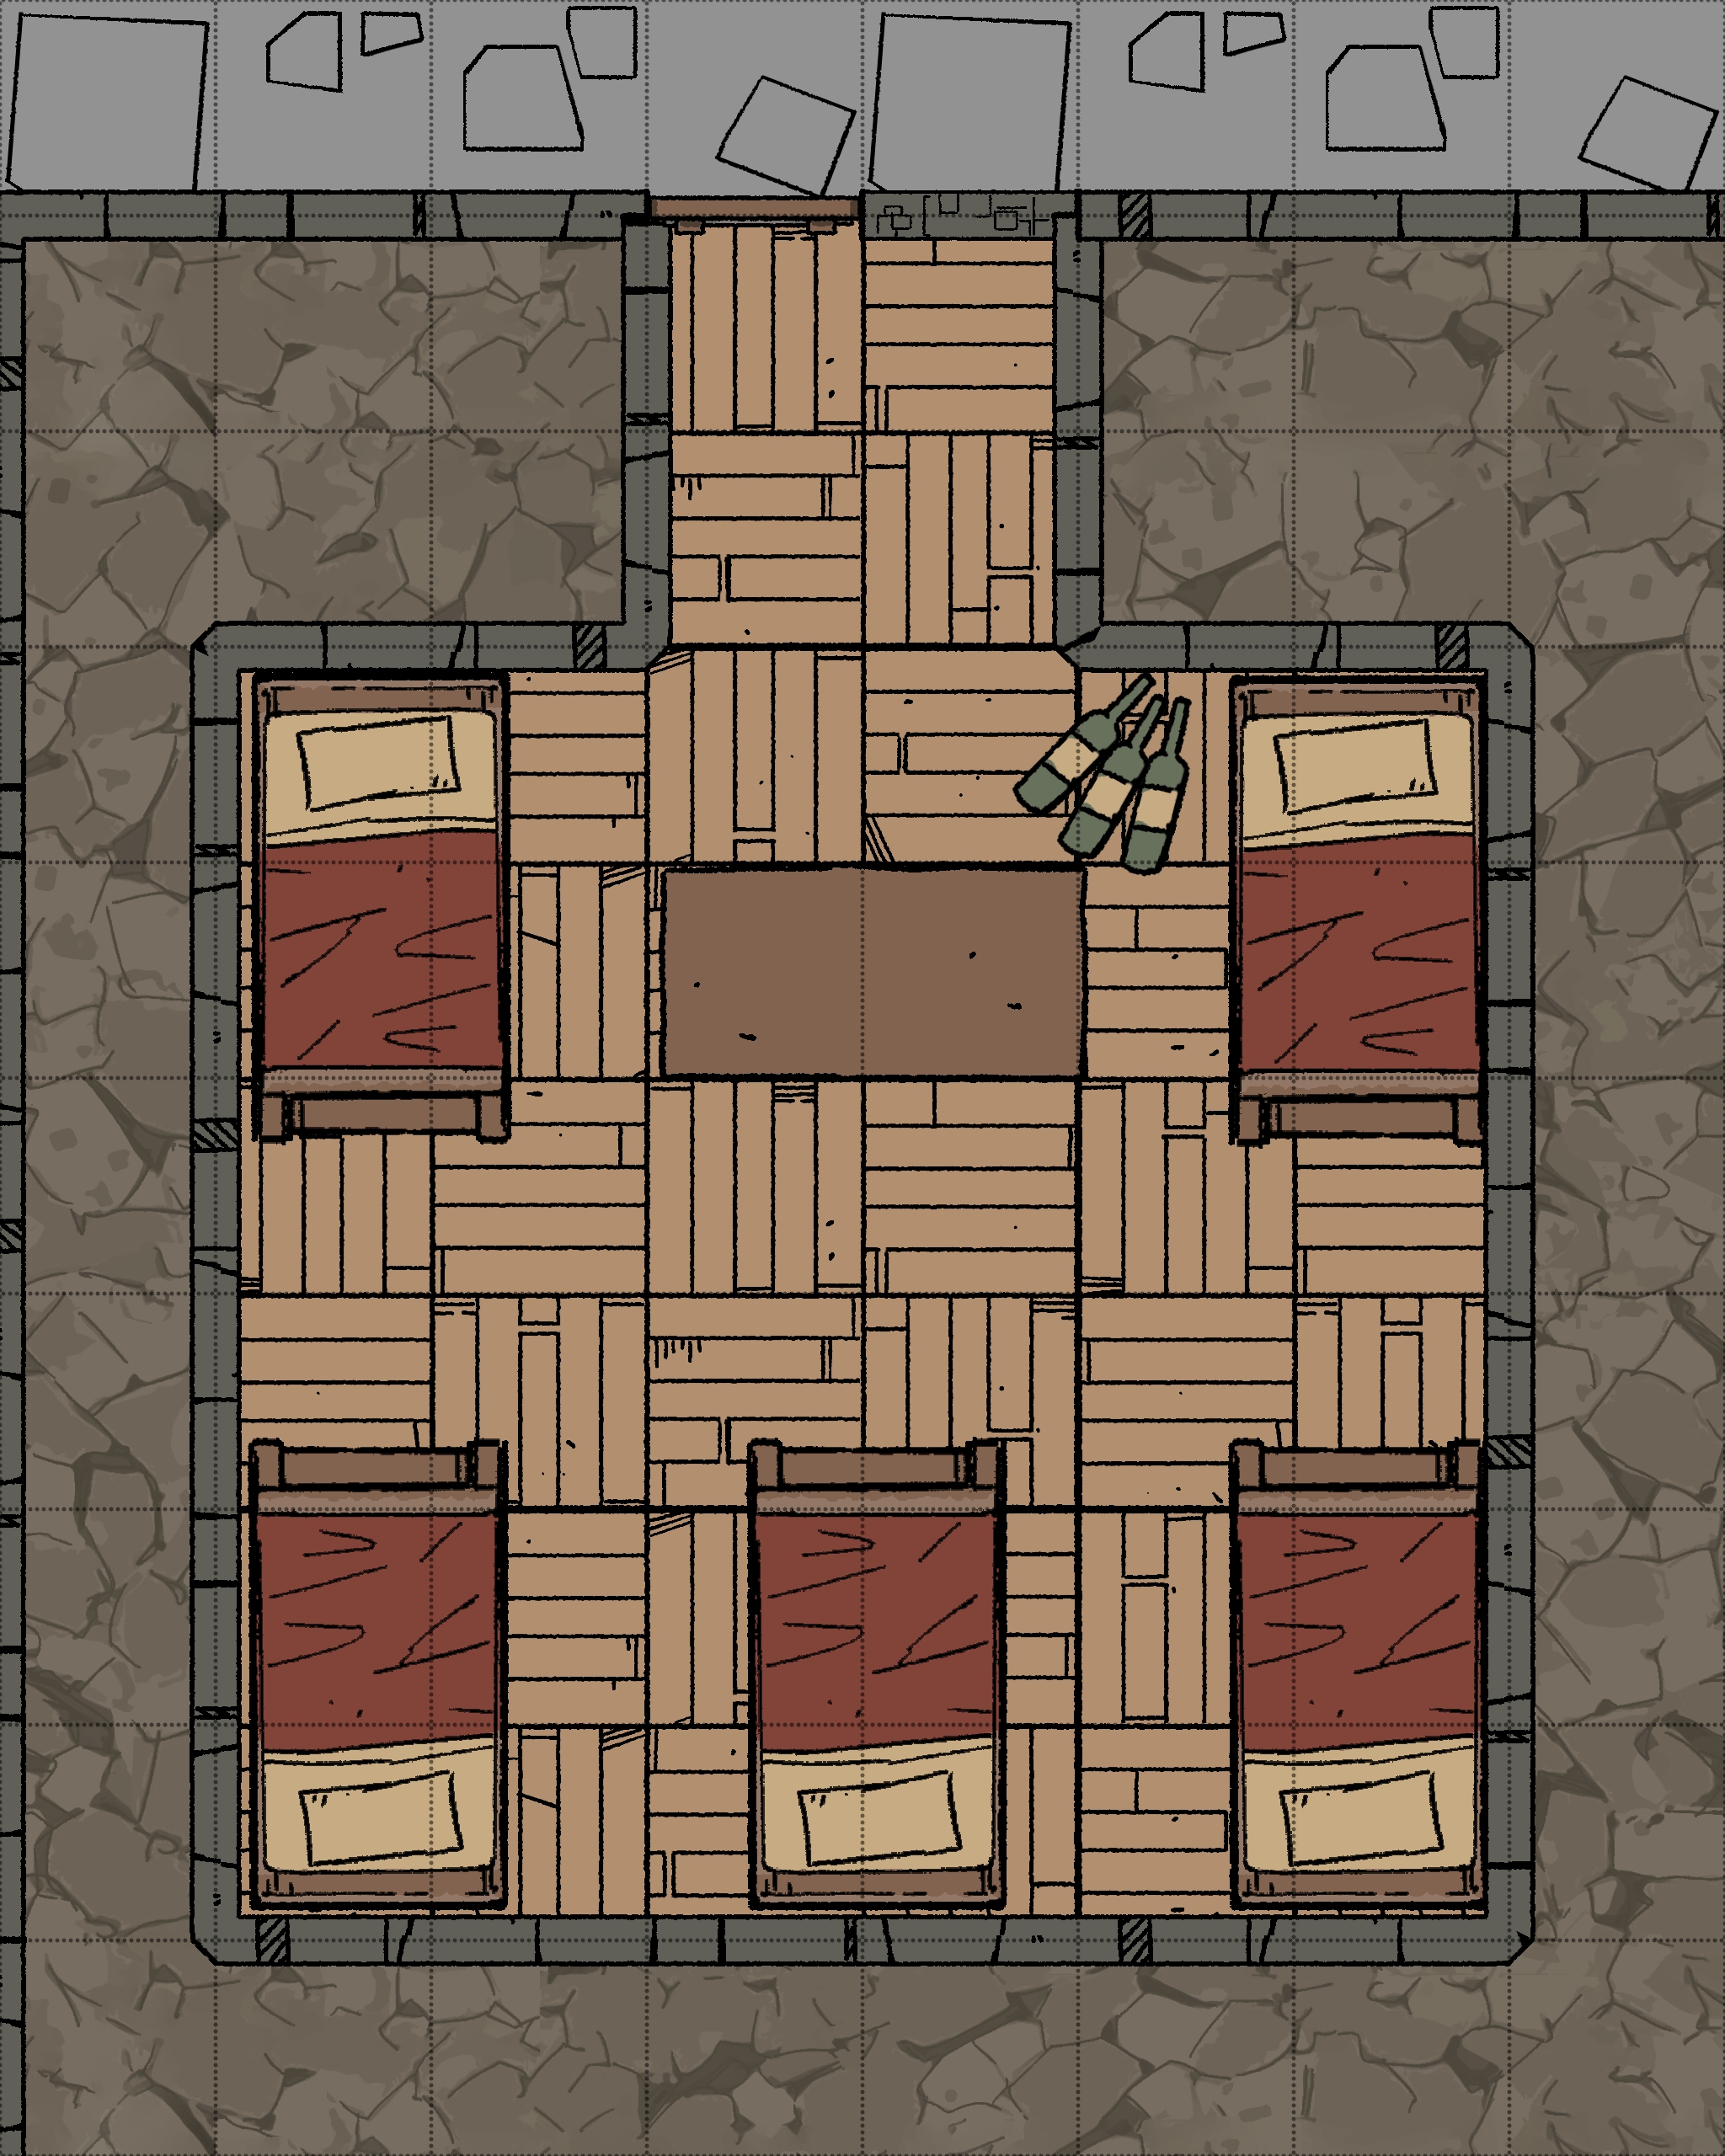
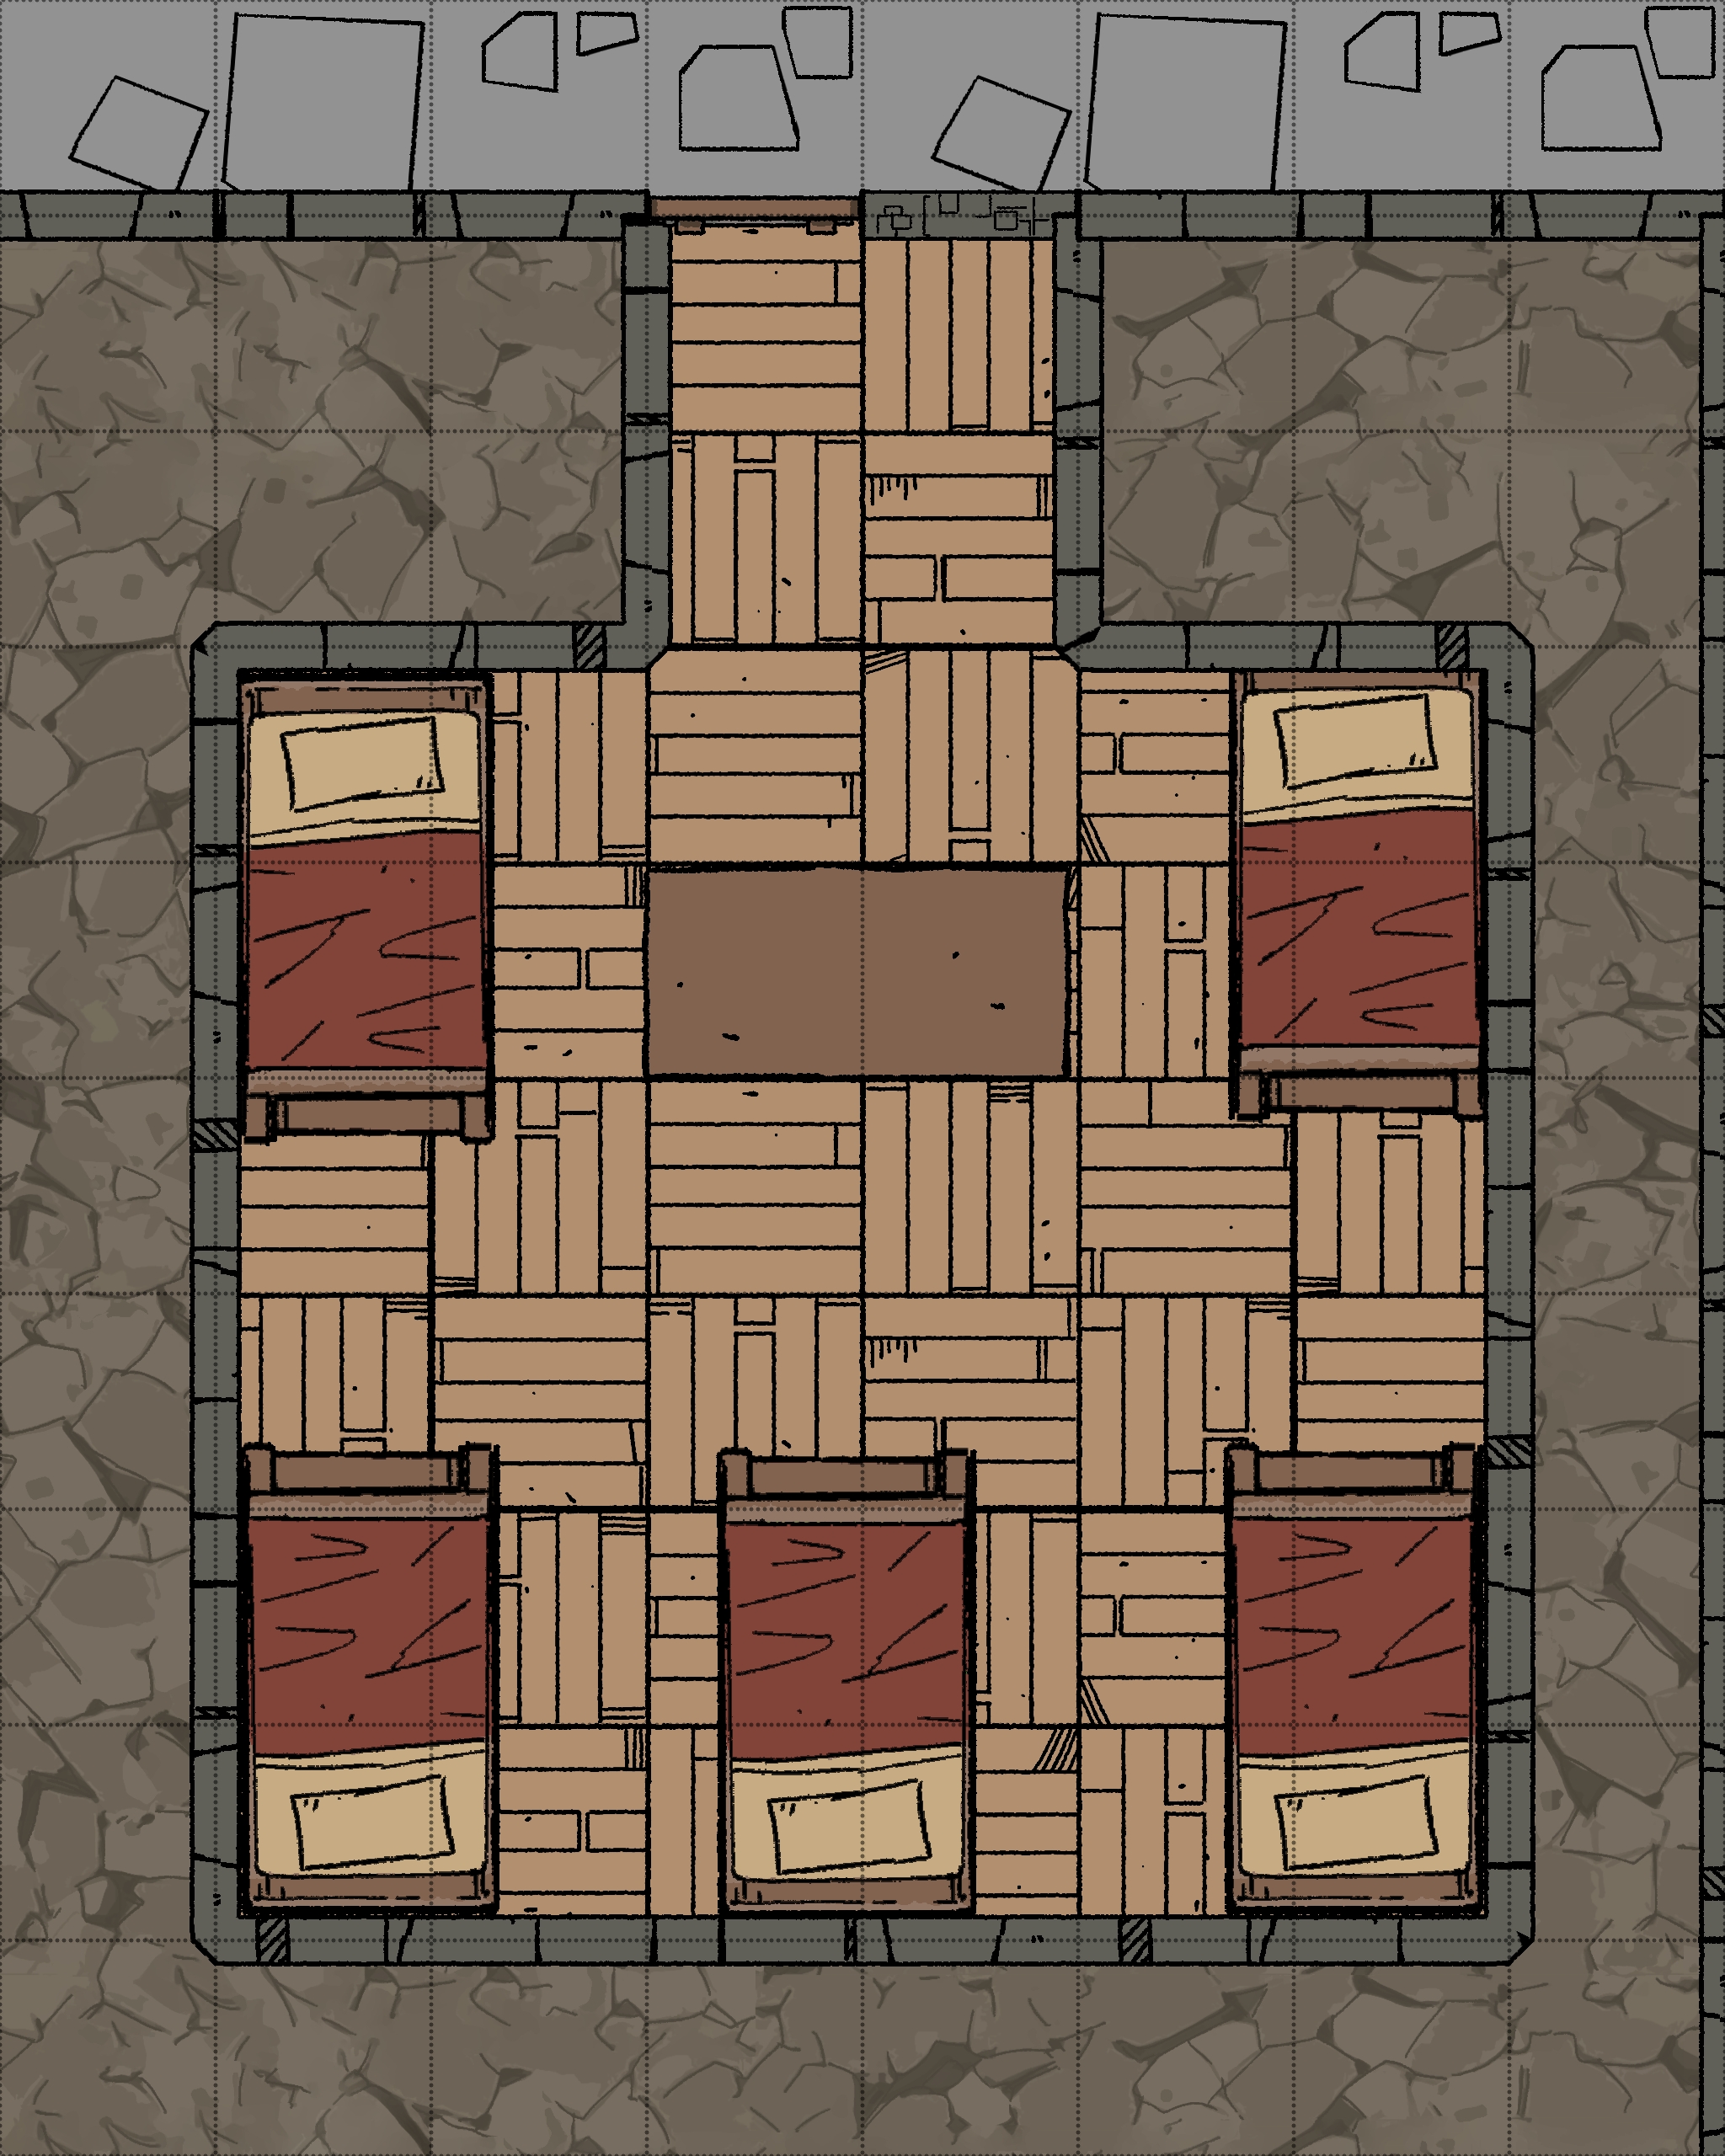
Rampage Barracks - B1-10
Room Type: Special
Light Level: Dark
Similar to the other barracks, this chamber has nice wooden floors and walls, making it feel warmer and more inviting than the usual dark stone walls. This room features 6 bunk beds and a small sitting area.
Unlike the other rooms, there is dried blood splattered over most of the furniture, floors and walls. On the table is a letter and a crate of wine bottles, one of which is empty and smashed.
The letter on the table reads, “As a reward for your hard work, only drink once your shifts are over”.
Wine is poisoned! Tastes great, but Save vs Poison. On a fail, go into a rampage, attacking anything around as if they were enemies for 1d4 turns.
Connected Rooms
North - Wooden door with window - Barraks corridor
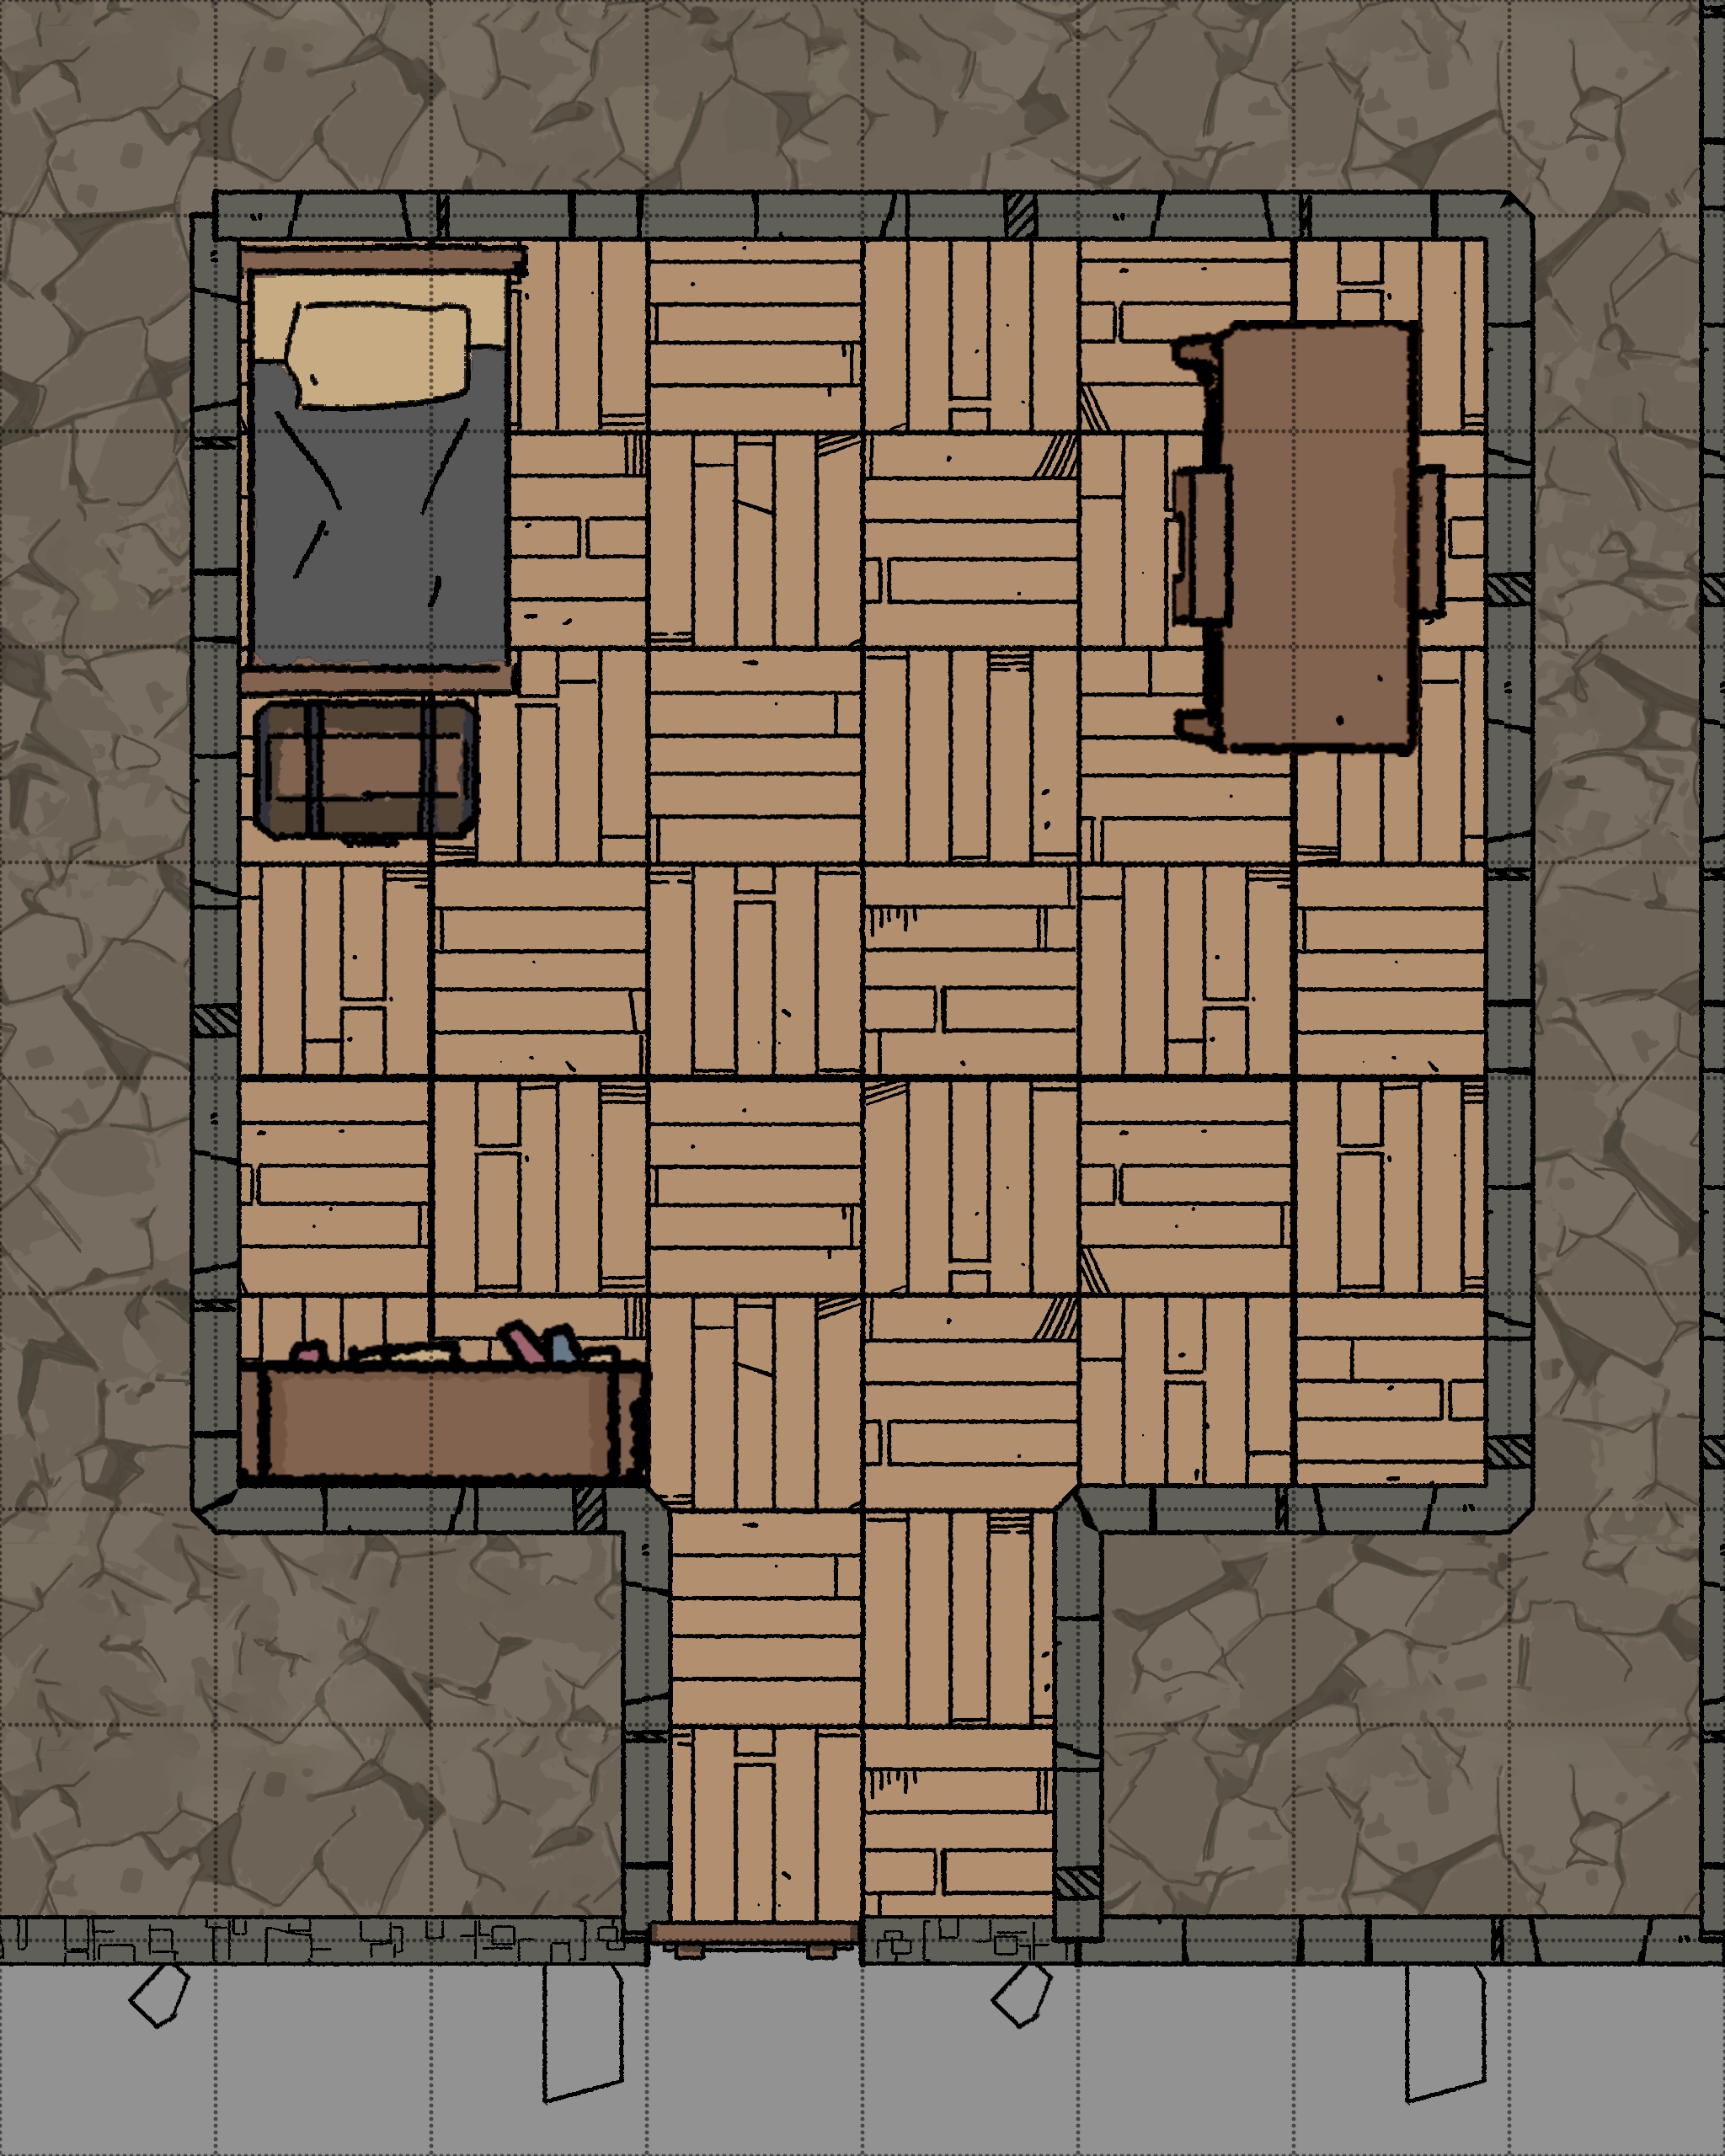
Sung-Mins Chambers - B1-11
Room Type: Lair
Light Level: Dark
This Barracks would be similar to the others, but has been modified by its new owner, Sung-Min. Only a single bed remains, and a writing desk has been moved from elsewhere.
Being a former professional thief himself, Sung-Min will carry anything of value with him, not leaving it for others to take.
There is a 5-6 chance to find Sung-Min here unless he has already been found elsewhere on the floor. If he has left his rooms, he might use his spell, Sung-Min's Lesser Wall of Force, to block the doorway.
Connected Rooms
South - Wooden door with window - Barraks corridor
Staff Chambers - B1-12
Room Type: Empty
Light Level: Dark
Similar to the other living chambers in this section, this room has wooden floors and walls. This room is intended for some of the tower's staff rather than guards. Bunk beds have been substituted for regular single beds.
Nothing of much value can be found unless you are after furniture or bedding.
Connected Rooms
South - Wooden door with window - Barraks corridor
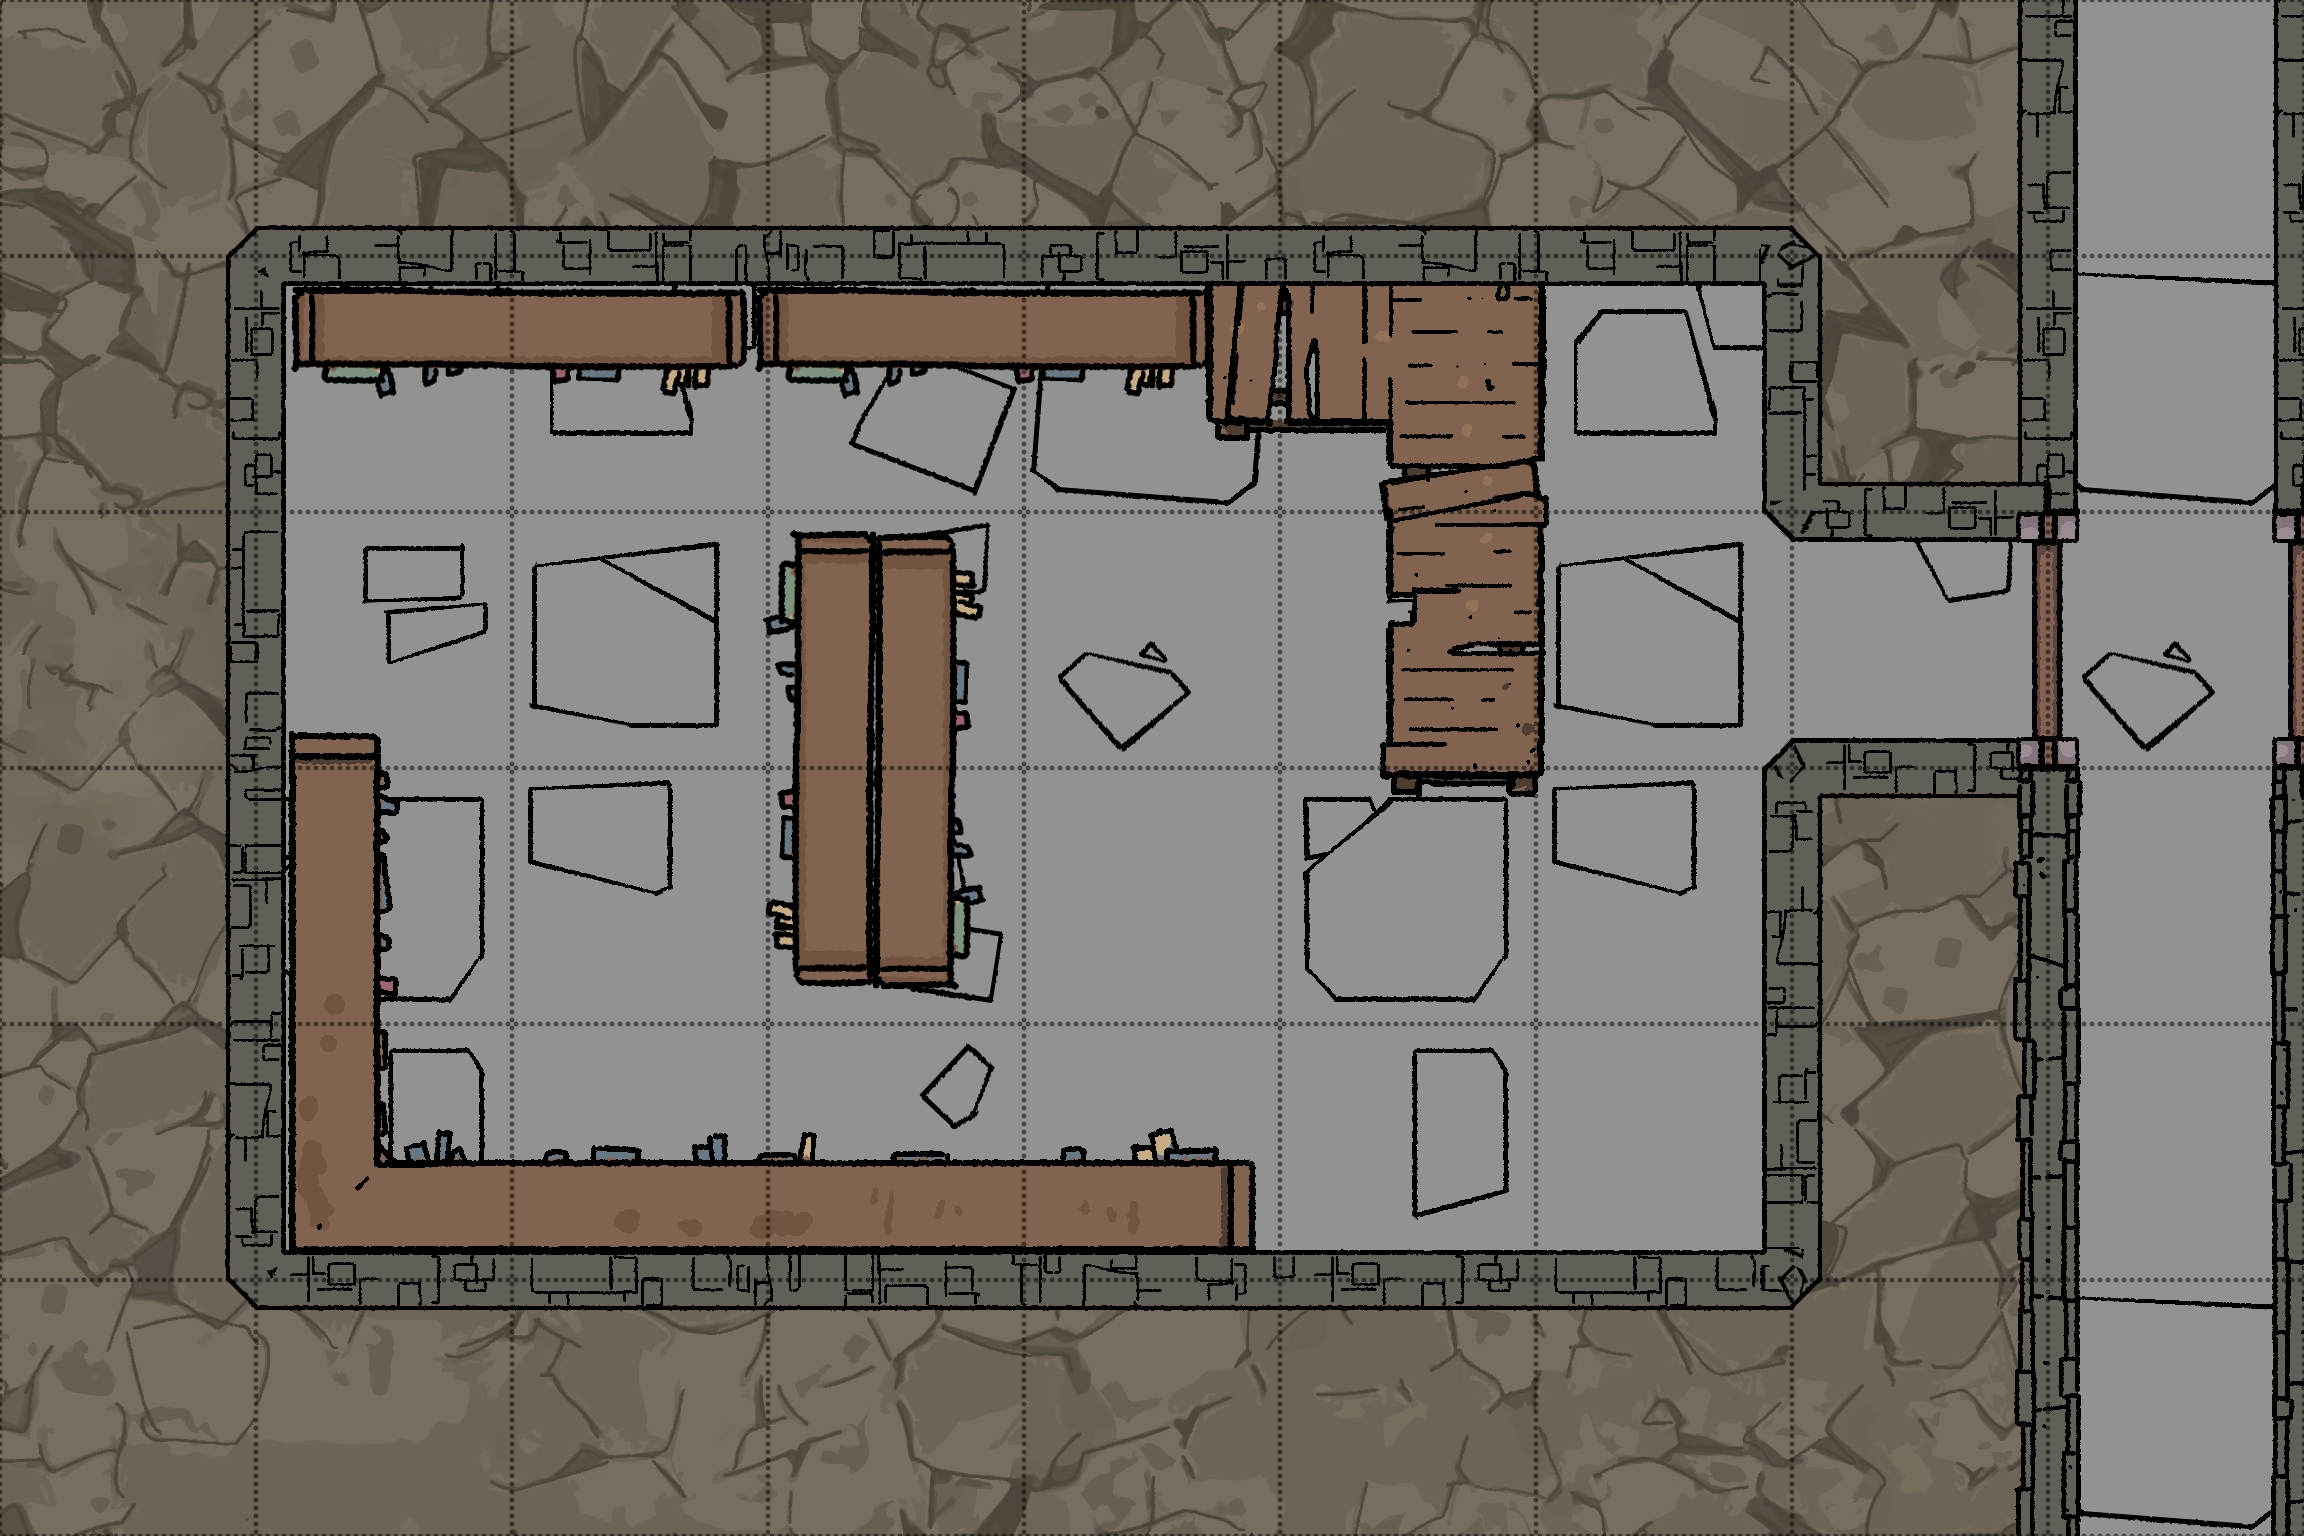
Guards Armoury - B1-13
Room Type: Special
Light Level: Dark
A large circular vault door protects this room, and inside is the armoury for the guards who used to defend this tower. The decorations are utilitarian, with hard stone floors, but they have made some effort with the walls, now providing dreary curtains that hide the dark walls.
Contained in this room is a large amount of mundane weaponry and armour, but also a few magical pieces belonging to the guard captain.
Against the west wall is a teliportation sigil and a sign that reads “To the Roof”. This takes you up to 6-4.
Mundane Loot:
Weapons
- 5 battle axes
- 3 crossbows
- 5 daggers
- 4 javalins
- 3 longbows
- 4 maces
- 4 polearms
- 2 spears
- 5 bundles of torches
- 2 shortbows
- 4 two-handed swords
- 5 warhammers
Armour
- 2 leather armour
- 3 chainmail
- 3 shields
- 2 platemail
Ammo
- 5 cases of bolts
- 4 quivers of arrows
- 4 silver-tipped arrows
Magical Loot
- Guardians Chainmail +2
- Bulls Head Sheild +1
Connected Rooms
North - Secret door - Secret passage
West - Reverse of vault door (Unlocked from this side) - Barracks corridor
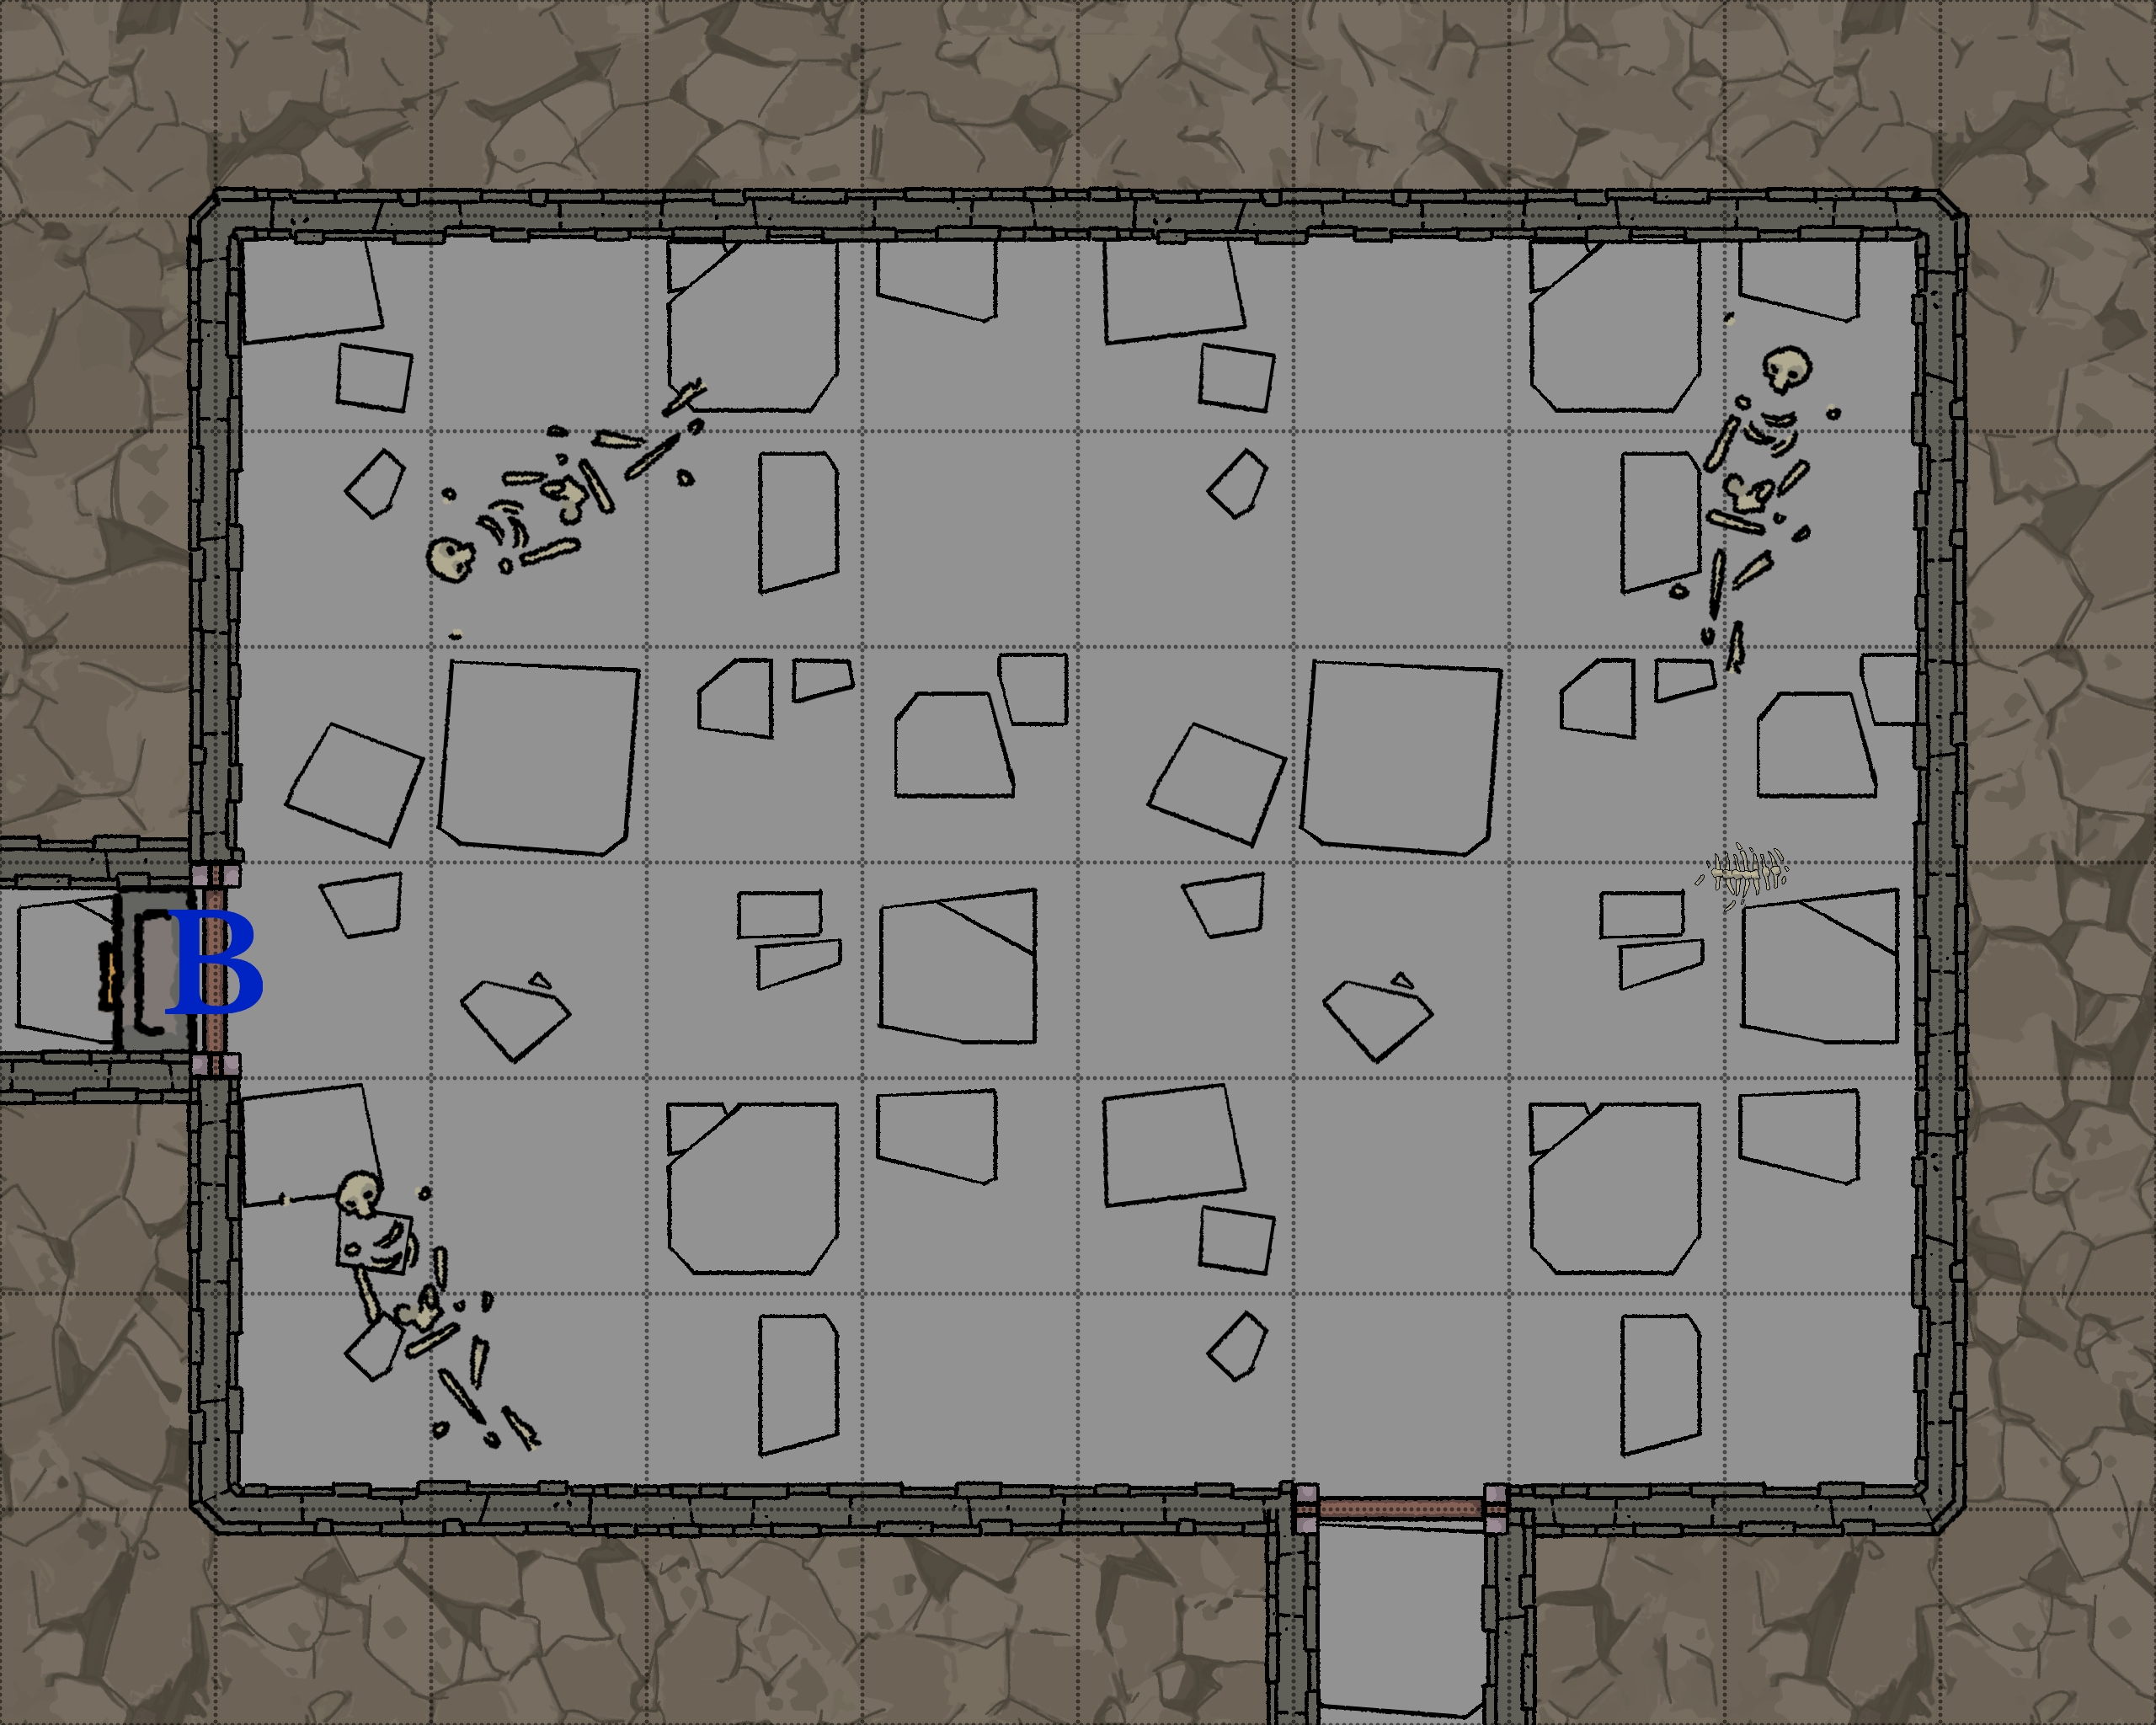
Jail Cells - B1-14
Room Type: Trap
Light Level: Dark
This large chamber is dank and dark, with cobwebs clinging to the edges. There are 3 cells in this room, one larger than the others and a Jar Guardian waiting silently in the corner.
The Jailer is a large construct whose body resembles a jar or urn, with arms, legs, and a head attached. The limbs and head are carved from stone, but the body looks reasonably delicate. It looks like it was originally painted as an ominous figure, but time has worn it down to a grey smudge. Inside the jar is the body of an old employee of the tower still powering the construct; the jar is the only thing keeping them “alive”.
Encounter!
Entering the room will wake up the Jailer (Crystal Living Statue Stats), who will attack anyone outside of a cell with his spear.
If someone is inside the holding cell after falling from 1-3, the Jailer will negotiate with the occupants to relieve them of their gear. He will offer things he has no access to, such as food and water. He will throw all gear into B1-15.
This construct can talk but is limited by its “programming”. He does not think like a person, but is focused only on its job as a jail guard
Its overall plan is to disarm people and move them into the smaller cells so that the Lord of the Tower can take them away. He is not coming, so you will be waiting a long time.
Connected Rooms
Up (Large Cell) - Slick metal tube - 1-3
North - Metal door with “speakeasy grate” - Corridor
Dumping Room - B1-15
Room Type: Empty
Light Level: Dark
This chamber has no visible doors and is open to the floor above into room 1-4. The floor of this room is made of thick, slick metal that slopes towards a hole that drains into water B2-1. This room is a dumping ground for unwanted things in the tower and is not meant to be traversed.
Connected Rooms
Down - Hole in floor - B2-1
East - Secret door - Corridor
Freezing Trap - B1-16
Room Type: Trap
Light Level: Dark
This room is an obvious trap with its metal walls coated in thick ice and the floor slick with patches of black ice. This room is freezing cold; any extended time spent here without providing heat will cause huge problems. Being wet will only make this much worse.
Each door is a portcullis that magically keeps out the cold, and each has a crank on both sides to open it. The cranks, however, have very poor gearing, and it takes a full dungeon turn to open/close a door. Only one door can be opened at a time! So, to open a door, you must close all the others first; this slows travel and means more time spent in the cold.
Connected Rooms
North - Portcullis - B1-17
East - Portcullis - Blocked corridor (dead-end)
West - Portcullis - B1-5
Ignition Chamber - B1-17
Room Type: Trap
Light Level: Dark
This open room has a recessed floor and thin walkways that cross in the middle. The walls and floors are made from metal stained by ash. The floor is 20ft down and is a maze of metal pipes with hundreds of small vents producing flame.
Every round, the fire on the floor flares up, igniting anything flammable in the room. If you are wet, then you are dry after one flash.
Moving fast across these thin walkways requires a roll-under dex to keep your balance; moving slowly does not. On a fail, you fall 20ft into the pipes, not a good place to be. No additional damage from the pipes but you are still ignited every round.
Connected Rooms
North - Reinforced wooden door - B1-19
East - Wooden door - B1-20
West - Carved wooden door (religious) - B1-35
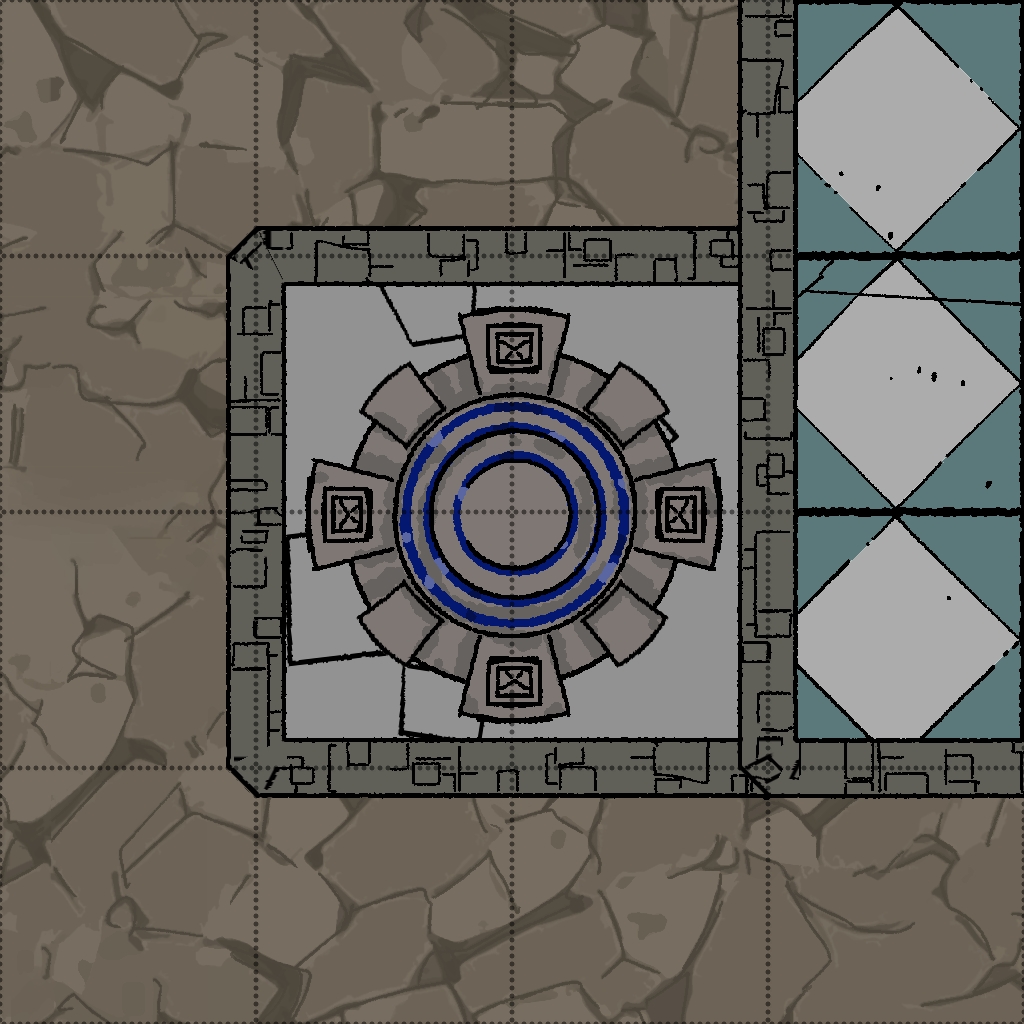
Heart Monitor - B1-18
Room Type: Special
Light Level: Dim Light
This imposing room is lined with lead. The enchanted ceiling provides a dim glow over the many tables, which are lit with blinking lights. This room is used to monitor the condition of the Heart of the Tower next door in B1-6 and protect the original only entrance.
Heart Monitor
- Water Level - Full
- Power Level - 3/4
- Door Seals - 3/3
- Drain Alarm - 0
- Clone Chamber Status
- 50% full
- 2 Broken Down
All the information is provided via lights; there is no way to input or change anything. There is only one button that reads “Emergency”. Pressing this has a 3-6 chance of summoning Alistair Mortayne. Pressing it multiple times will just increase the chance of him appearing. He will ask for a report on the problem before realising who the people are and then start killing.
Two levers flank the doorway towards the Heart of the Tower (B1-6); both must be pulled simultaneously for both sets of doors to open. Careful about Corruption when looking at the Heart from here.
Connected Rooms
North - Lead-plated door - Caved-in corridor (dead-end)
South - Lead-plated door - Corridor
West - Large lead blast style doors - B1-6
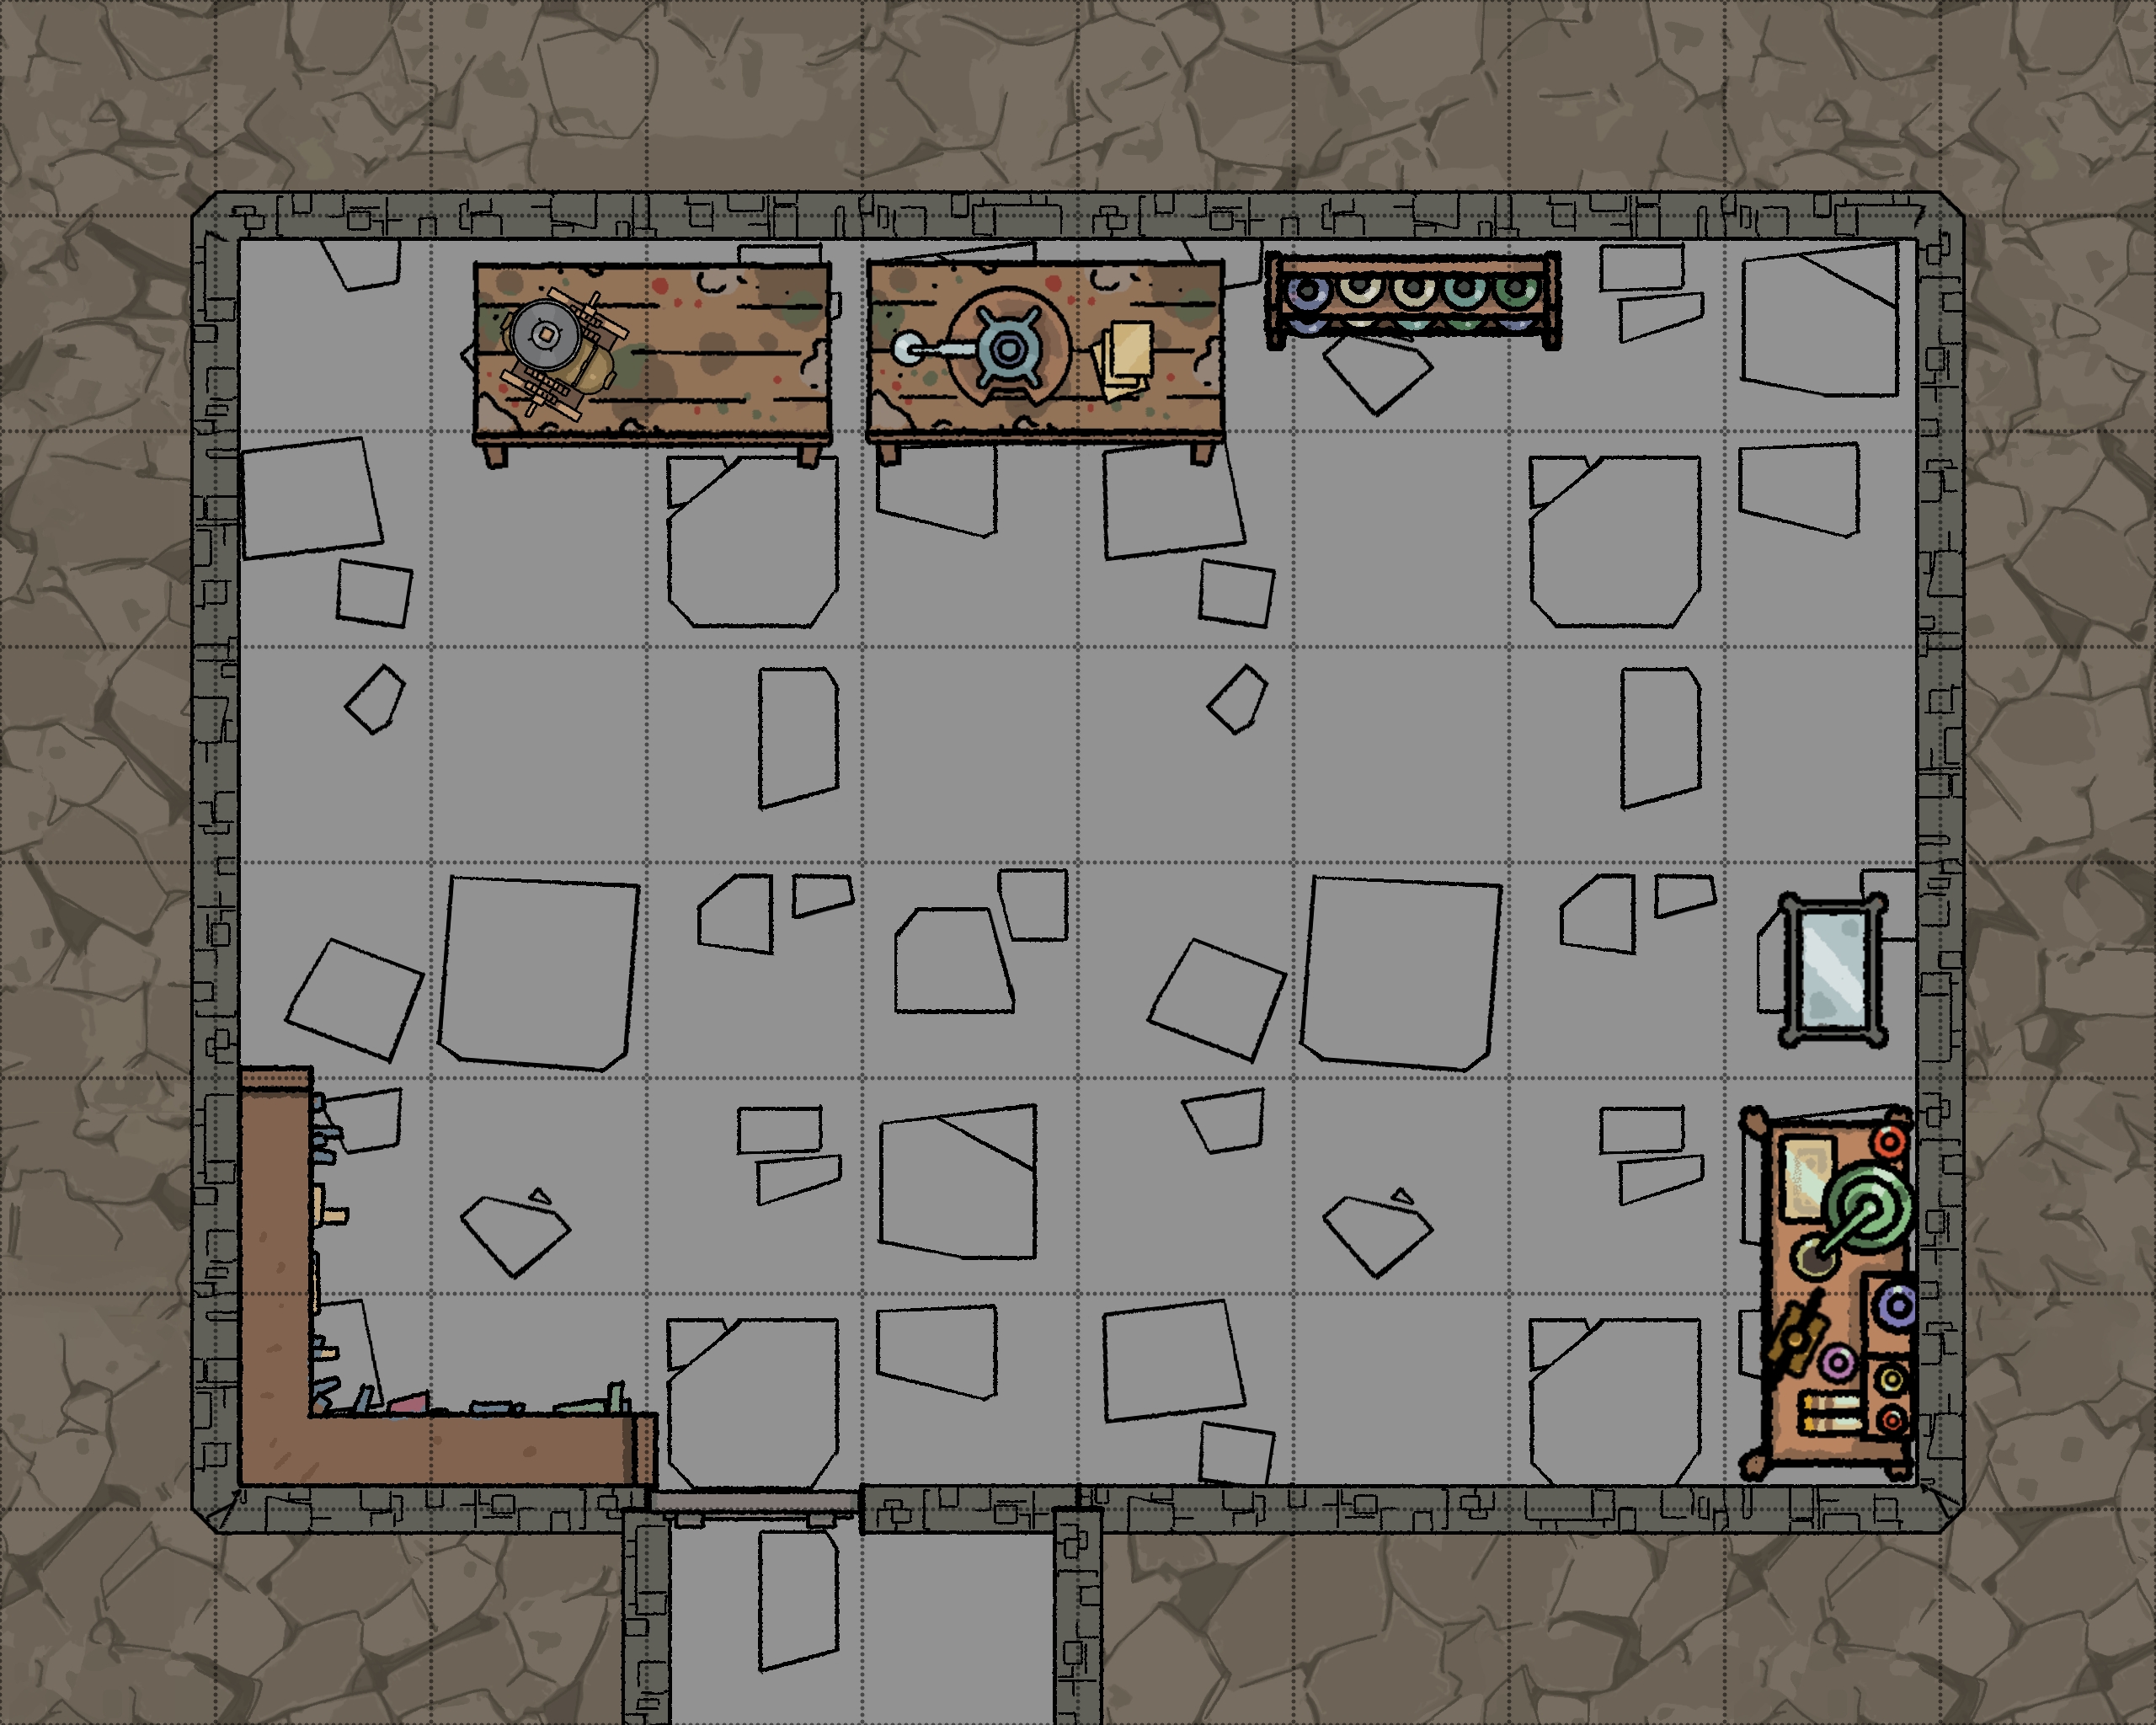
Overload Laboratory - B1-19
Room Type: Special
Light Level: Dark
This large laboratory looks like it was abandoned in a hurry. The room smells of dried herbs and books. There are potion bottles lined up next to equipment that appears to have boiled over, damaging the table.
This room was used to create Overload Potions before being abandoned. There is a coded journal that explains the recipe.
Loot!
- 2 Overload Potions
- Overload Journal
Connected Rooms
South - Reinforced wooden door - B1-17
Mountain Men Coil - B1-20
Room Type: Lair/Trap
Light Level: Dim Light
This chamber has been taken over by the Mountain Men, who have heavily defended it because it is the main way into their territory.
Towards the north side of the room, a large pole protrudes from the stone, with coiled metal suspended around it. This contraption glows with green energy and every few seconds sends crackling energy out, arcing to the floor and burning the stone.
Anyone within 10ft of the coil will be zapped! 6d6 damage and Corruption.
The switch to turn the coil on and off is in the hallway past the north door. Often guarded by a gnome waiting to hear the codeword to switch it off. Shouting in the room should get his attention.
Connected Rooms
North - Darkened wood door - Mountain Men territory
West - Reinforced wooden door - B1-17
Mountain Men Officers Bedroom - B1-21
Room Type: Lair
Light Level: Dim Light
This is a luxury bedroom for the Gnome in charge of the expedition, featuring all the nice things from home, nothing scavenged from the dungeon.
The current leader of the Mountain Men is heavily corrupted, so he has been locked in this room until he can be taken home. He is suffering from the paranoid corruption condition.
He has trapped the rug at the entrance to the room. The stone floor under the rug has been removed to make a small 1ft hole that has been filled with nails from the bed. Not going to kill anyone, but a real pain for the first person coming to get him. 1d4 damage.
Loot in personal chest:
- 1000sp
- 300gp
Connected Rooms
East - Reinforced wooden door - Mountain Men territory
Mountain Men Storage - B1-22
Room Type: Lair
Light Level: Dim Light
This room is filled with gnome-sized shelves and cupboards, serving as the main storage area. This room holds a range of mundane items, from tools and fabrics to firewood and dry rations. Everything an expedition would need, they have resupplied with each new group.
This room will often have at least 1 gnome in here to manage.
Connected Rooms
East - Reinforced wooden door - Mountain Men territory
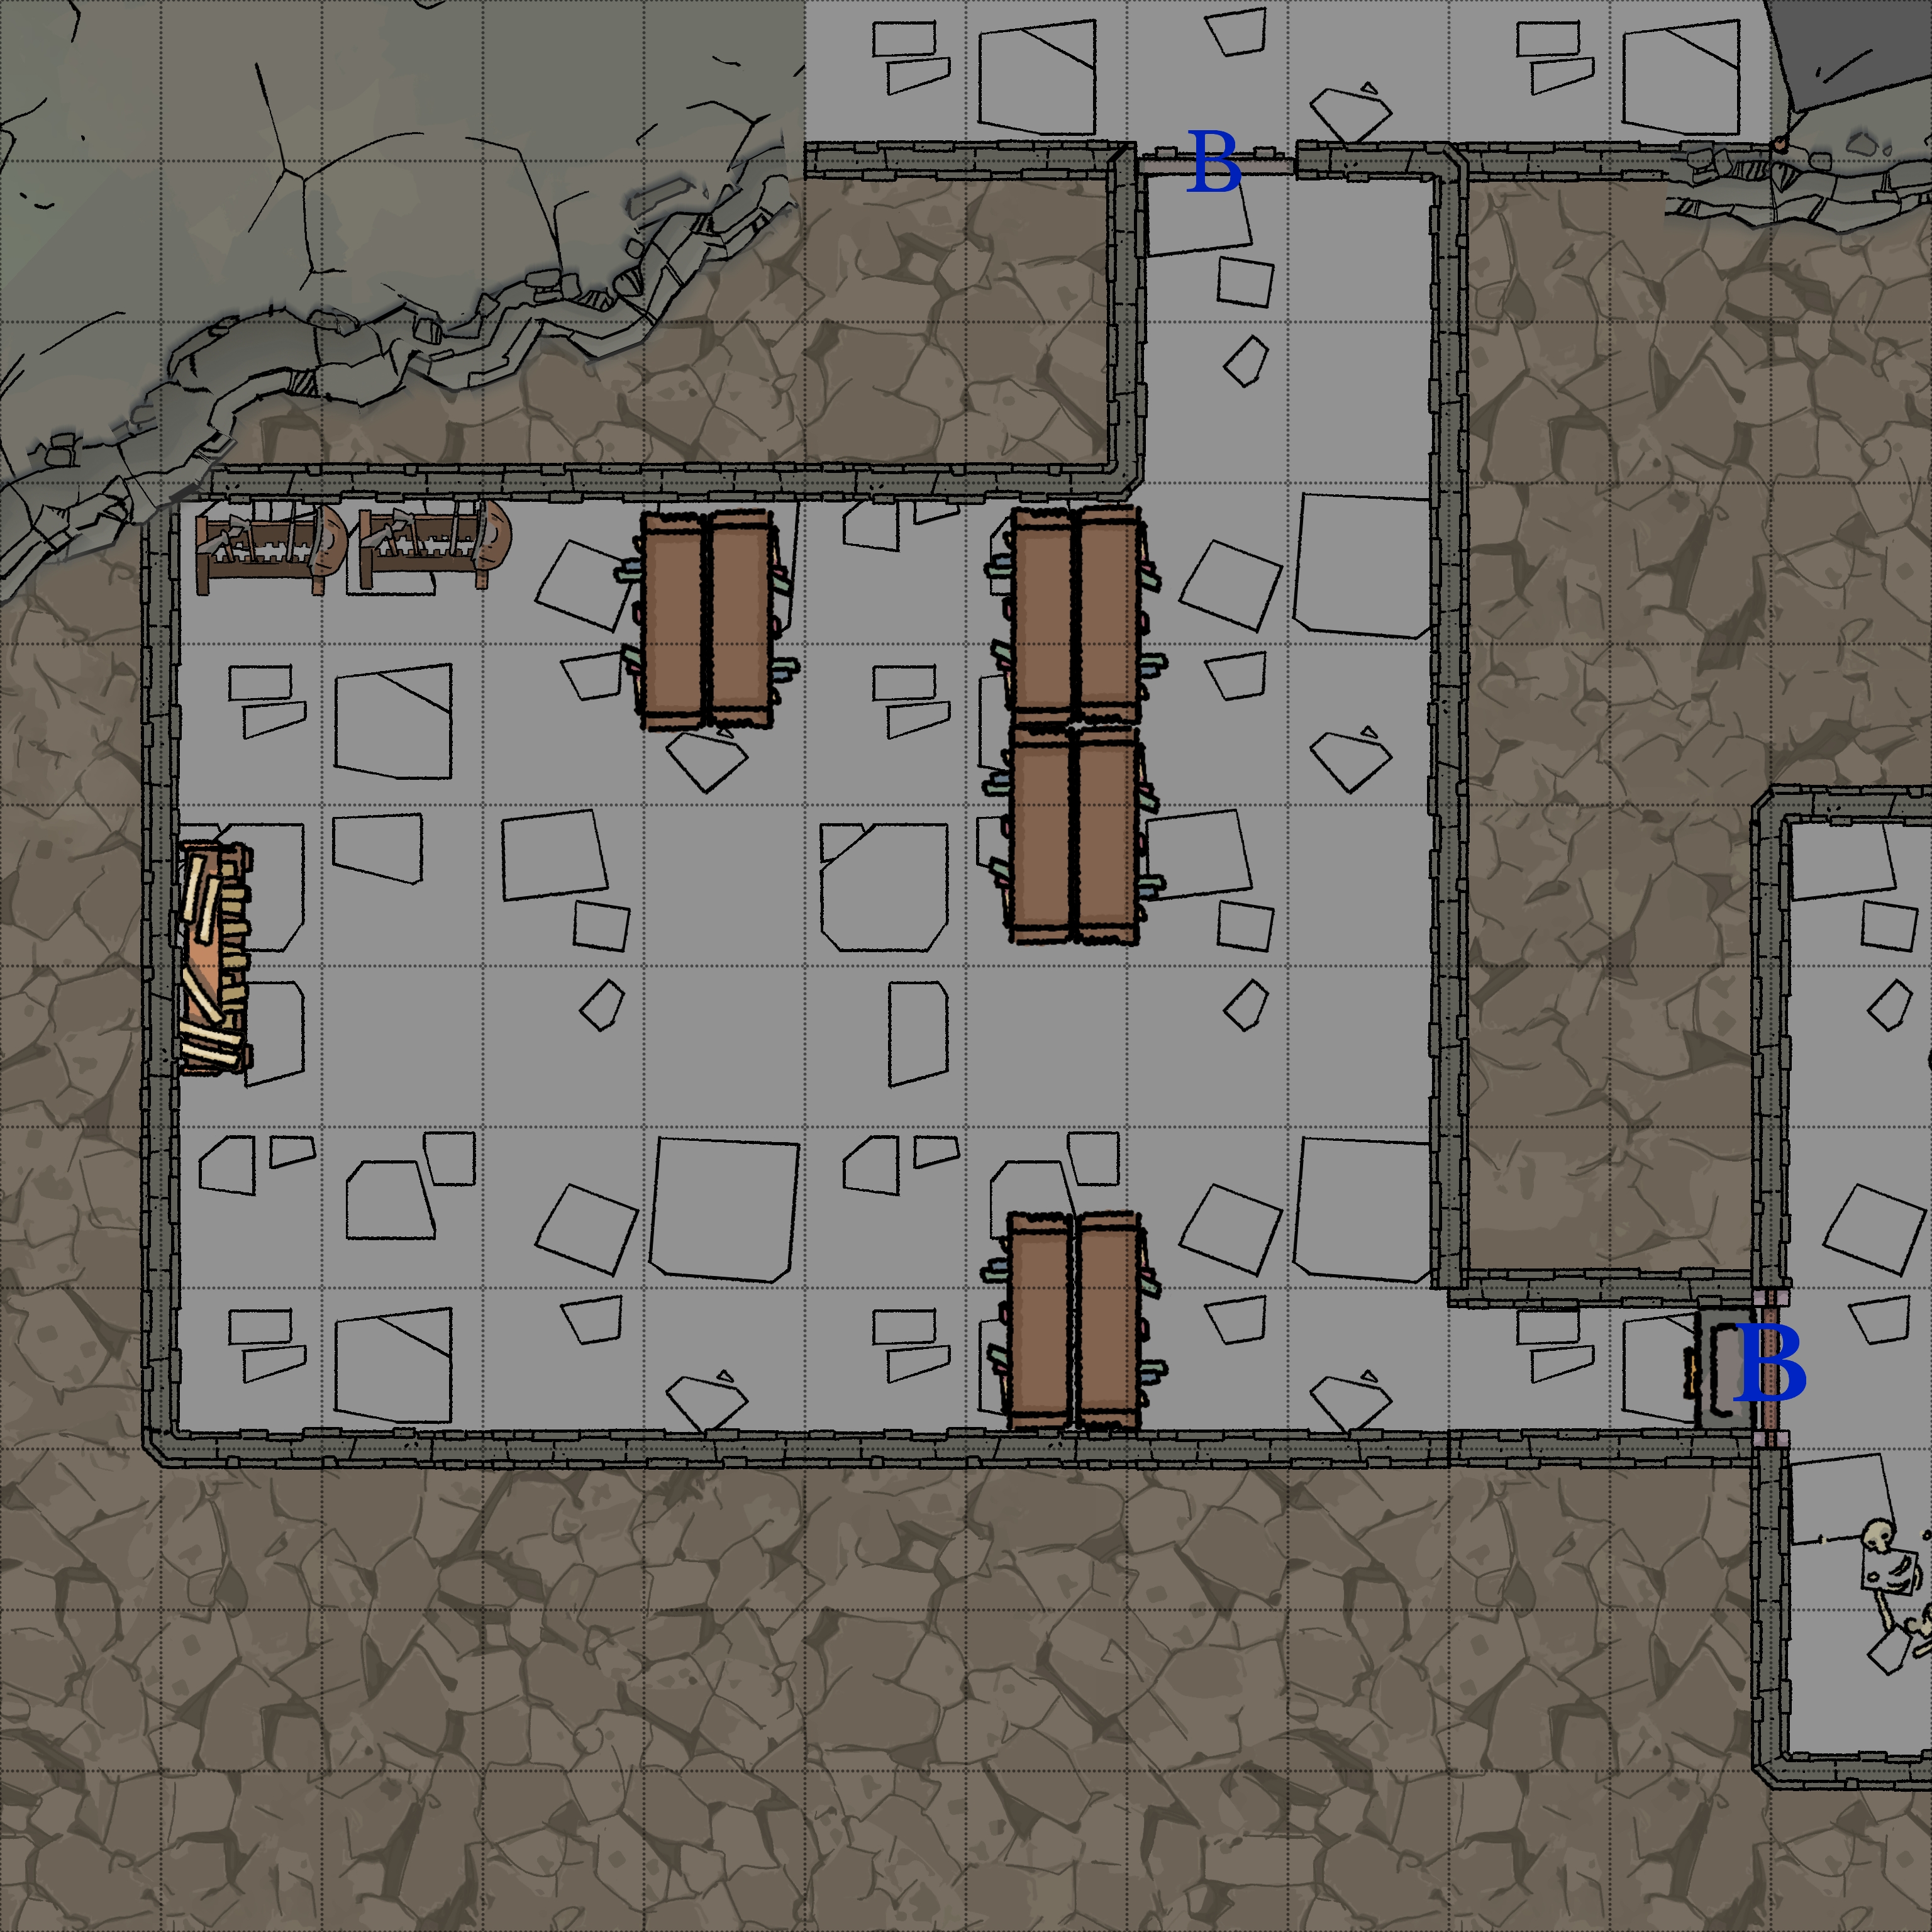
Mountain Men Main Barracks - B1-23
Room Type: Lair
Light Level: Dim Light
This chamber has been converted into a barracks for the mountain men working at this time. They swap out every few weeks, but they still have made this room homely. They have brought gnome-sized furniture from home and their personal belongings.
They have even set up a small wood burner in the corner for warmth.
Connected Rooms
West - Reinforced wooden door - Mountain Men territory
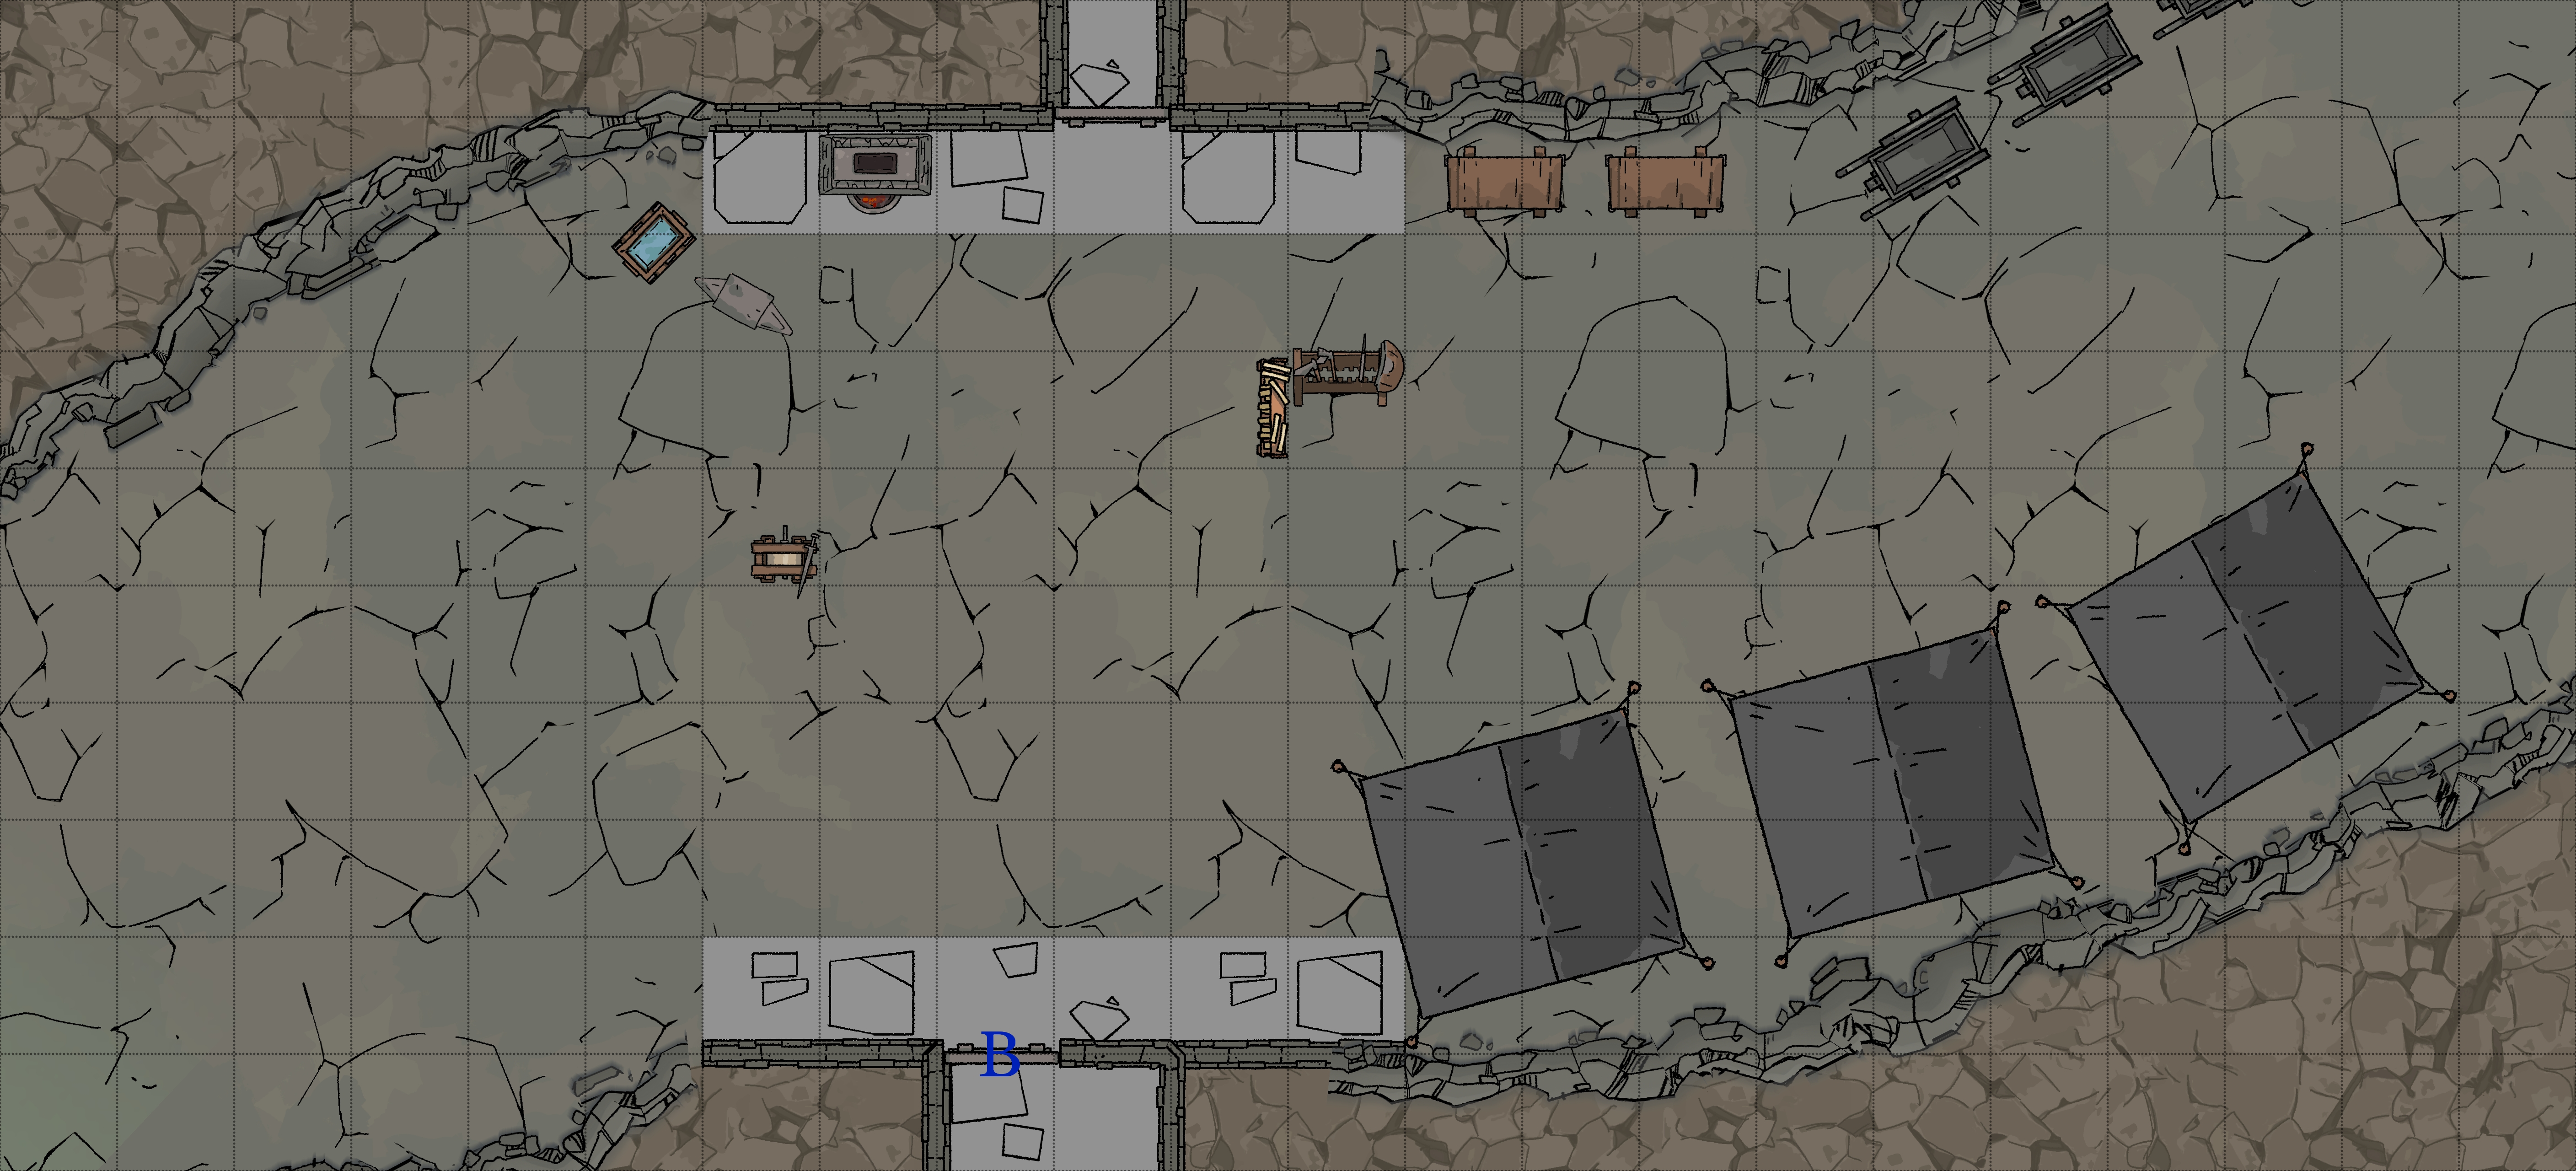
Mountain Men Excavation - B1-24
Room Type: Lair
Light Level: Dim Light
This room is the main location for the Mountain Men; this is where they dug into the tower. They have set up tents to protect equipment and livestock from falling debris and set up small labs to test the Heart of the Tower.
Following the tunnel to the NE is a 2-day journey that eventually leads to the Mountain Men's home under the distant mountains.
The Gnomes here run various experiments on the heart, but have also installed conduits to bring its power to different stations.
Walking too close to the SW will mean you will need to start rolling saves vs corruption.
Connected Rooms
North - Metal door that does not match the dungeon - Mountain Men territory
East - Open cave tunnel - Mountain Men home
South - Metal door melted to its frame (Blocked) - B1-41
South West - Green glowing cave - B1-6
Old Showroom - B1-25
Room Type: Empty
Light Level: Dim Light
This room features a nice, light, smooth stone floor and several similar podiums placed around. These podiums once held objects of value, but all that remains is the simple spotlights illuminating them from above.
On the south wall is an arched ecove with a podium that seems to be of higher note. On this podium is an Invisible Ring.
Invisible Ring
- A ring that is Invisible, provides no other benefits. Just don't drop it.
Connected Rooms
North - Open thin corridor - B1-26
East - Metal door - Corridor
Moving Door - B1-26
Room Type: Special
Light Level: Dark
This room is buzzing with magic. The floors and walls are covered in stunning marble tiles, with the marble's grain spelling out impossibly small magical sigils. The only visible entrance to the room is a narrow passage, with a door floating an inch off the floor in the middle.
This magical door can be moved around the room in 3d space. It has weight to it, but with a person on each end, it's easy enough to move. Pushing this door against a wall will lock it in place, allowing you to access the hidden rooms behind the wall. You can then close the doors and pull the door away to place it somewhere else. This magical door also works on the floor (B2-14) and ceiling (1-33).
This door can't leave the room (magic keeps it from leaving). If you dispel the door, then remove it, then you just have a fancy door. The room provides the magic.
Connected Rooms
Up - Stone Wall - 1-33
Down - Stone Wall - B2-14
North East - Stone Wall - B1-32
East - Stone Wall - B1-31
South East - Stone Wall - B1-28
South - Open thin corridor - B1-25
South West - Stone Wall - B1-30
West - Stone Wall - B1-29
North West - Stone Wall - B1-27
Moving Door - B1-27
Room Type: Lair
Light Level: Dark
This room can only be accessed via the magical door. In this cold, dark chamber, a number of bodies are twisted and broken. There are no signs of what killed these people, but it looks like they were carrying loot when they died.
These bodies are Wights(3) waiting in ambush.
Loot!
- 3000cp
- 6000sp
- +1 Sword +1, Flaming
Connected Rooms
No doors - See B1-26
Flash Bang - B1-28
Room Type: Trap
Light Level: Dark
This room can only be accessed via the magical door. This tiny chamber is lined with the same dark stone found elsewhere in the dungeon and features a large clouded glass orb embedded into the stone. It has magical sigils spiraling around it.
Touching the glass orb activates it. When activated the orb eradiates a blinding light and loud cracking sound like lightning. Save Vs Spell or be blinded for 1d8 turns. Roll for an encounter.
Connected Rooms
No doors - See B1-26
Stone Coffin - B1-29
Room Type: Empty
Light Level: Dark
This room can only be accessed via the magical door or B1-30. This room is dark and empty, scratch marks can be seen on the stone walls. The walls in this room are thick enough that it would be very hard to hear someone scream from outside.
Connected Rooms
No doors - See B1-26
Teliportation Box - B1-30
Room Type: Trap
Light Level: Dark
This room can only be accessed via the magical door. This box chamber contains a large obvious teliportation sigil that activates when stepped on. This takes you to the Stone Coffin - B1-29.
Connected Rooms
No doors - See B1-26
Ghoul Chamber - B1-31
Room Type: Lair
Light Level: Dark
This room can only be accessed via the magical door. This room contains 3 very hungry ghouls who will rush out as soon as they see light. The chamber they reside in is full of bones from other ghouls that have been cannibalised; clearly, they have been trapped in here a while.
A large chest rests in the corner of the room, made of wood with a simple lock.
Loot!
- 1000cp
- 2000sp
- 10x 100gp gems
- 500gp ruby
- 600gp engraved platinum ring
- 1200gp necklace
- 1300gp Jewelled Bangle
- 1400gp
Connected Rooms
No doors - See B1-26
Acid Barrier - B1-32
Room Type: Trap
Light Level: Dark
This corridor is similar to the others on this floor. Halfway down the corridor is a thin stream of acid that falls from the ceiling and falls into grates in the floor. This stream of acid has a laminar flow, looking like green-tinted glass that covers the width of the hallway.
Getting covered in this acid will do 1d6 damage a round until removed.
Connected Rooms
Final Spell - B1-33
Room Type: Empty
Light Level: Dark
This large open chamber lacks any furniture or decoration, just dark stone walls and floors. There are, however, a few dead adventurers scattered around the room.
These dead adventurers look like they have acid burns from the trap to the west (B1-32), but that did not kill them. They were killed with weapons, and the wizard still has a spear through him.
The wizard is dead with his hand against the south door, looking like he was casting a spell when he died.
The south door has Wizard Lock on it.
Connected Rooms
North East - Wooden door - B1-34
South - Wooden door with Wizard Lock - B1-36
West - Wooden door - B1-32
Blind Snake Statue - B1-34
Room Type: Trap
Light Level: Dark
This small room contains a large statue of a snake poised to strike, but it is missing its eyes. The floor is covered with broken, damaged darts that appear to be made of bone. There is also a dead body covered with darts against the west wall.
Snake Statue
This statue will shoot darts at any noise it hears. Dart damage is 1d4. If you are really mean, you can make people roll saves to avoid making noise when hit!
Connected Rooms
North - Decorated wooden door (religious) - B1-35
West - Wooden door - B1-33

Crypt Stairs Down - B1-35
Room Type: Trap
Light Level: Dark
This room has dart arched ceilings and intricately decorated walls in the style of a fine crypt. There are little alcoves in the walls containing urns, unlit candles and stone plaques with engraved names. The room's scale seems off; a crypt would not be this small.
4 stone sarcophagi are crammed around the stairs, built into the floor. One of the Sarcofagi even acts as the first step down. Stepping on these sarcophagi is incredibly disrespectful and will wake up Poltergeists. They will then start throwing things at the invaders.
Connected Rooms
Down - Stone stairs - B2-35
East - Decorated wooden door (religious) - B1-17
South - Decorated wooden door (religious) - B1-34
Wizard Locked Room - B1-36
Room Type: Special
Light Level: Dark
This room is used to store old furniture from elsewhere in the dungeon, all neatly covered with fabric to keep them dust-free.
A Homunculus called Reggie has been locked in here to keep him safe from the battle outside. His master is now dead, and he is now very bored, having been locked in here for weeks.
Connected Rooms
North - Wooden Door (wizard lock) - B1-33
Shooting Ally - B1-37
Room Type: Trap
Light Level: Dark
This room has catastrophically collapsed into the floor below; all that remains are two thin sections of floor and a 20ft drop into dark water.
The north wall contains a range of nasty-looking torture equipment perfect for the 1d6 poltergeists to throw at anyone crossing the central walkway.
Connected Rooms
Down - Missing floor - B2-1
North - Wooden door with small hole - B1-39
South - Wooden door - B1-38
West - Wooden door - Corridor
Taxidermy Machine - B1-38
Room Type: Special
Light Level: Dark
This room is large and empty, clearly used for storage, but only one thing remains. Against the south wall is a device covered in cloth to keep dust off, which was clearly abandoned here a long time ago.
Taxidermy Device
This machine stands 7ft tall and resembles a large insect exoskeleton looming over a stone platform. Many arms reach around at different angles, each with large needles at the ends. Any creature placed on the platform will be taxidermied, living or dead, just a horrible way to go. This process takes 1d4 turns.
Connected Rooms
North - Wooden door - Corridor
Lord Breakfast's Lair - B1-39
Room Type: Lair
Light Level: Dark
This room has collapsed and split in two; water trickles from the eastern cracked walls, hinting at erosion as the culprit. Connecting the two sections of this room is a very tight crawl space; only smaller individuals will be able to squeeze through.
On the other side of the crawlspace is Lord Breakfast's lair and horde. A comfortable area has been made from layered pages of books, interwoven with coins and a few gems.
- Displacer Cloak
- 1,000sp
- 400gp
- 100gp gem
- 500gp gem
Connected Rooms
South - Wooden door with small hole - Corridor
Last Stand - B1-40
Room Type: Empty
Light Level: Dark
This chamber is the site of a bloody fight; all that remains are scattered bones and long dried bloodstains. One of the bodies looks like it crawled over to a corner before dying, having carved a message into the stone before succumbing to its wounds.
“They live on 4”
Connected Rooms
South - Wooden door - Corridor
West - Blocked metal door - B1-41
Blocked Storage - B1-41
Room Type: Empty
Light Level: Dark
This old storage room has been blocked off to provide a buffer for the Mountain Men. They blocked the southeast door with a locked but empty safe, then melted the north metal door shut. They took anything they found useful, but missed a couple of treasures.
Loot!
- Old manuscript about the gods, gold-embossed cover - 400gp
- Rolled tapestry showing an event in Grimrest before the tower was built 220gp
Connected Rooms
North - Melted metal door - B1-24
East - Wooden door with a safe in front of it - B1-40
Cults Hidden Highway - B1-42
Room Type: Lair
Light Level: Dim Light
Strangely Identical to the floors above and below. Large stone blocks make up the walls and floors; the only standout feature is an enclosed spiral staircase built into the corner of the room. This staircase is the quickest way to travel between Floor 4 and Basement 2, but is always heavily guarded by The Children of the Tower.
Guards and Procedure
Each floor of this Hidden Highway has 1d6 cultists who can often be found around a table playing cards or relaxing. They don't usually get visitors. If anyone outside the cult comes in through the secret doors, they will be killed. This secret passageway can't be discovered, as it leads directly to the cult's home. Once combat starts, they have a procedure:
- Engage the invaders
- Shout up and down the stairs to alert the floors above and below.
- Guards on each floor then shout up and down again.
- Every floor will then go up to the 4th floor, fighting any invaders along the way.
If the invaders survive and learn of this secret passage, the cult will utilise its Magic Users to lock the highway entrances with Wizard Lock (Level 3). They then use a secret knock to gain entrance through these doors.
Connected Rooms
Up - Spiral staircase - 1-5
Down - Spiral staircase - B2-4
West - Back of secret door - Corridor
Blocked Stairs Up - B1-43
Room Type: Empty
Light Level: Dark
The stairs up here are blocked. The cold, dark room offers little else than the way up (1-22). A heavy metal grate has been laid over the opening to the floor above; it can be seen through and lifted if you are strong enough. Mechanics to move the grate are located on the floor above.
Connected Rooms
Up - Staircase (Blocked) - 1-22
West - Wooden door - Corridor