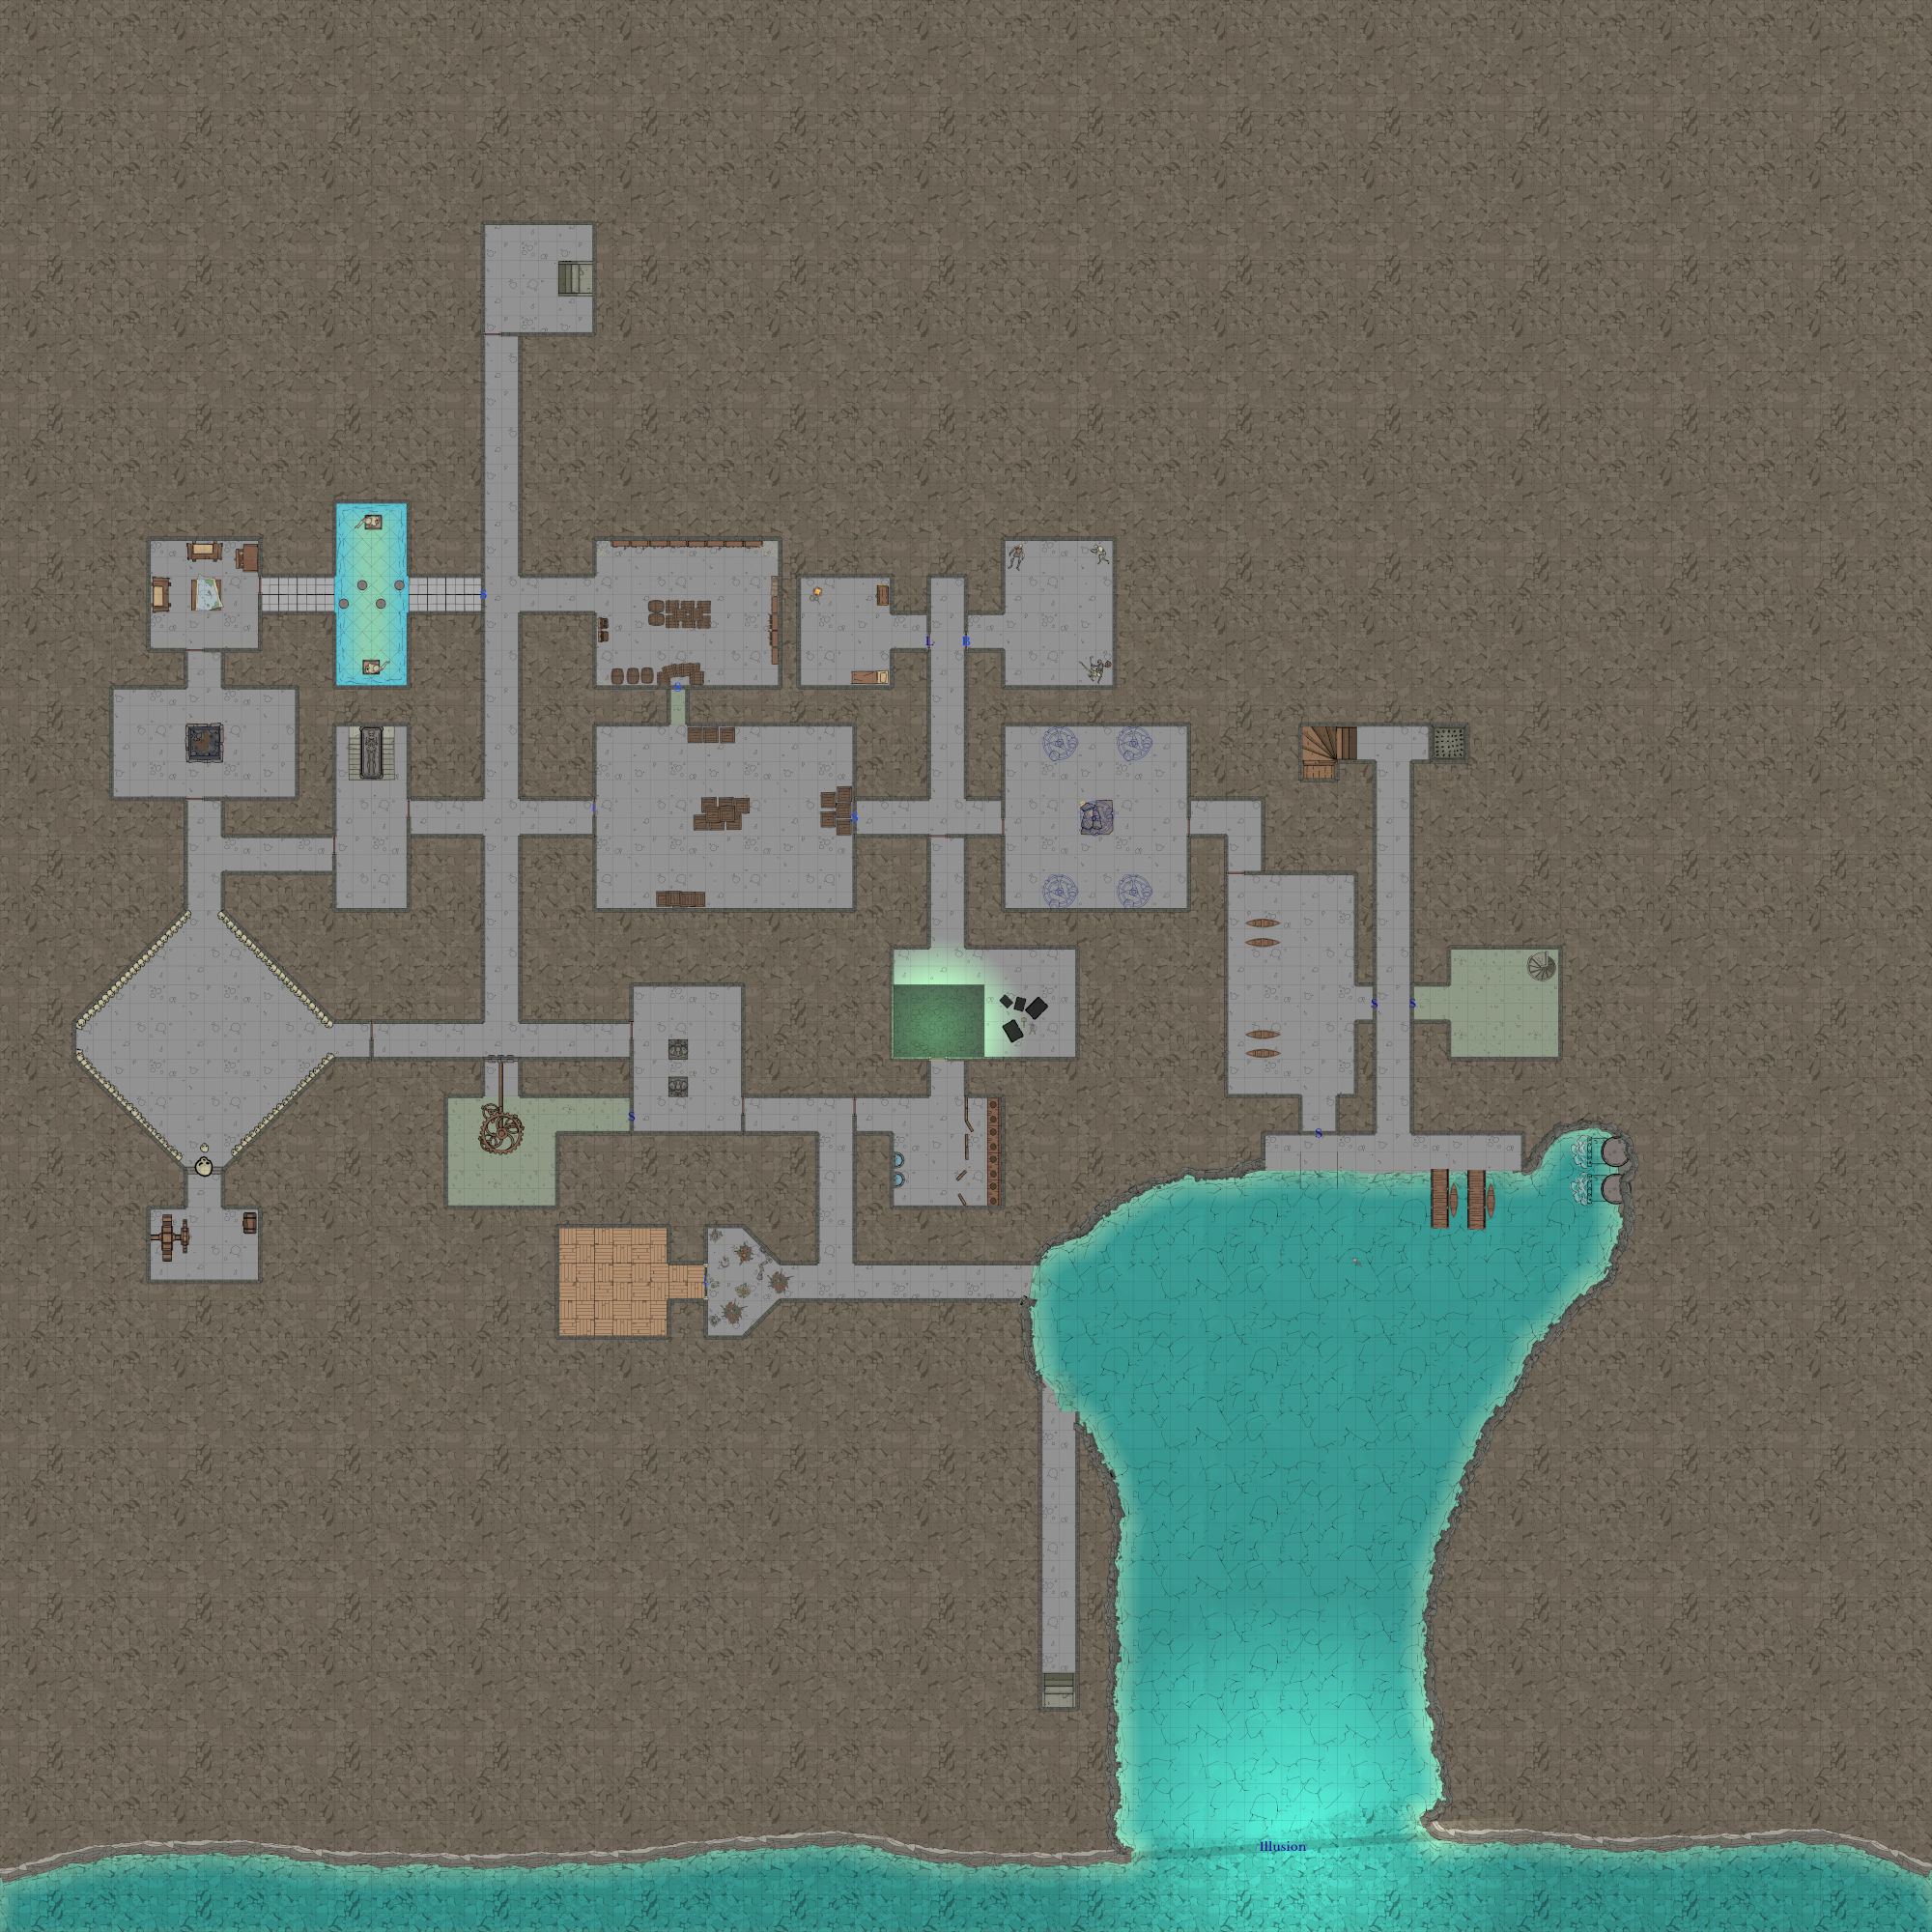
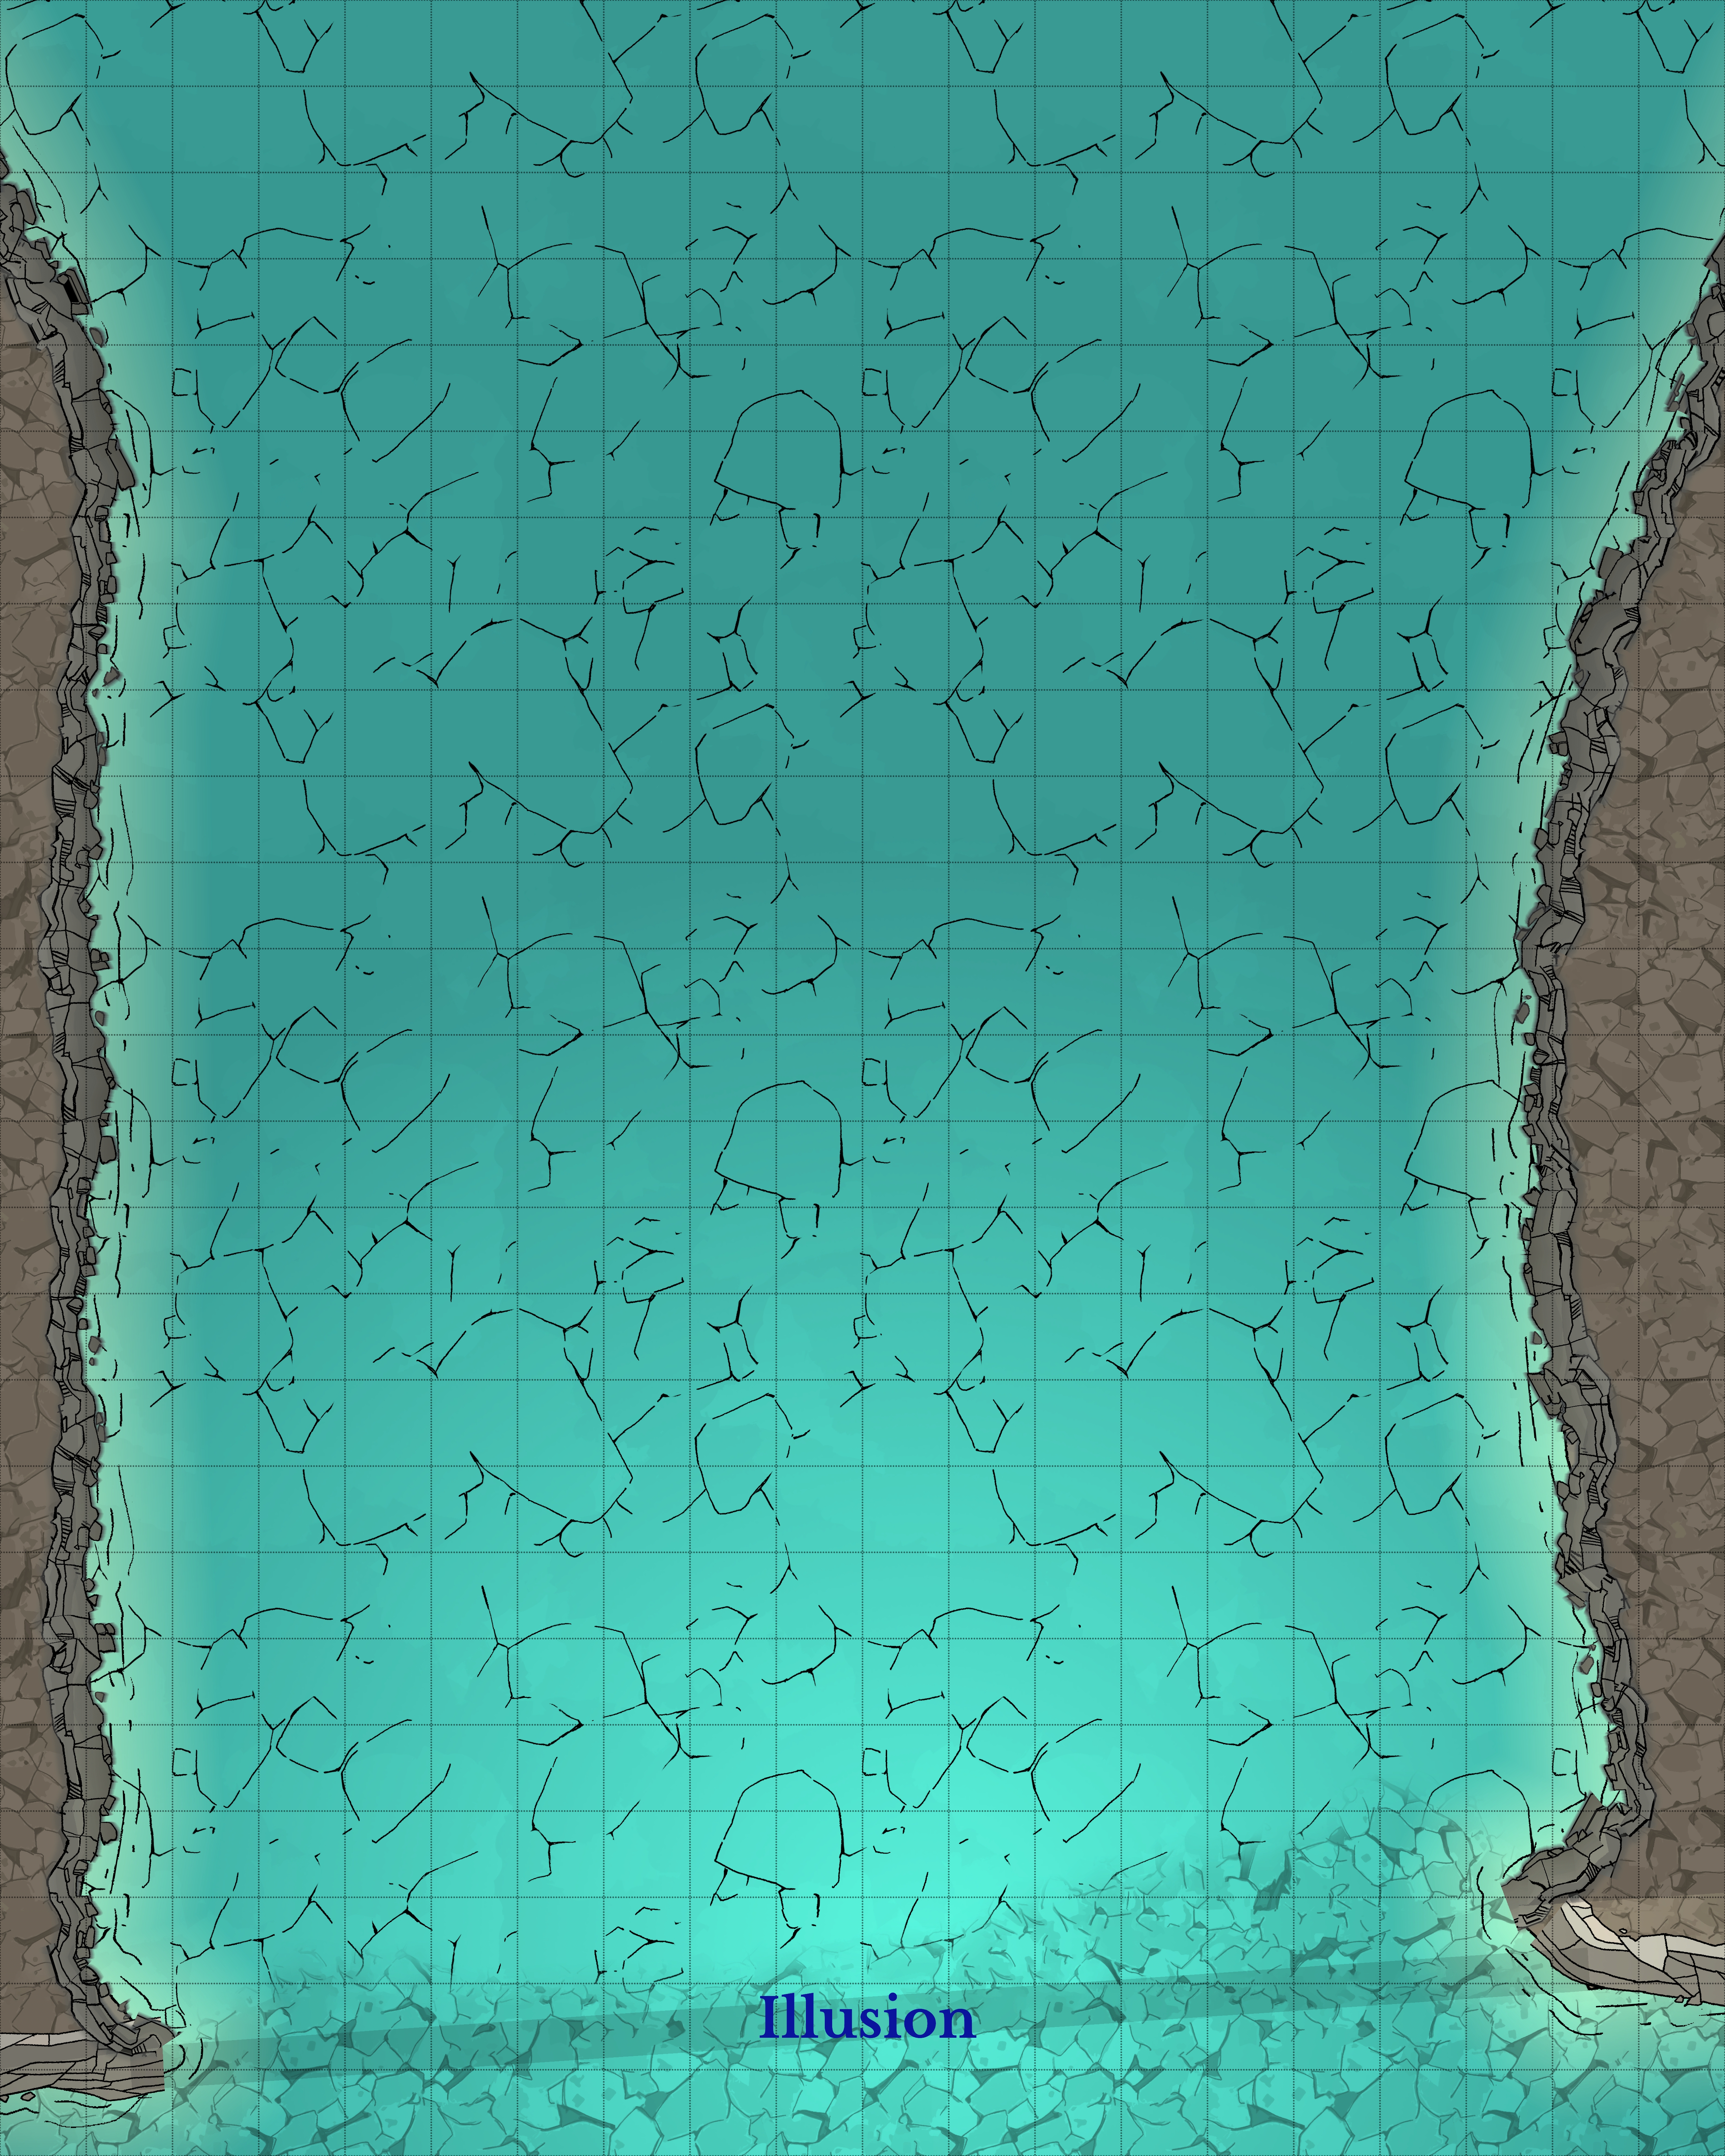
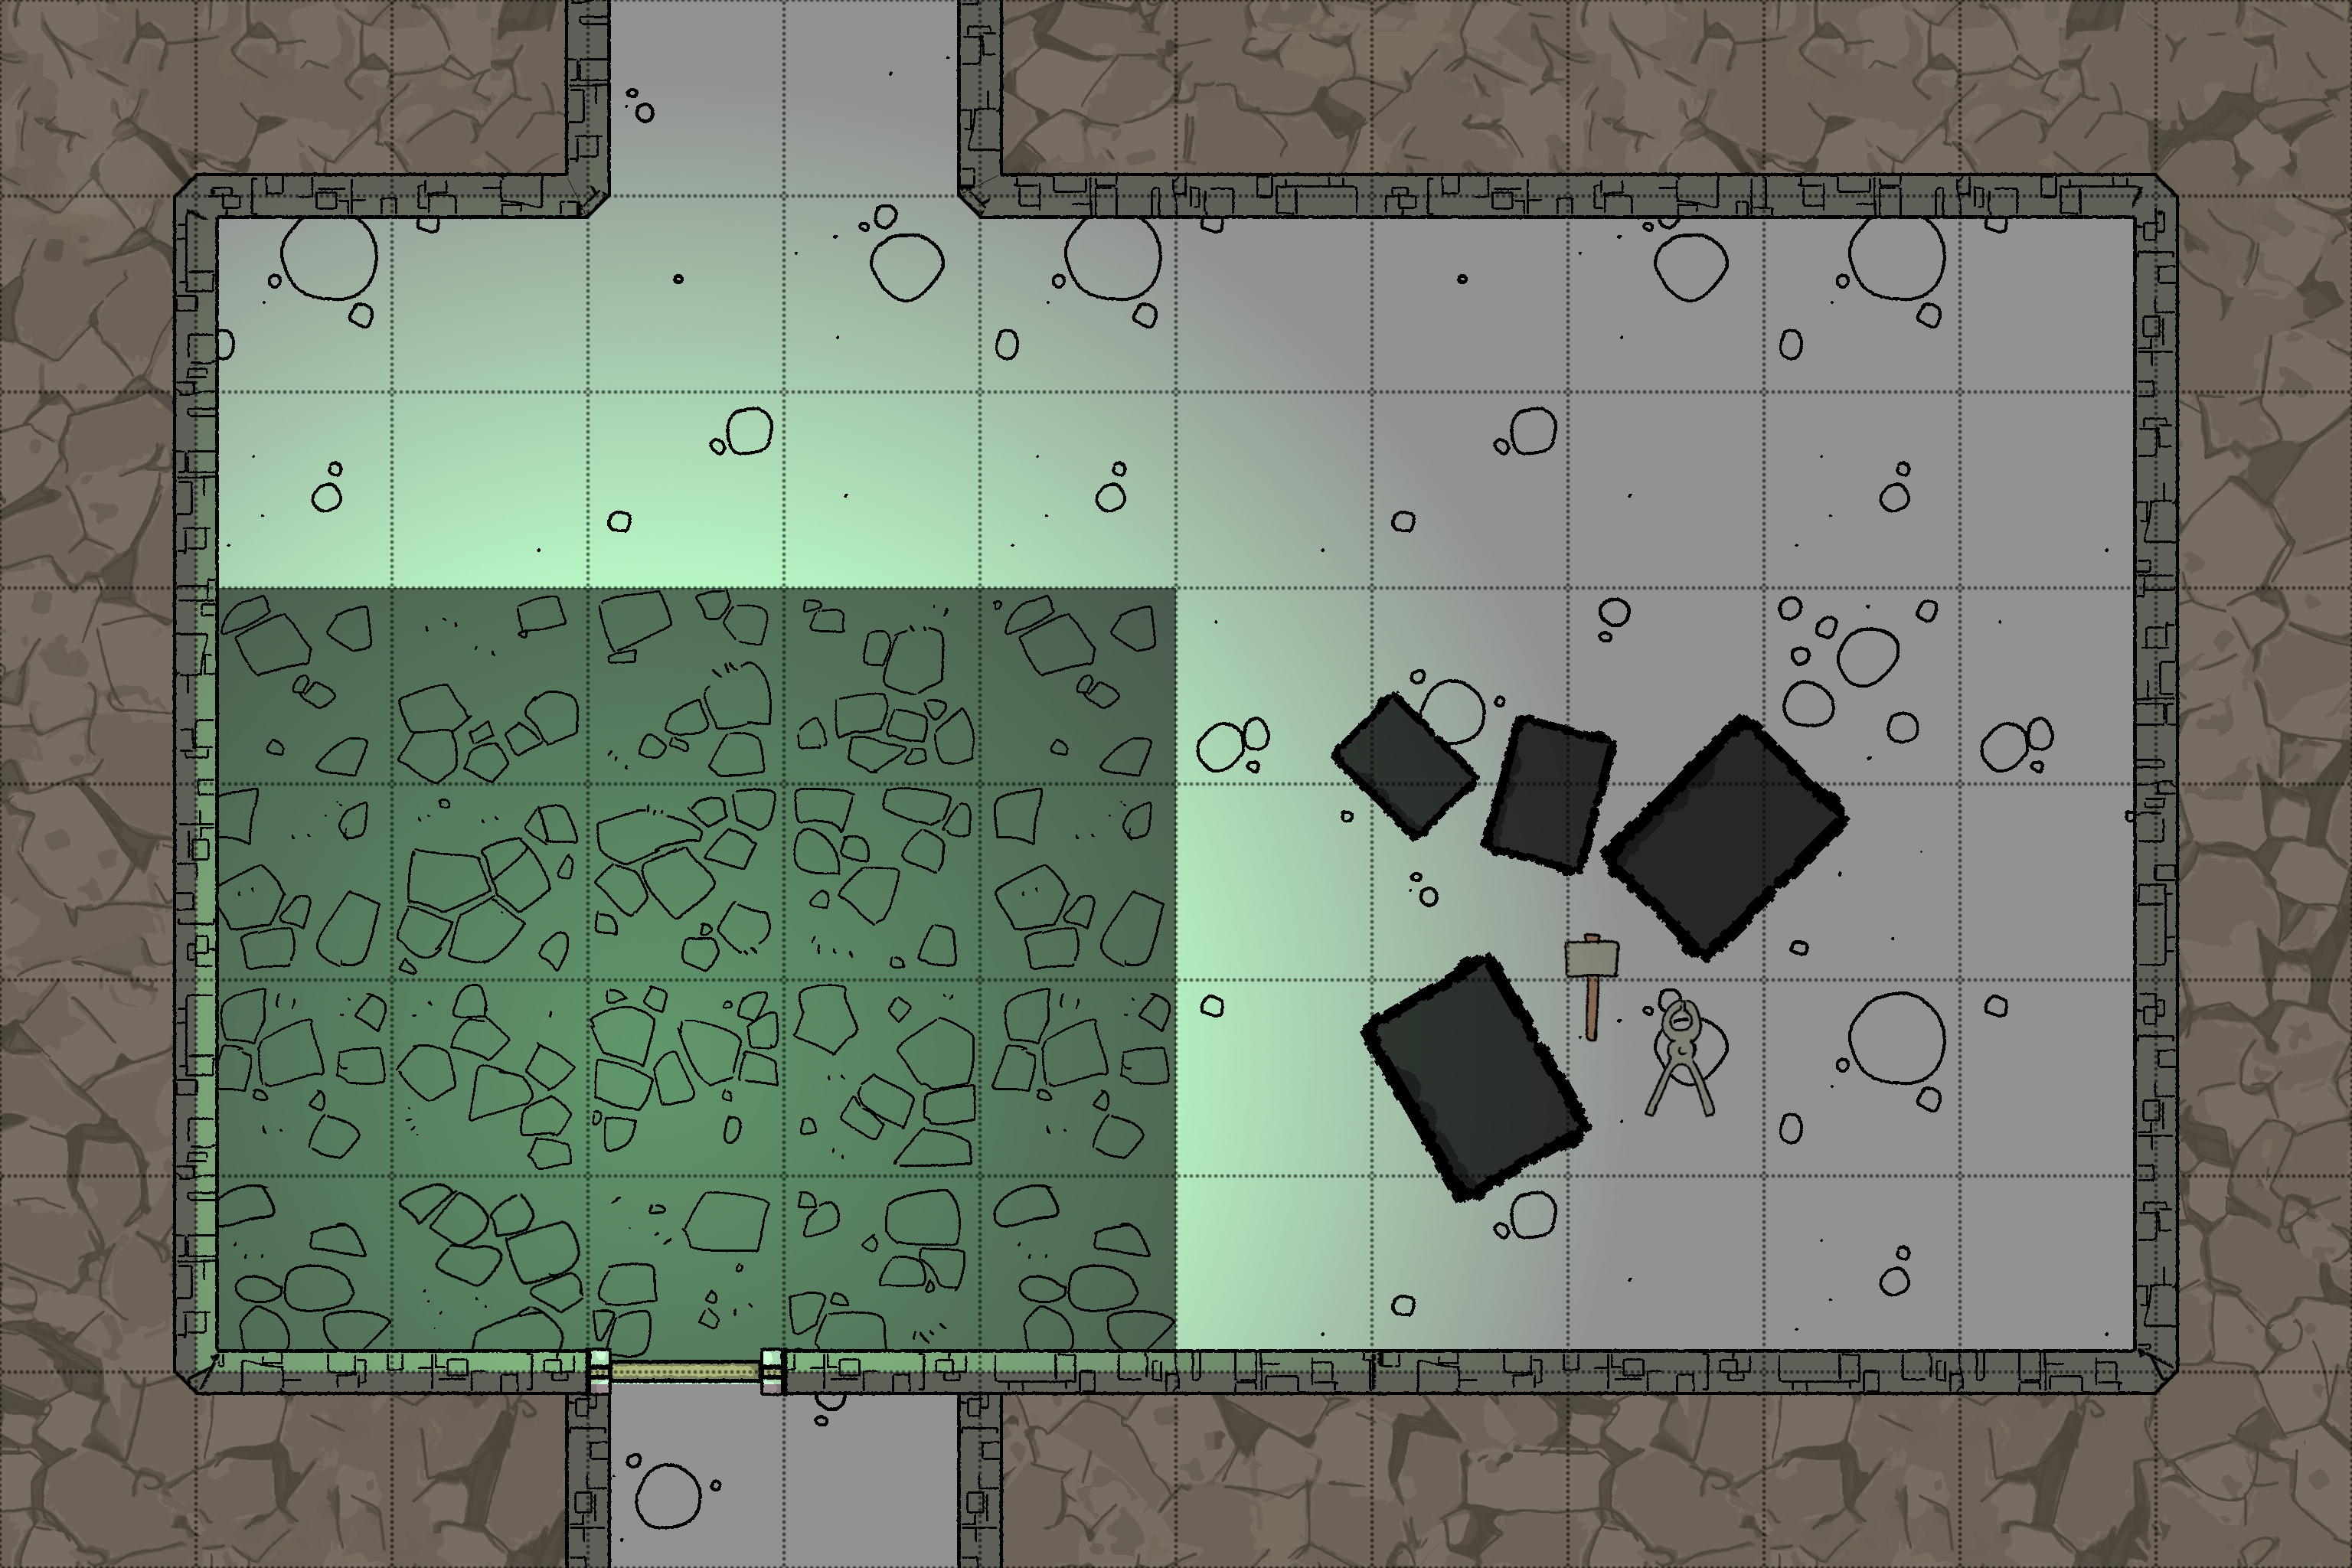
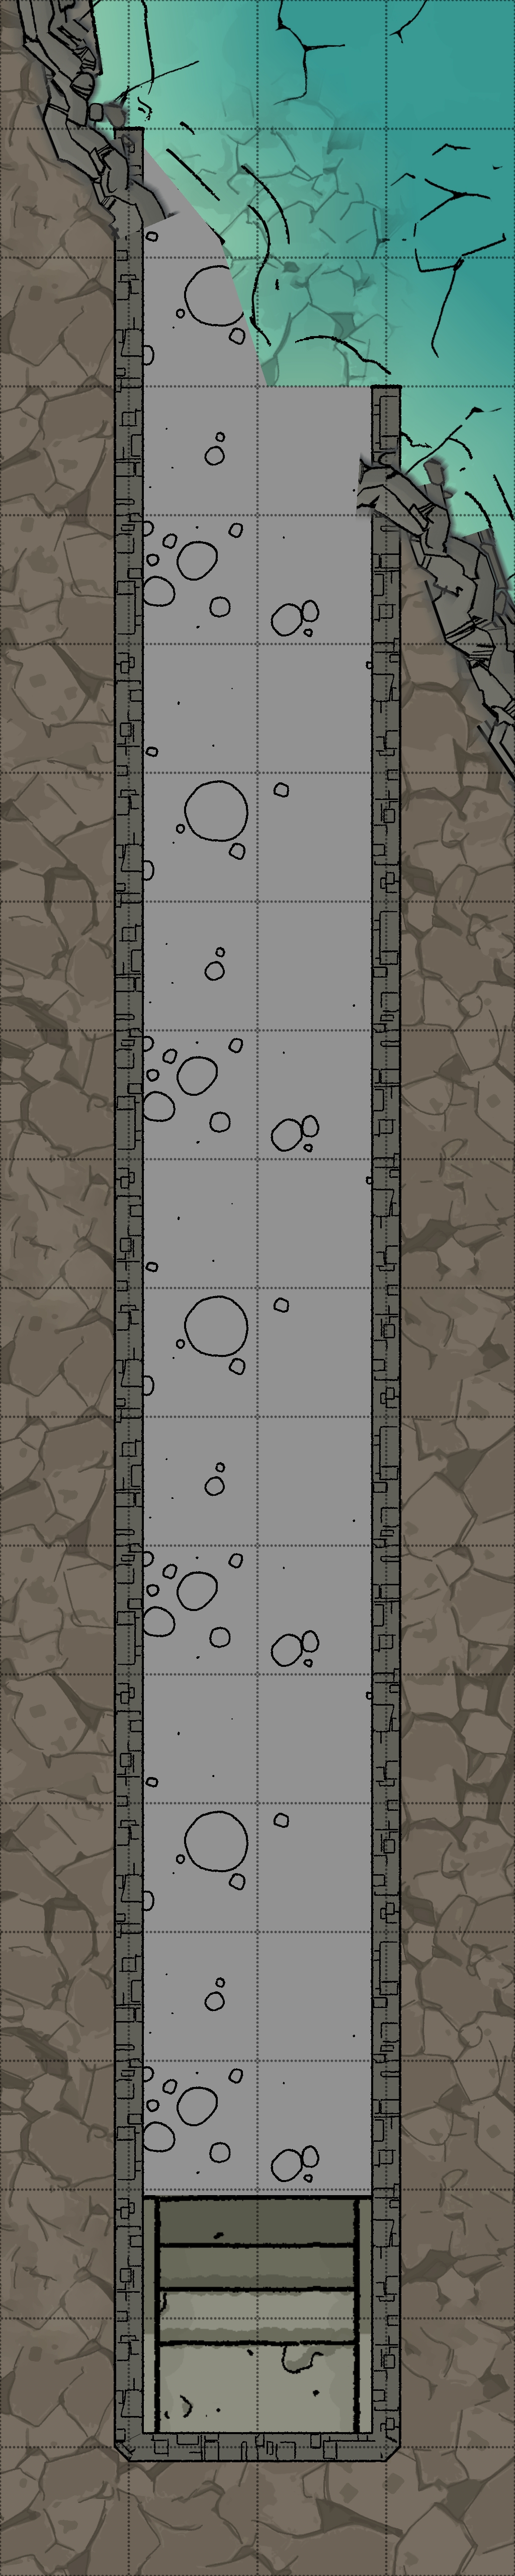
River Entrance - B2-1
Room Type: Empty
Light Level: Sunlight
This body of water is deep but has little to no current compared to the river outside. A few swells form here and there but quickly dissipate; the only real disturbance is closer to the pipes (B2-2).
The illusory barrier allows light into this chamber and is transparent from the inside. The cave ceiling, however, receives little light, hiding the hole through which undead fall from above. (Marked with a zombie floating in the water on the map)
This cave is home to many crocodiles that live off the dead and unlucky that fall from the ceiling. They wait patiently for something to splash in the water; they won't bother boats, but don't fall in.
Connected Rooms
North - Open water - B2-3
South - Outside the Tower - River
South West - Rocky coast - B2-26
West - Rocky coast - B2-13
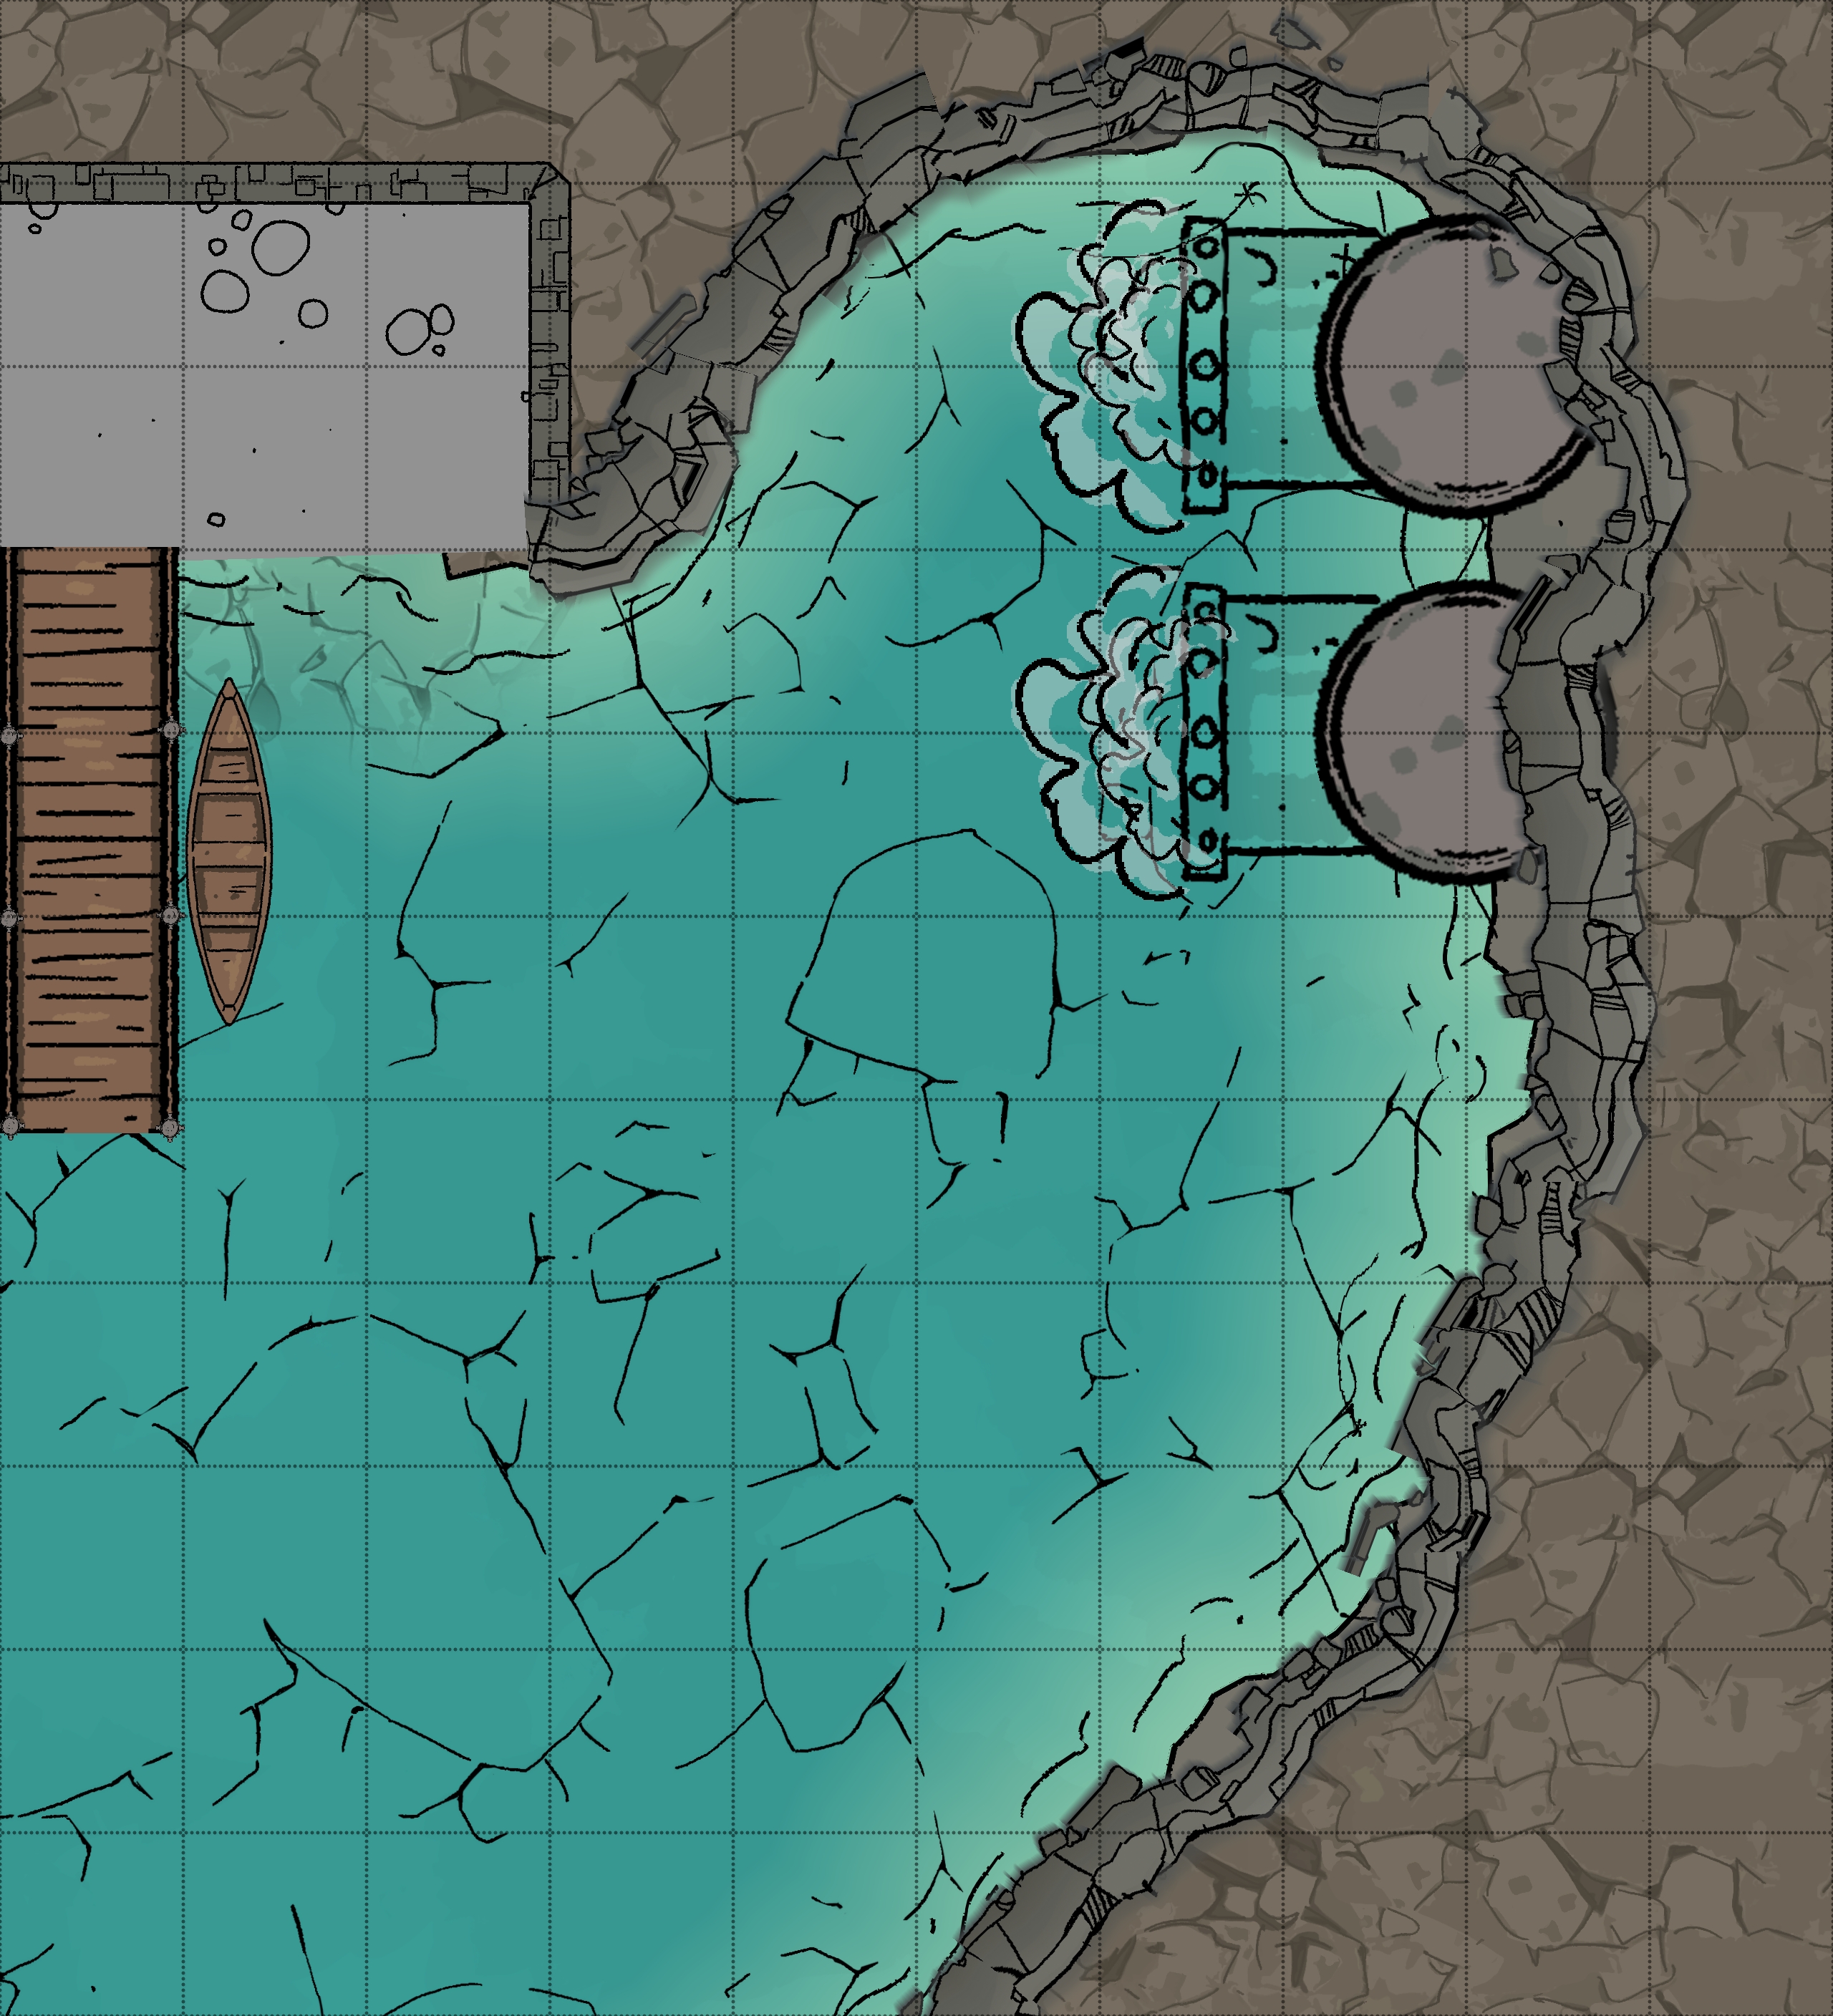
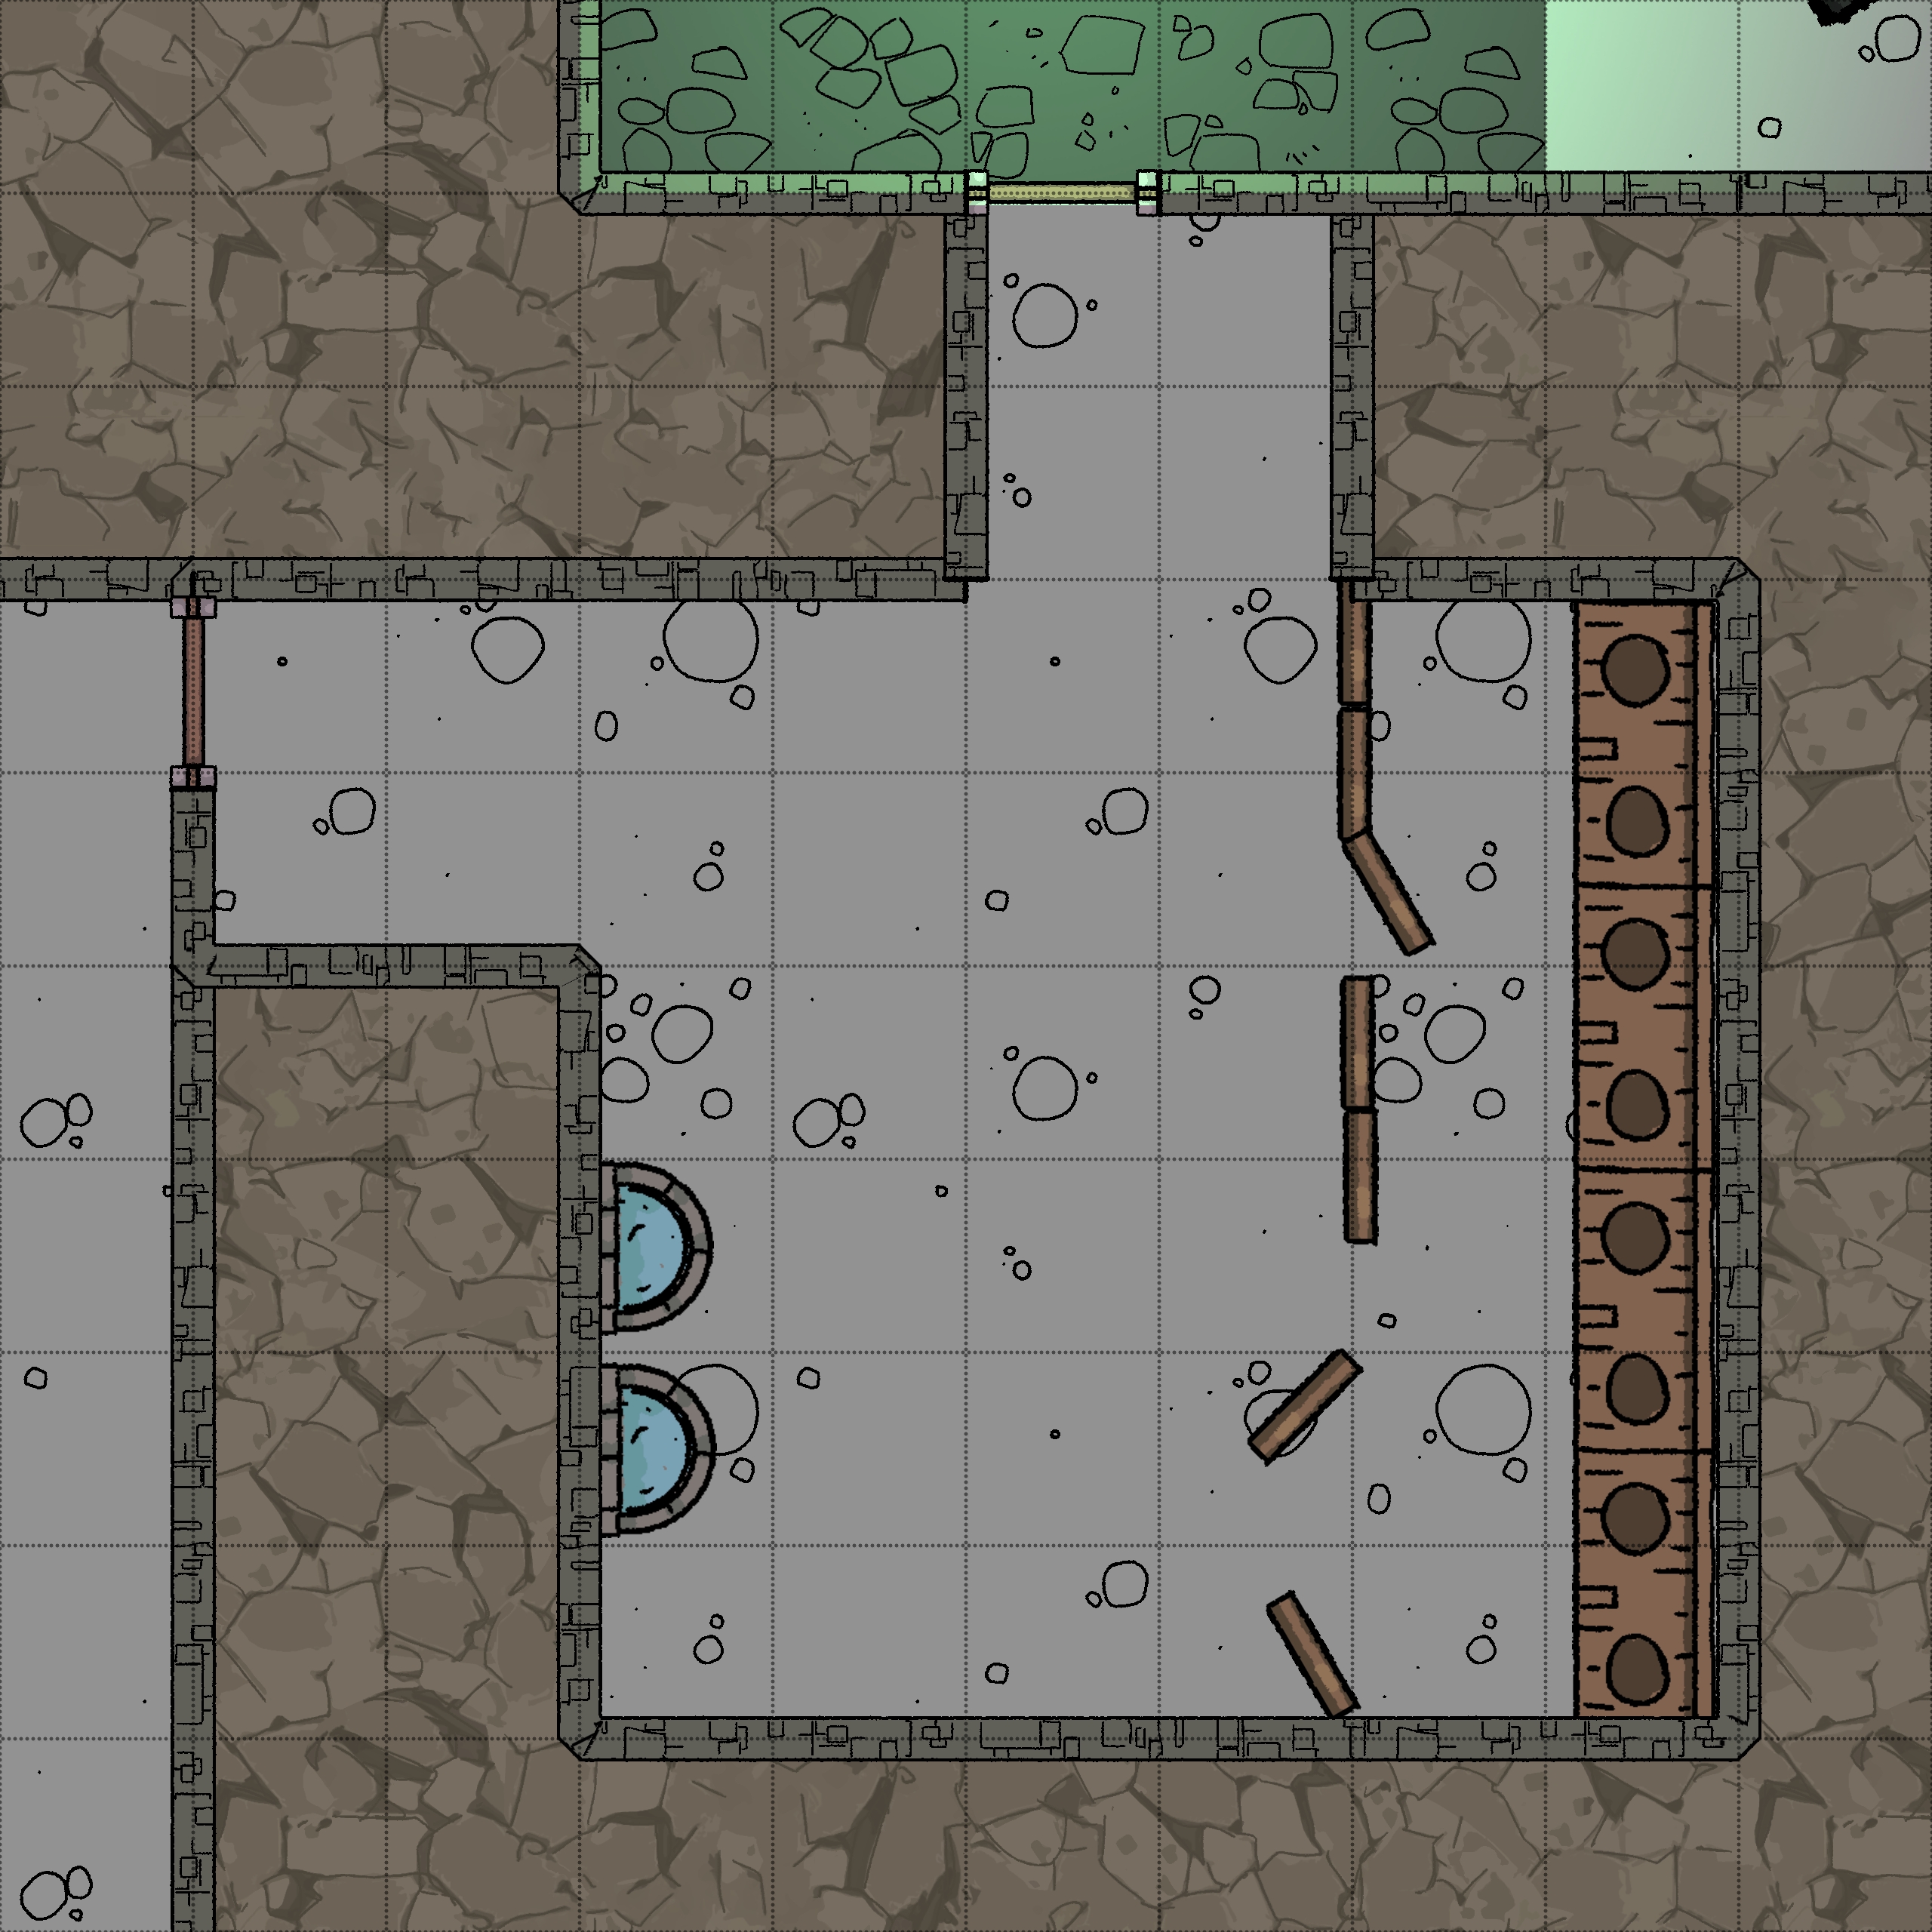
Water Intake - B2-2
Room Type: Special
Light Level: Dim Light
Out of the craggy cave wall come two huge pipes, 4 feet in diameter, made of corroding dark metal. Both these pipes are pulling water from the river up to the 14th floor. These make a lot of noise and generate a lot of current; if you get too close, it might be hard to swim away.
Both pipes look identical, but they have one key difference. The south pipe, unlike the north pipe, is blocked by a large filter on 2-24. Impacting this filter will deal 4d6 damage and potentially cause them to get stuck due to the high pressure.
Connected Rooms
Up - Water pipe - 14-1
South - Open water - B2-1
West - River bank - B2-3
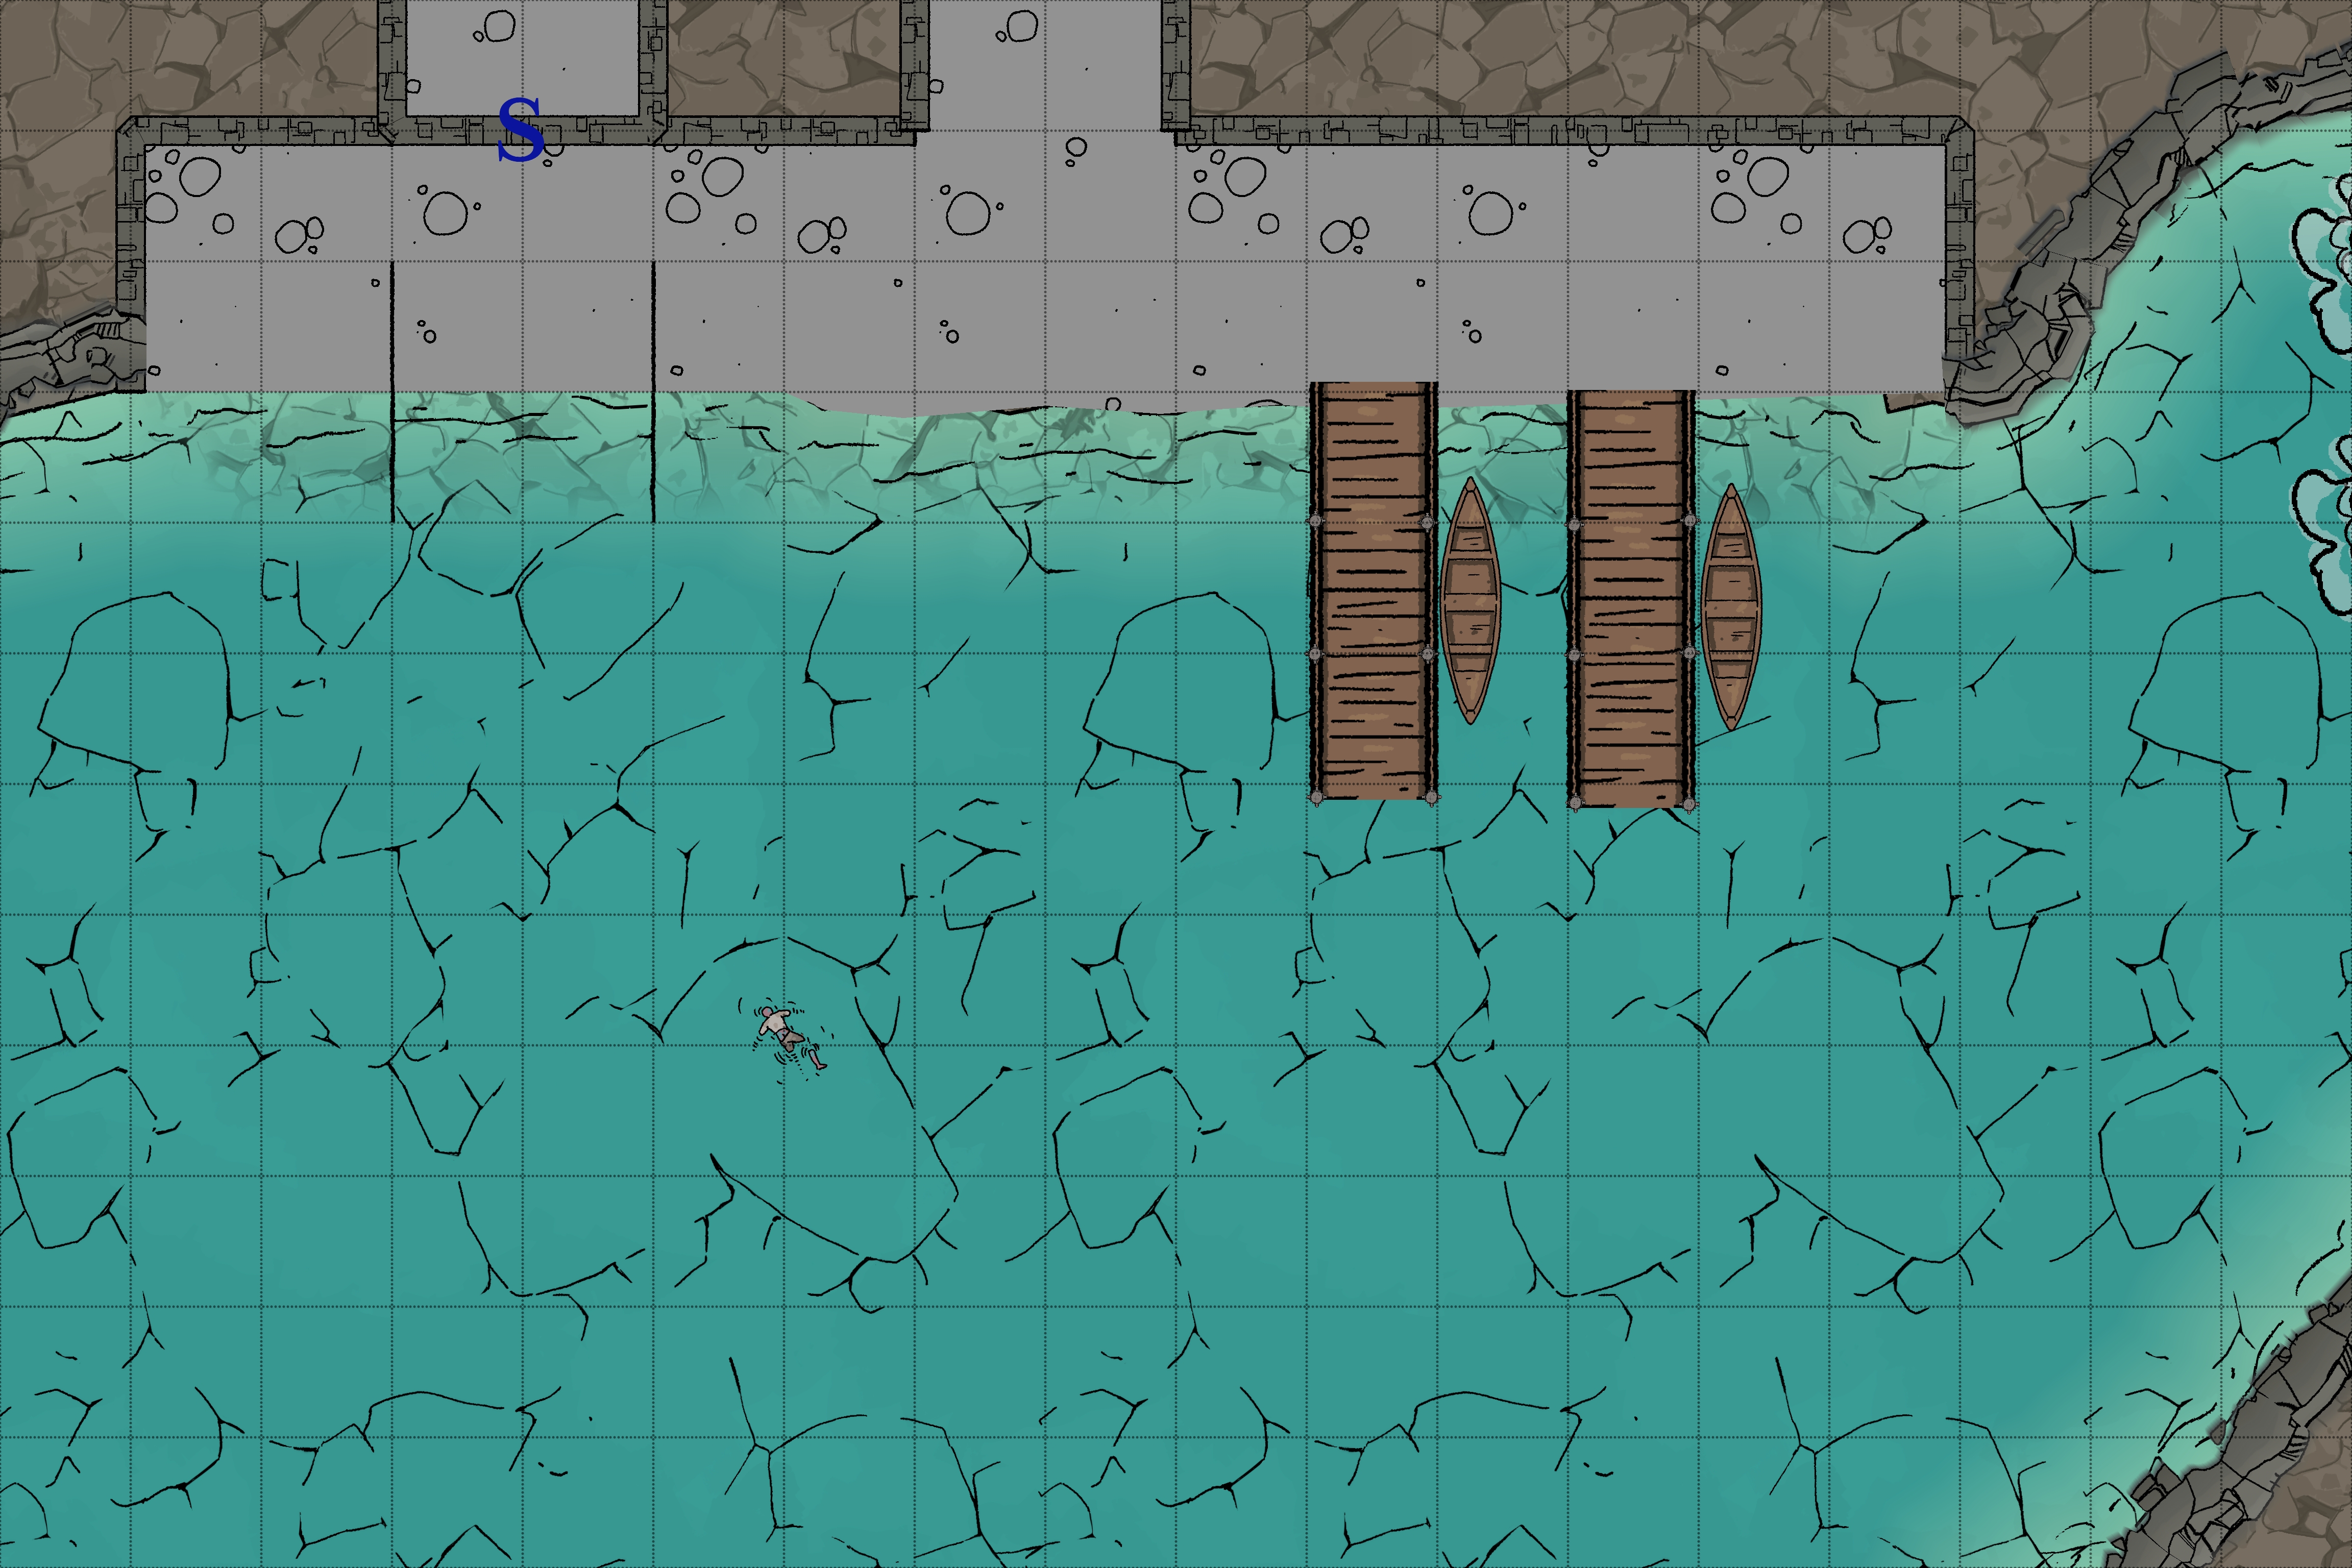
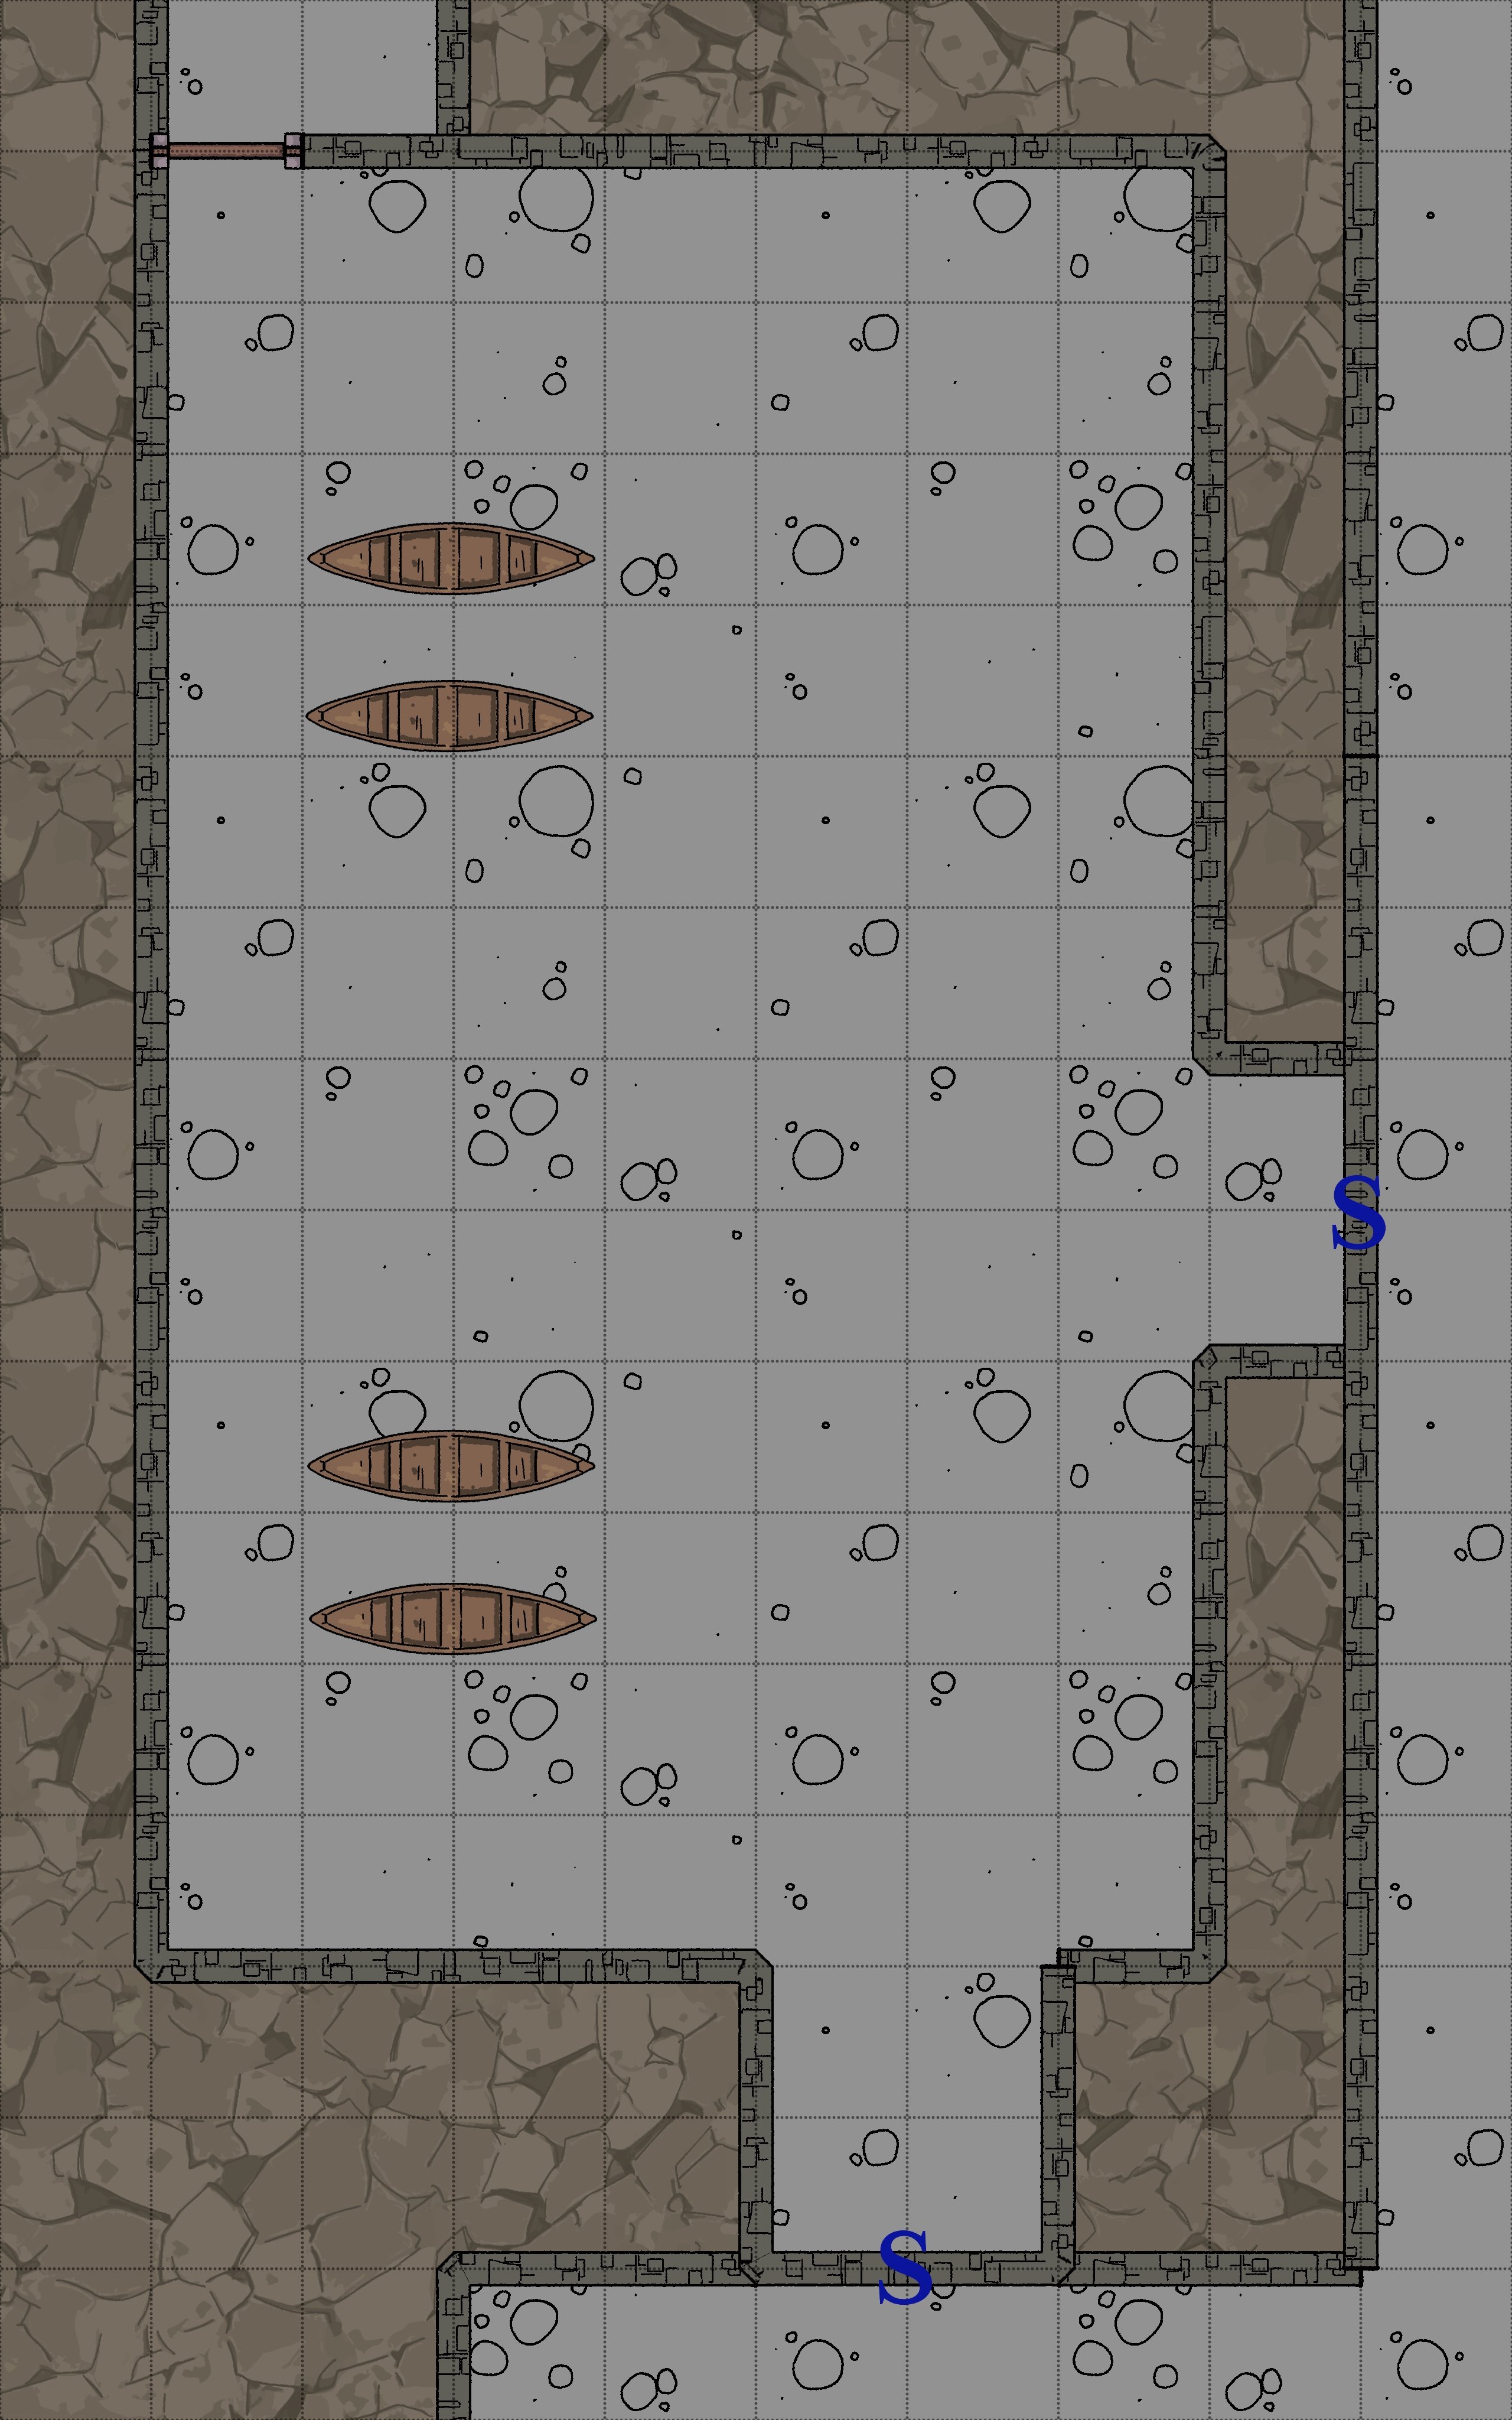
Cultist Dock - B2-3
Room Type: Special
Light Level: Dim Light
This simple wooden dock is used for launching and mooring small wooden row boats. Two wooden docks extend into the water; they look well-maintained, with fresh planks.
Always 1d4-1 boats here. Each boat can have 4 crew members.
This dock is controlled by the Children of the Tower, with a 2-6 chance that they will be guarding.
There is a small launch for boats with scratch marks leading up to a stone wall. This secret passage is a hidden garage-style door into B2-5; it looks like a stone wall, but can be pulled from the bottom up.
Connected Rooms
North East - Water pipe - 14-1
East - Secret door - B2-4
South - Open water - B2-1
West - Secret door - B2-5
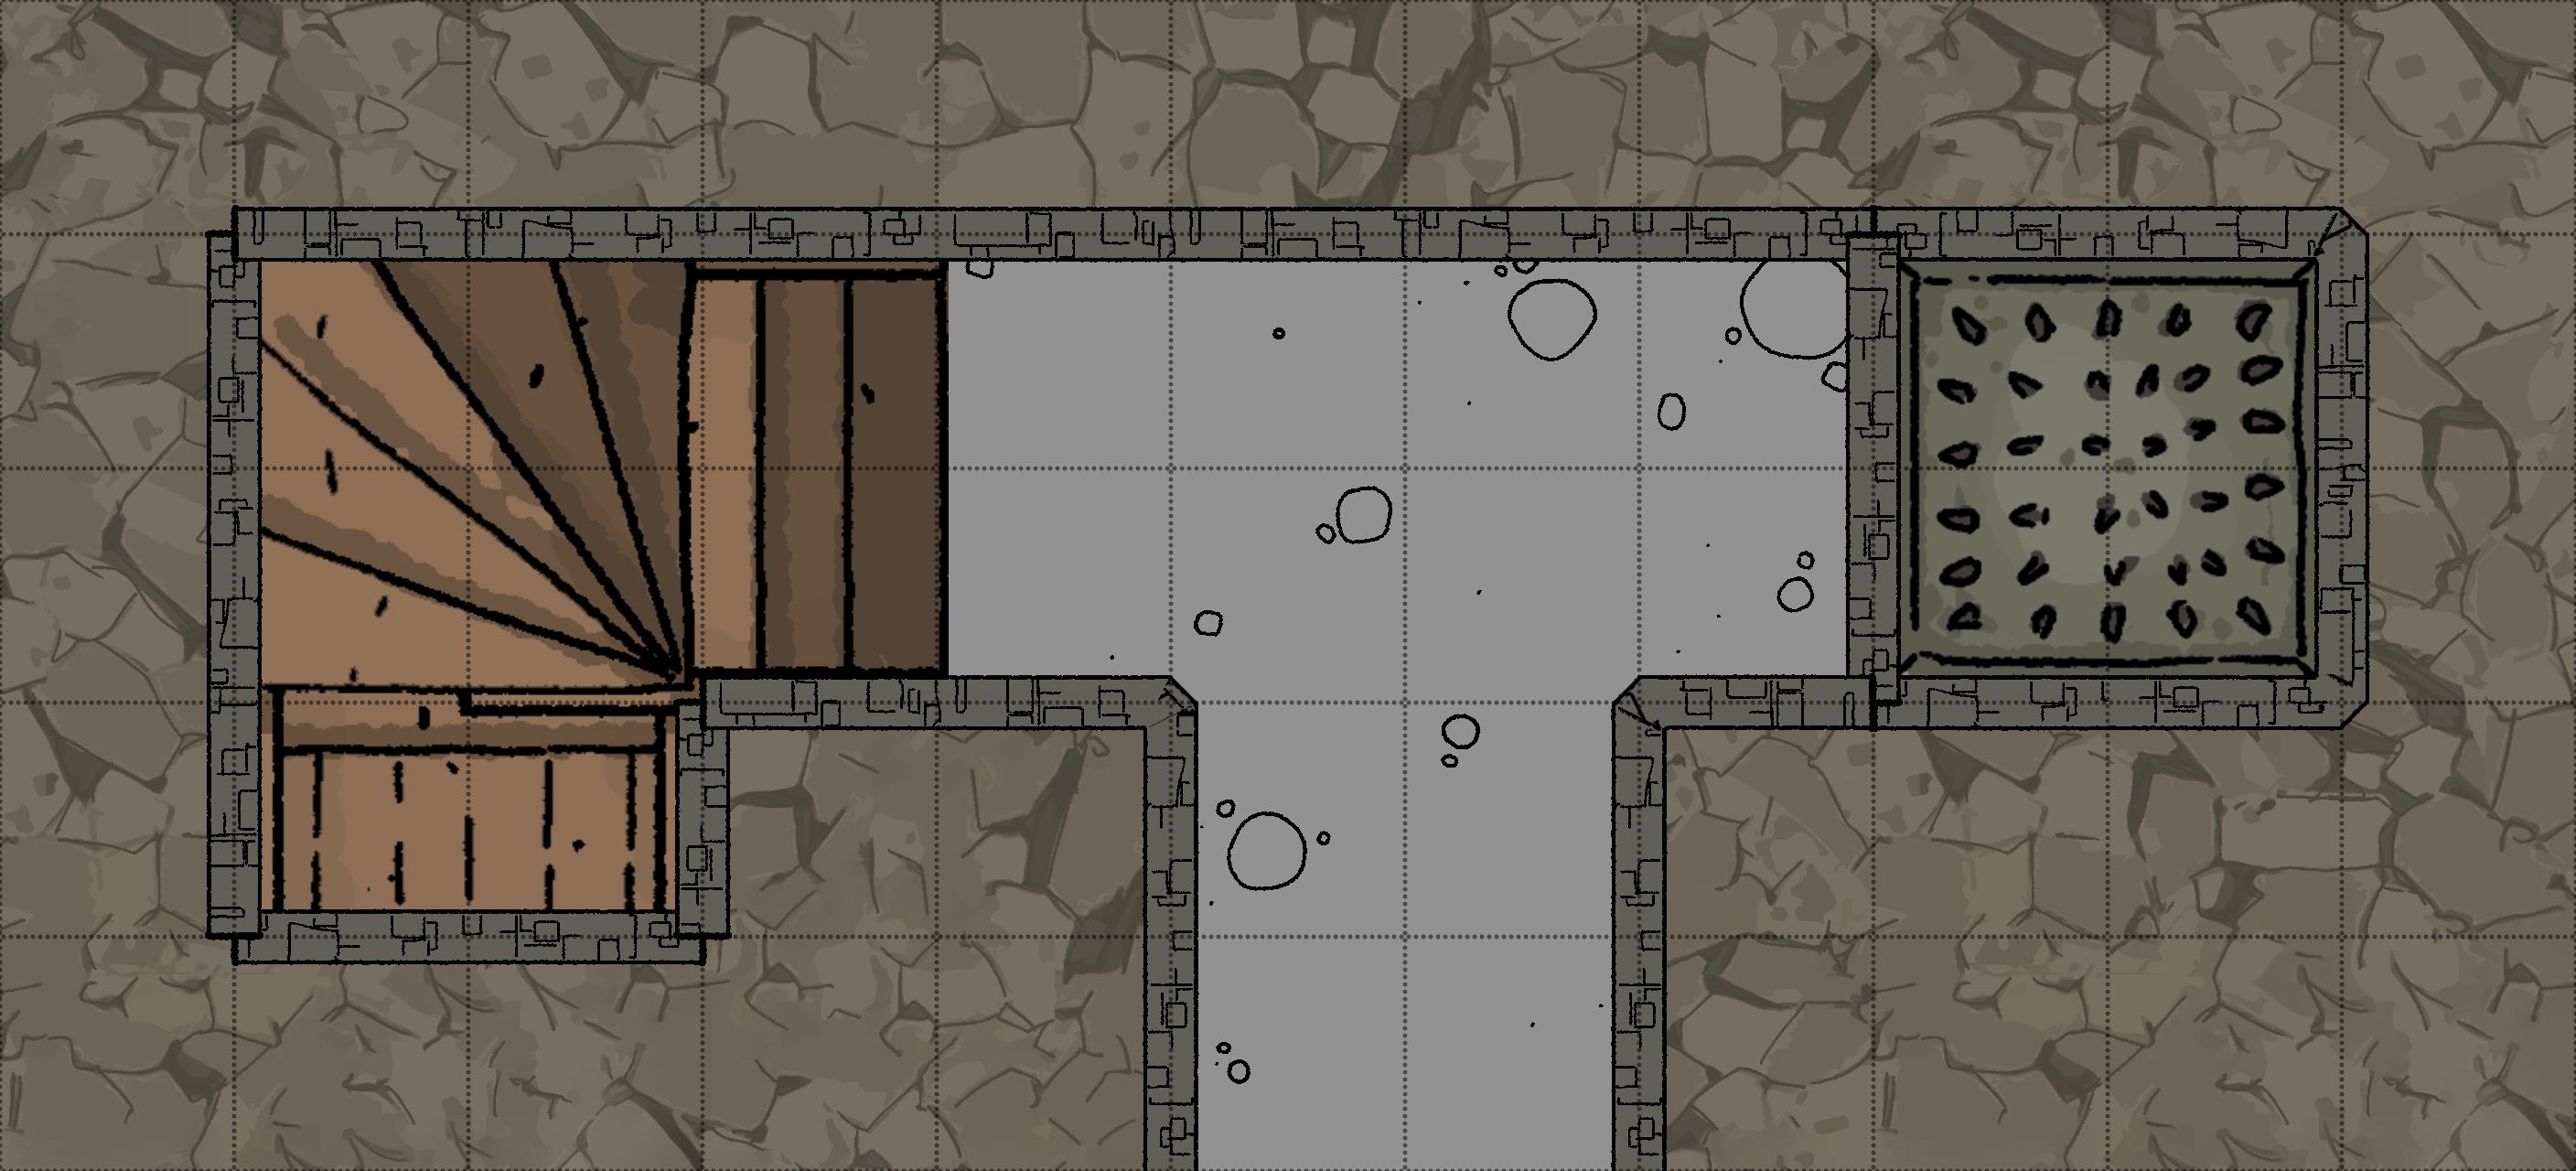
Cultist Hidden Highway Bottom - B2-4
Room Type: Lair
Light Level: Dim Light
Strangely Identical to the floors above. Large stone blocks make up the walls and floors; the only standout feature is an enclosed spiral staircase built into the corner of the room. This staircase is the quickest way to travel between this floor and Floor 4, but is always heavily guarded by Children of the Tower.
Guards and Procedure
Each floor of this Hidden Highway has 1d6 cultists who can often be found around a table playing cards or relaxing. They don't usually get visitors. If anyone outside the cult comes in through the secret doors, they will be killed. This secret passageway can't be discovered, as it leads directly to the cult's home. Once combat starts, they have a procedure:
- Engage the invaders
- Shout up and down the stairs to alert the floors above and below.
- Guards on each floor then shout up and down again.
- Every floor will then go up to the 4th floor, fighting any invaders along the way.
If the invaders survive and learn of this secret passage, the cult will utilise its Magic Users to lock the highway entrances with Wizard Lock (Level 3). They then use a secret knock to gain entrance through these doors.
Connected Rooms
Up - Spiral staircase - B1-42
West - Back of secret door - Corridor
Boat Workshop - B2-5
Room Type: Special
Light Level: Dark/Light
This woodshop is used to create and maintain small boats. All the tools and raw materials needed are stored here, including fresh planks. This workshop is very clean and clearly still in use.
This workshop is controlled by the Children of the Tower, with a 2-6 chance that they will be guarding. If they are there, the room will be well-lit by the lamps they bring.
Connected Rooms
North - Metal door - B2-20
East - Back of secret door - Corridor
South - Back of secret door - B2-3
Tower Secret Entrance - B2-6
Room Type: Trap
Light Level: Dark
At the end of this hallway is a sign with an arrow pointing to the left. The sign, made of wood and affixed to the wall, reads “Secret Entrance”.
The stone stairs to the left are built into a corner and go out of sight. The stairs don't go anywhere. At the corner, there is a pressure plate that turns the steps into a ramp. Falling people will roll against the opposite wall that acts as a cat flap into a hidden room. This flap only opens into the pit, making it very hard to open from the inside.
Behind the “cat flap” wall is a 10ft-deep pit with spikes; 3d6 damage.
Connected Rooms
South - Open Corridor - B2-3
Forgotten Vault - B2-7
Room Type: Special
Light Level: Dark
This large vault has not been opened since it was sealed 1000s of years ago. The air is stale, and the walls are lined with tough metal. Rows of racks holding picture frames and other artwork fill this room.
Stored here is artwork from the lord of the tower, Alistair Mortayne, before he became a lich. The memories of his former family are too painful, so he has brought all his artwork from his past life here.
There are a few large paintings of the entire family with their names written on the back of the frame. Notable information:
Wife: Lady Elara Mortayne
Eldest Son: Darius Mortayne
There was a bit of an age gap between Darius and the other children, and there are many portraits of him and his parents.
They become less common as he becomes a young adult. Often seen in armour or with a sword.
Second Son: Alistair Mortayne 2nd
There are only portraits of him as a child. Strangely, he is in later portraits of the entire family, but always the same age. Often portrayed holding a wand in these images.
Youngest Son: Lucian Mortayne
Always in joint portraits with Seraphine Mortayne, clearly twins.
Eldest Daughter: Seraphine Mortayne
Always in joint portraits with Lucian Mortayne, the other twin!
Youngest Daughter: Isolde Mortayne
There is only one portrait of Isolde as a young girl in a small personal room filled with taxidermied animals.
There are no artworks of Isolde and her mother, unlike all the other children.
Some other artworks are worth gold, very large and awkward to carry in their frames (frames are 10% of the value). Portraits of the family are done well, but not as valuable as portraits of individuals.
- Painting from the distant mountains of Grimrest, the foundations of a tower can be seen. Signed by Elara Esti - 200gp
- Painting of an extravagant throne room and an old man on his knees in torn wizard robes in front of a blood-stained Alistair Mortayne. Labelled Judgment. - 110gp
Connected Rooms
East - Back of vault door - B2-13

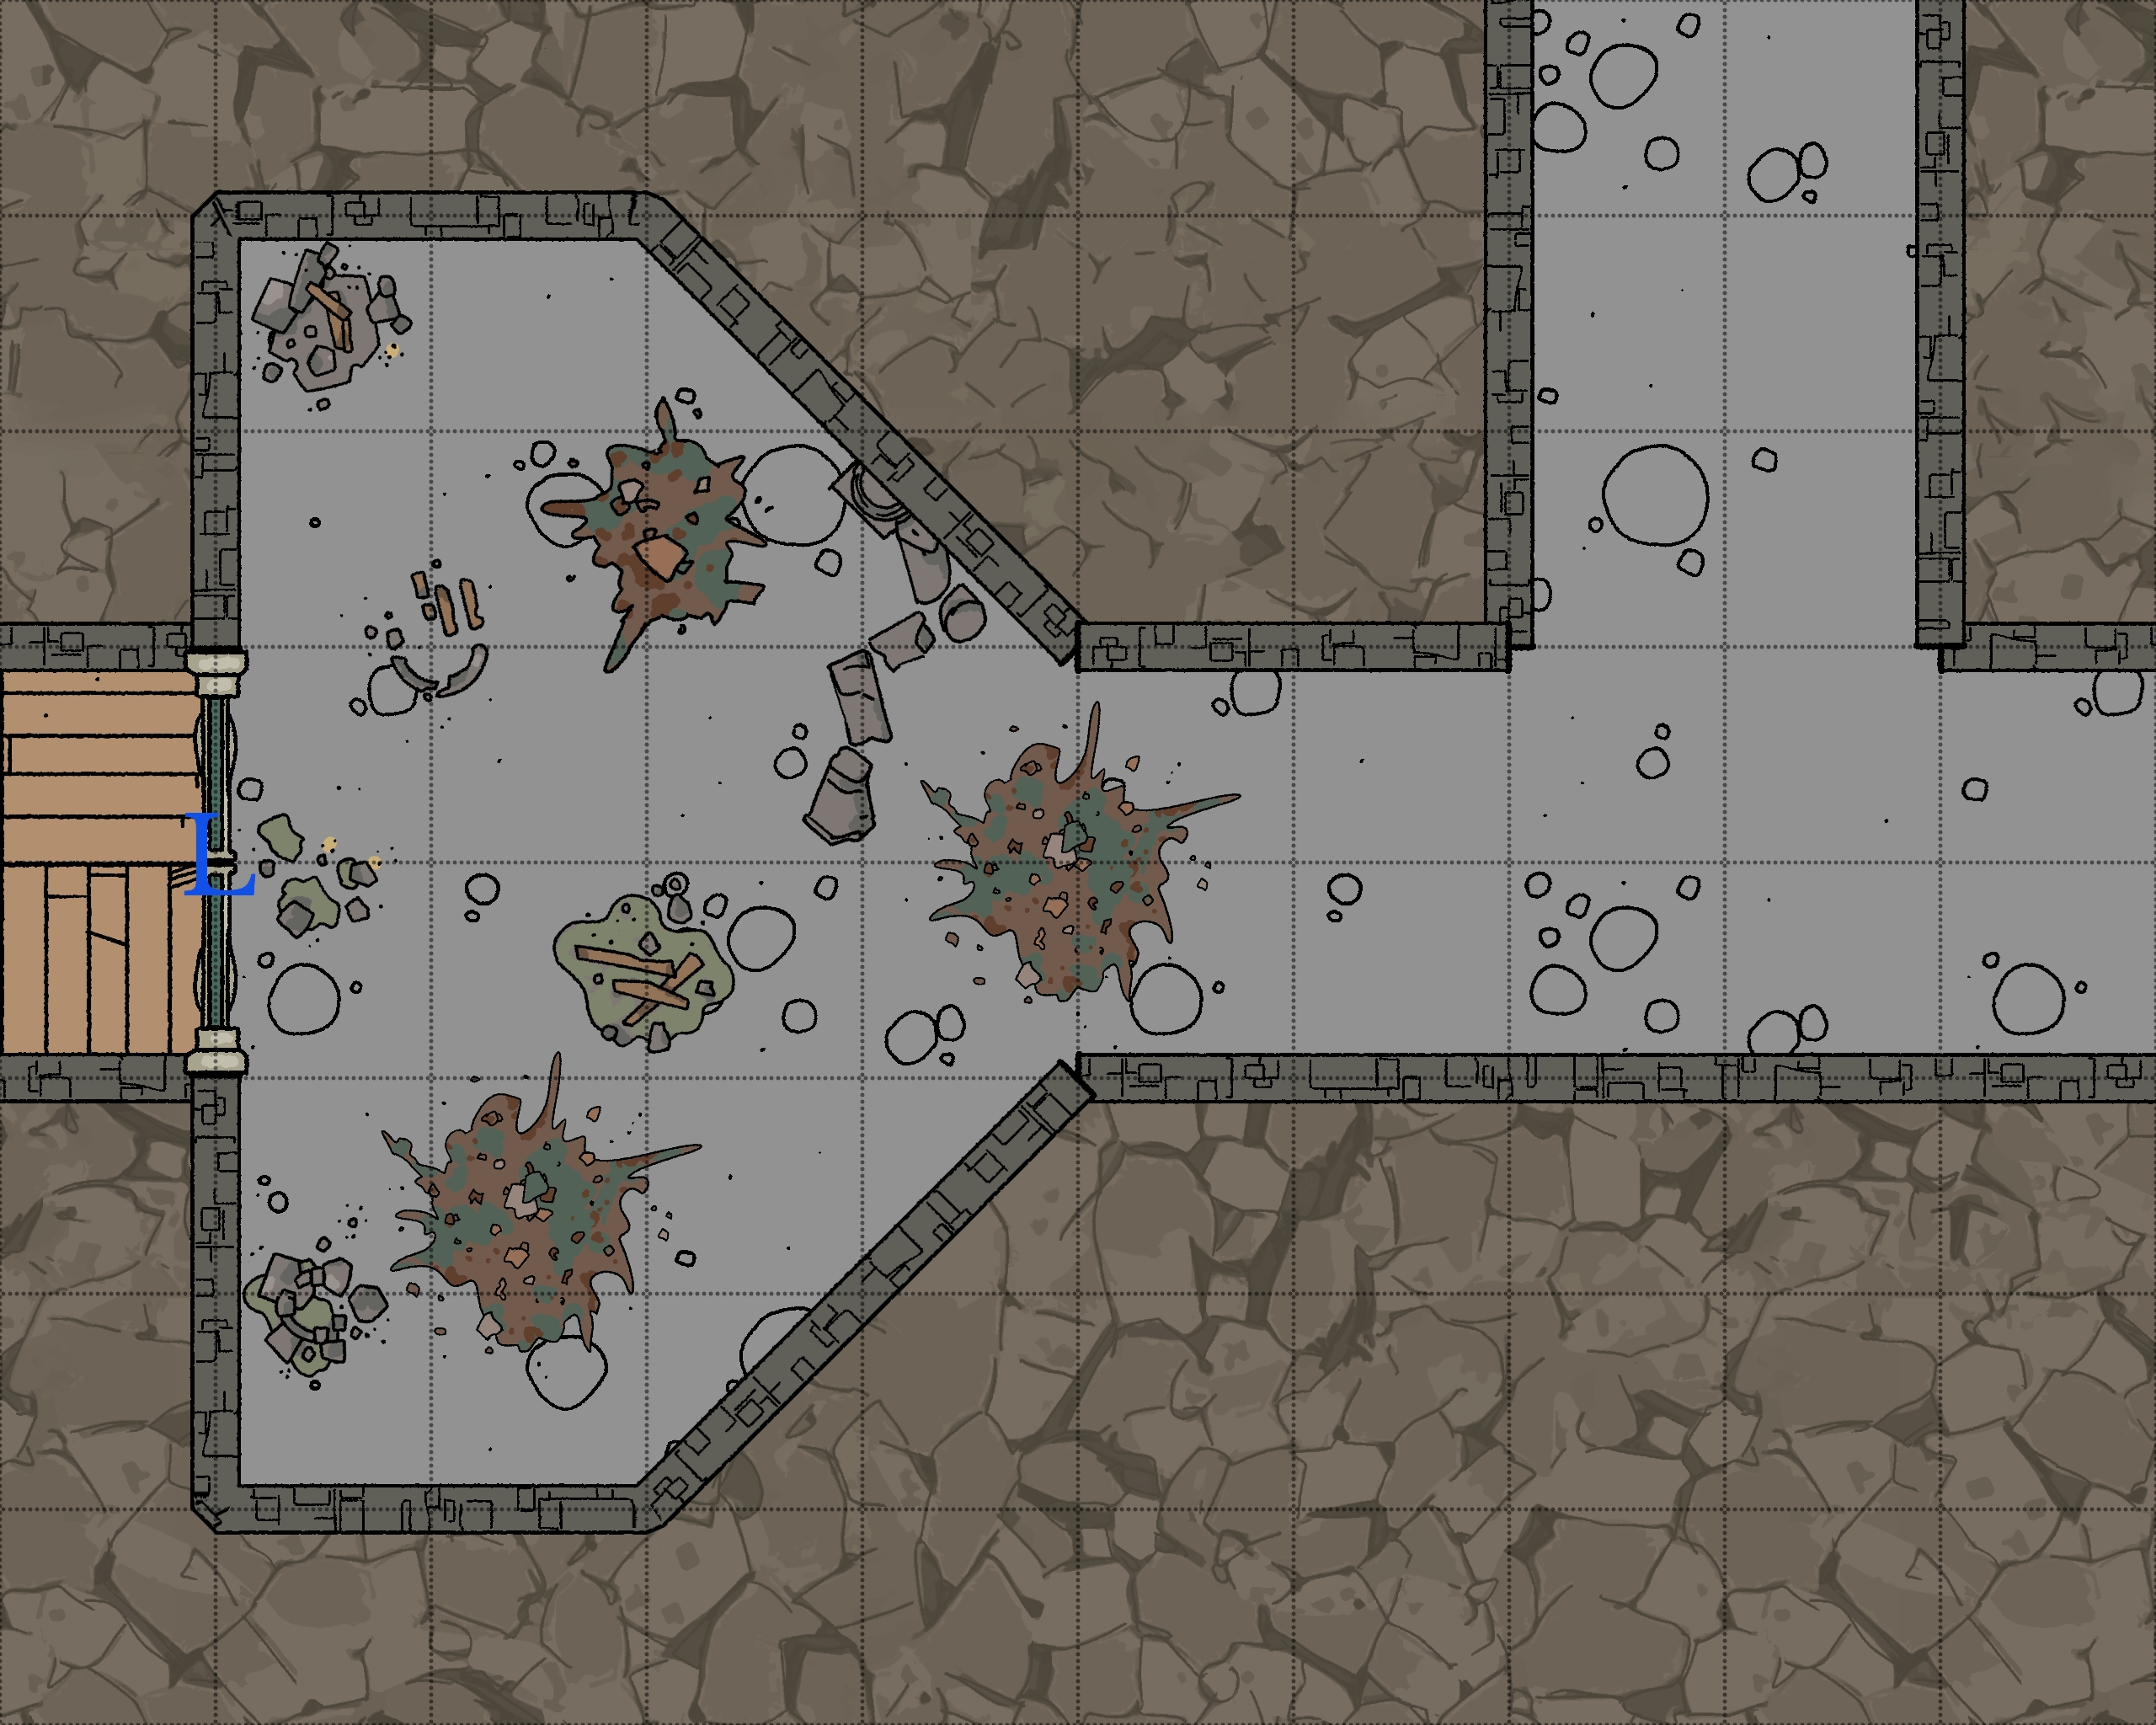
Shortening Hallway - B2-8
Room Type: Special
Light Level: Dark
This hallway looks like many of the other hallways in the lower parts of the tower, but this is more complex. When entering the hallway from the north, there are pressure plates on the floor, easily visible and felt when stepped on. This triggers the wall at the south end of the room to move northward, quickly shortening the hallway. This moving wall has several stops to make each crosswalk seem like a T-junction. The longer the party takes to get down the hallway, the shorter it will seem.
The moving wall will not be seen or heard moving and will look like a stone wall. Pushing it will move it backwards. Use Open Doors to test the strength to move it backwards. At its full extension, it stops next to the doorway to B2-9.
This is designed to disorientate and confuse, not squish people. Sprinting down the hallway at the start will get you to the B2-19 B2-10 crossroads in time.
Connected Rooms
North - Wooden door - B2-25
North East - Open corridor - B2-9
East - Locked reinforced wooden door - B2-10
South East - Back of secret door - B2-11
South - Behind a moving wall - B2-12
South West - Wooden door - B2-18
West - Reinforced wooden door - B2-17
North East - Secret door - B2-16
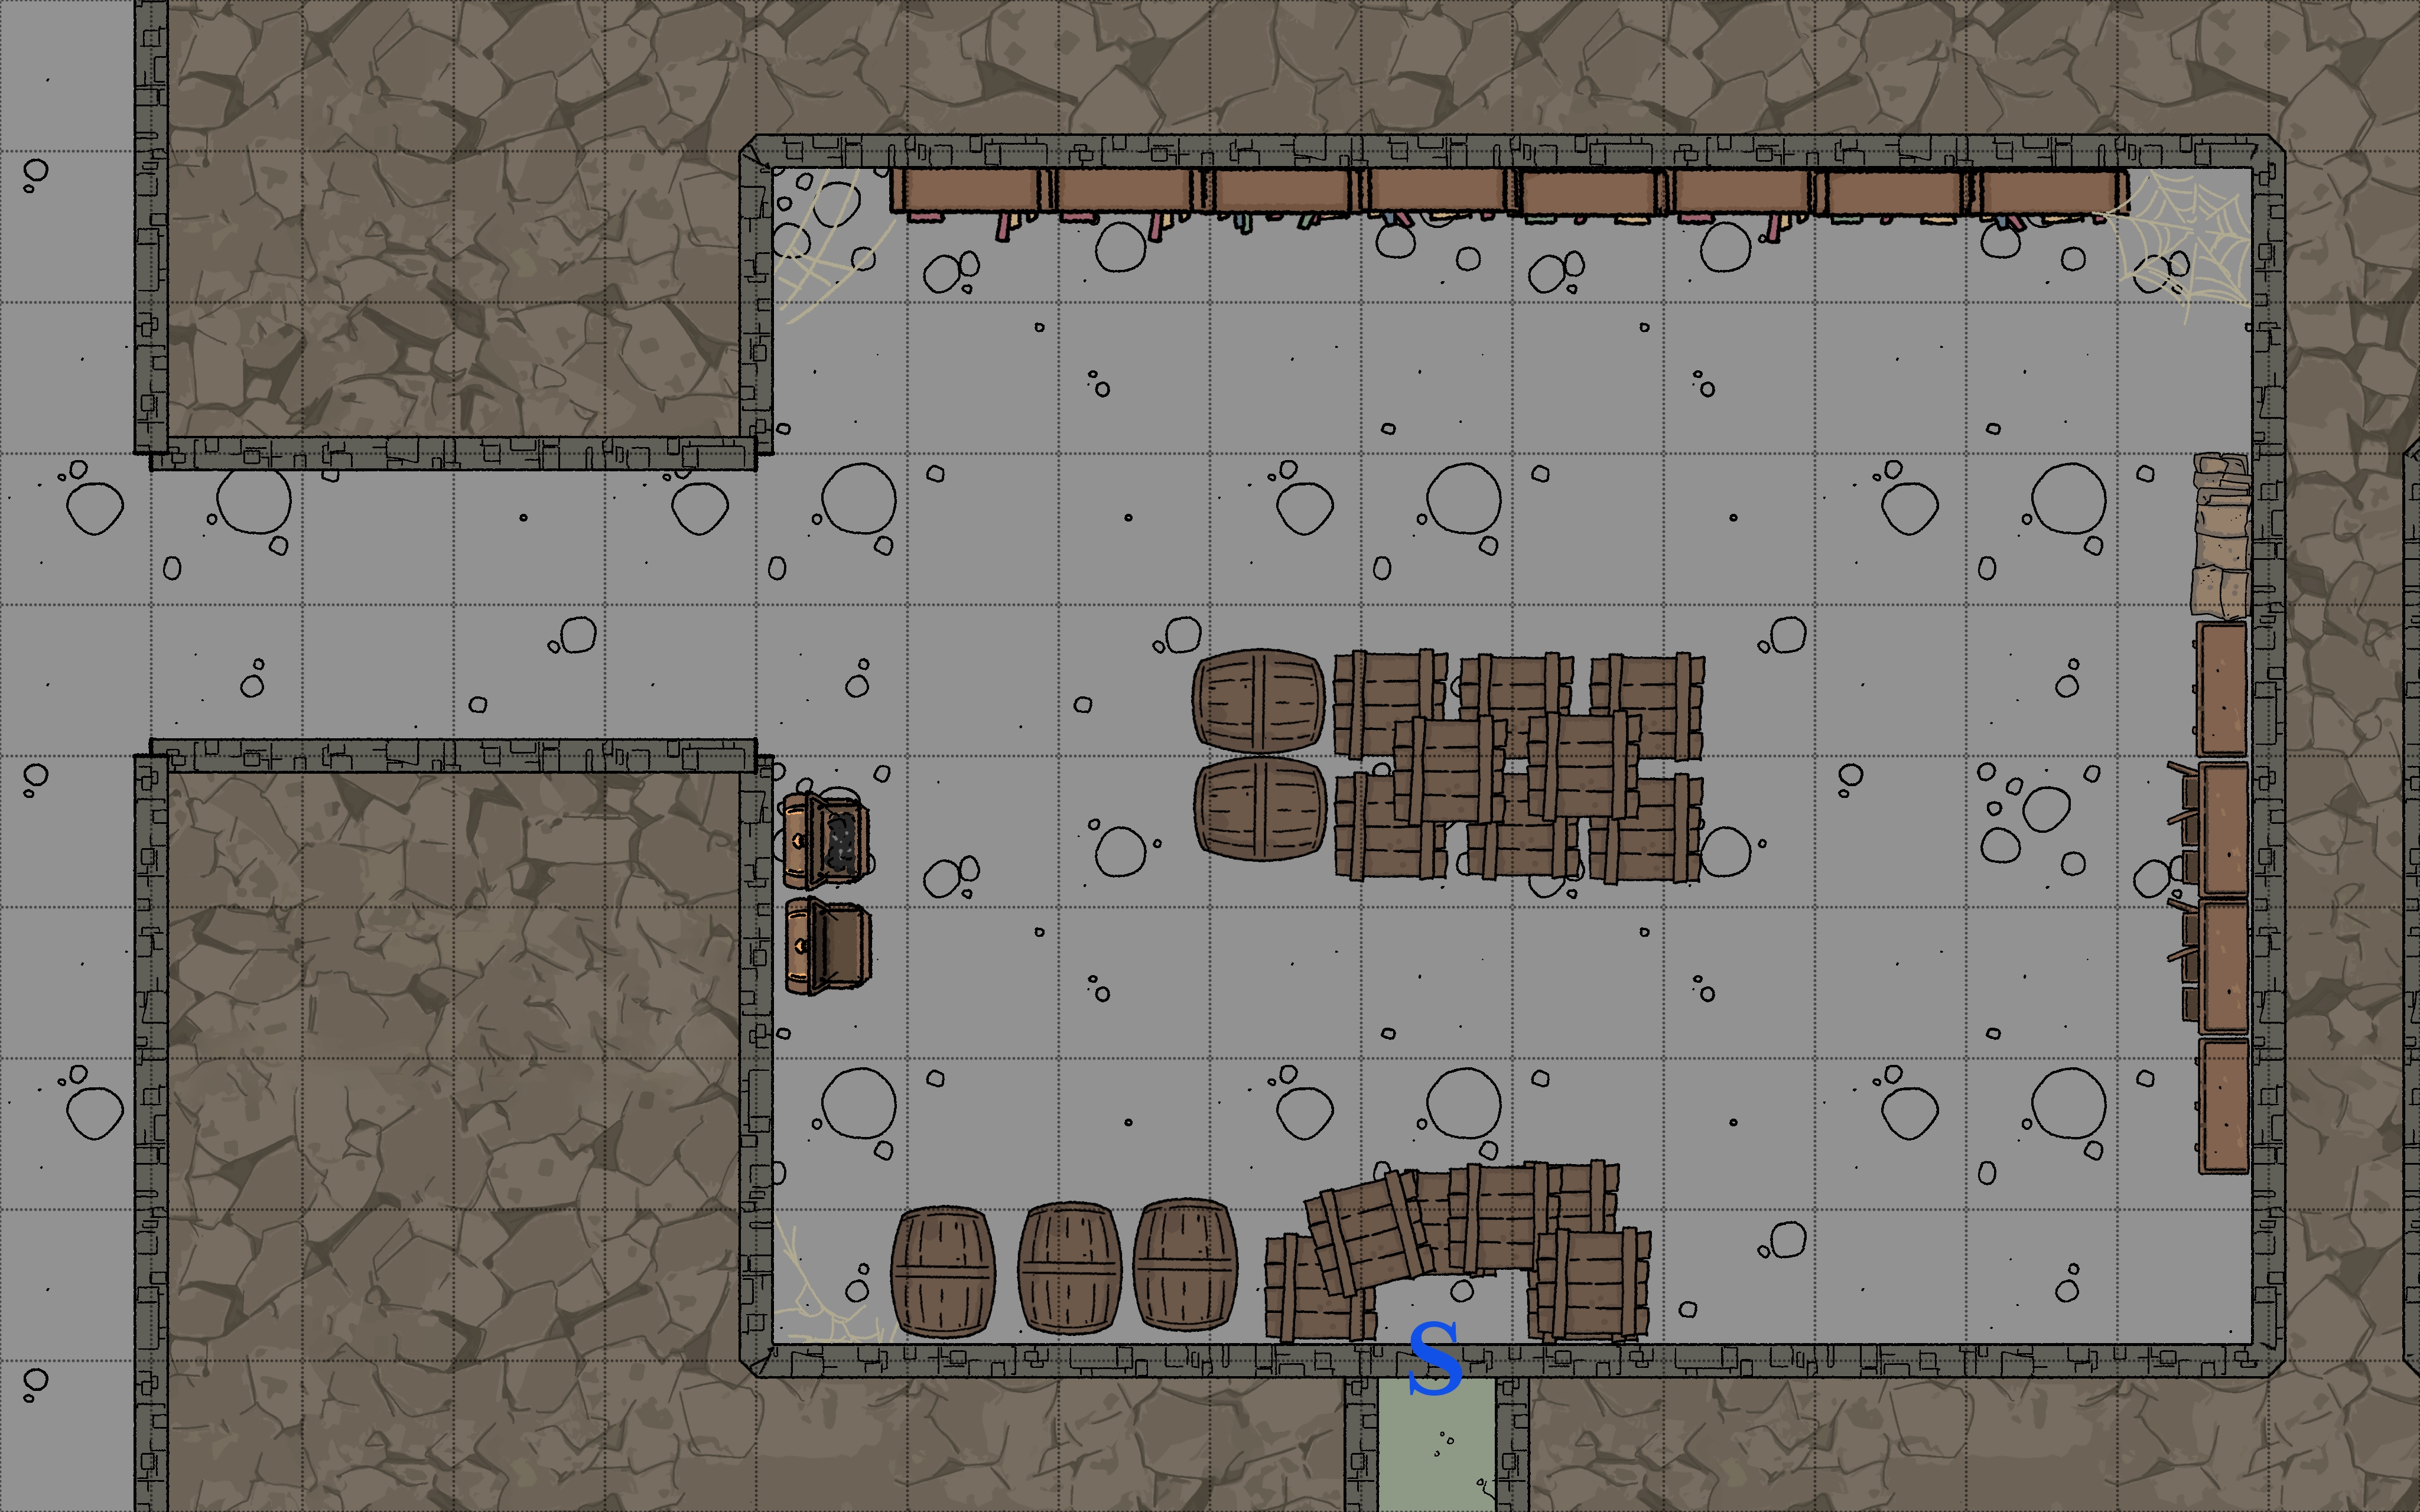
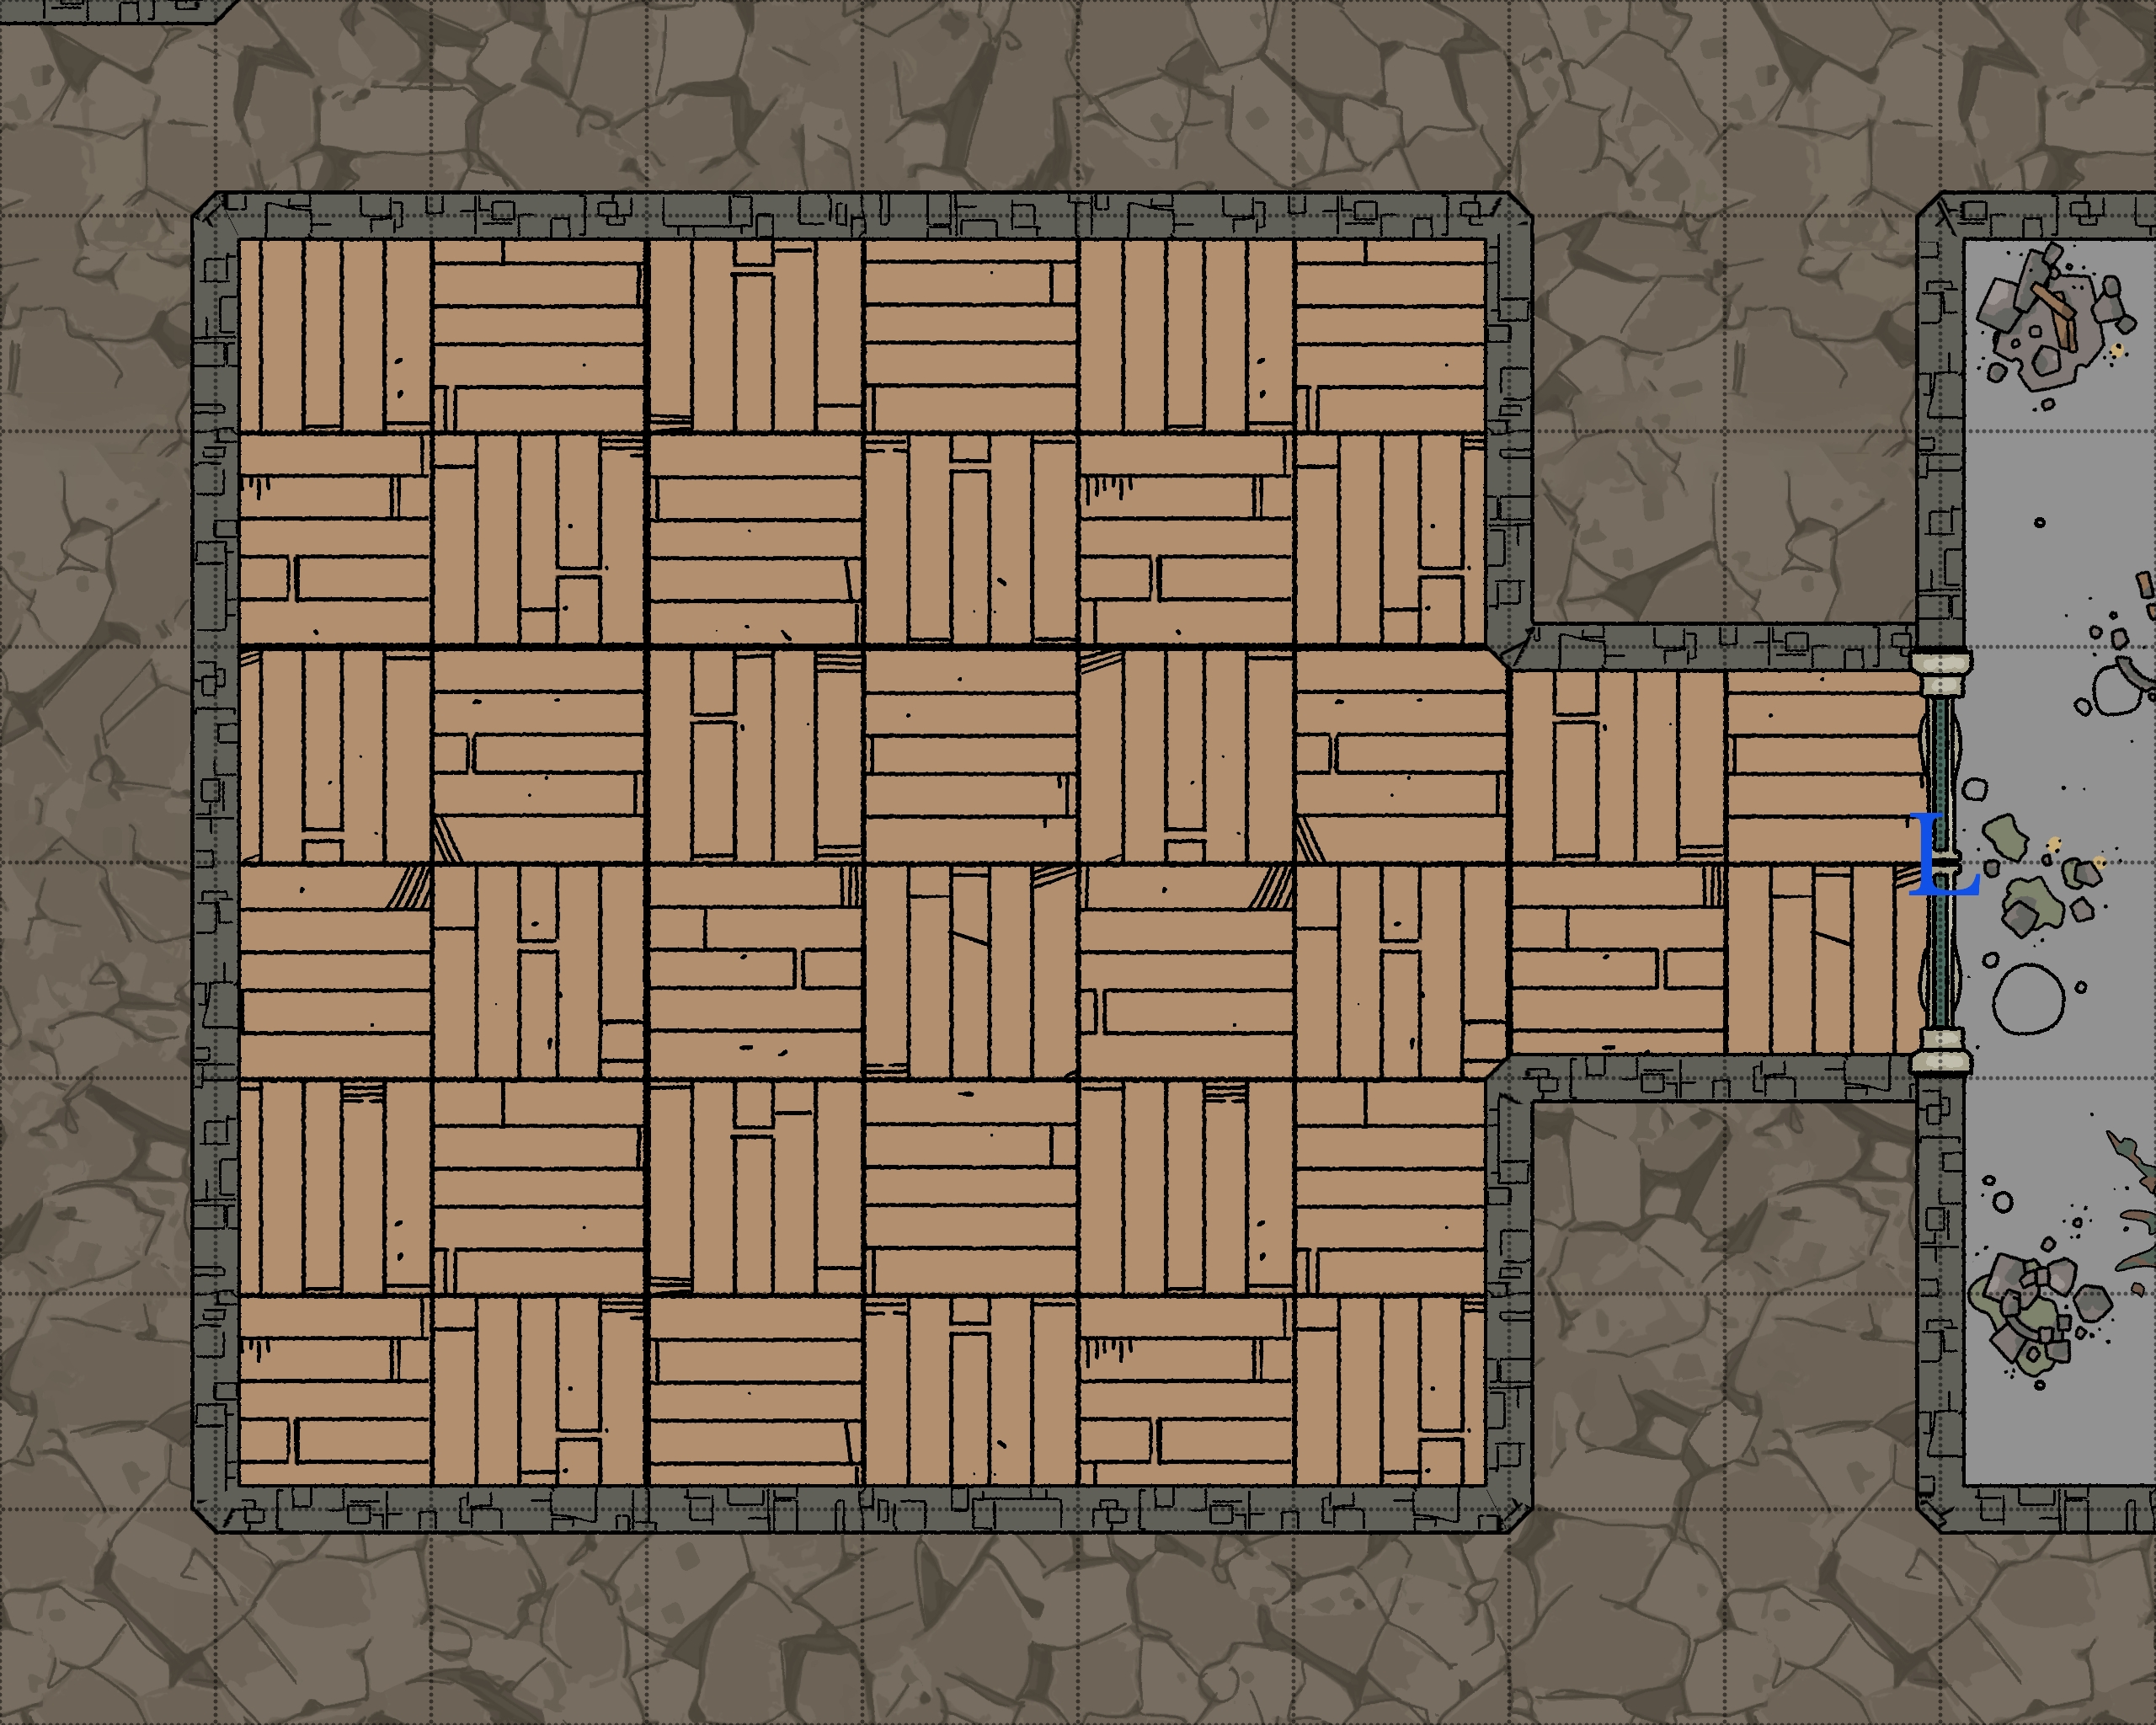
Old Storage Room - B2-9
Room Type: Empty
Light Level: Dark
This large open storage space is full of crates, mice and cobwebs. Many boxes are broken open with their contents removed, but many are still sealed.
Most mundane equipment or household objects can be found here, just not weapons or specialist tools like thieves' tools or masons' tools.
Crates against the south wall are hiding a secret door.
Connected Rooms
South - Wooden door hidden by boxes - B2-10
West - Open corridor - B2-8
Expansive Storage Room - B2-10
Room Type: Empty
Light Level: Dark
This storage room is an extension of B2-9. It's used for slightly more important things. Once the Lord of the Tower became a lich, he did not need food or kitchen staff.
Inside these boxes are plates, cooking utensils and cutlery. The loot here takes time to gather and is very noisy.
Loot!
- 500gp worth of silver cutlery
- 100gp of porcelain plates - very fragile
Connected Rooms
North - Wooden door - B2-9
East - Wooden door hidden by boxes - Corridor
West - Wooden door - B2-8
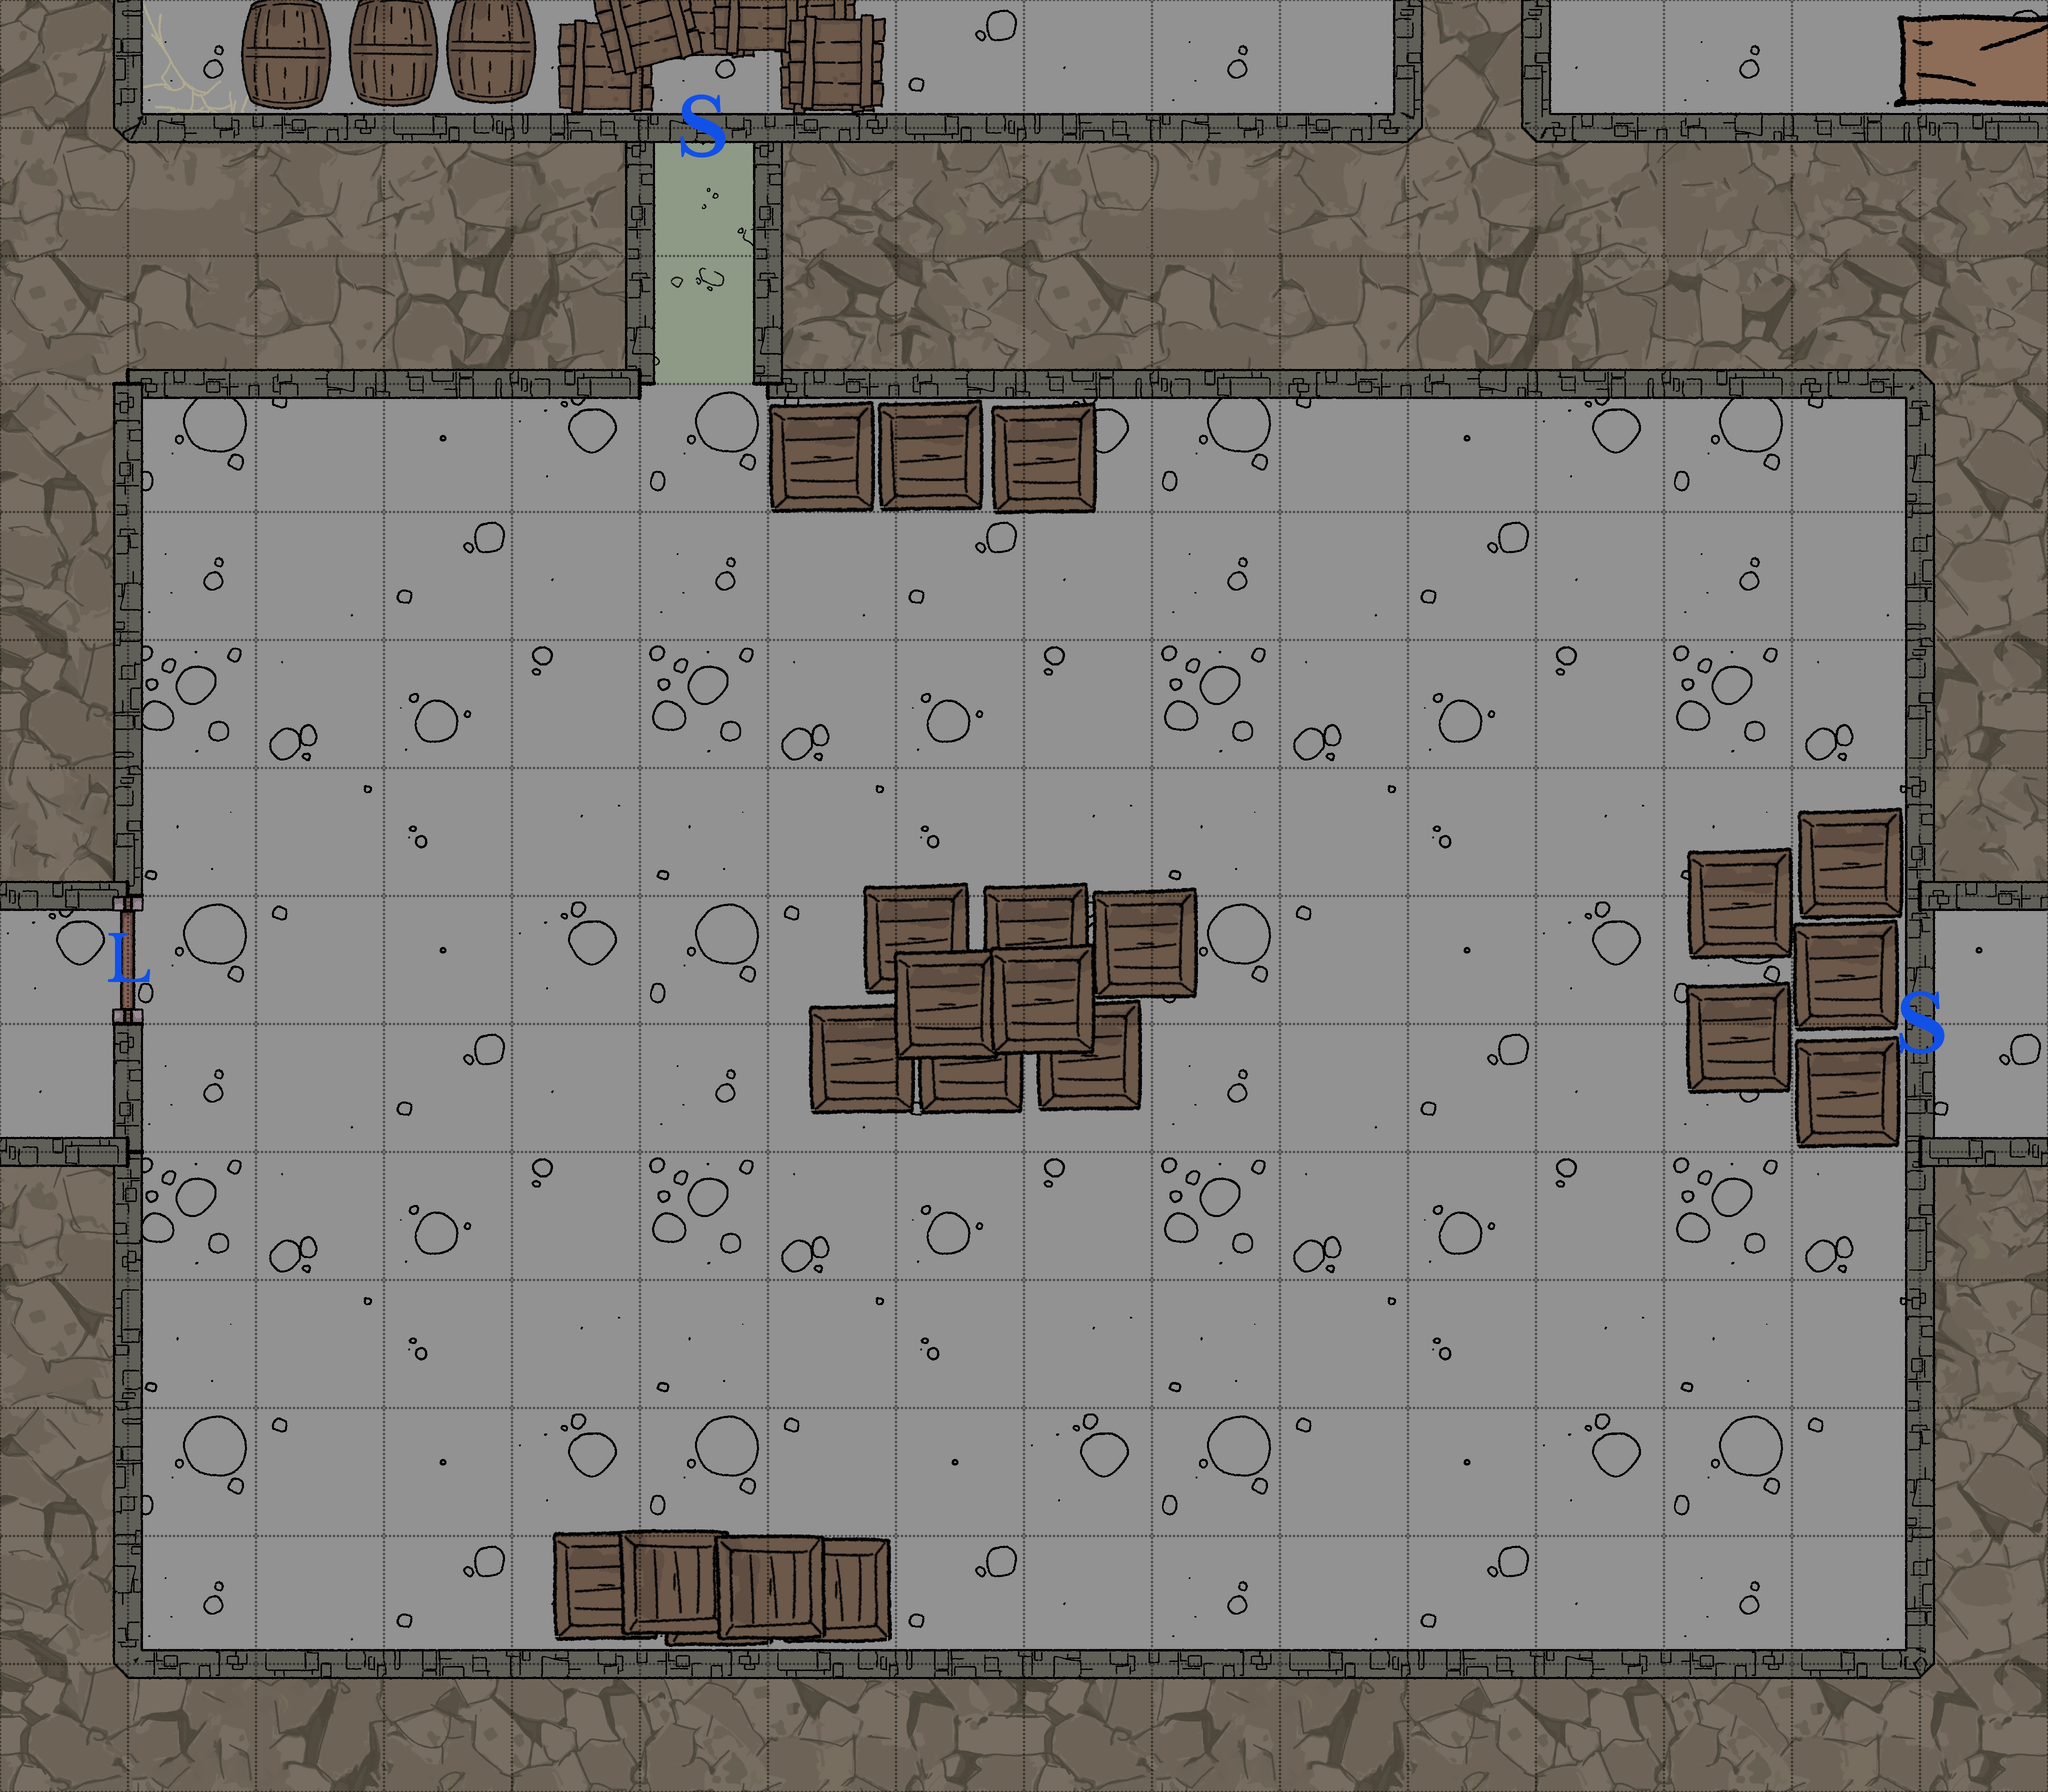
Crystal Guardians - B2-11
Room Type: Trap
Light Level: Dark
An empty room except for two impossibly complex crystal statues that stand in the middle. Each is watching one of the doors in the room.
These statues were created in the image of the Lord of the Towers' son, Darius. They look like a friendly young man in decorated full plate armour with long flowing hair. Clearly moved away from the Lord of the Towers view.
Both will attack anyone opening the doors to this room.
Connected Rooms
East - Wooden door - Corridor
South West - Secret door - B2-12
West - Wooden door - B2-8
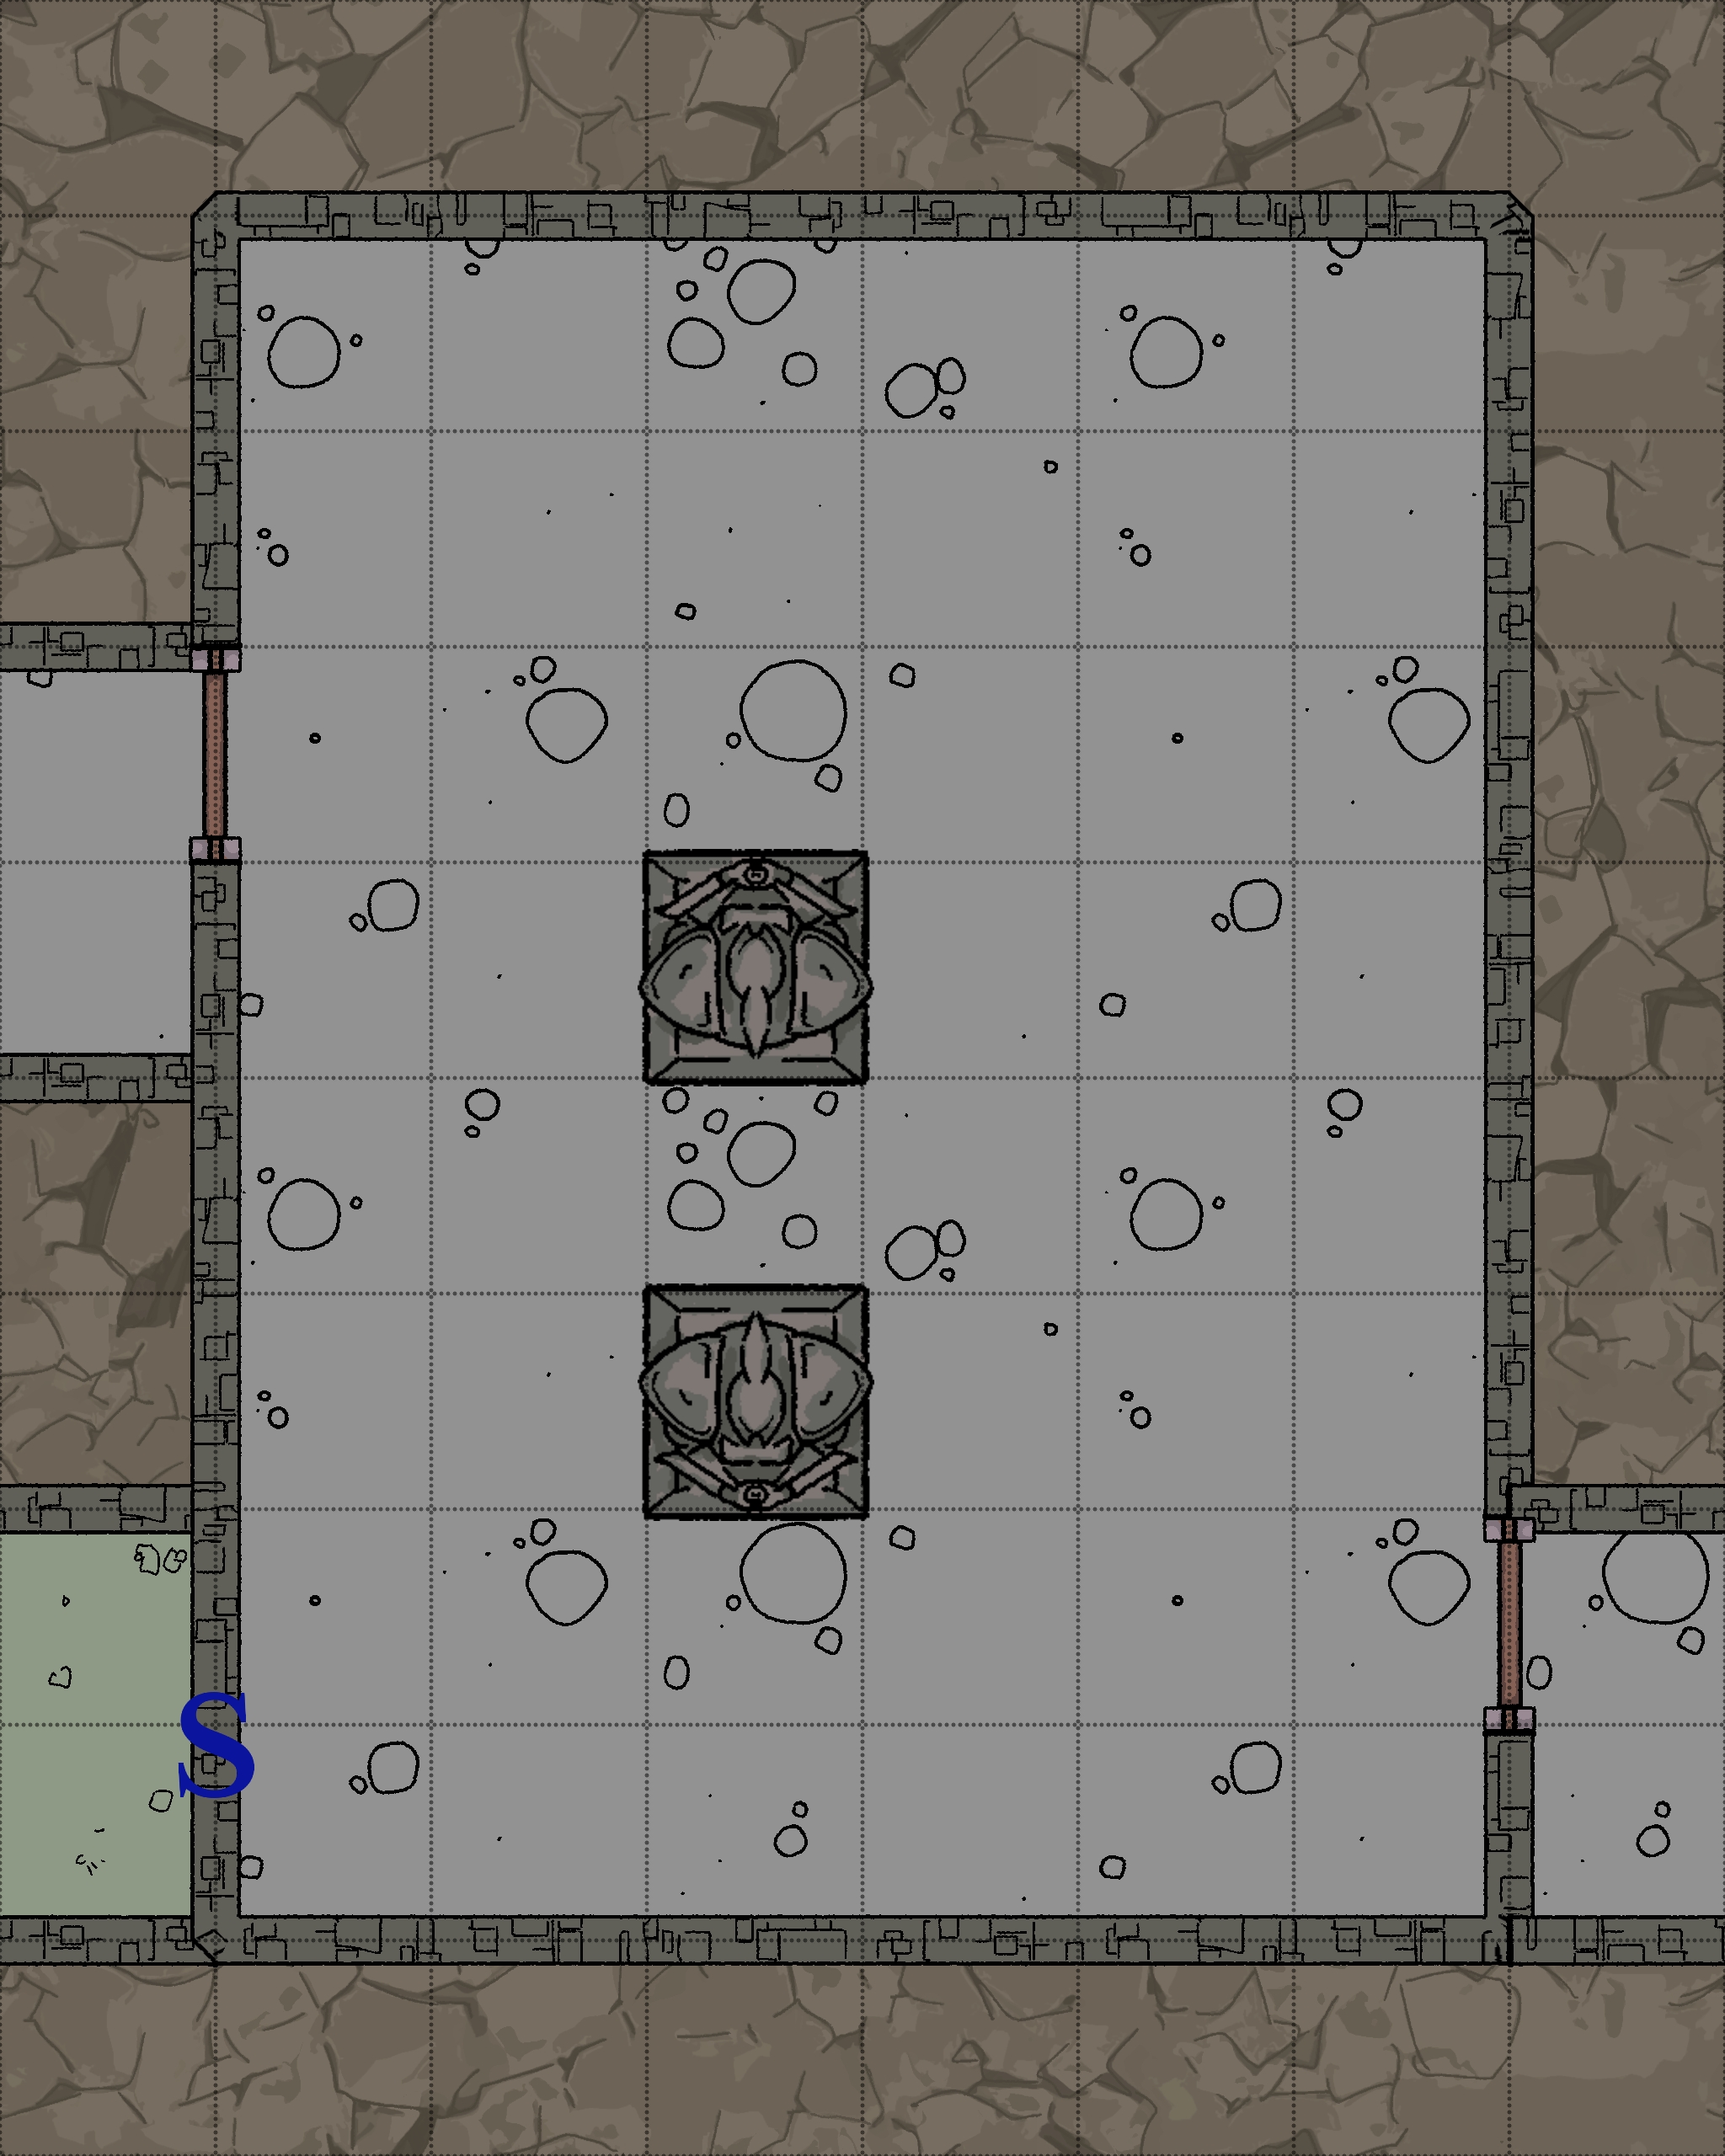
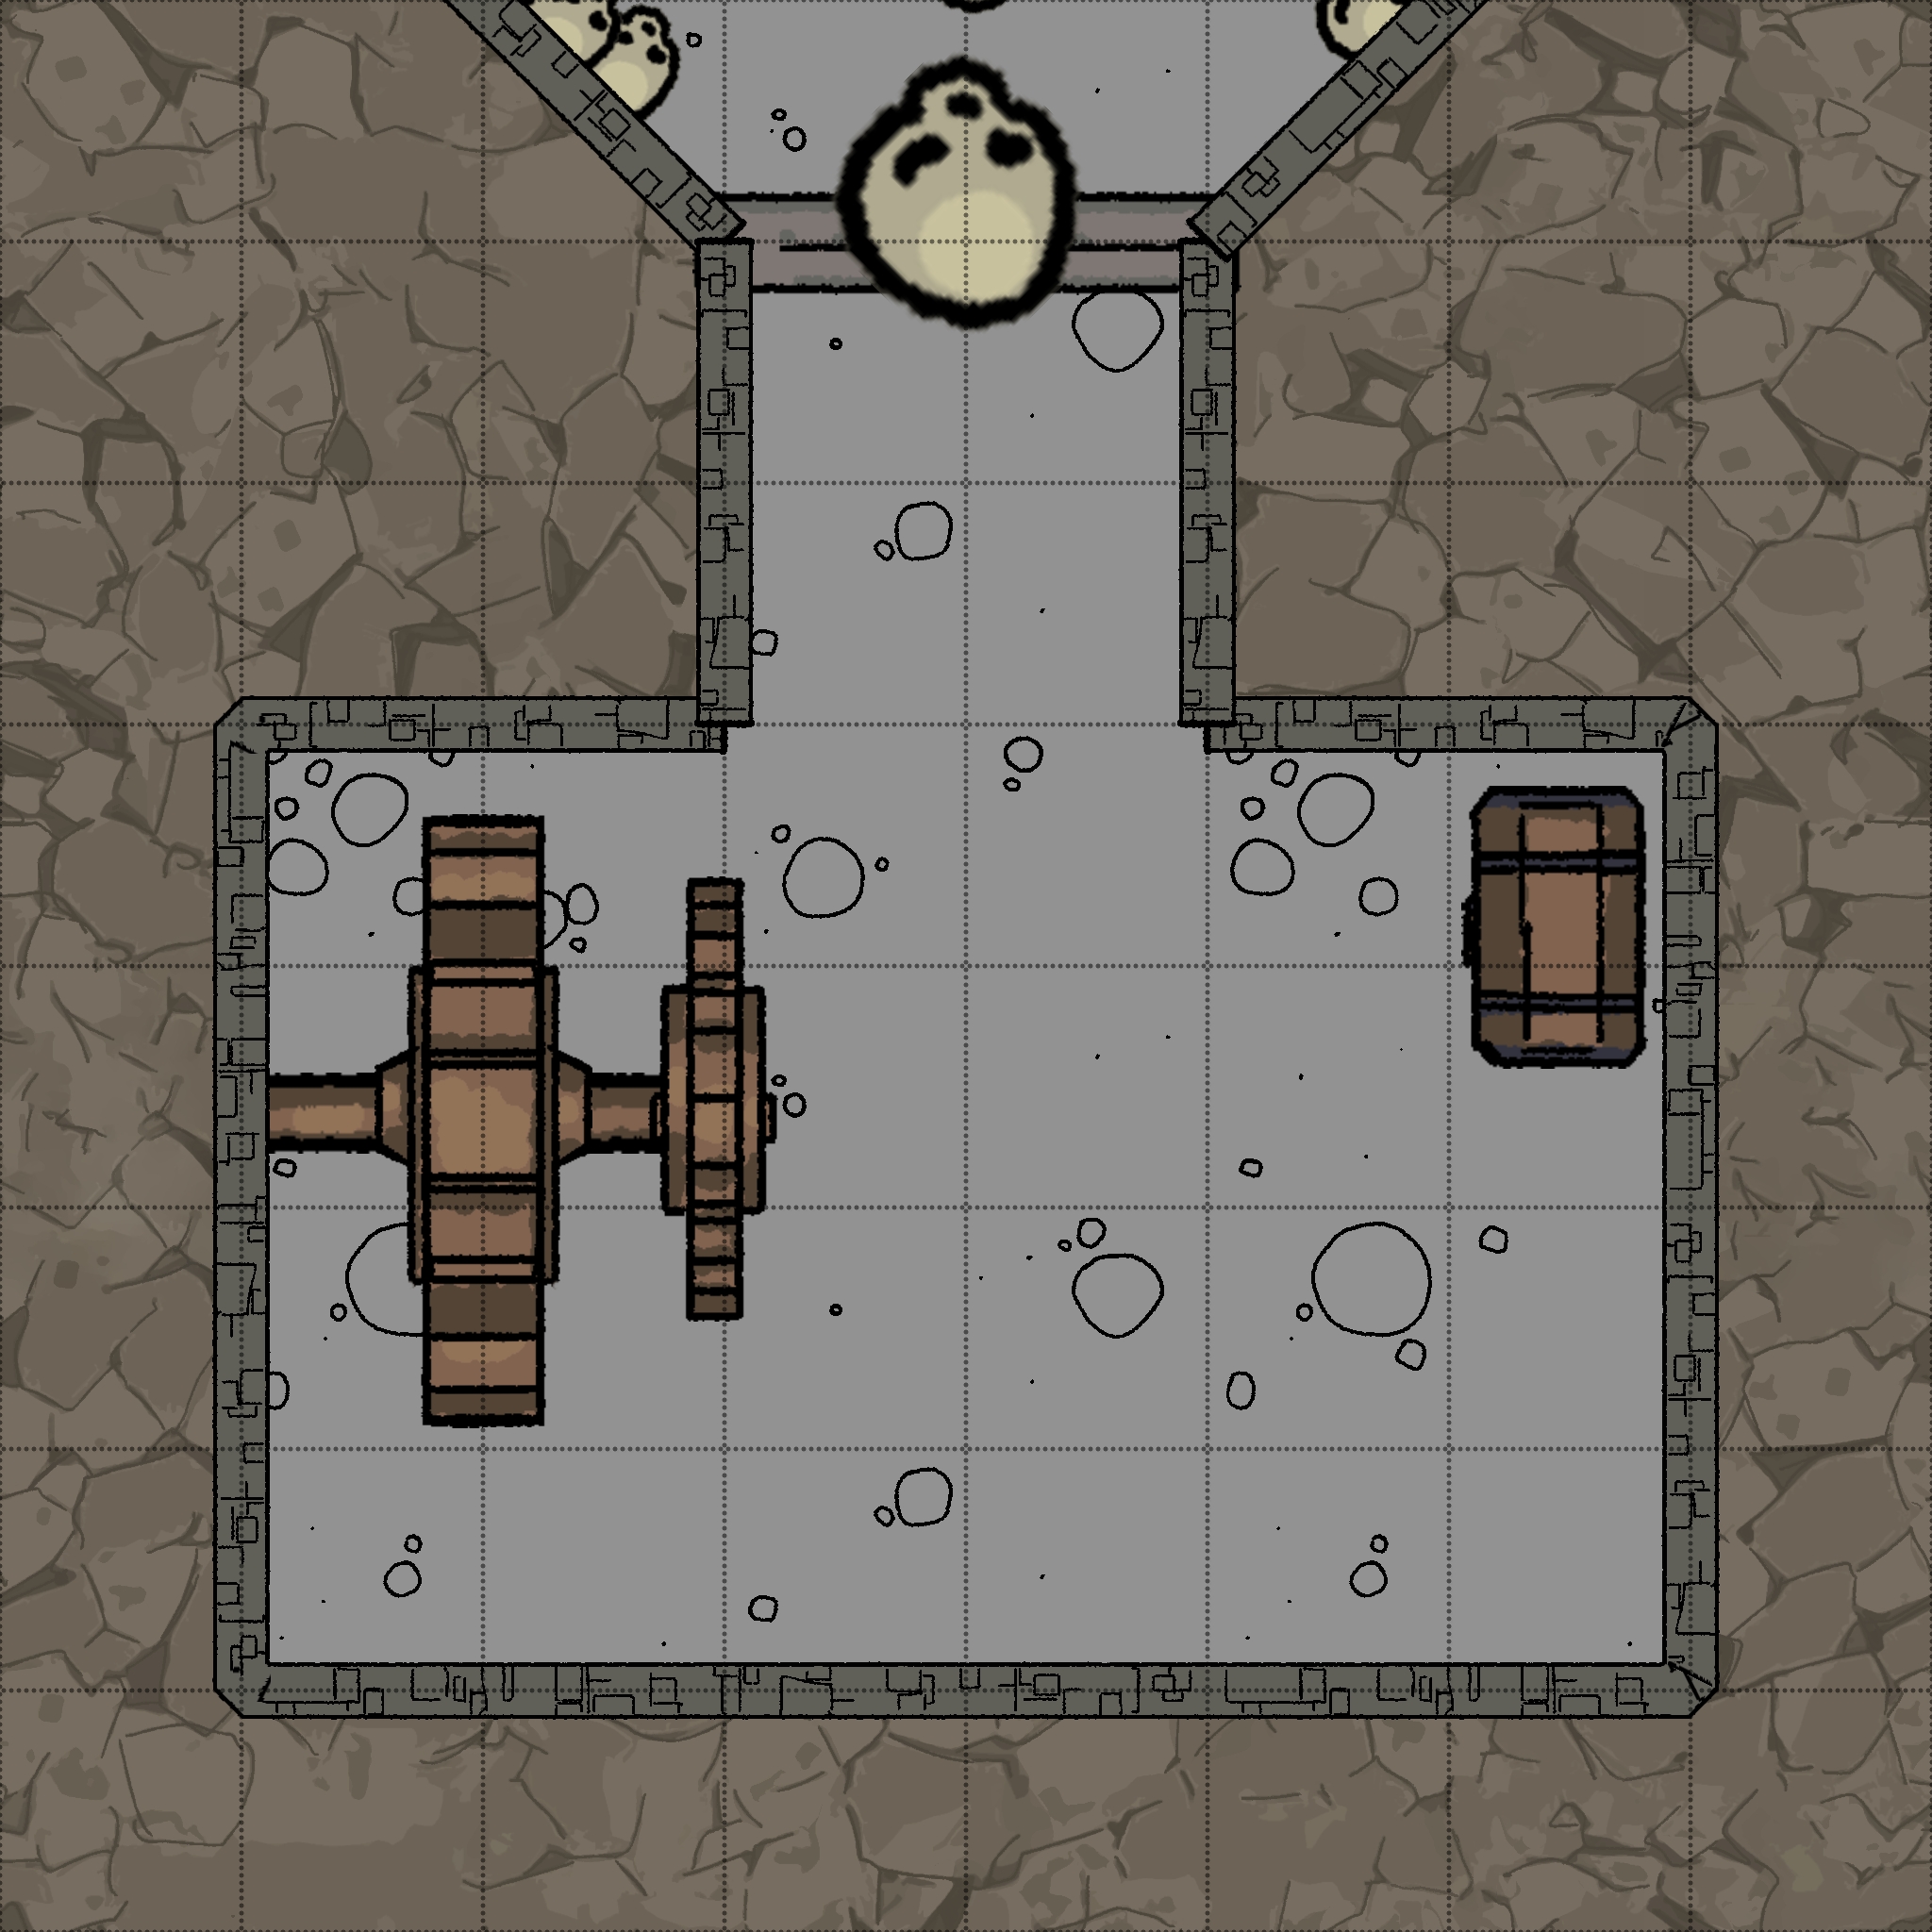
Mechanism Room - B2-12
Room Type: Special
Light Level: Dark
This hidden chamber houses the mechanism that controls the Shortening Hallway (B2-8). This room is full of dangerous exposed gears and pistons, and contains controls for manually controlling the hallways and switching them off.
Connected Rooms
North - Slip behind a moving wall - B2-8
East - Back side of secret door - B2-11
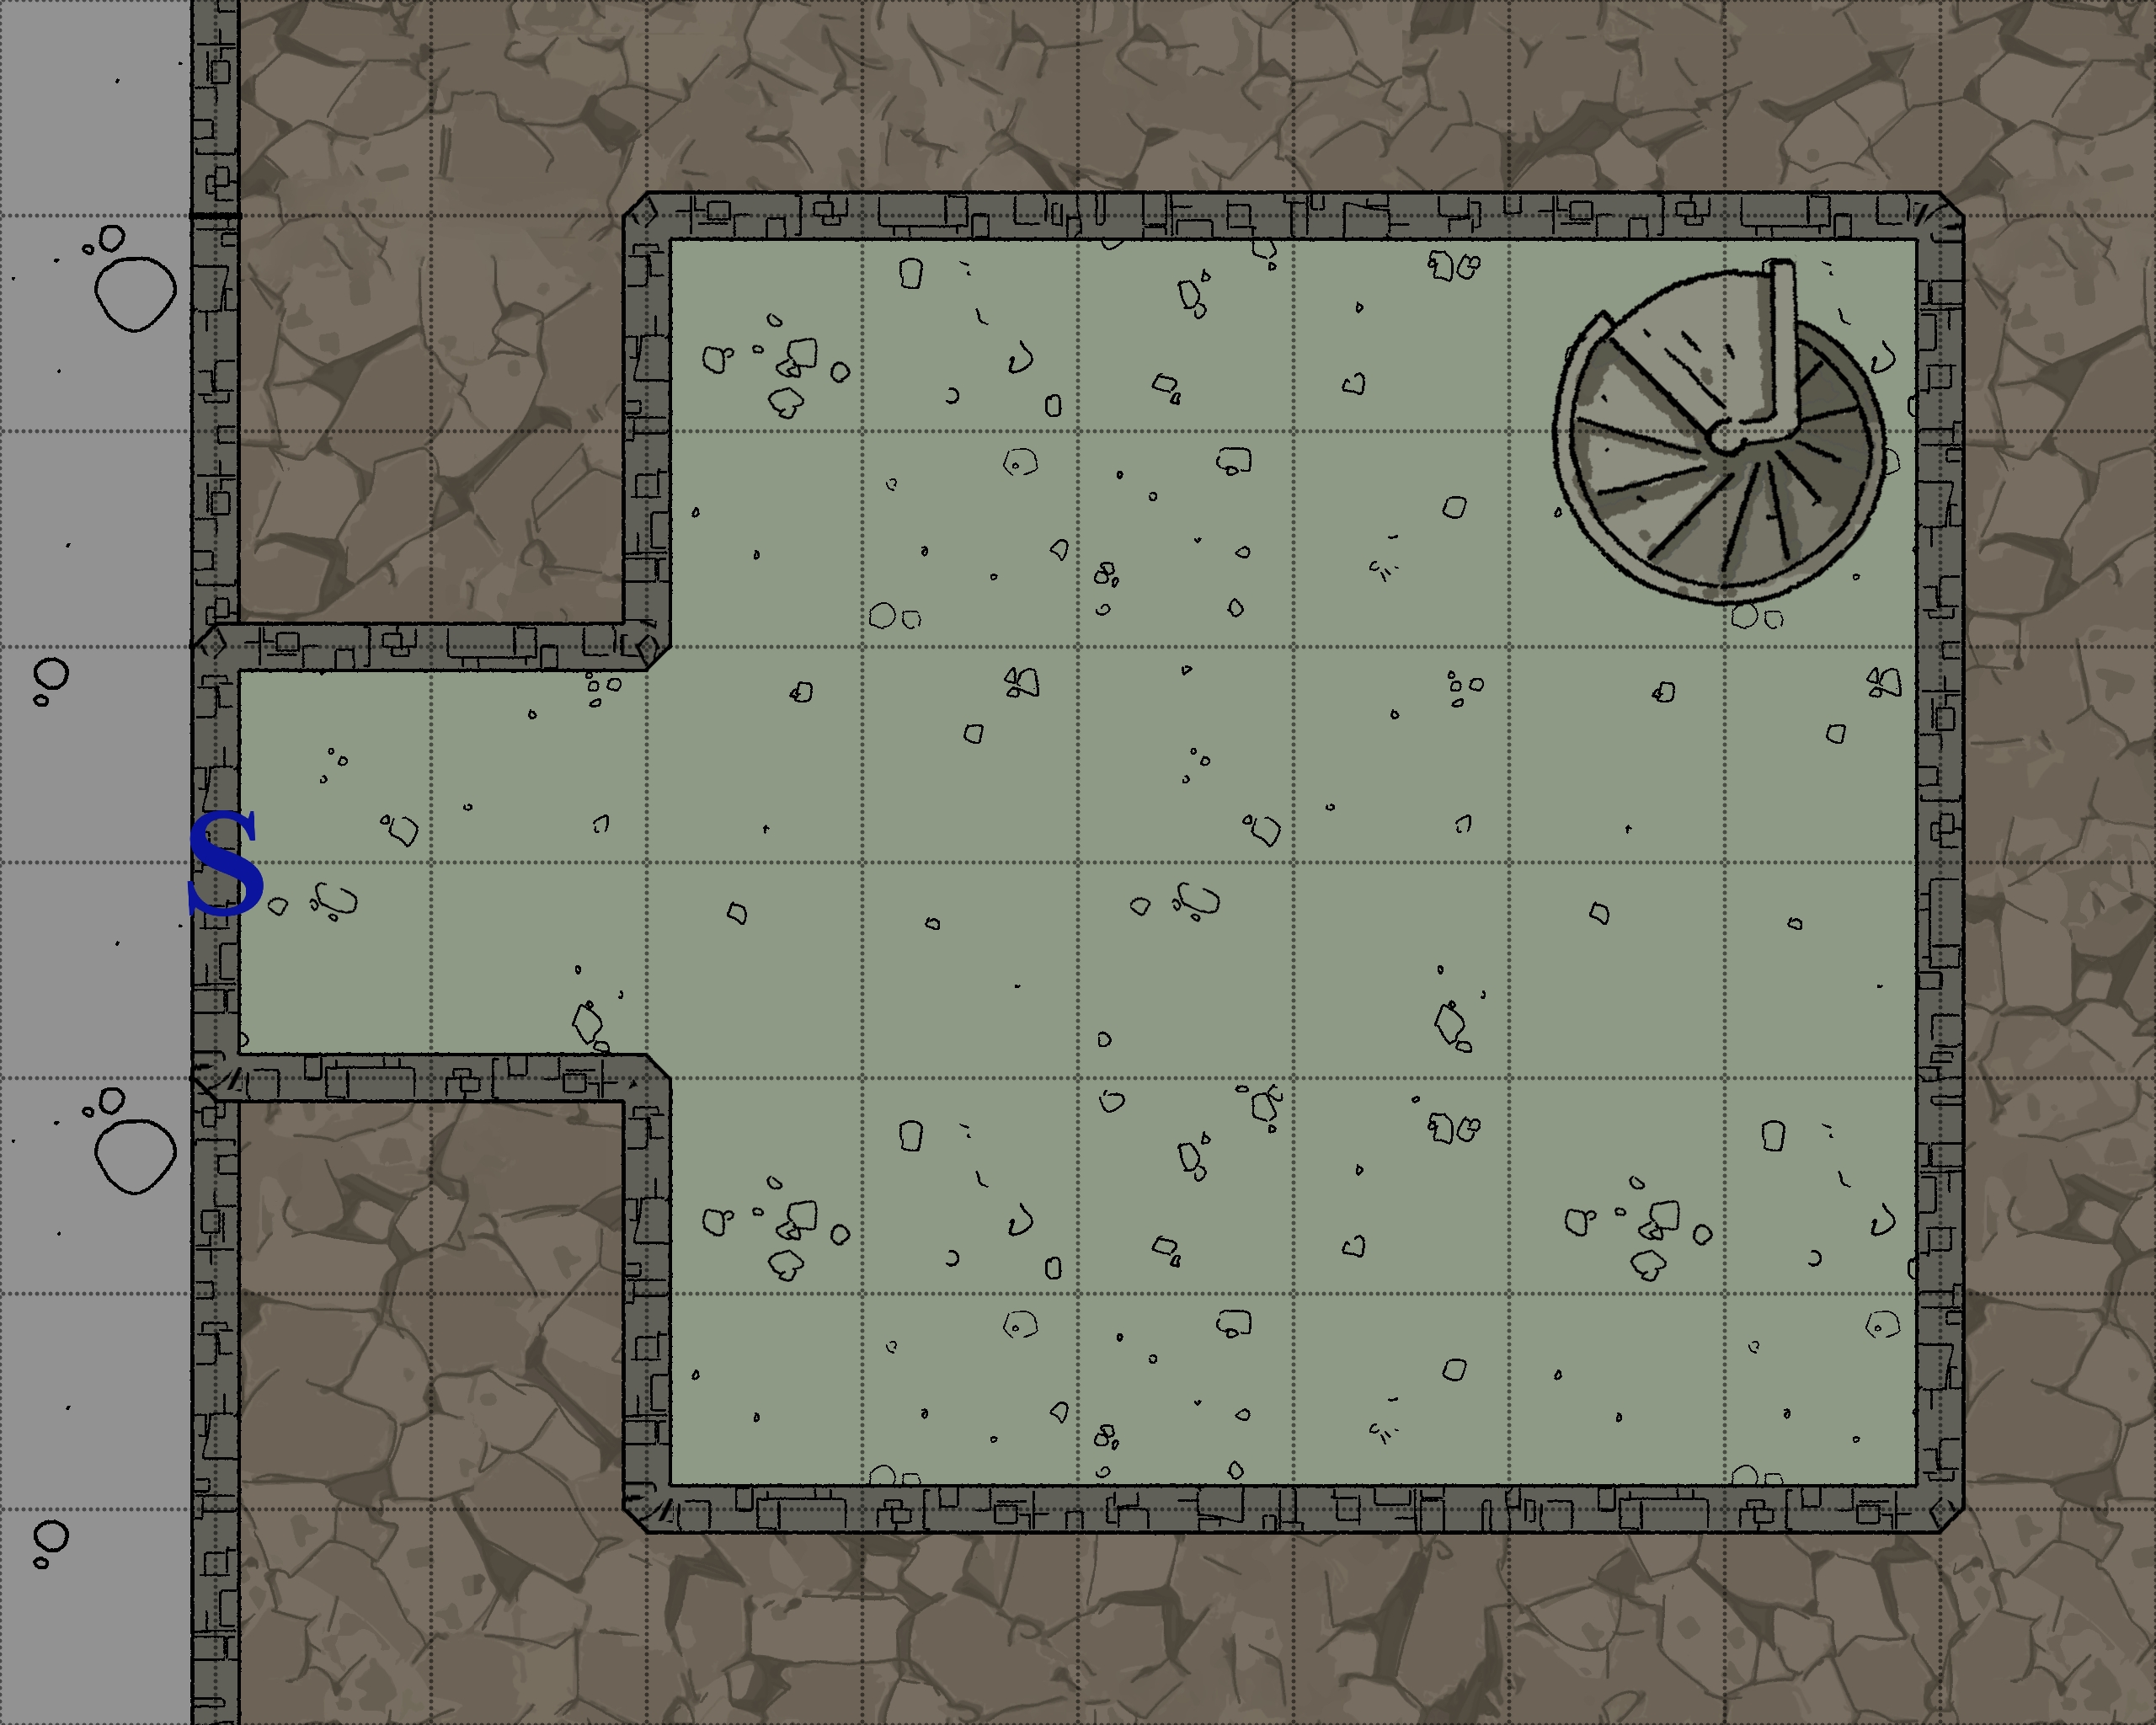
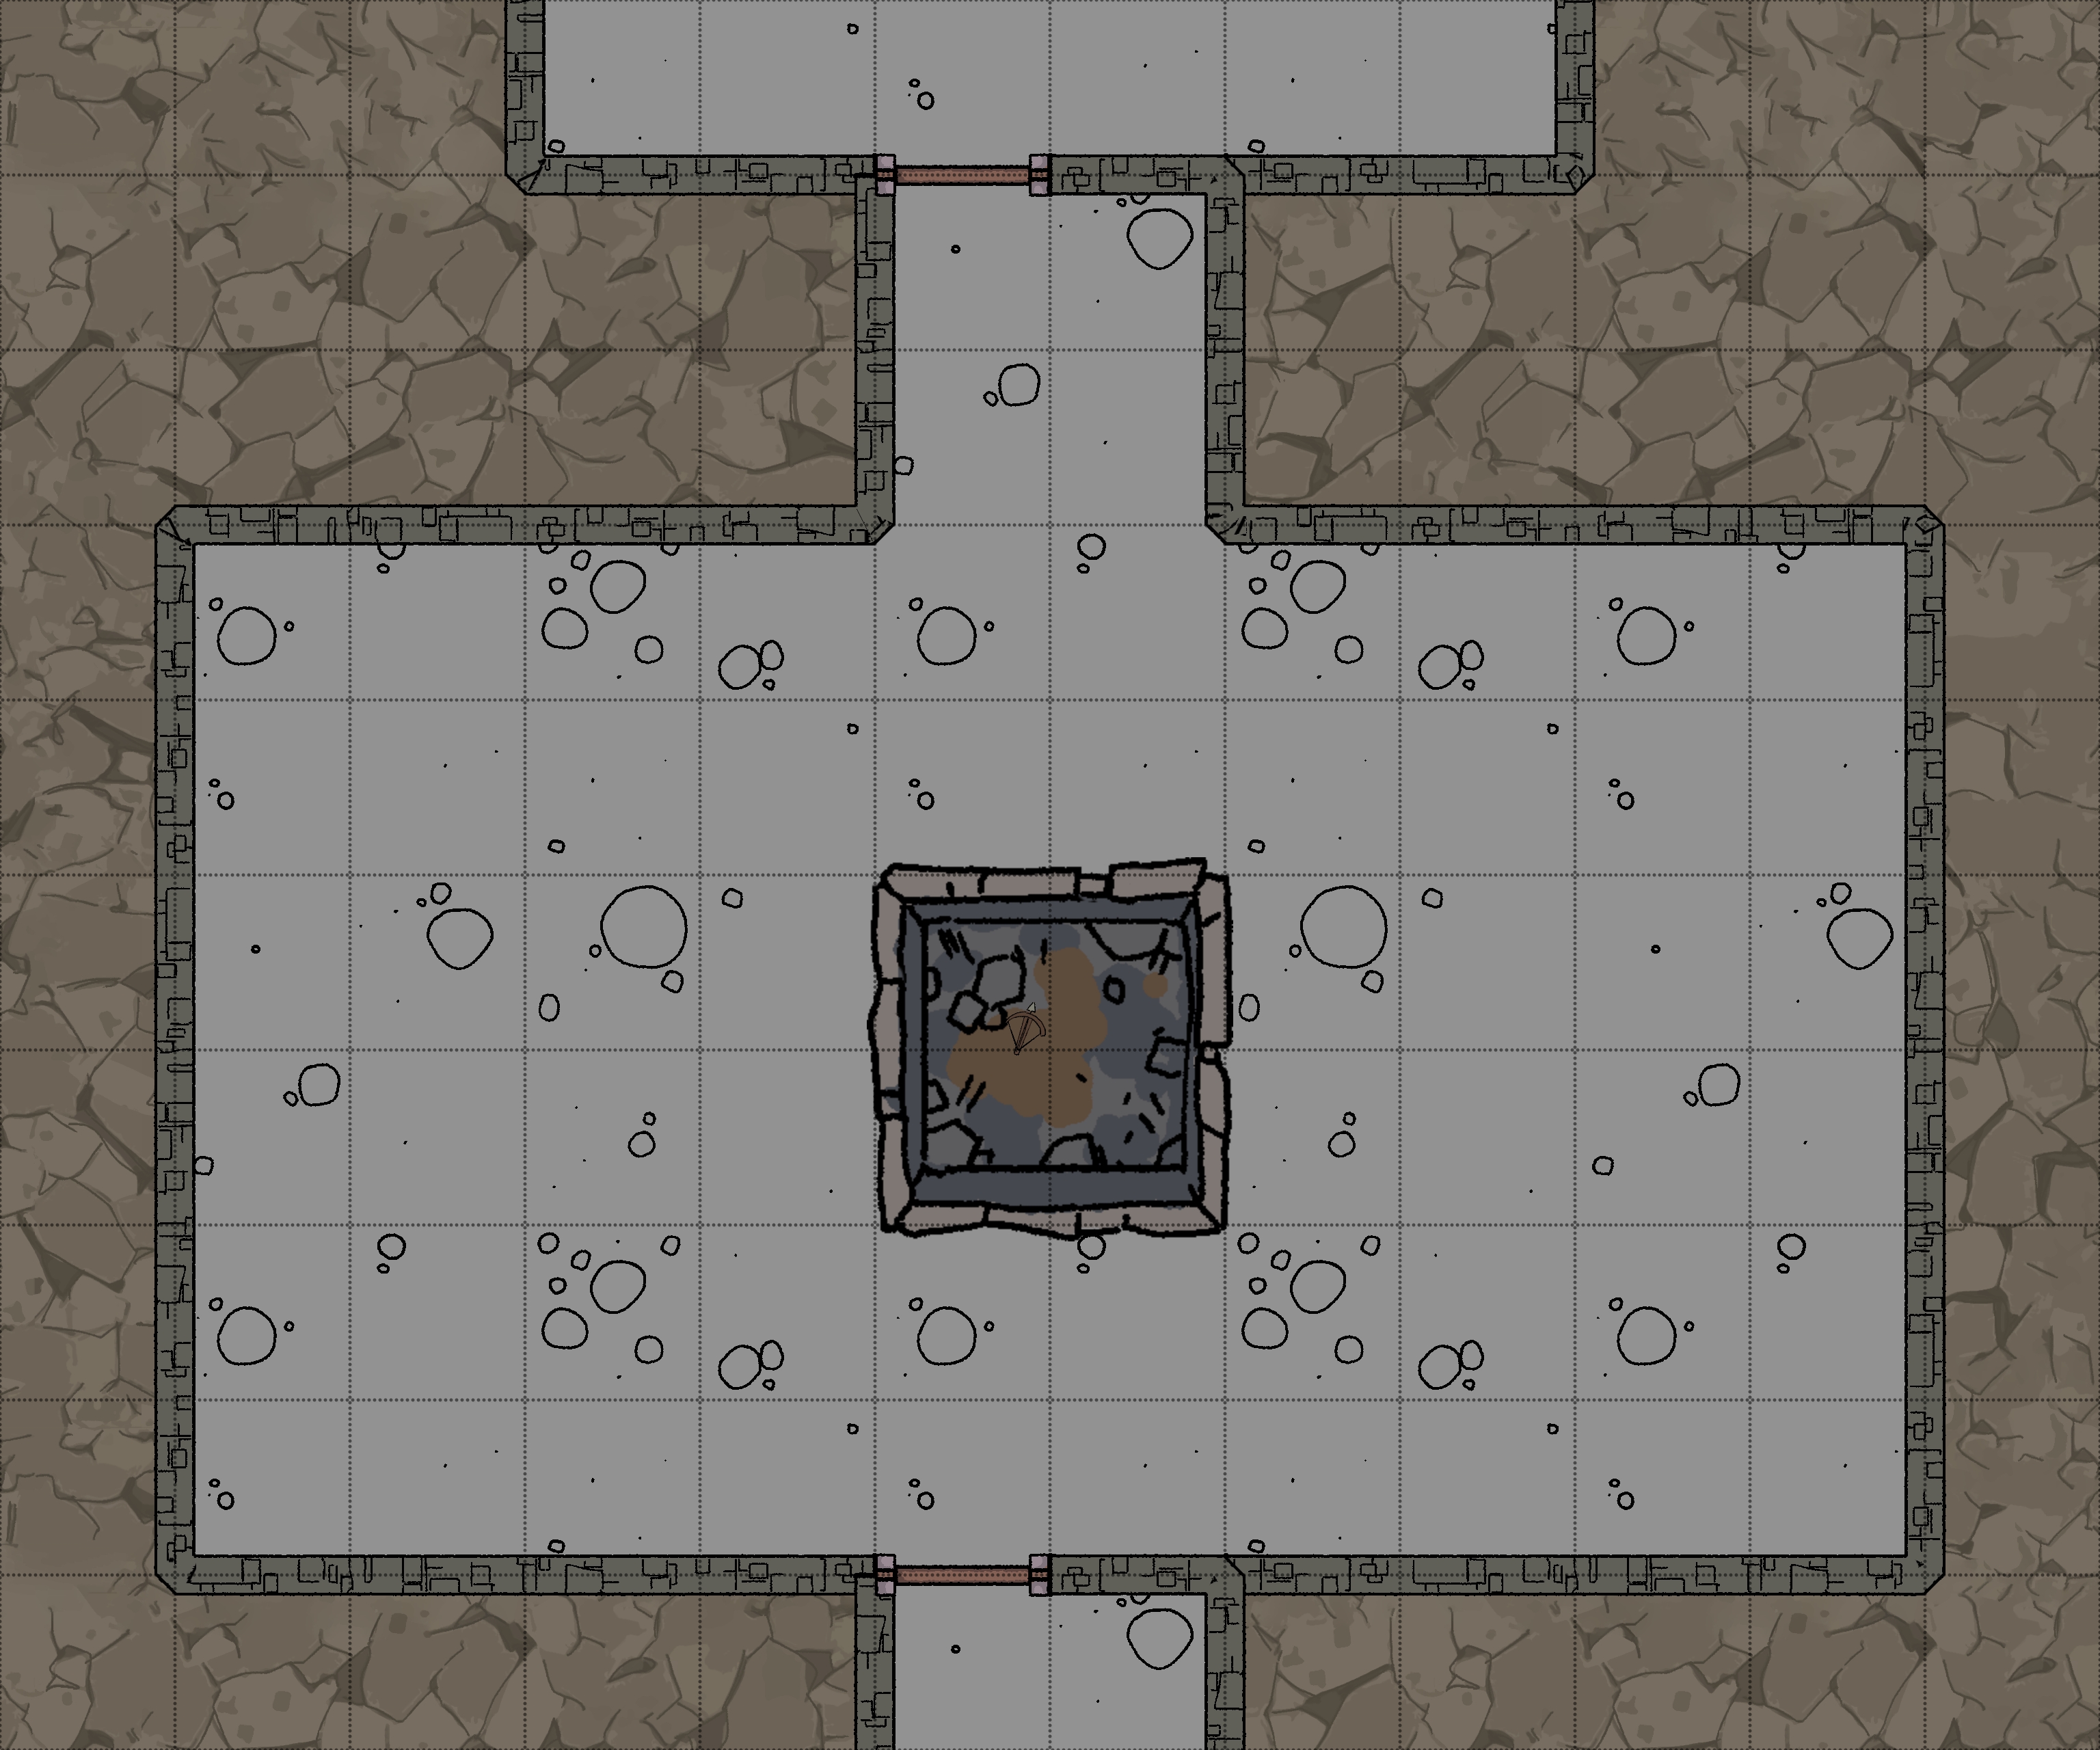
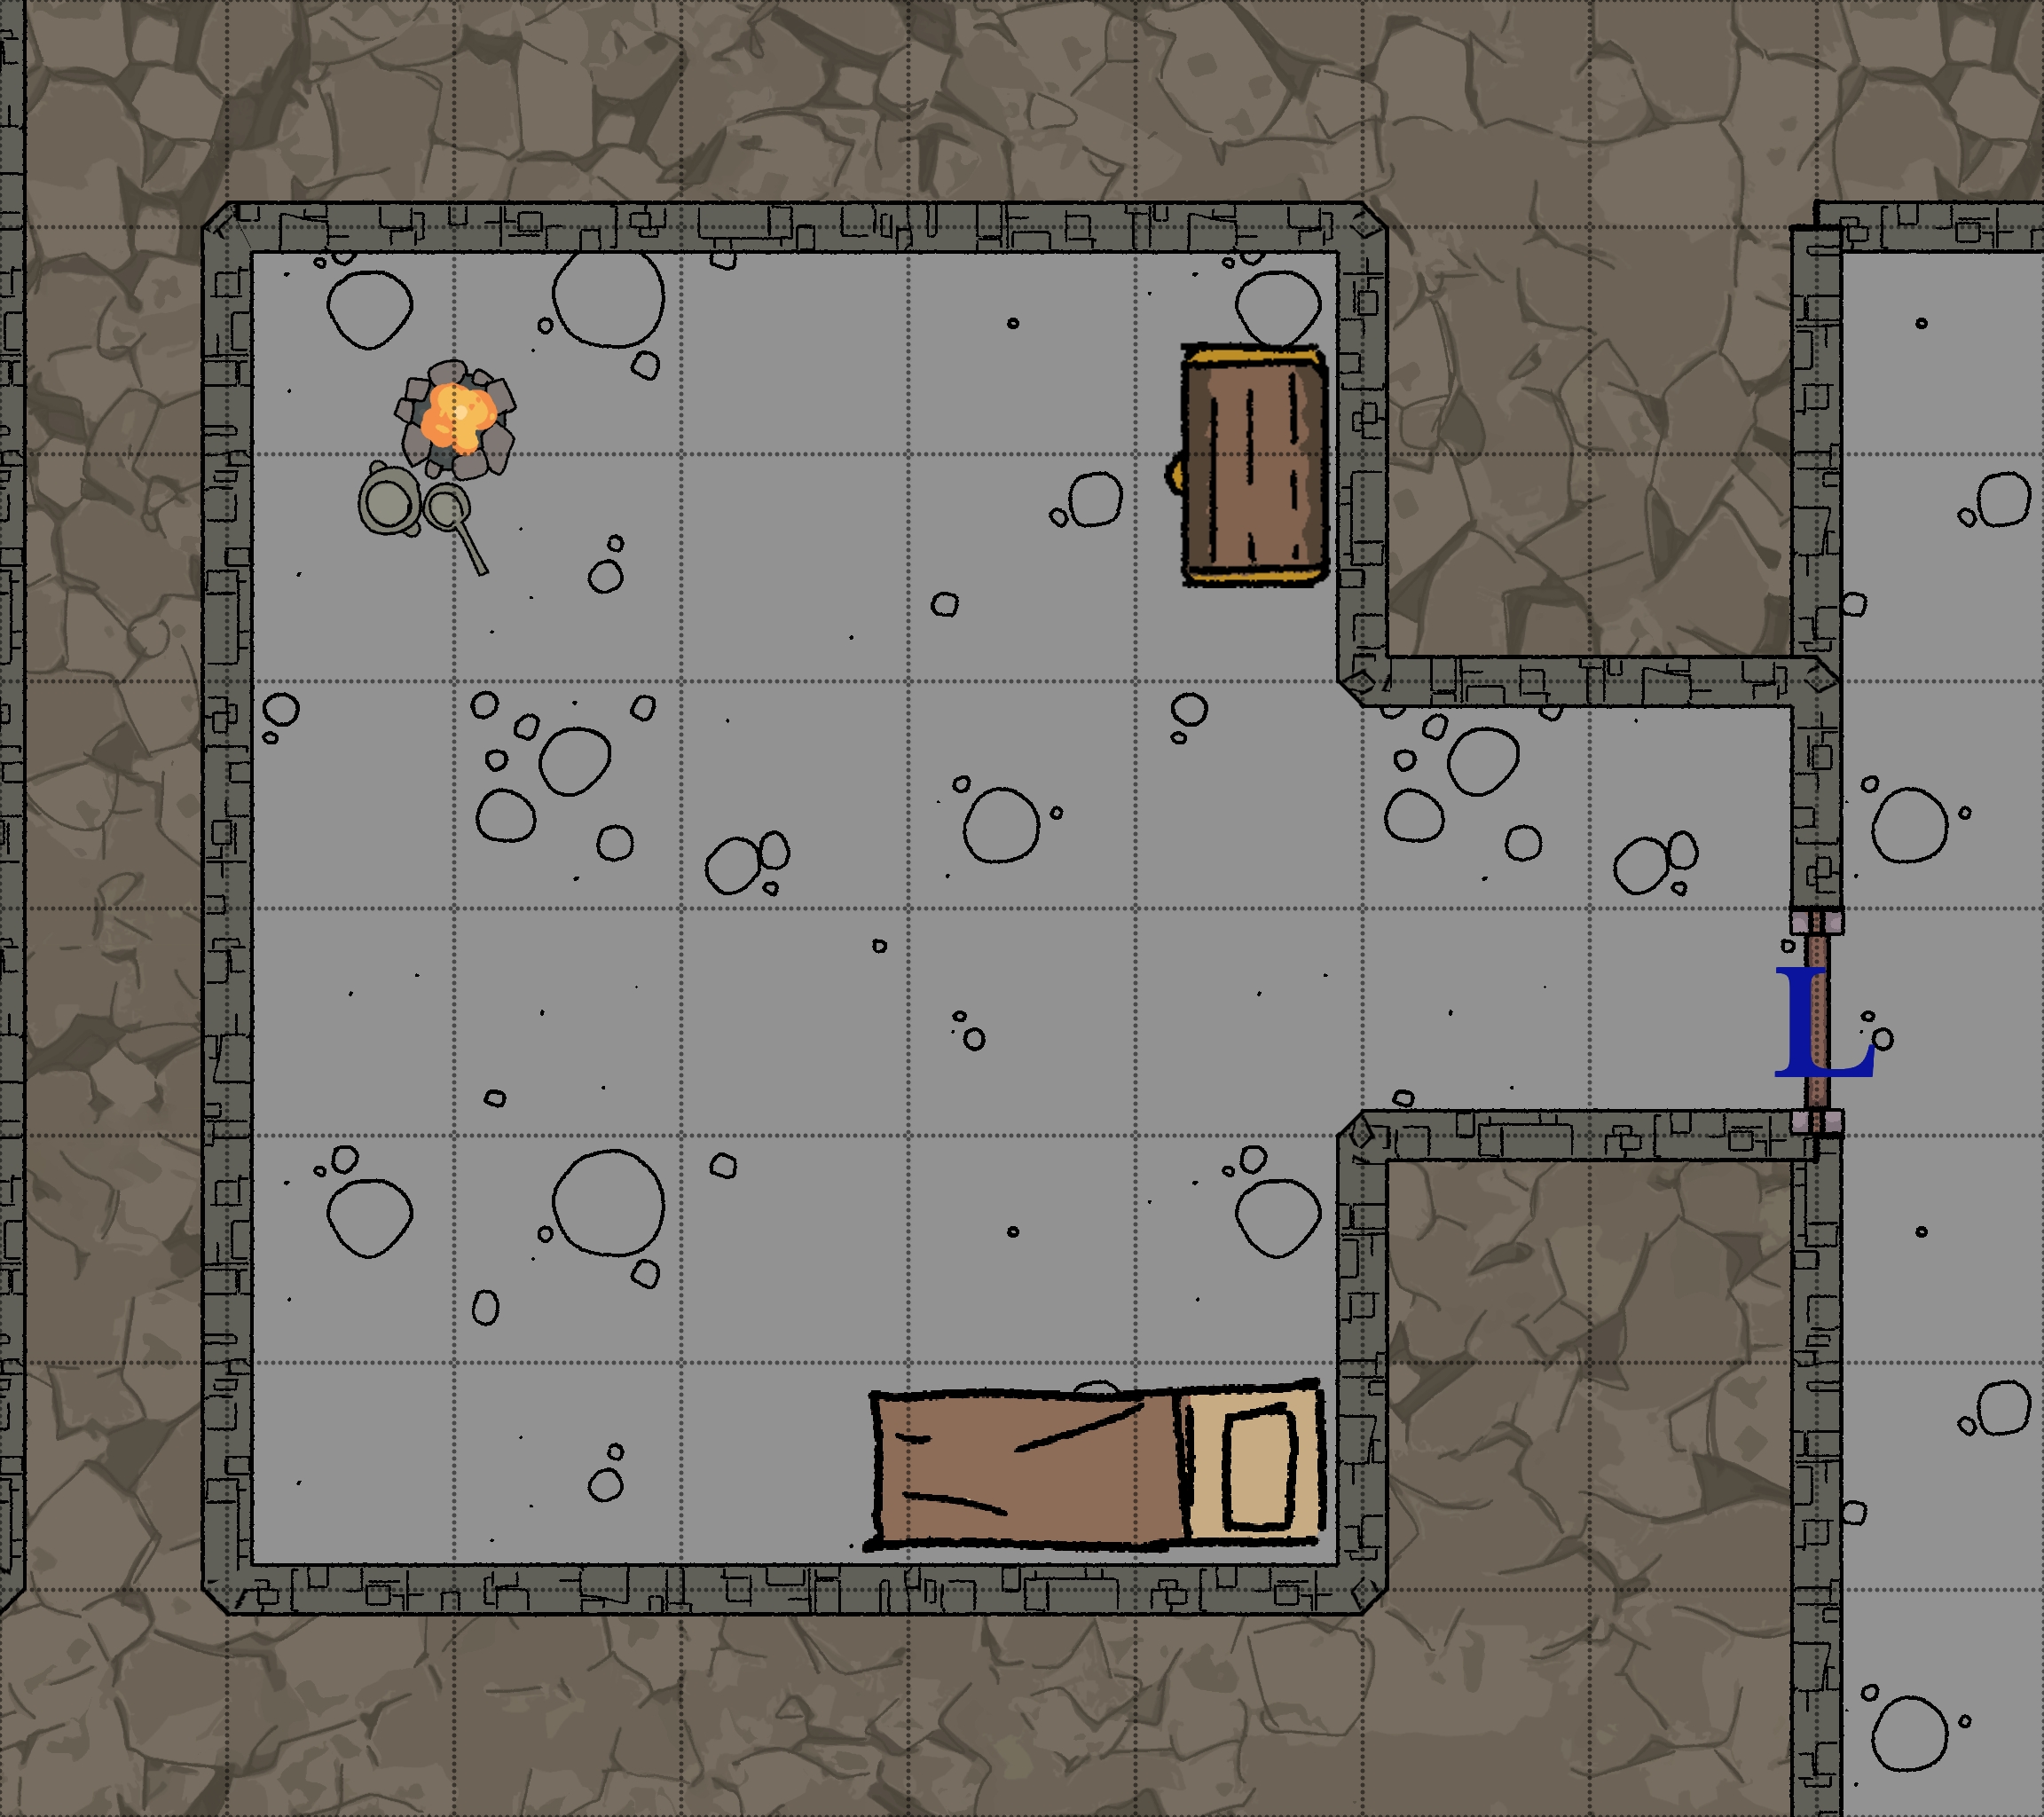
Crocodile Nests - B2-13
Room Type: Lair
Light Level: Dark
This small room is home to a group of crocodiles that live on the dead that fall into the water. This is where they rest when not feeding. The floors are covered in grime and small nests for eggs. Against the west wall is a large round vault door that's once shining metal is now splattered with muck.
2d6 crocodiles are found here.
Connected Rooms
North - Corridor - B2-22 and B2-11
East - Corridor - B2-1
West - Locked vault door (code) - B2-7
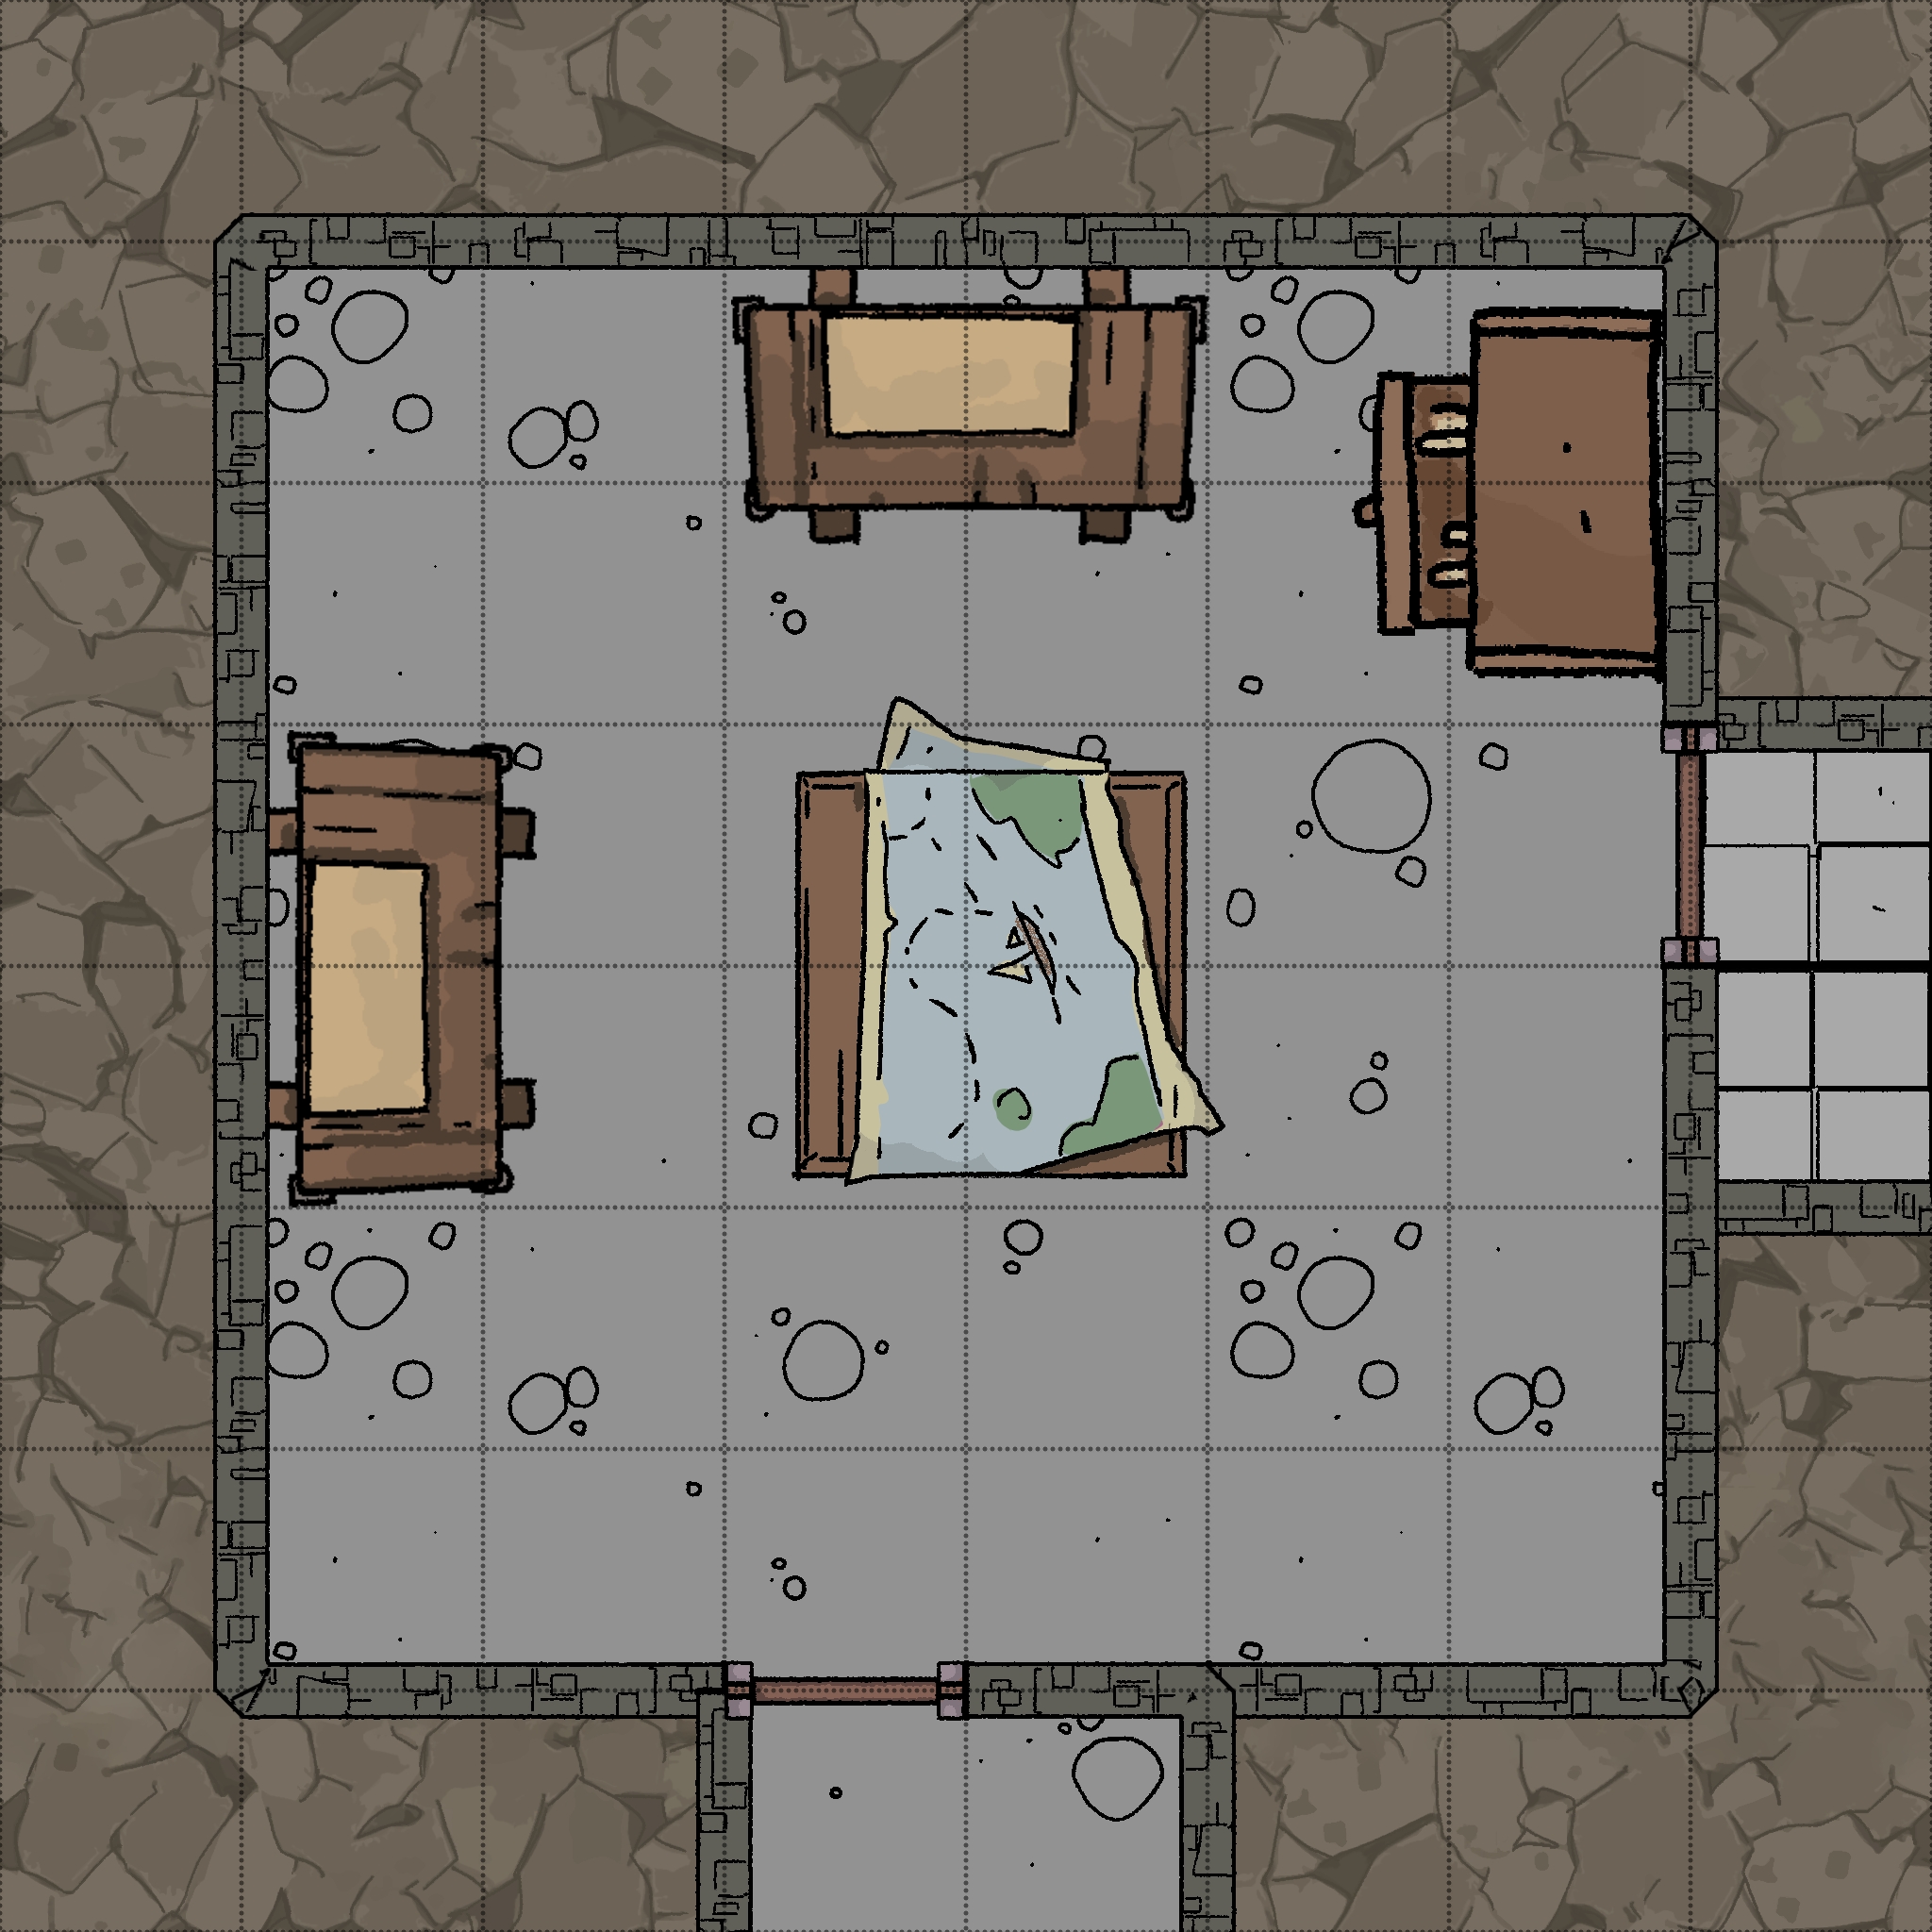
Planning Room - B2-14
Room Type: Special
Light Level: Dark
A room filled with plans, some are stuck to the walls, others are in the middle of being drafted on tables. This room was used to plan different floors for the tower. The one they are currently planning is floor 12.
Floor 12 seems to be used as a greenhouse to grow food and magical components. It's twice as tall, and all the windows seem to connect to the one large open room.
A handwritten note on the table appears to have many drafts under it. The notes are a letter to Alistair Mortayne, discussing the floor. The letters mention they have more than enough room for everything if they can just leave out the “Blood Oak” tree. It provides no benefit and just blocks light and takes up space. The author is clearly trying to write a less combative version.
Connected Rooms
East - Wooden door - B2-16
South - Simple metal door - B2-15
Planning Room - B2-15
Room Type: Trap
Light Level: Dark
A large open room void of decoration, just the same dark stone floors and walls. There is a large 10ft by 10ft hole in the floor that is very clean except for a few items at the bottom. This hole contains a captured Gelatinous Cube used as waste disposal.
A hole in the ceiling connects to the trash chute in Laundry (B1-4) and aligns with the pit in the floor.
At the bottom of the pit is some loot!
- Frugal Crossbow +1
- 1000sp
- 400gp
Connected Rooms
North - Simple metal door - B2-14
South - Simple metal door - Corridor
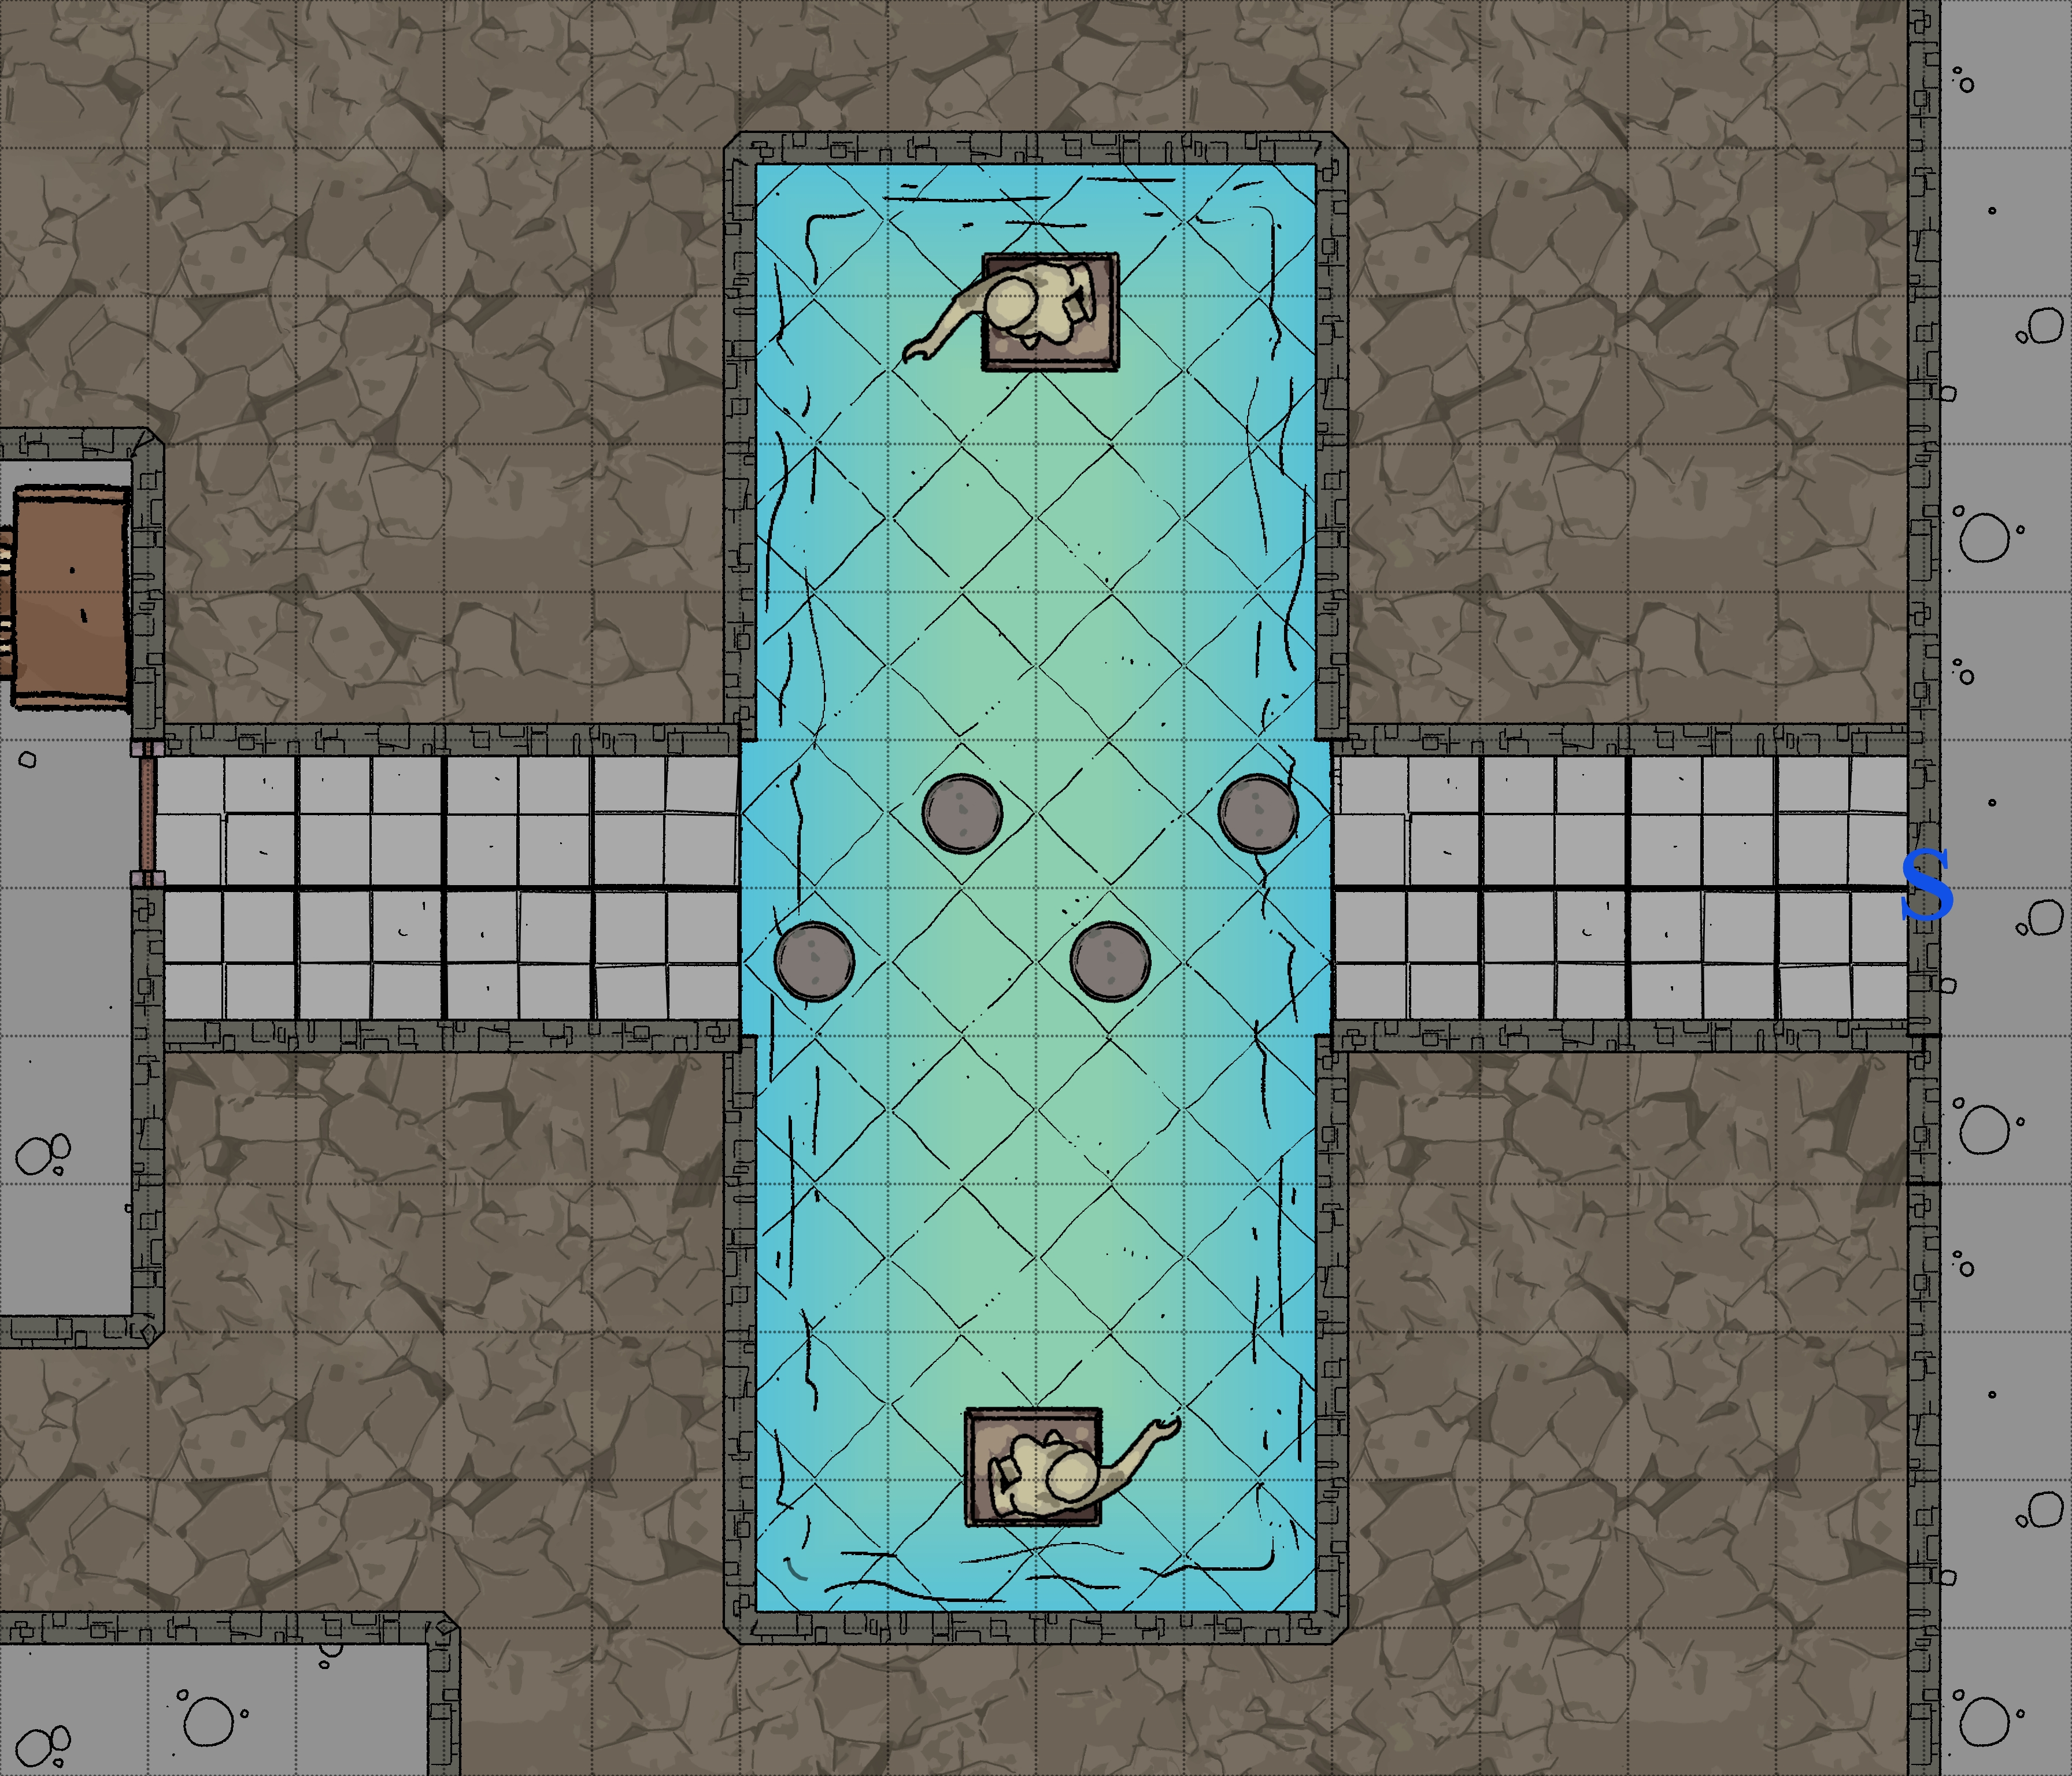
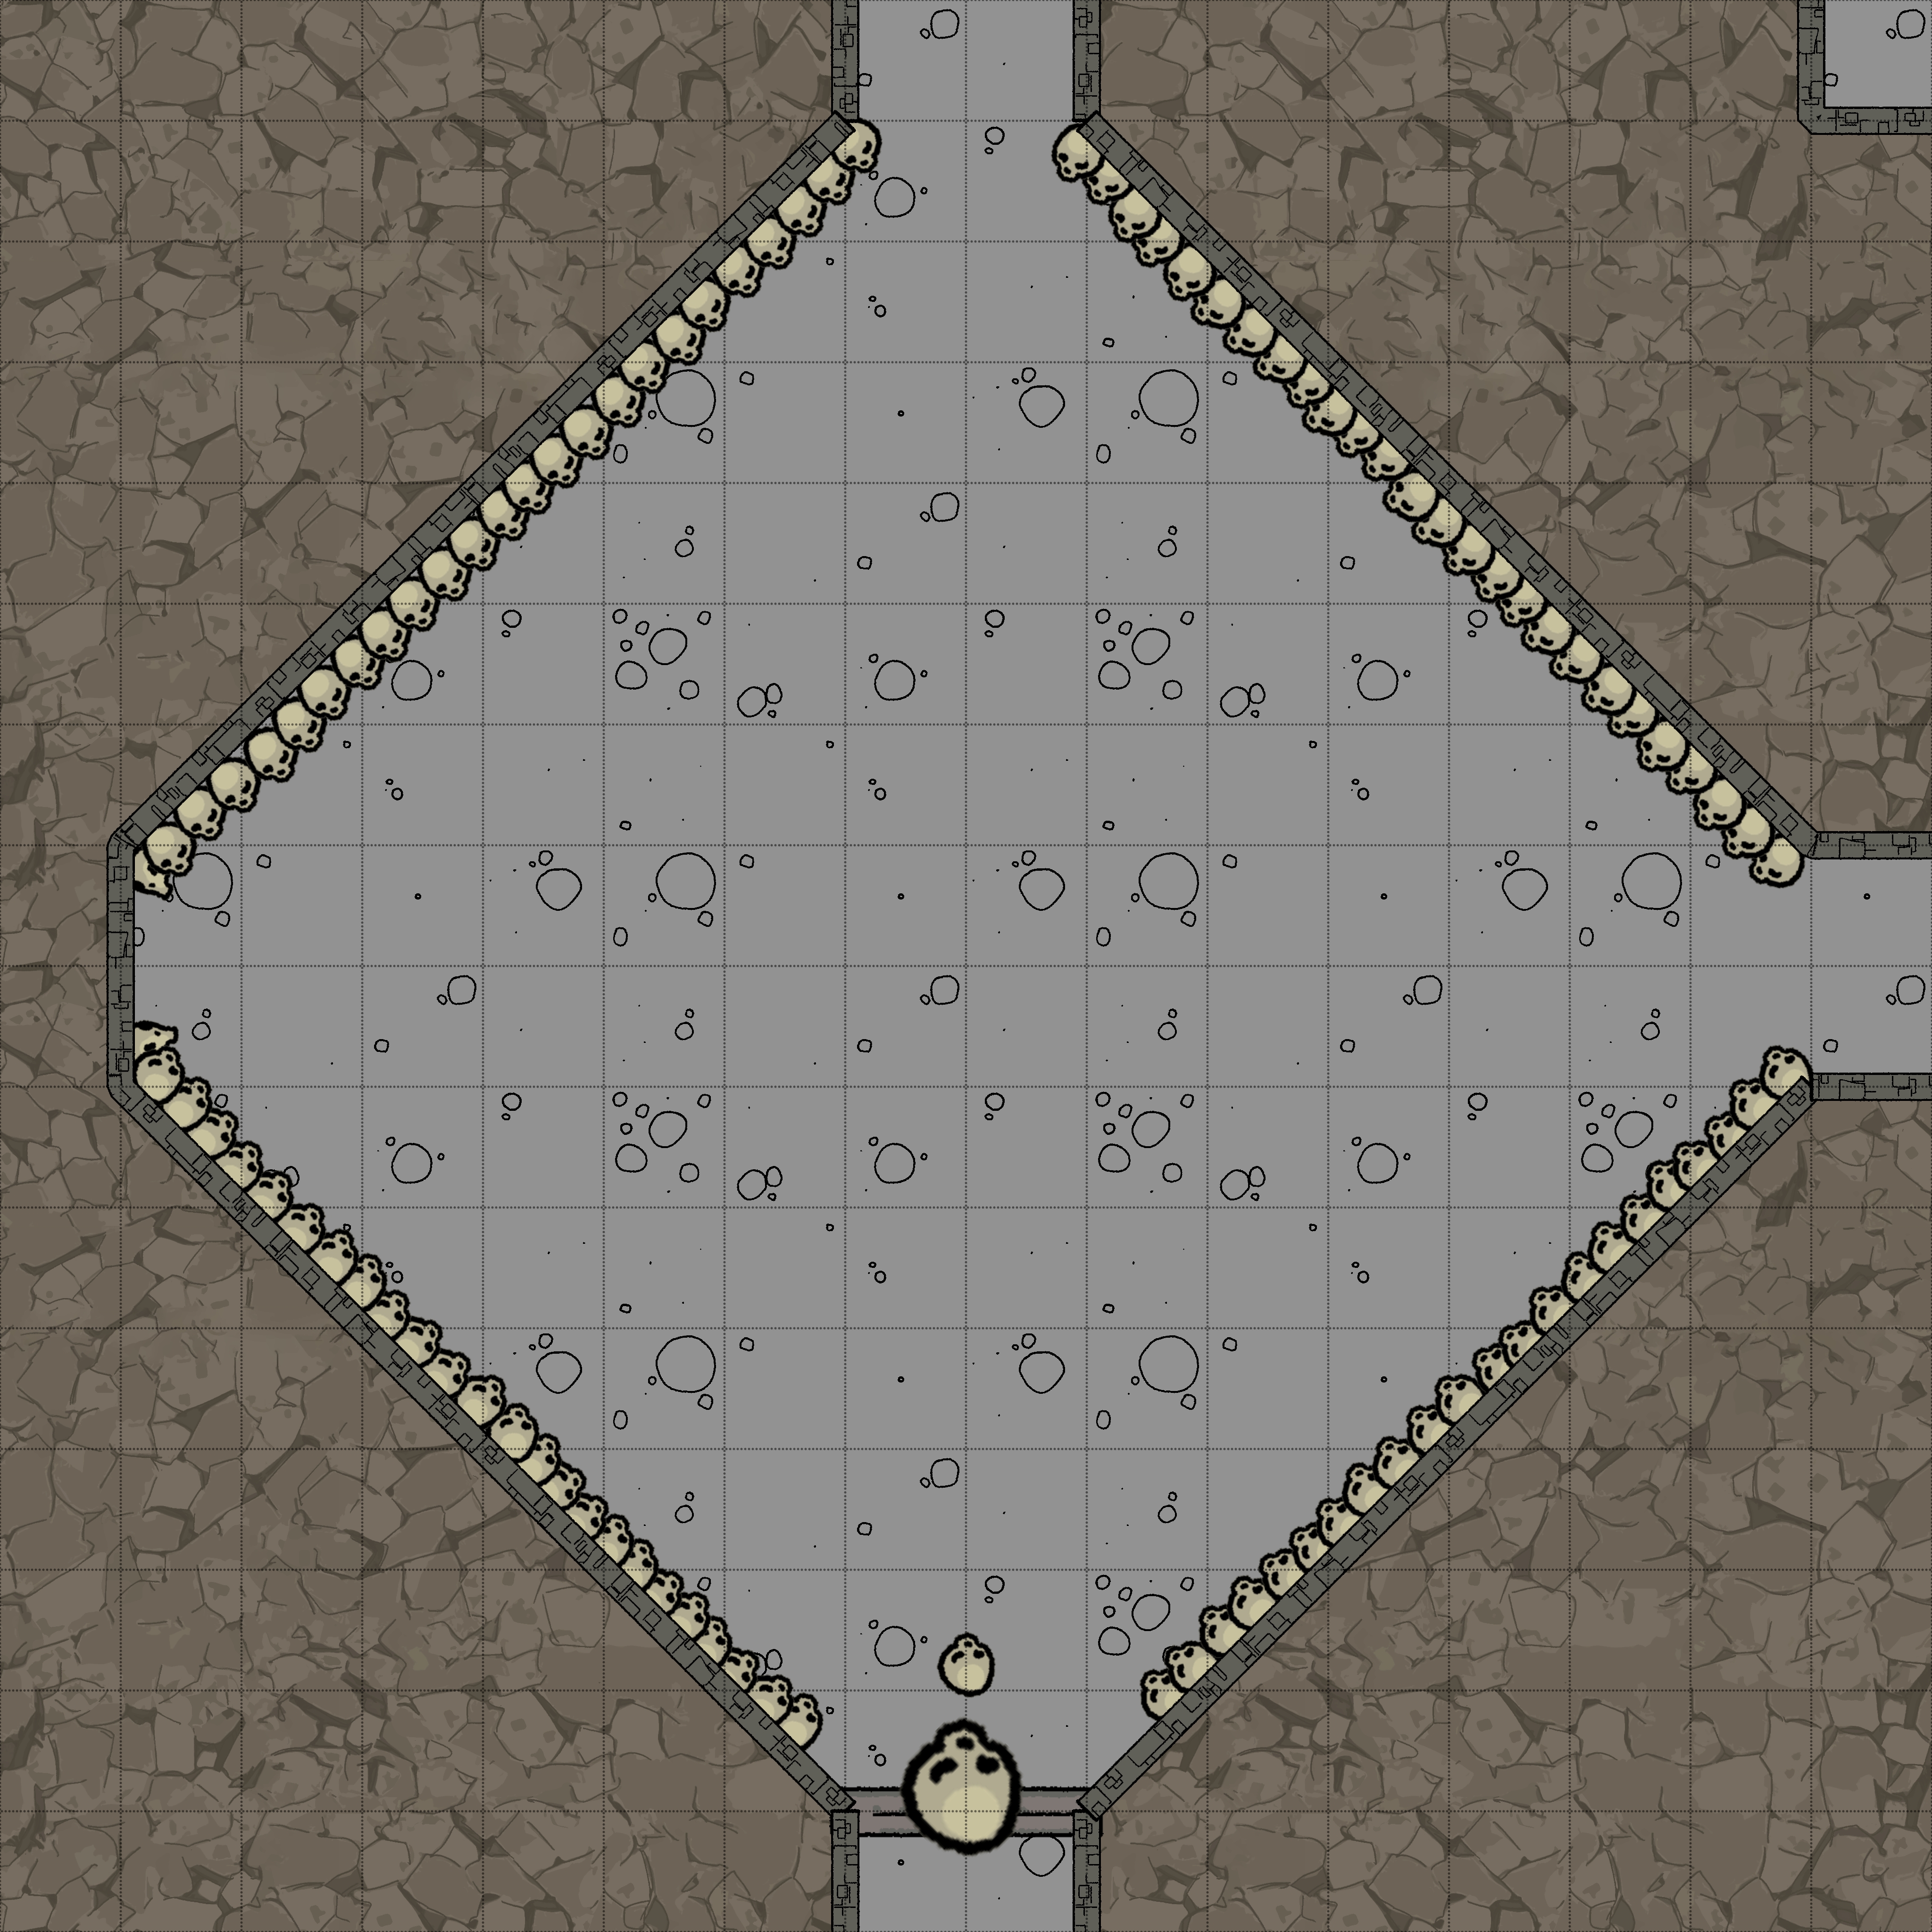
Wishing Fountain - B2-16
Room Type: Lair
Light Level: Dark
The chamber contains a large, beautiful pool with stepping stones across it. The water is crystal clear with coin shimmering under the surface; it looks like a wishing fountain. At the north and south points of the water are two statues. These statues depict people who look as if they are in the process of downing, with water spewing from their mouths like a fountain.
This water is 4ft deep and contains 3 Water Fiends who wait in ambush for anyone grabbing the coins.
Loot!
- 5000pp
- Gem worth 50gp
- 2x Gem worth 100gp
- Spell case containing spell scrolls
- Protection from plants and animals
- Wall of thorns
- Entangle
- Growth of nature
- Cure light wounds
Connected Rooms
East - Back of secret door - B2-8
West - Wooden door - B2-14
Failed Solution - B2-17
Room Type: Special
Light Level: Dark
This room is much like some of the other storage spaces on this floor, bland and bare of any decoration. Against the north wall is a large metal open sarcophagus that's been covered by dust sheets. Thick rubbery conduits connect to the device and the ceiling. Steps flank this sarcophagus, making it easier to step in and out.
This device was a failed attempt at immortality. When spending 1d4 turns in the sarcophagus, all wounds will heal, but save vs corruption (Moderate Source). If a dead body is placed inside that died within the last 10 minutes, then they will be revived, but take Severe Source corruption.
This device was never going to keep someone alive permanently, so it was abandoned.
Connected Rooms
East - Reinforced wooden door - B2-8
West - Reinforced wooden door - Corridor
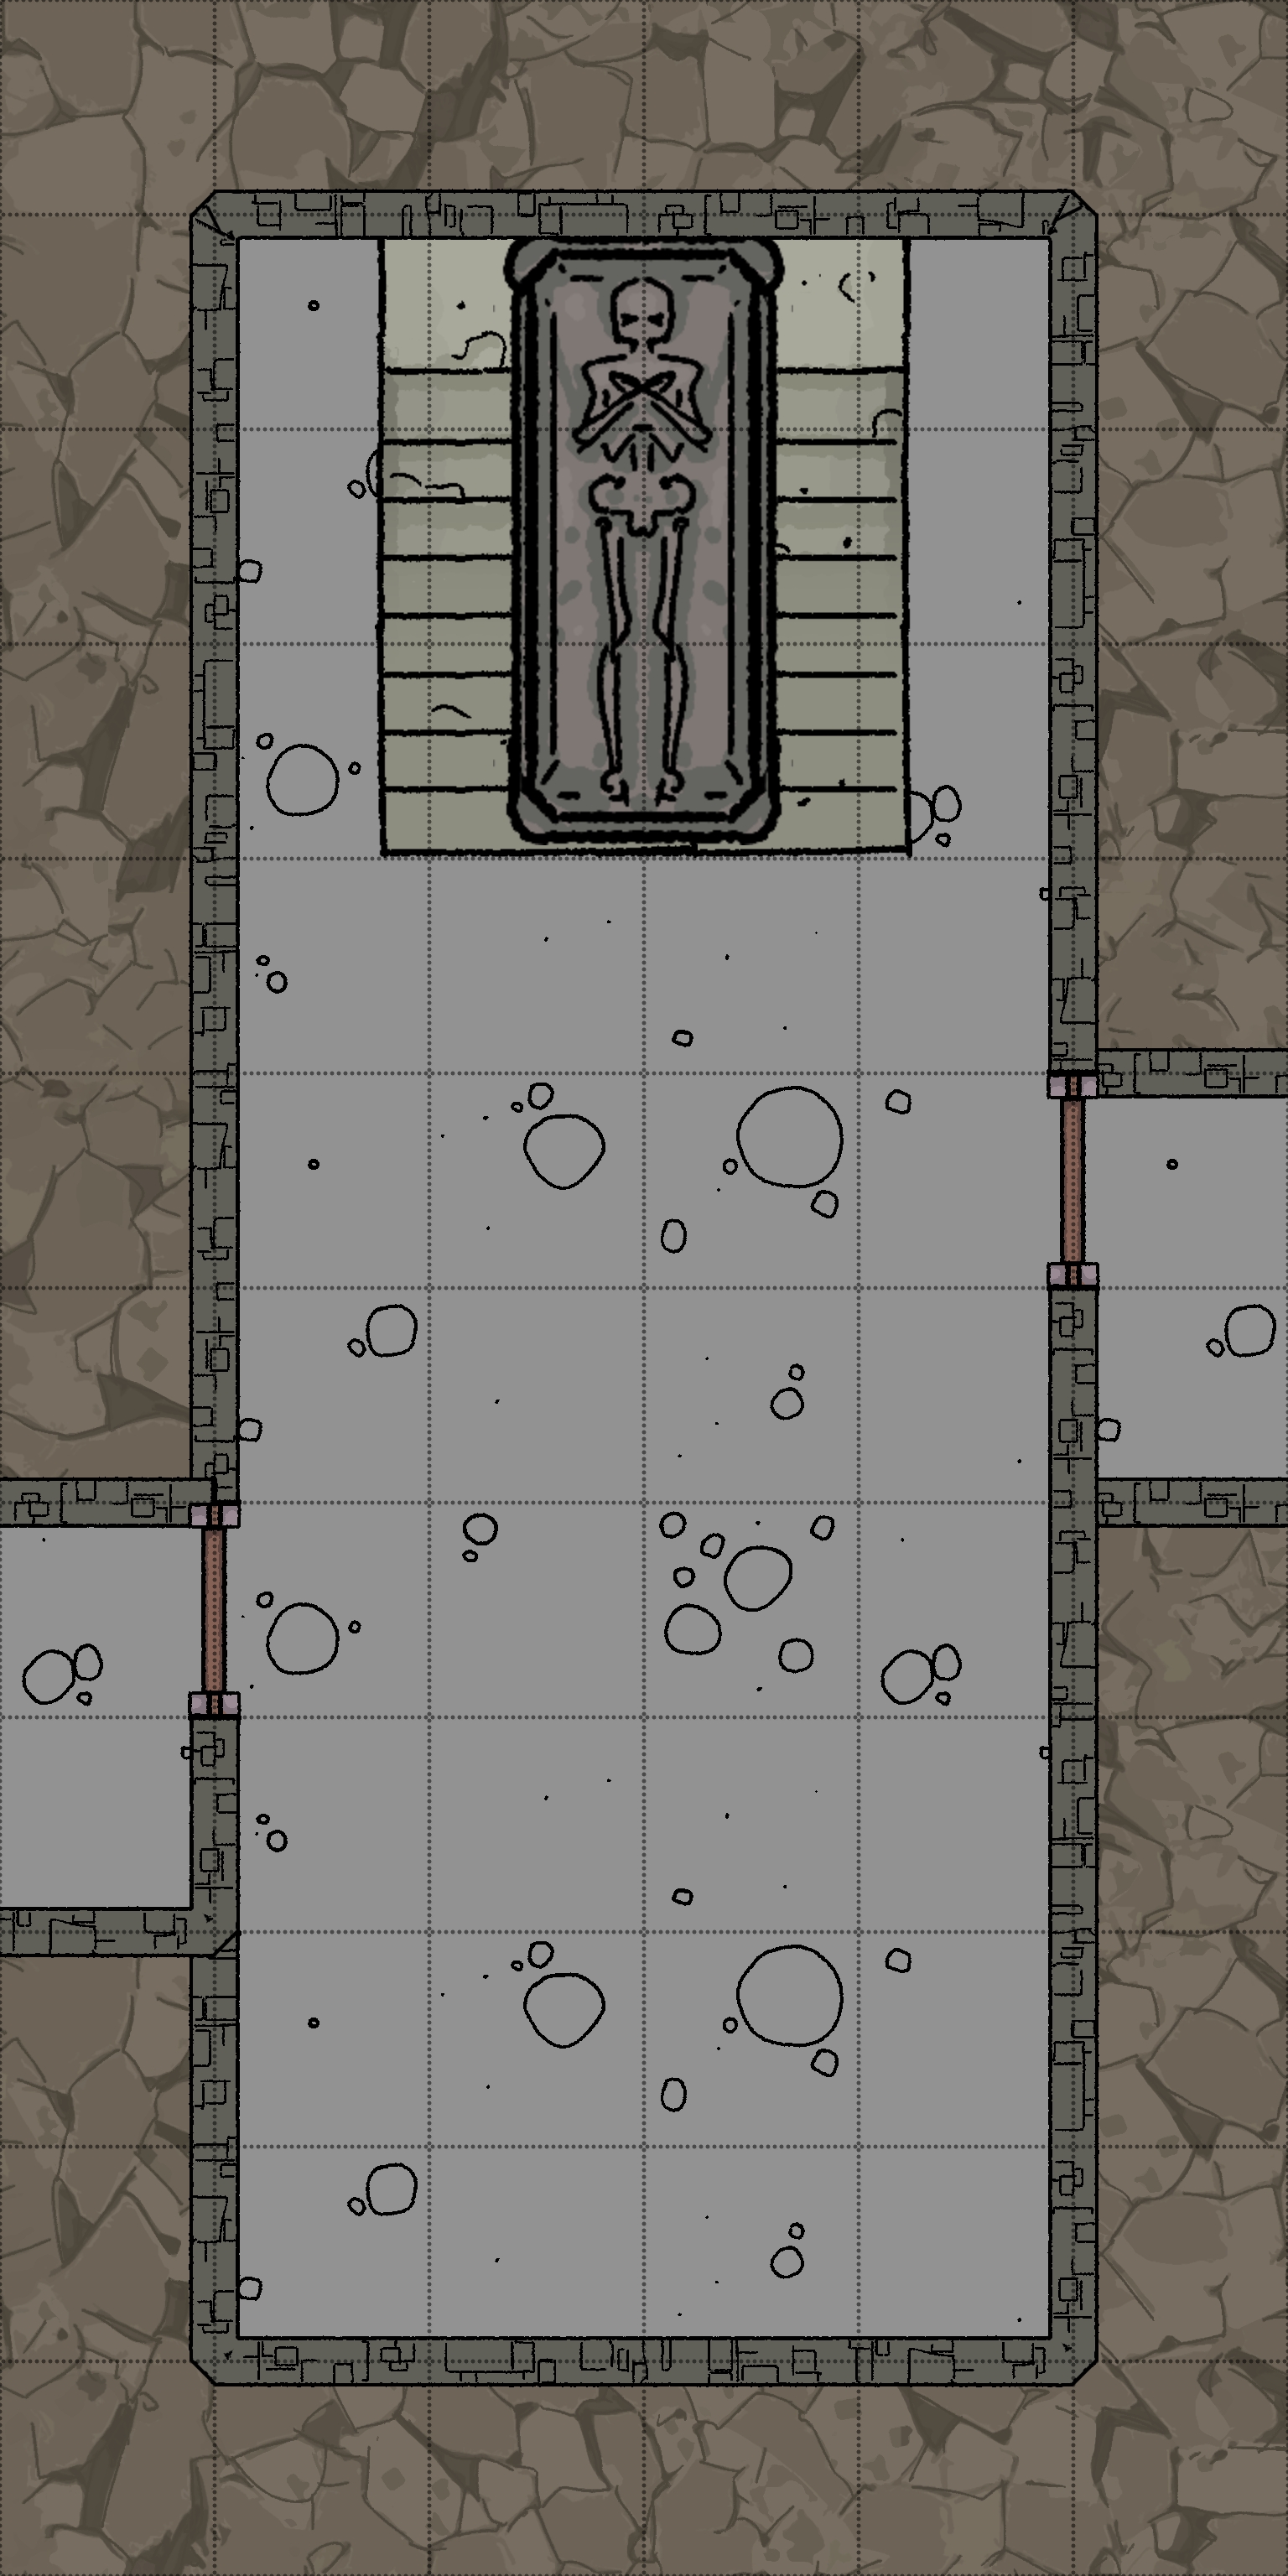
Skull Library - B2-18
Room Type: Trap
Light Level: Dark
Upon entering this room, you are greeted by thousands of skulls looking at you with hollowed sockets. Every bit of wall is decorated with a skull or decorative bone of a different creature, each labelled with its species name. This chamber looks similar to the Paris catacombs.
At the south end of the room is a large giant's skull with a podium in front of it. On top of the podium is a skull with a large cut gem (1200gp) at the back of its mouth. The skull has a chain attached to the back of it that slinks down the back of the podium, then towards the giant's skull. This chain is not obvious at first glance.
Trap!
This skull serves as a bear trap for anyone who reaches into its mouth to retrieve the gem. The mouth will snap down, trapping the individual (1d4 damage), and then the skull is pulled south by the chain. The giant's skull on the wall will start snapping its jaws, eventually killing the trapped person. The chain moves slowly, giving the party 2 rounds to act.
Connected Rooms
North - Open Corridor - B2-15 and B2-17
East - Wooden door - B2-8
South - Secret door inside giant's mouth - B2-19
Puppeteers' room - B2-19
Room Type: Special
Light Level: Dark
This small dark room is home to all the mechanics that make the trap in B2-18 work. There are lots of exposed cogs and mechanical components to get trapped in; there is also a small stash of coins amongst the device.
Loot!
- 500sp
Connected Rooms
North - Back of secret door - B2-18
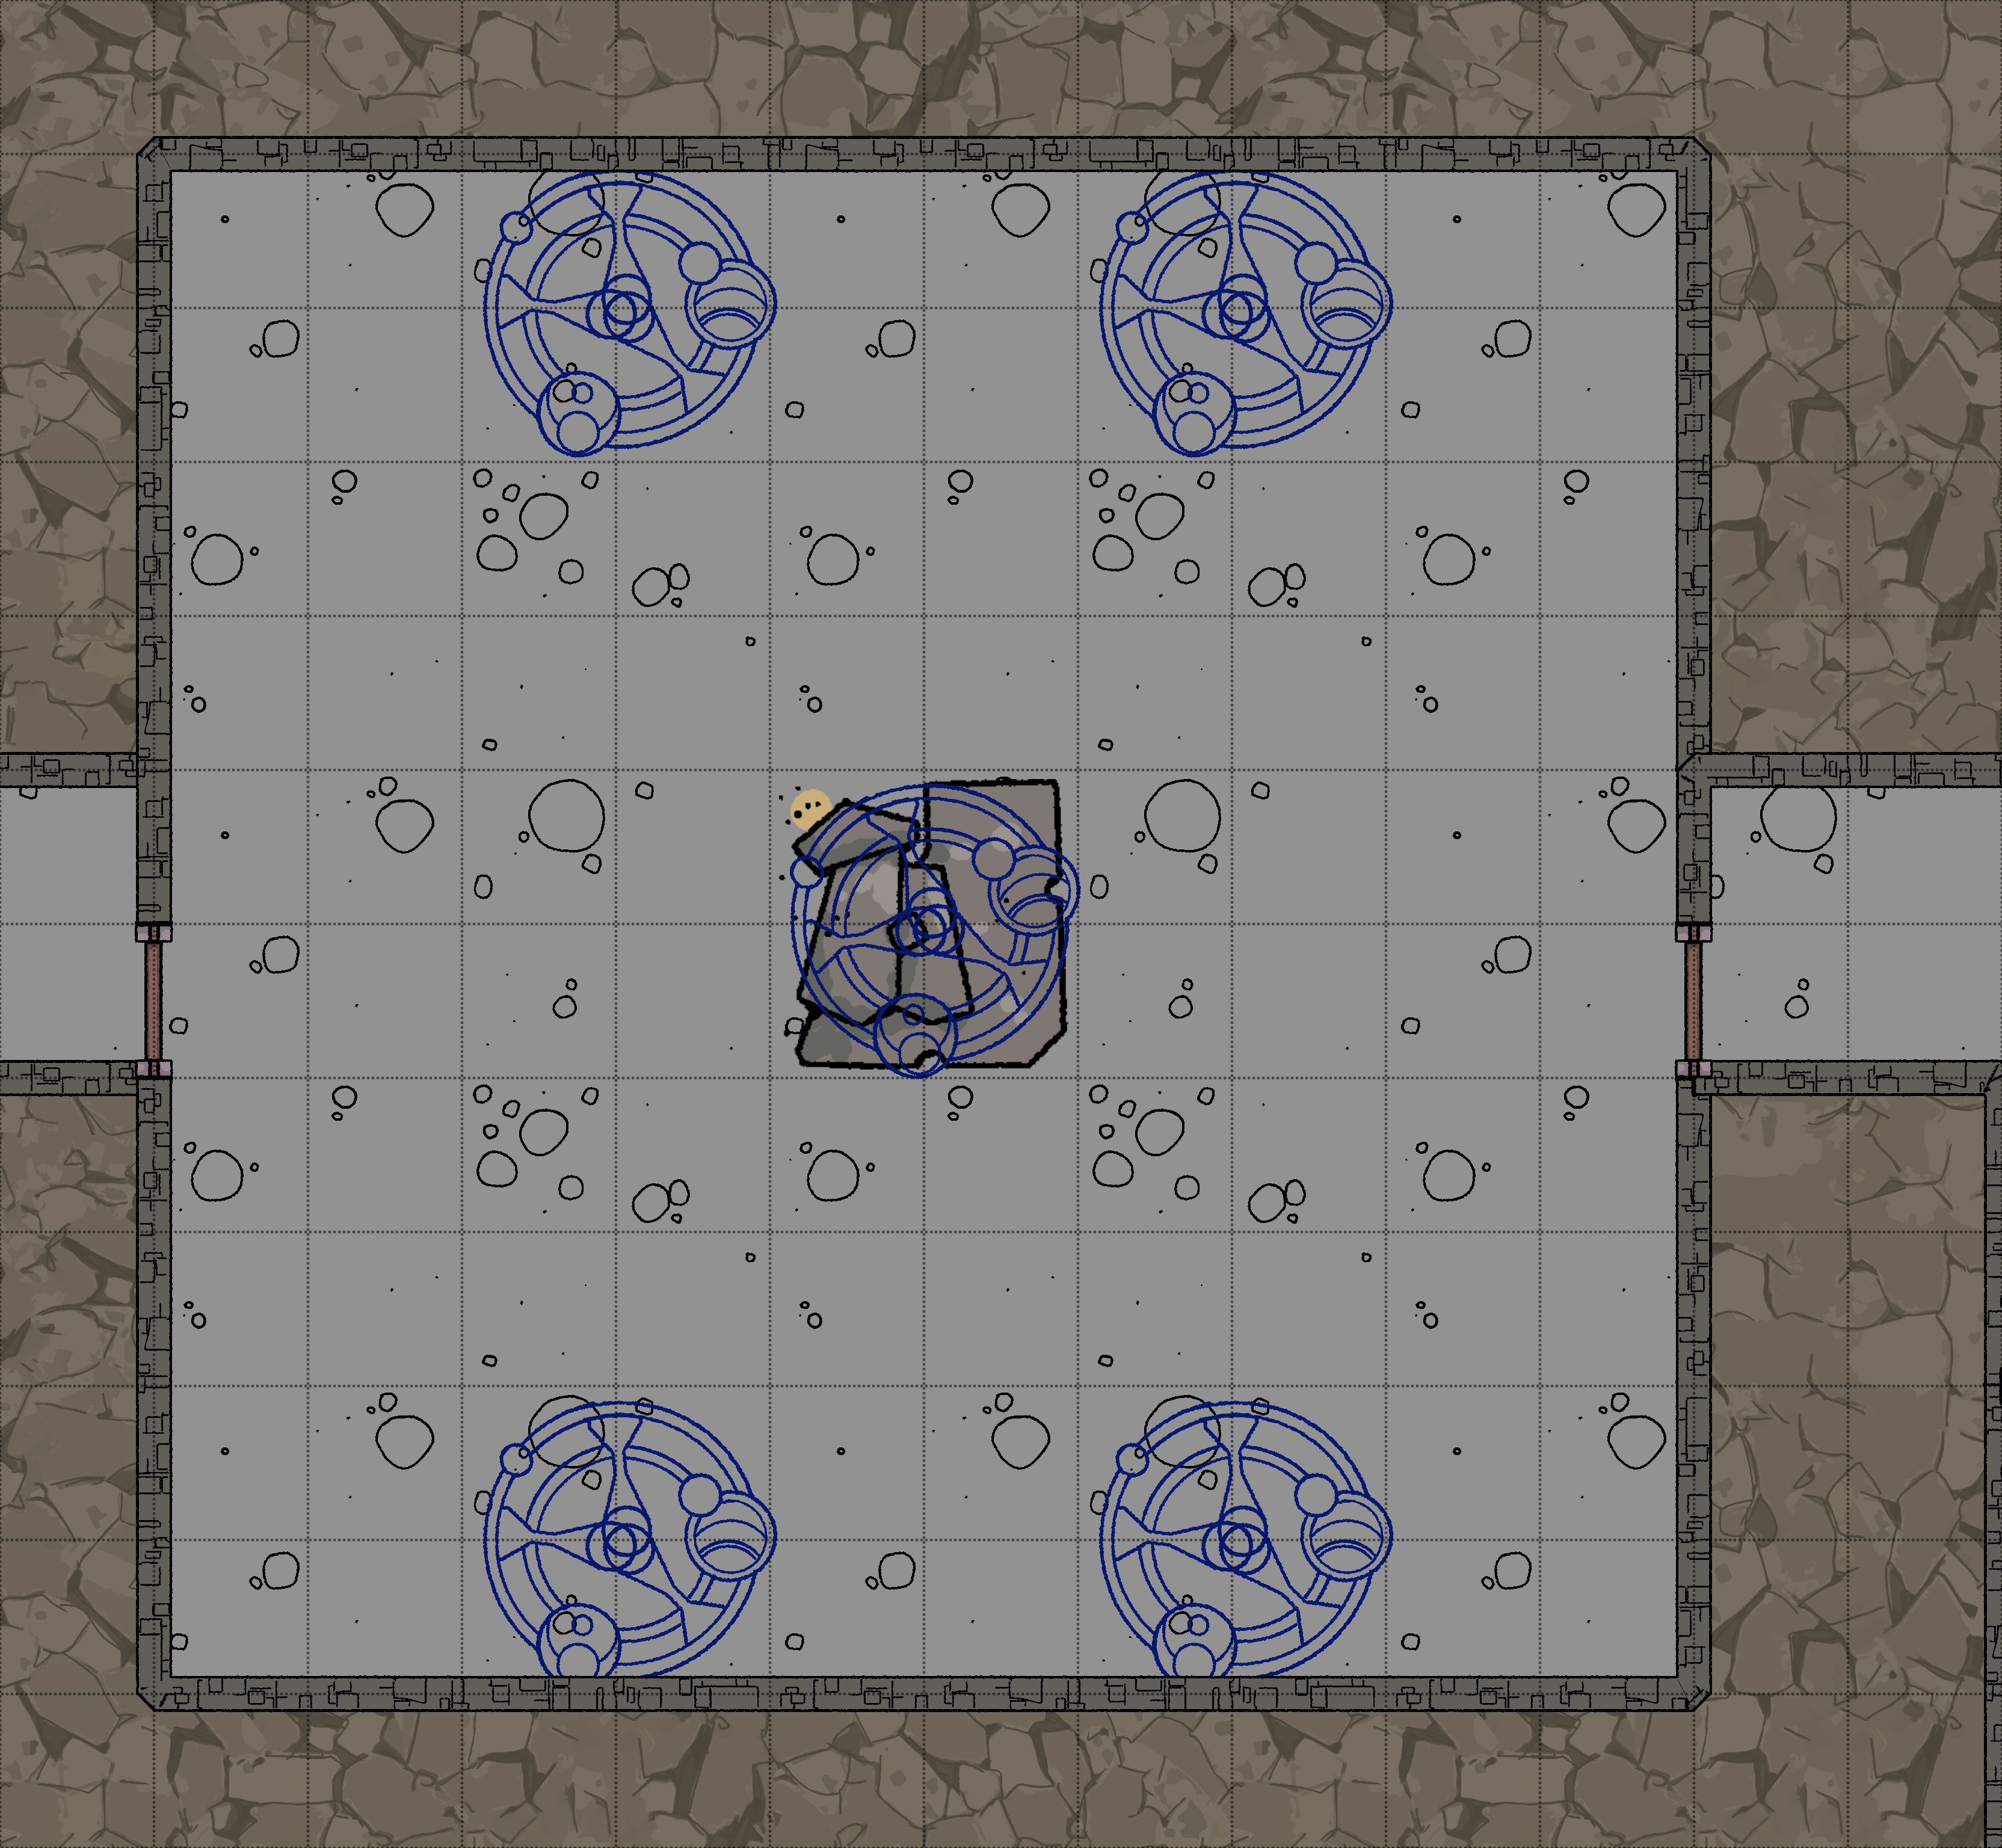
Abandoned Teliporter Room - B2-20
Room Type: Special
Light Level: Dark
This room was clearly once very decorated and ostentatious, with pillars carved into the wall and arched ceilings, now all cracked and muddied by years of grime. Evenly spaced around the floor are a number of teleportation sigils, each with an engraved label beneath it.
Simply stepping on the sigils transports you to the relevant rooms.
Central Sigil (Smashed)
The label can still be made out as “Guardian Lab”.
This smashed Sigil no longer works, but each piece can be collected for repair.
Top Left
"Control Room" (B1-18)
Top Right
“Staff Door" (1-27)
Bottom Left
No Sign (2-15)
Bottom Right
"Waiting Chamber" (3-33)
Non-Magically Connected Rooms
East - Metal door - B2-5
West - Metal door - Corridor
Hearts Underbelly - B2-21
Room Type: Trap
Light Level: Dim Green Light
Green light shoots from cracks in the ceiling of this room. Stonework has crumbled, revealing lead panels lining the ceiling; some have been removed. Corrupting energy from the heart above now leaks into this space.
Anyone exposed to a beam of this light is affected by a Severe Source of corruption. With no other light sources, these light beams are easy to see and avoid. The stone floor under the direct light is darker and crumbles easily.
In the corner of this space, some scraps of lead panels can be found. These scraps are the leftovers of when the Lead Knight made his armour.
Connected Rooms
North - Wooden door - Corridor
South - Crumbling wooden door - B2-22
Staff Lavatory - B2-22
Room Type: Empty
Light Level: Dark
Everyone poops. This staff lavatory has mostly fallen apart over time, but the toilets are still in working order, just lacking the privacy of a cubicle. These toilets are not complicated, just a pipe into the water to the east.
A few wooden cubical walls still exist, and some very old graffiti can be found on them.
- "We already have a nice village, why are we building one in a tower."
- "Alistair can't keep his family alive, so why does he care about us."
- "So glad our master has the dead guarding us, it means a job for life!"
Clean water can be run from sinks to the south-west.
Connected Rooms
North - Brittle wooden door - B2-21
West - Wooden door - Corridor
Lead Knights Lair - B2-23
Room Type: Lair
Light Level: Dark
A small, simple chamber where the Lead knight lives. Clearly, having taken a few pieces of furniture out of the nearby storage.
3-6 chance of finding the Lead Knight here if he was not found elsewhere on the floor. Will not appreciate anyone coming into his personal space.
Locked chest with a few personal possessions and some loot!
- 500sp
- 200gp
- Gem worth 500gp
Connected Rooms
East - Locked reinforced wooden door - Corridor

Trapped Ghouls - B2-24
Room Type: Lair
Light Level: Dark
This storage space was used to trap Ghouls. The 3d6 Ghouls were baited into this room by the Lead Knight before the door was sealed behind them.
Unfortunately, there is some loot that was left behind before the Ghouls took over.
Loot!
- 4000cp
- 4000ep
- A crown designed for someone with horns made from gold and encrusted with red gemstones (1700gp)
- Magnet Sheild +2
Connected Rooms
West - Reinforced wooden door blocked with pitons - Corridor
Staris Up - B2-25
Room Type: Empty
Light Level: Dark
This room is void of any decoration or clear purpose. Against the west wall is a stone staircase heading up to B1-35. The floor is littered with broken pottery and stone, clearly having fallen down the stairs.
Connected Rooms
Broken Corridor - B2-26
Room Type: Empty
Light Level: Dark
This corridor has been eroded by the water and is slowly crumbling away. It's a 2ft drop down into the water, with rocky edges that are awkward to traverse. The stairs to the south are made from stone and connect to the stairs near the Staff Chambers B1-12.
Connected Rooms
Up - Stone Stairs - Basement 1
North - Crumbling coastline - B2-1