Grand Entrance - 1-1
Room Type: Trap
Light Level: Well lit (during the day)
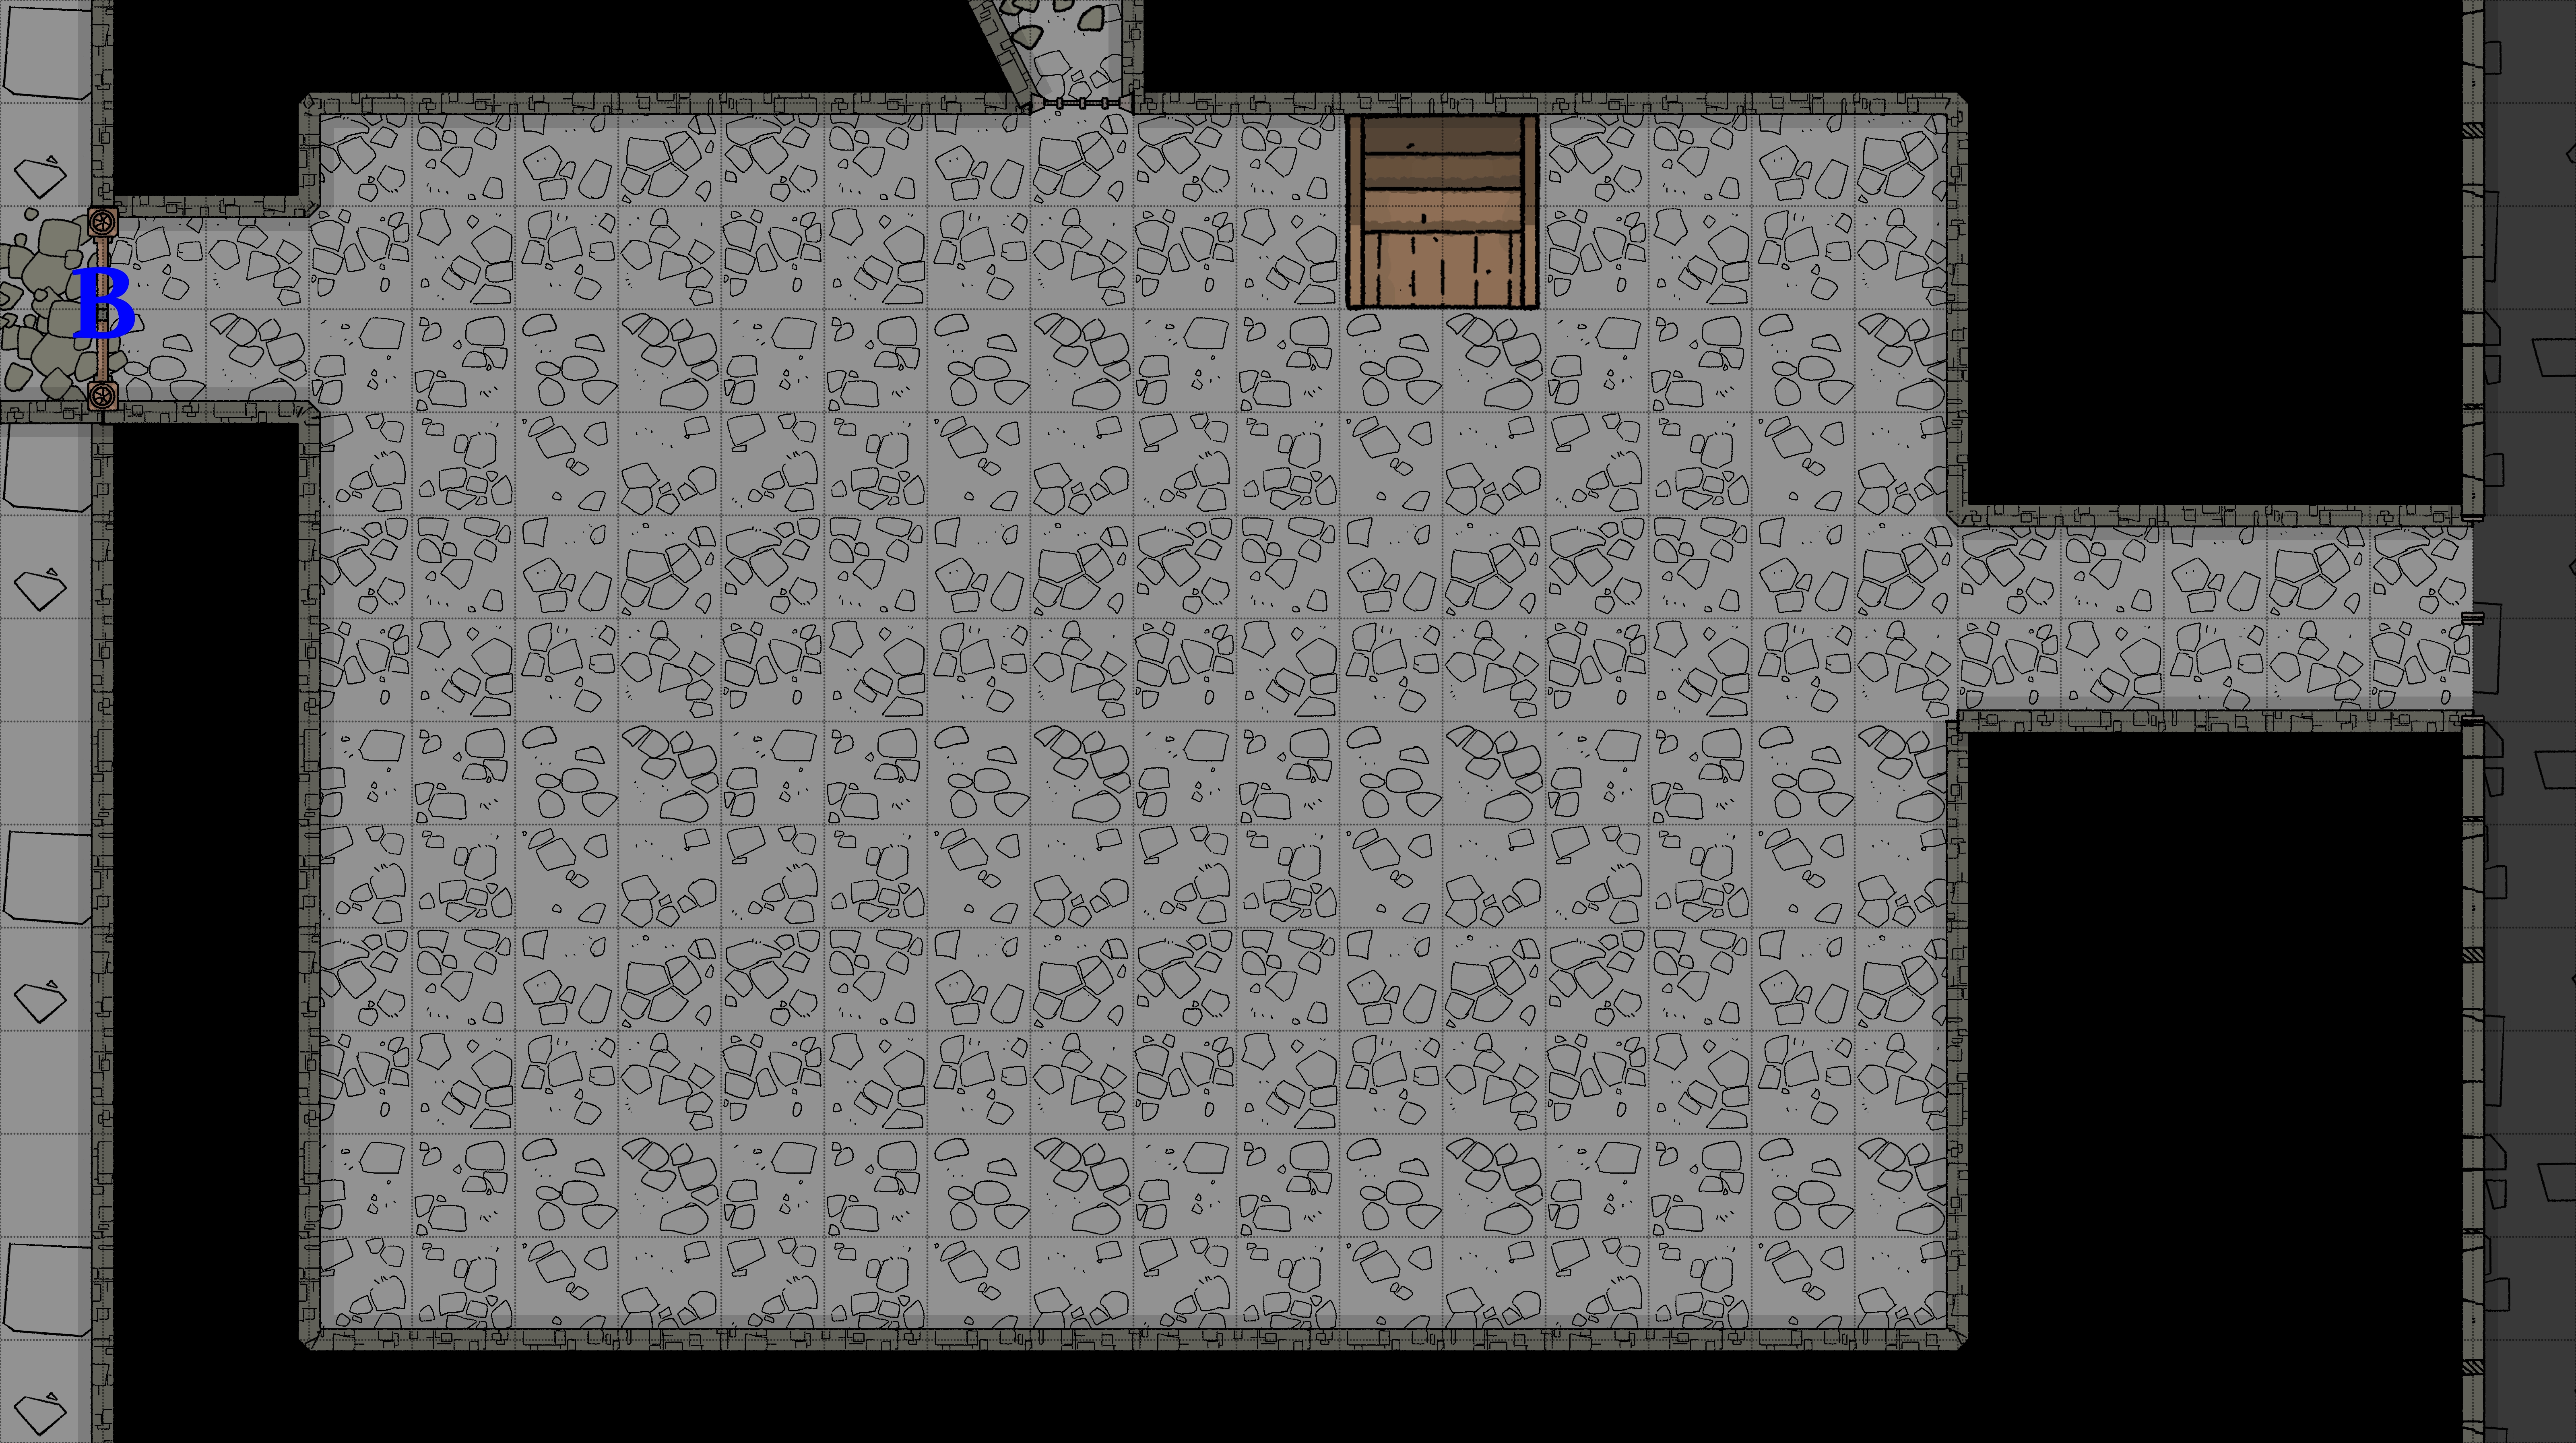
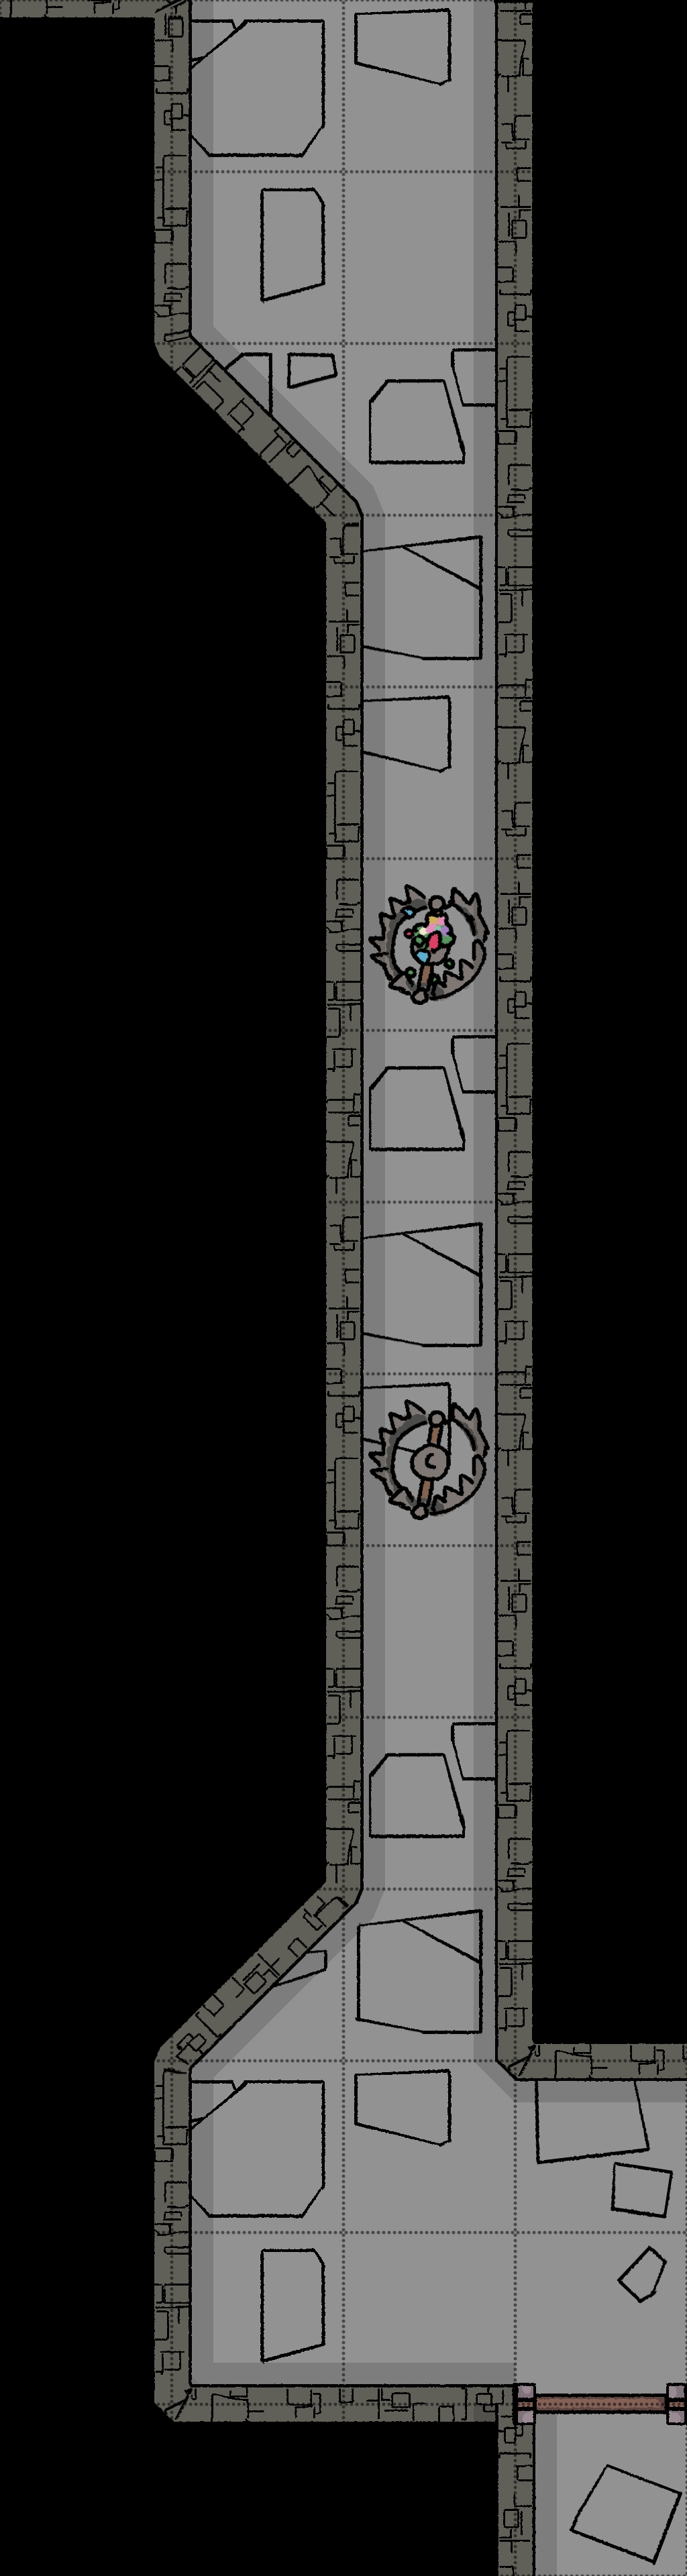
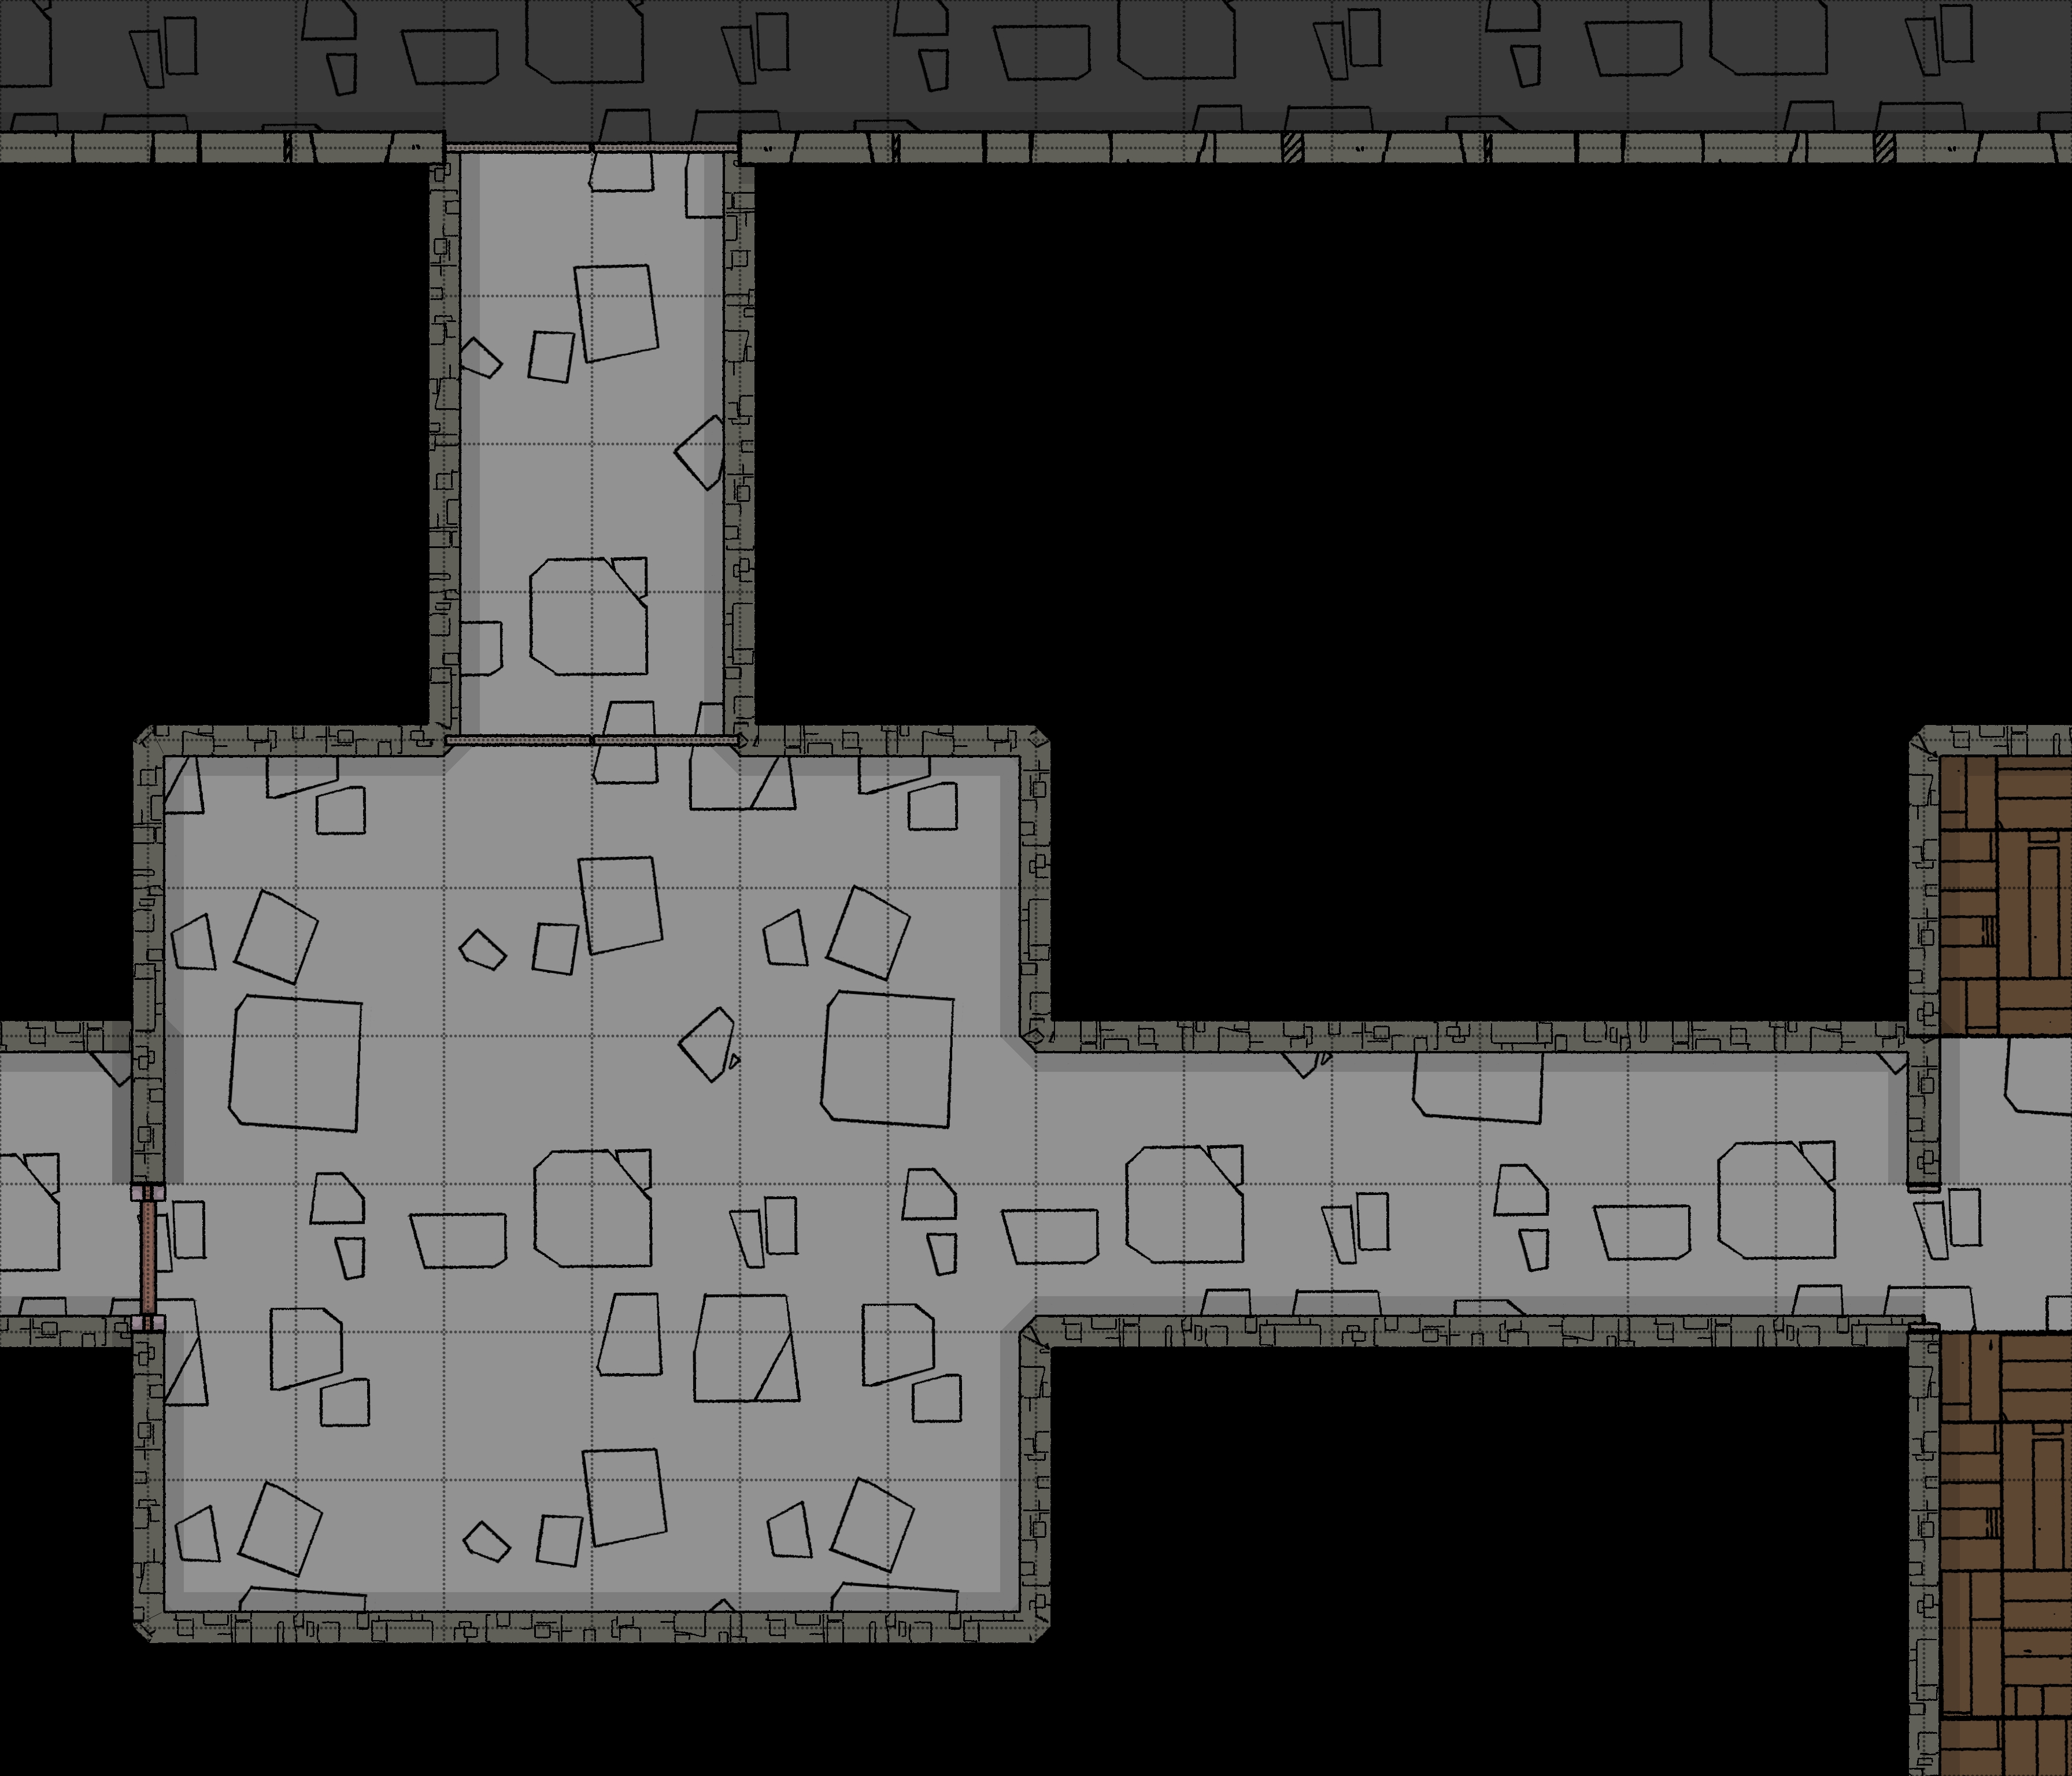
This passage is the main entrance to the tower. The large monolithic stone walls have a corridor cut through them, leading from light into total darkness, except for a distant statue lit by several candles.
Entrance Message
At the entrance, a large semicircular engraving extends from the tower's footprint. It features many languages, all saying the same thing: “Crawl towards your lord and thank him for your life.”
Distant Statue
The distant Brass Statue (in room 1-2) looks like a skeleton covered in jewellery, its arms spread wide, as if welcoming guests or looking down on a begging crowd. It has a stone tablet resting against its legs, but it is unreadable from this distance.
Trapped Corridor
The entire corridor has pressure plates on the floor and spears that protrude from the walls. The pressure plates are not obvious, but clear holes are visible on both walls. Activating the pressure plates will trigger the trap, causing spears to protrude from the walls, but only at 3ft and up. So crawling or being short will protect you.
Connected Rooms
North - Open archway - 1-2
South - Outside the Tower
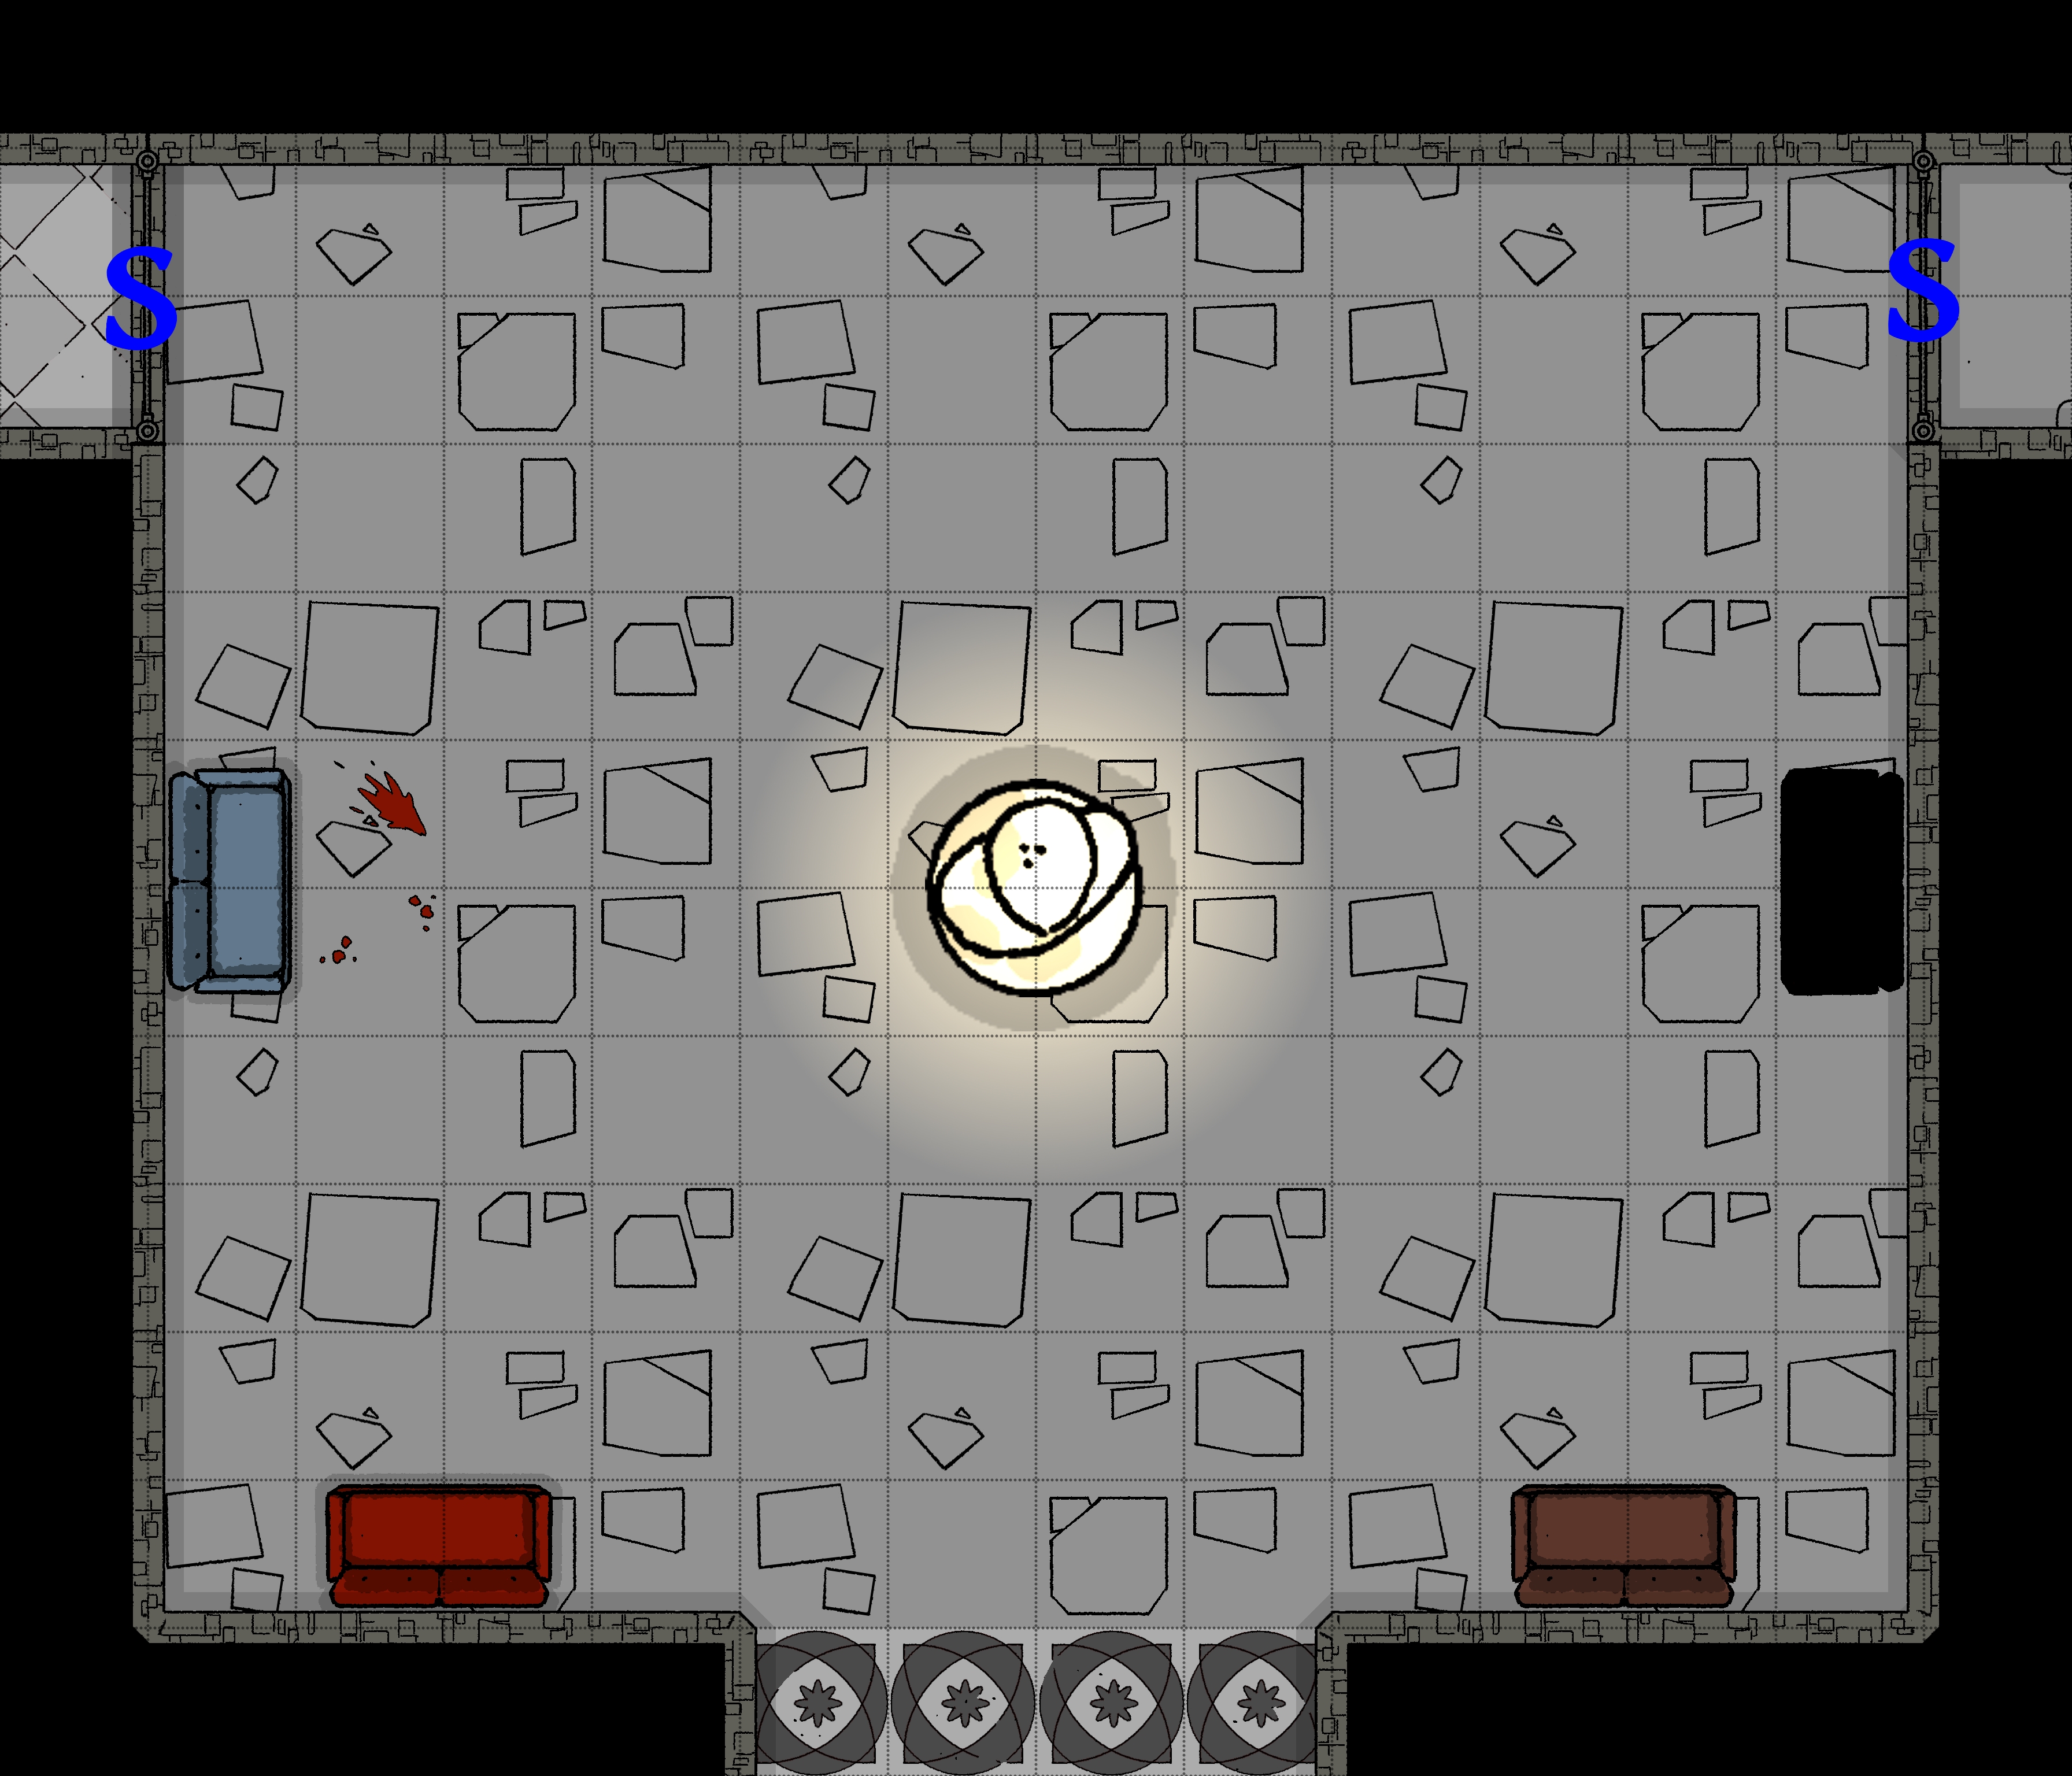
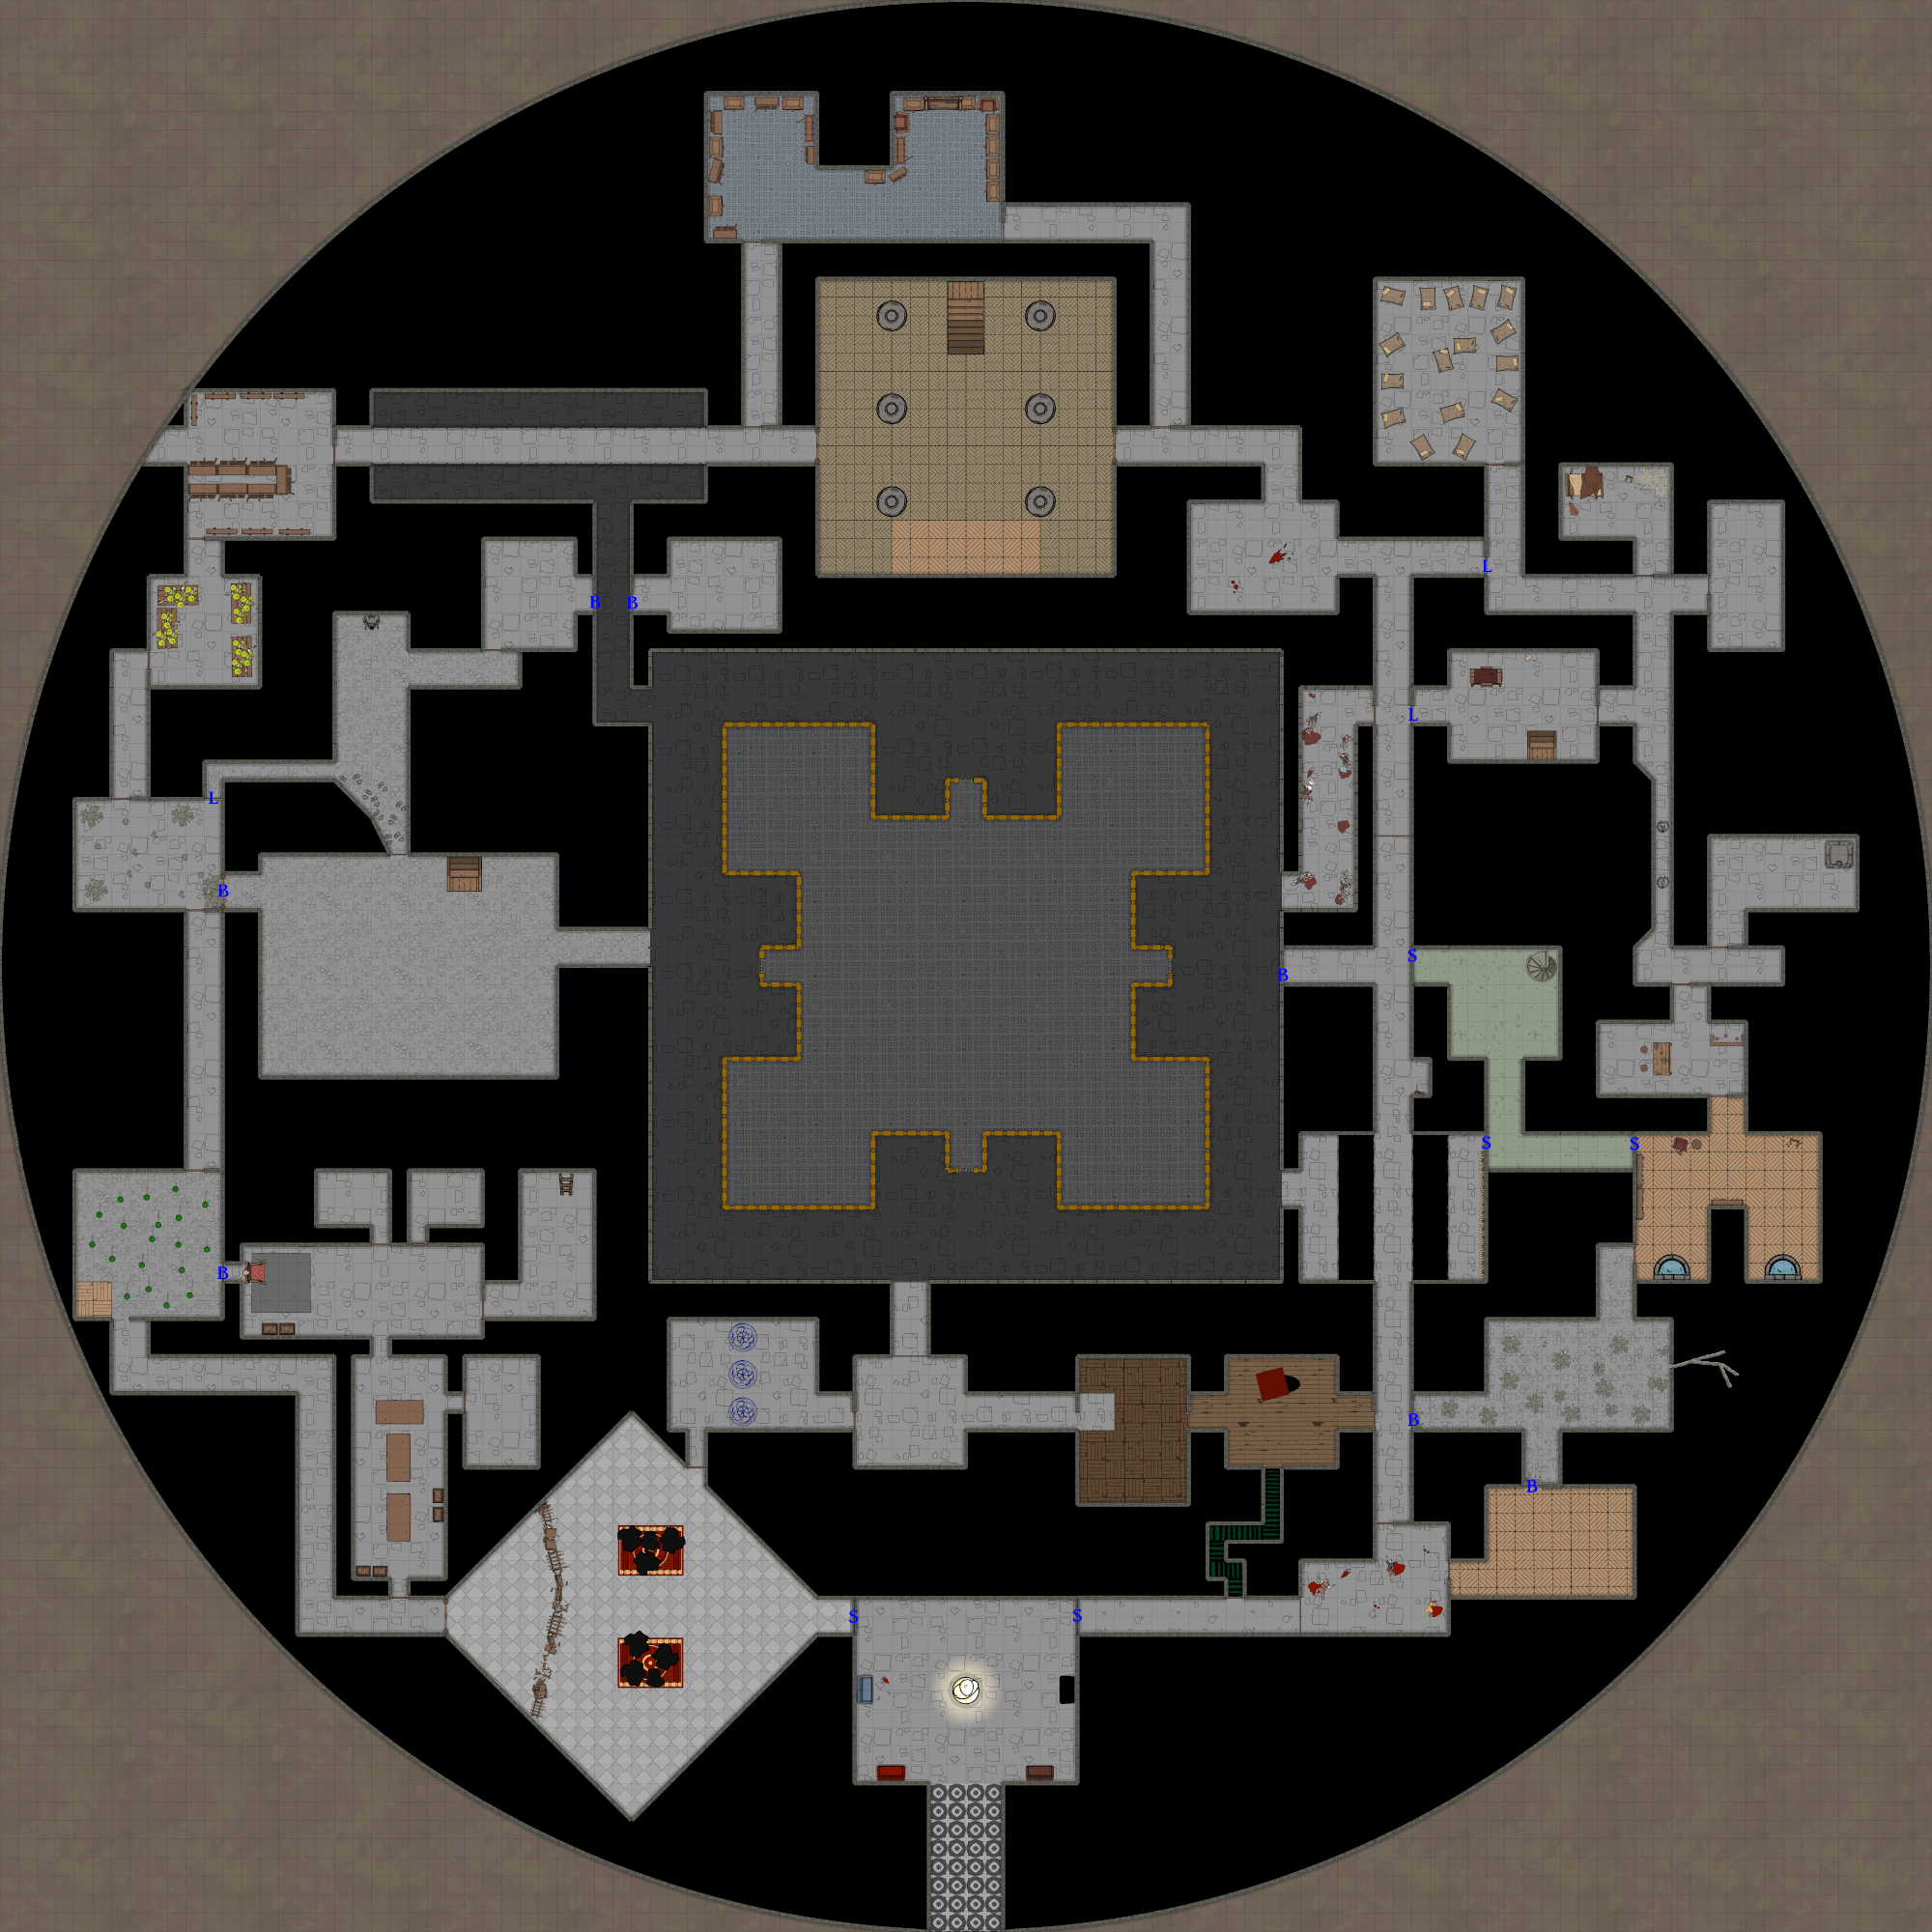
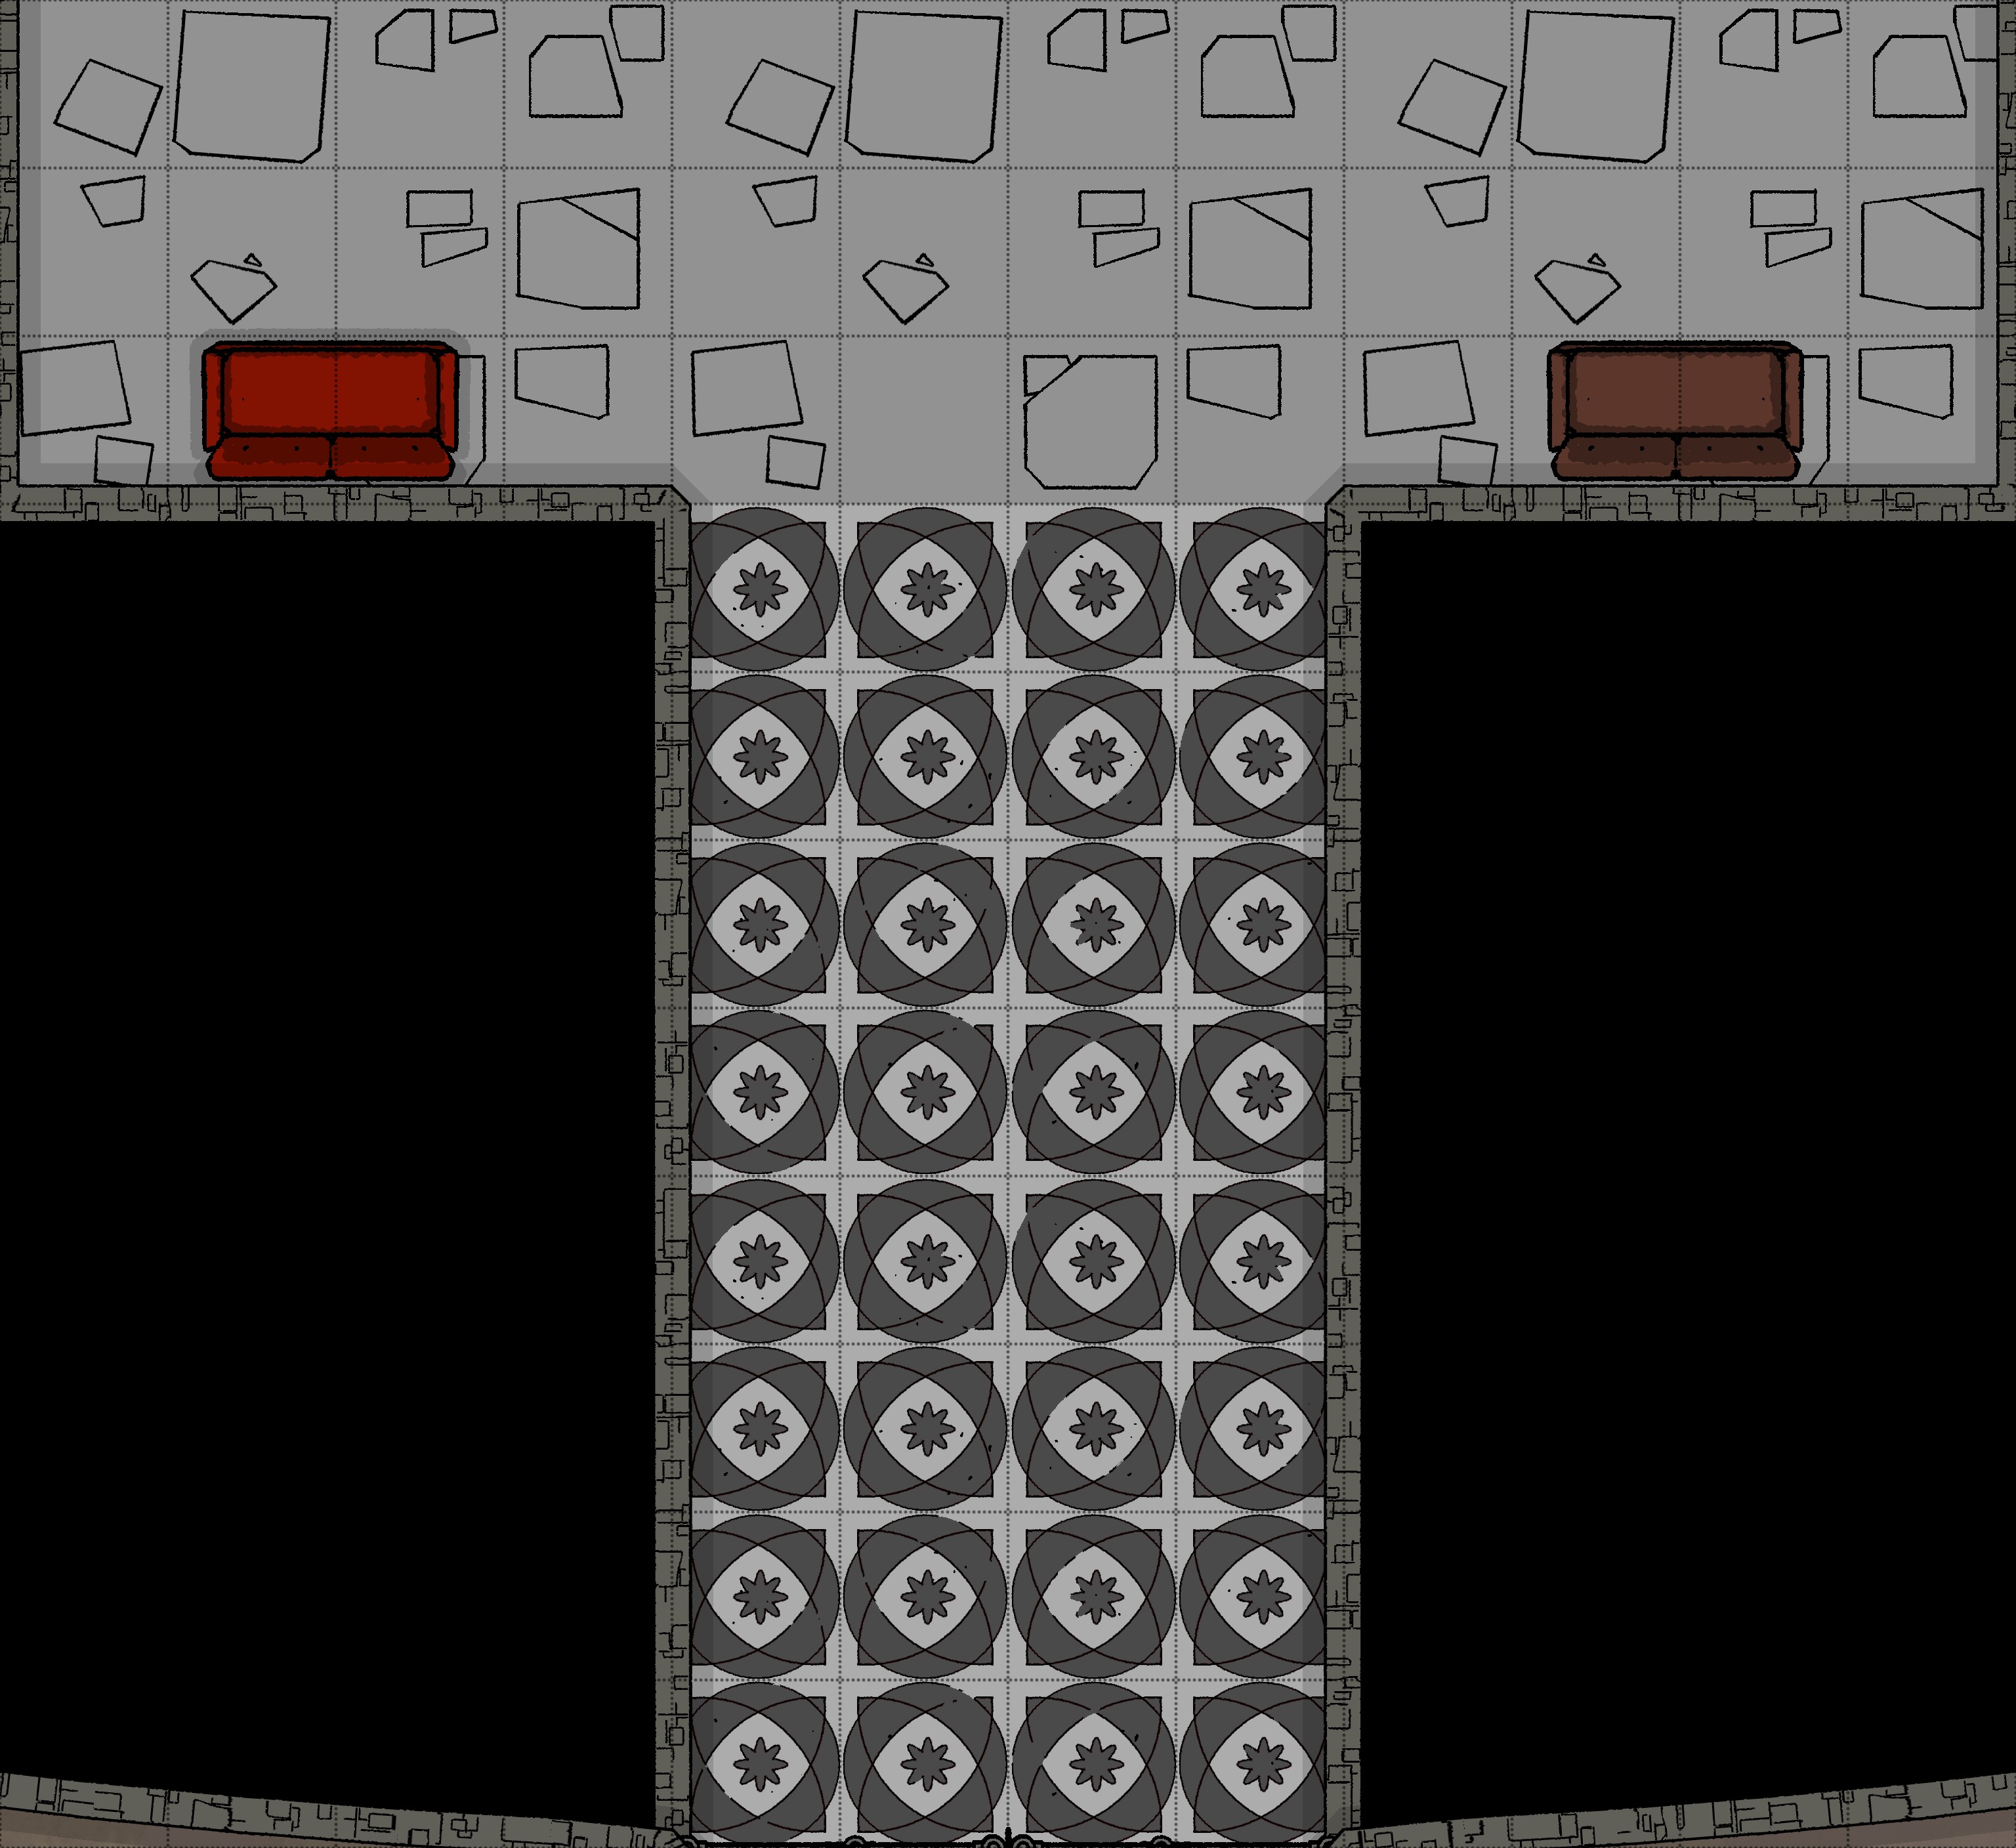
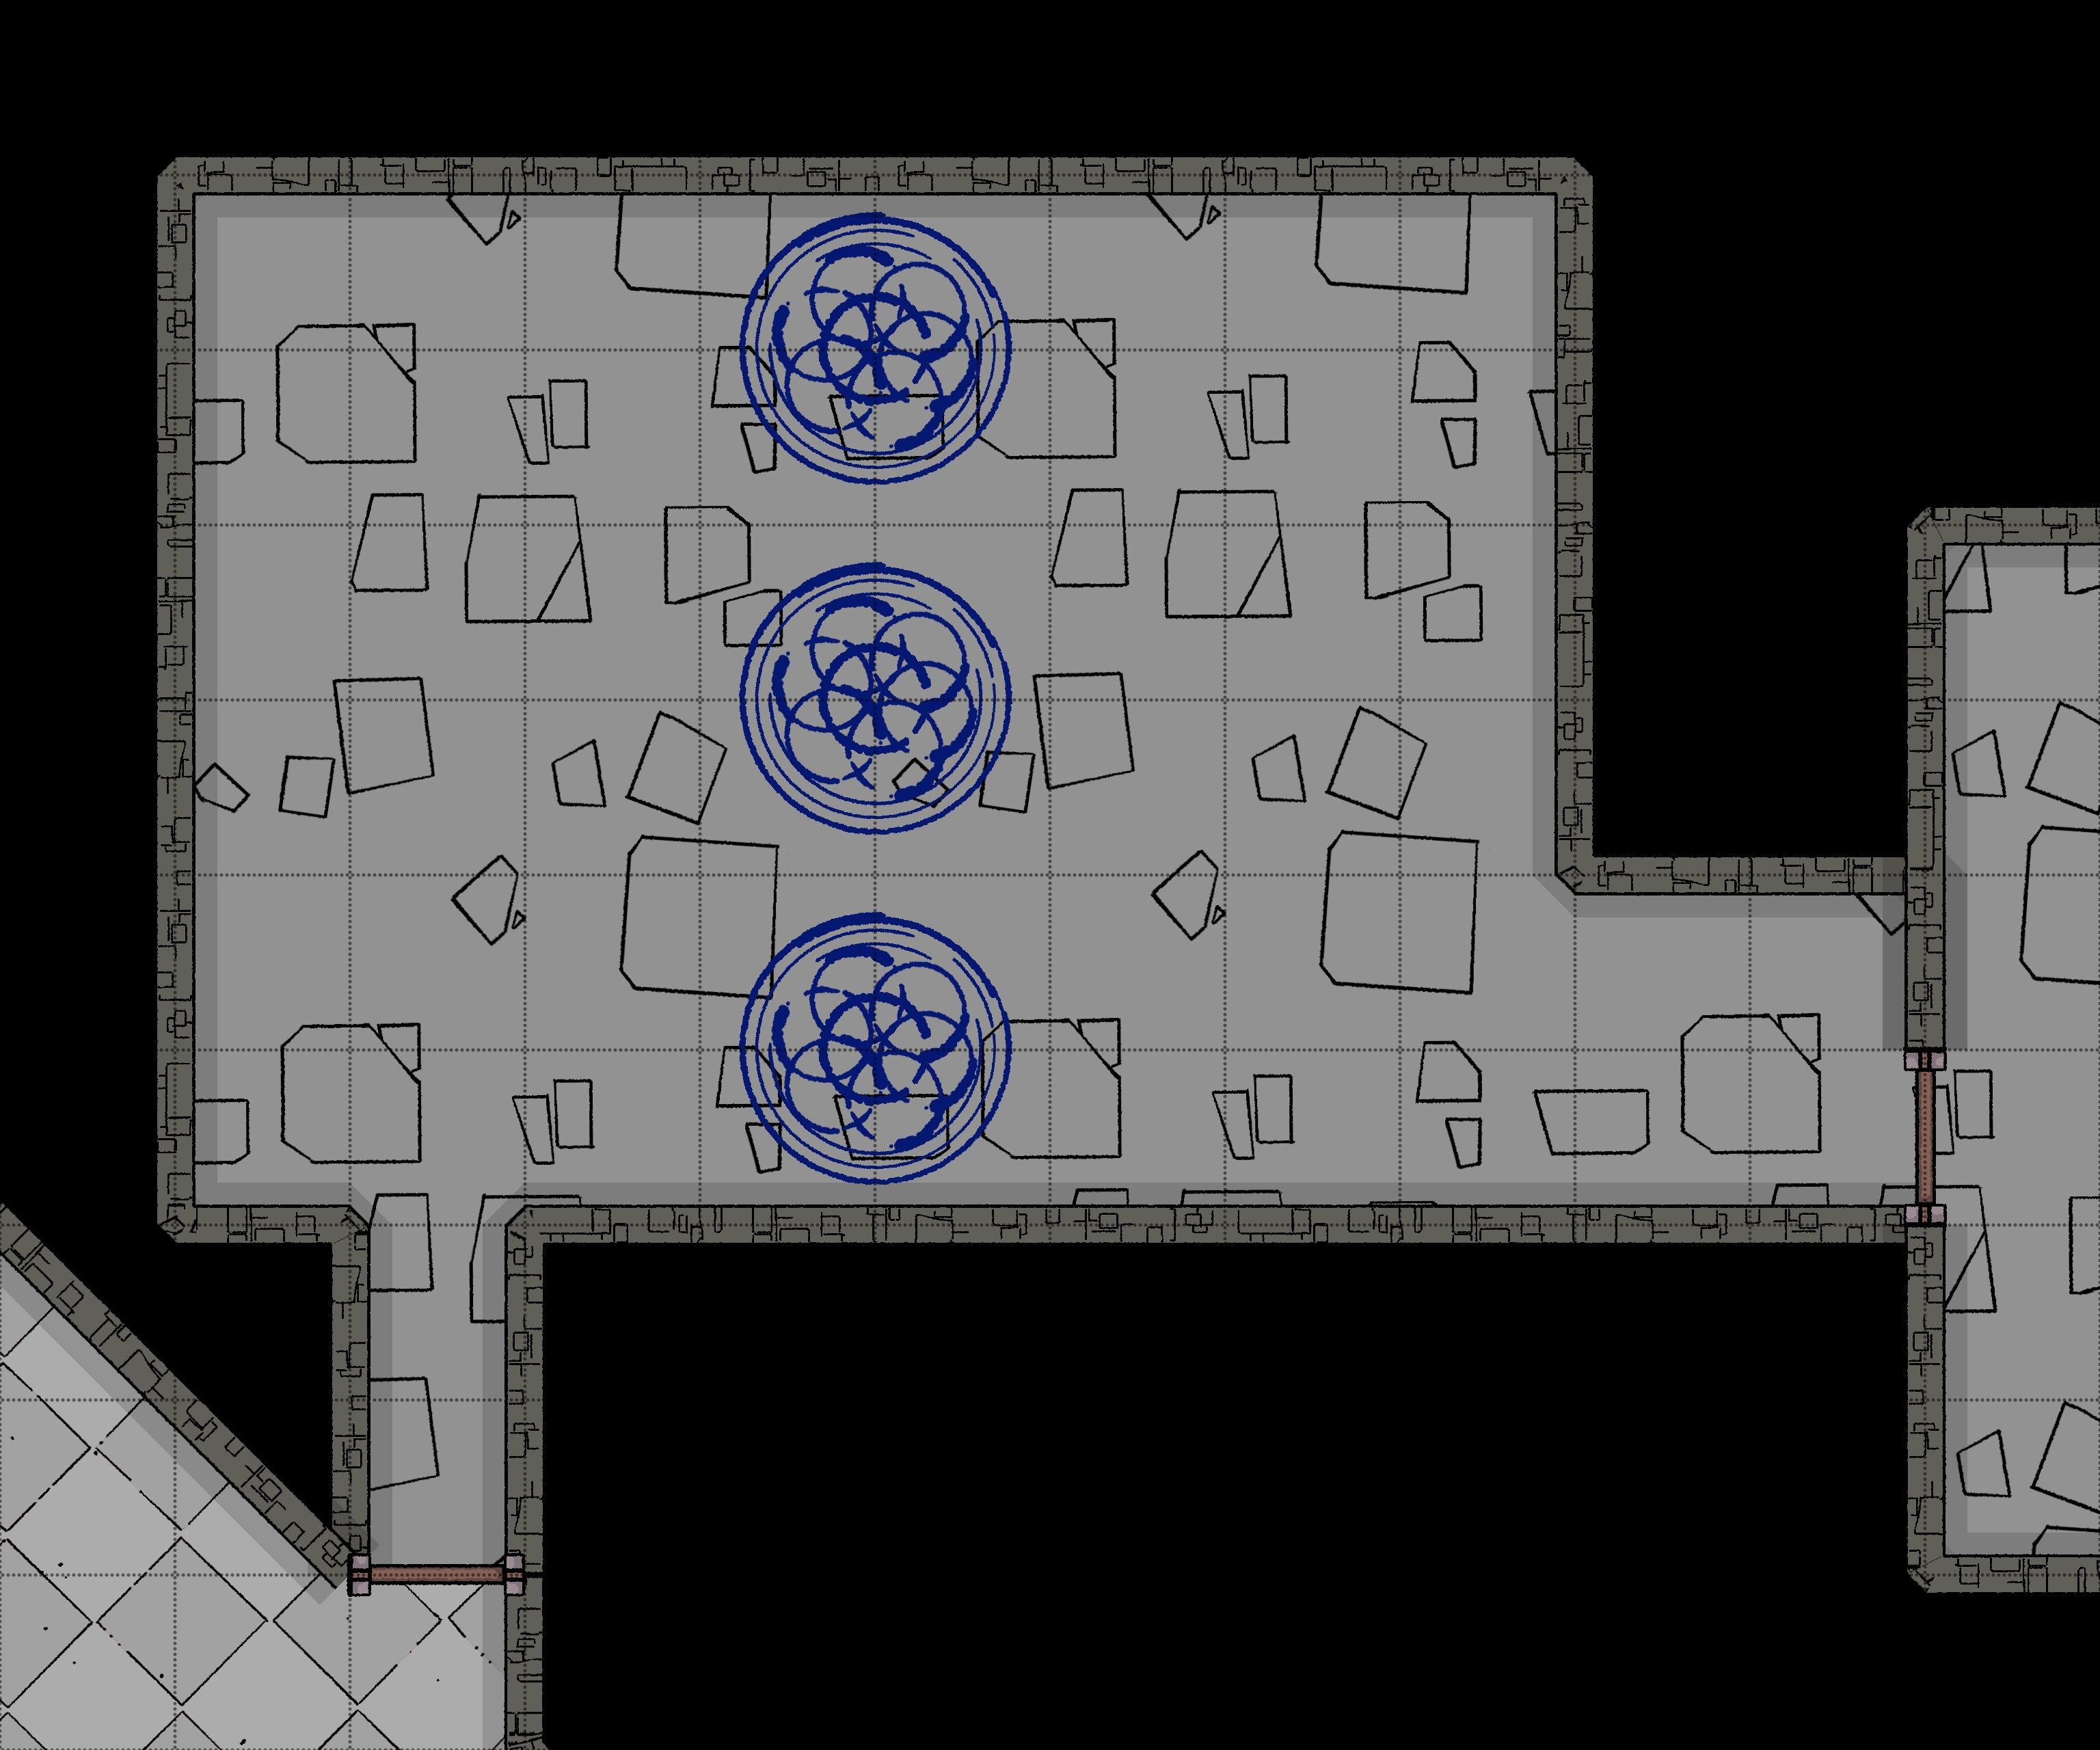
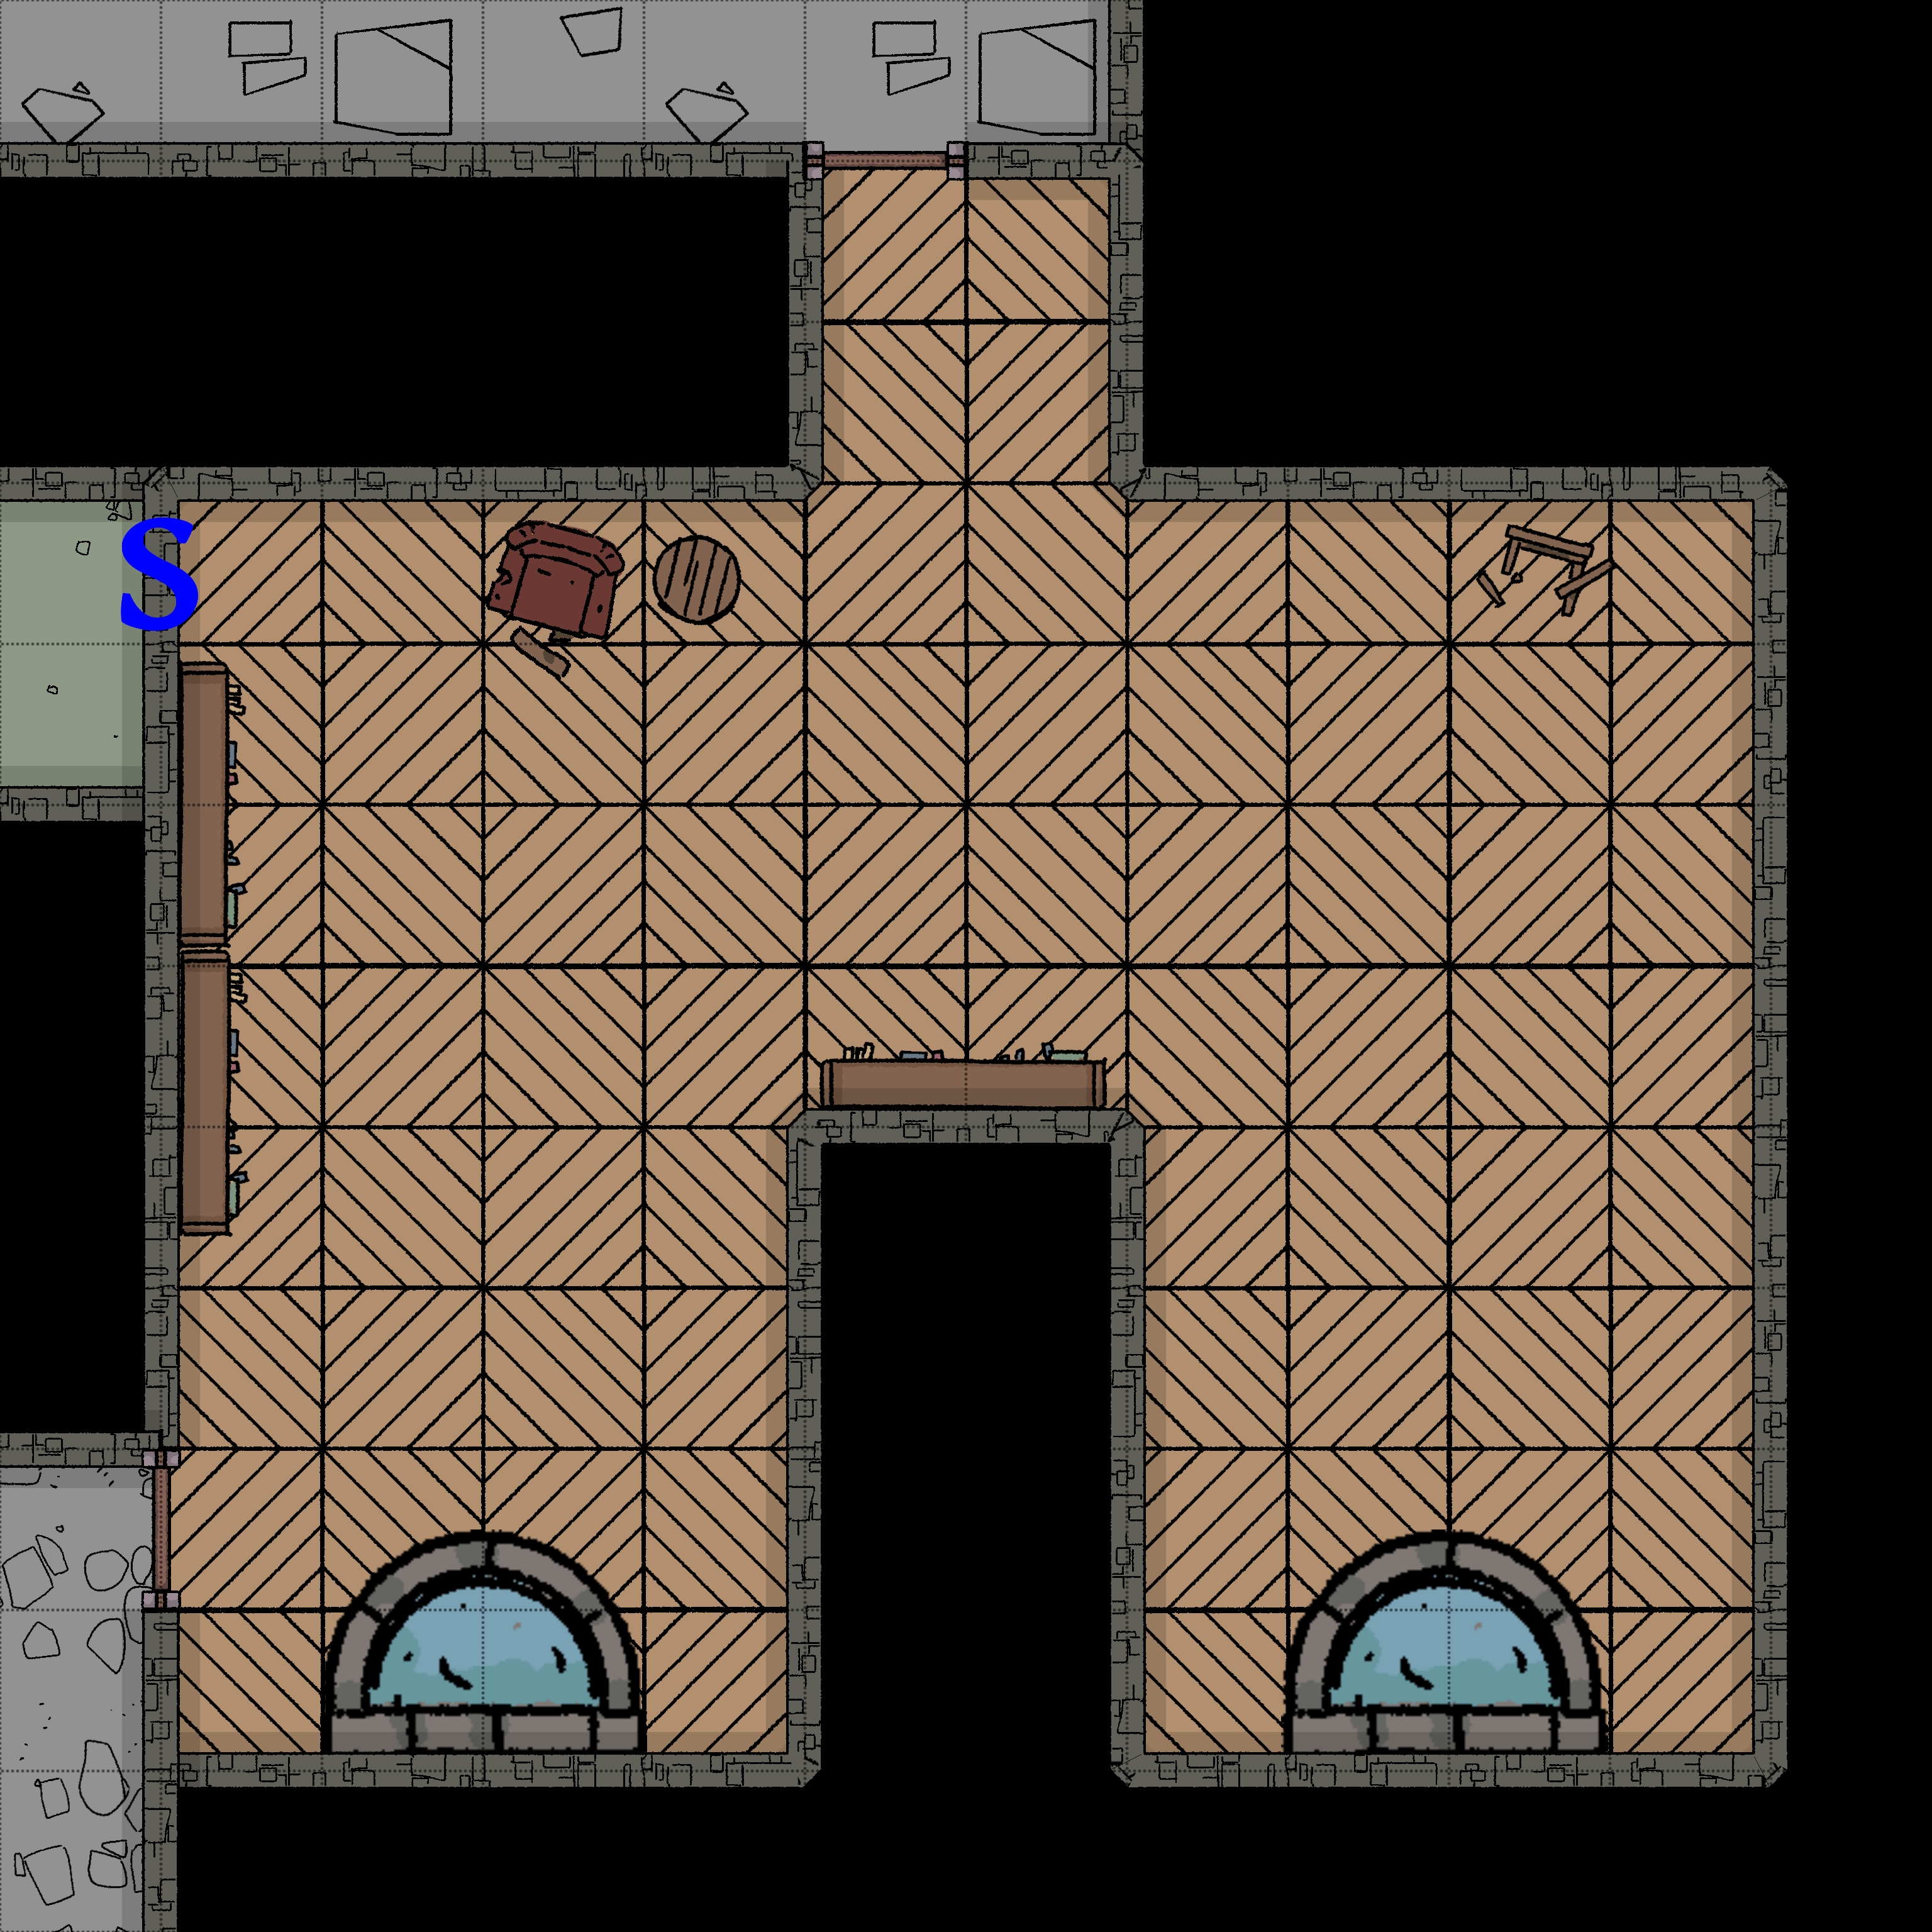
Main Lobby - 1-2
Room Type: Trap/Special
Light Level: Dim Light
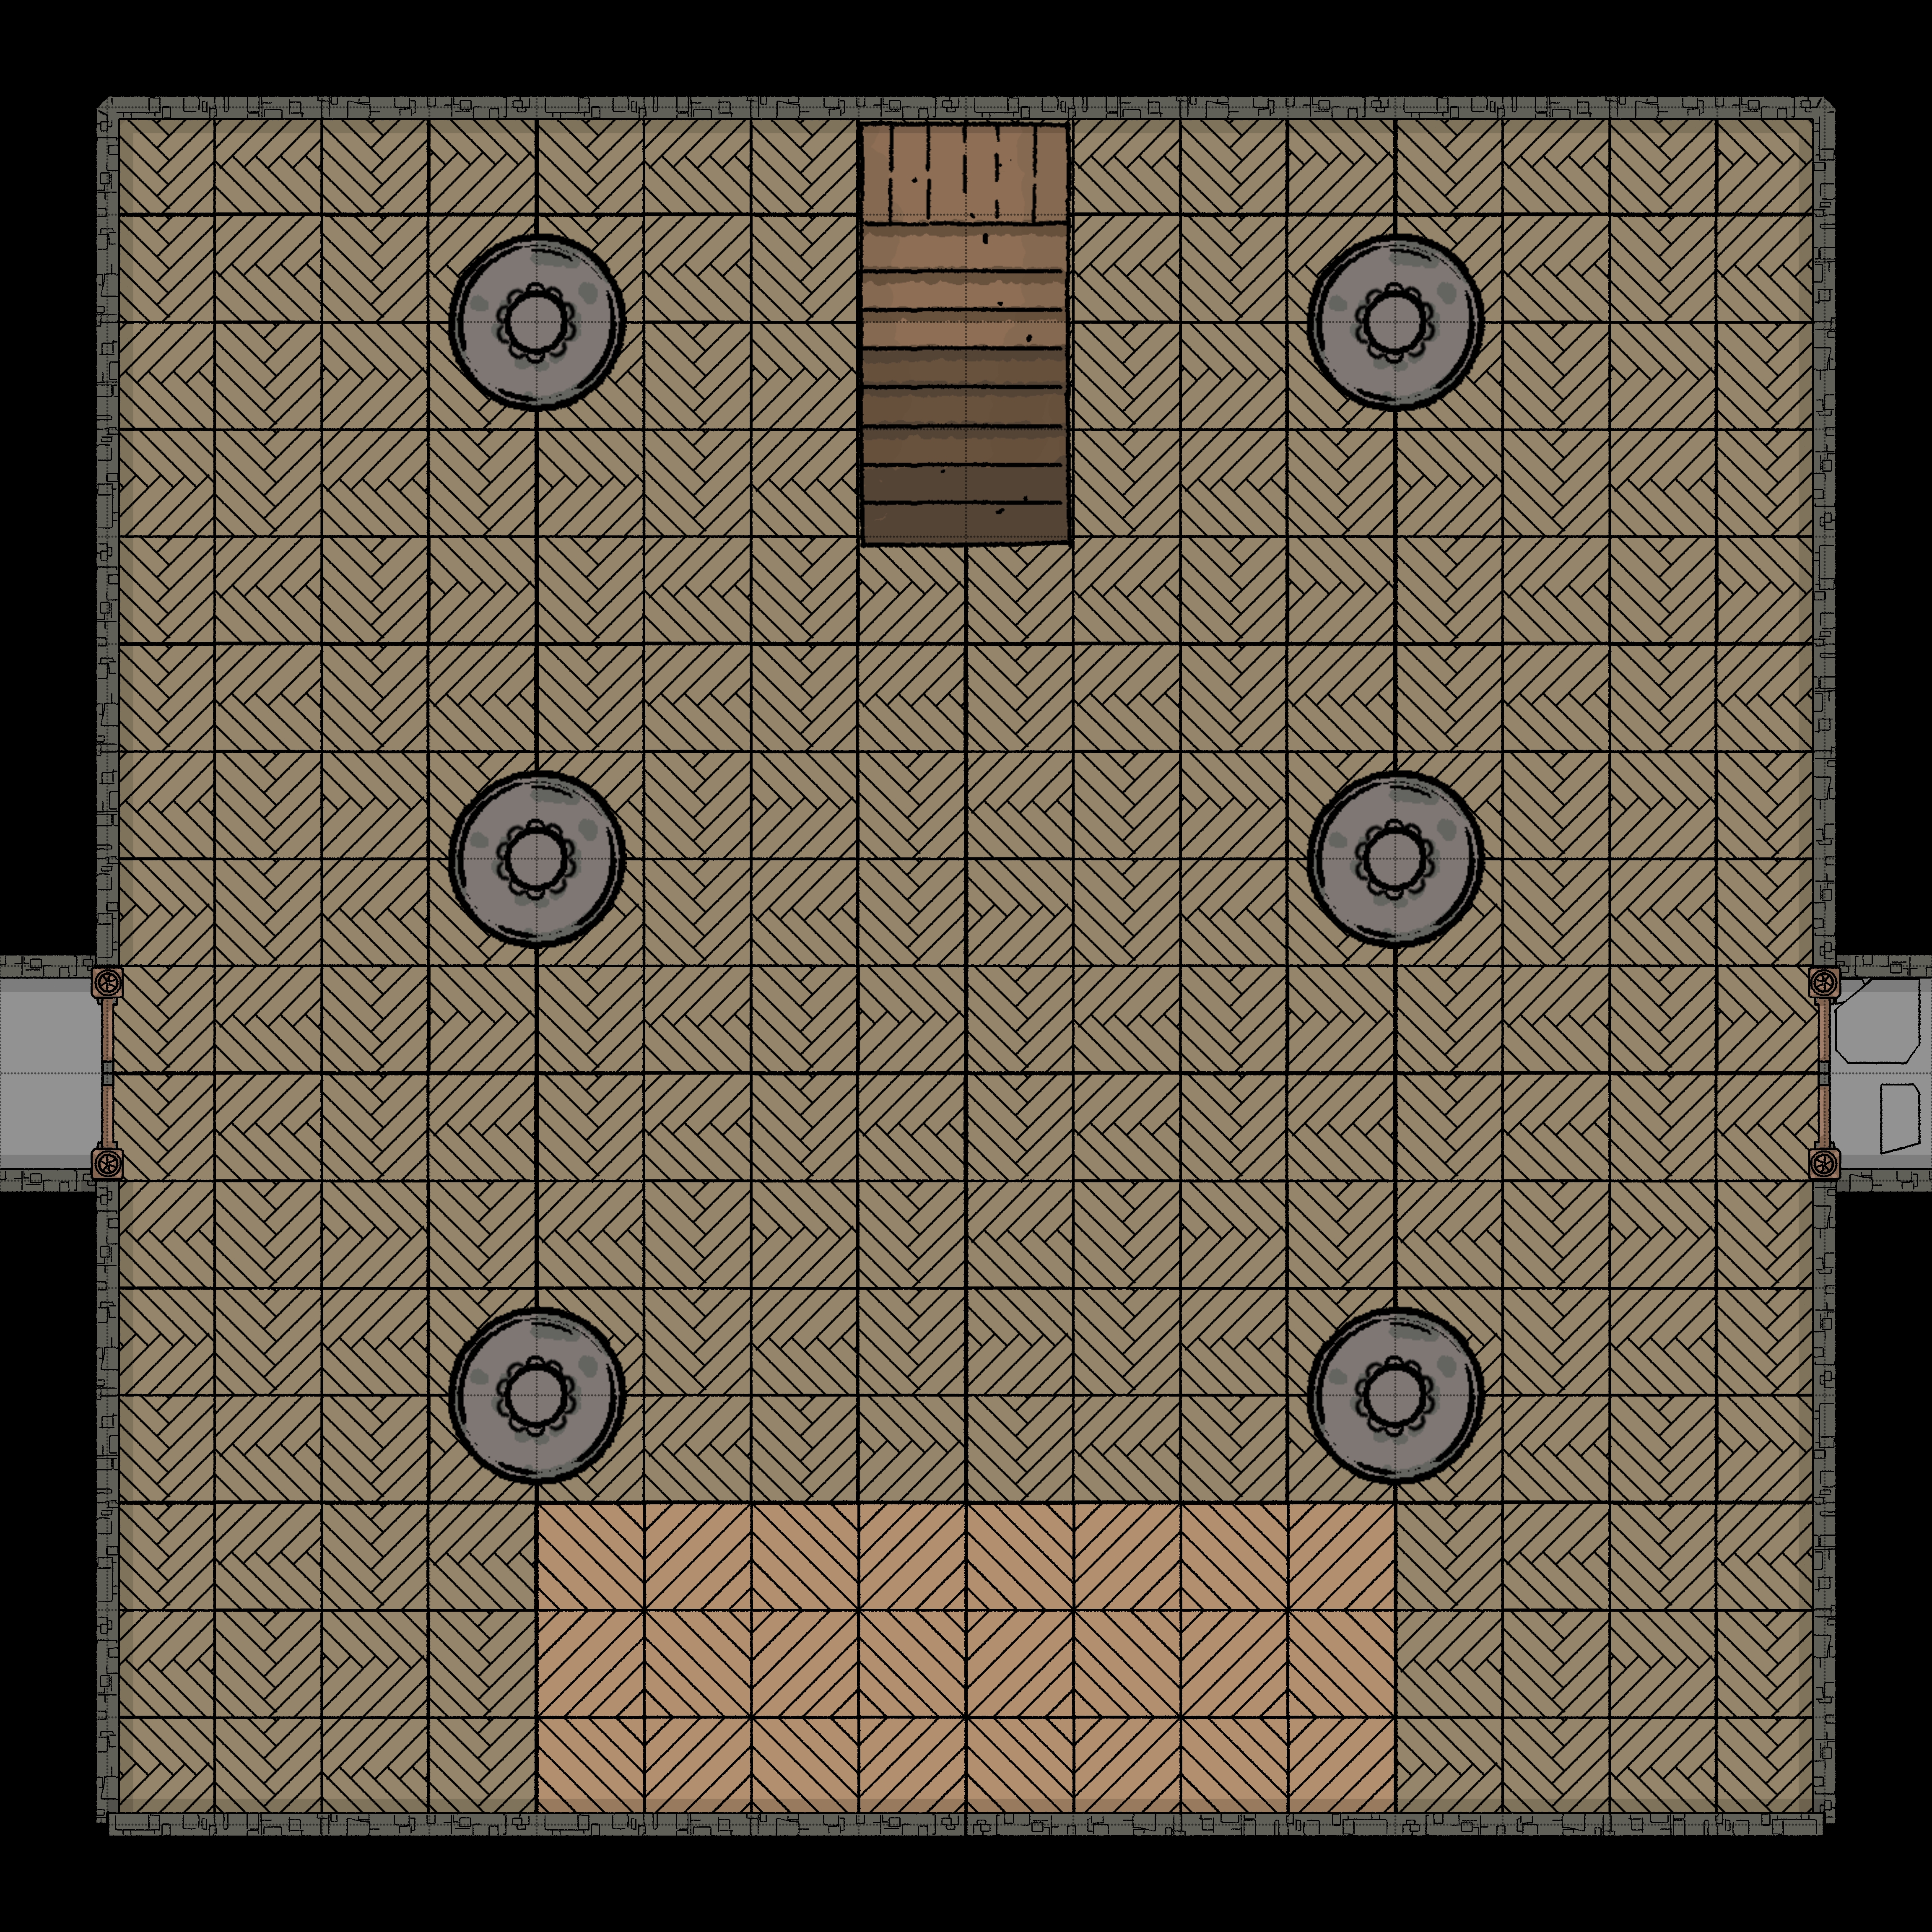
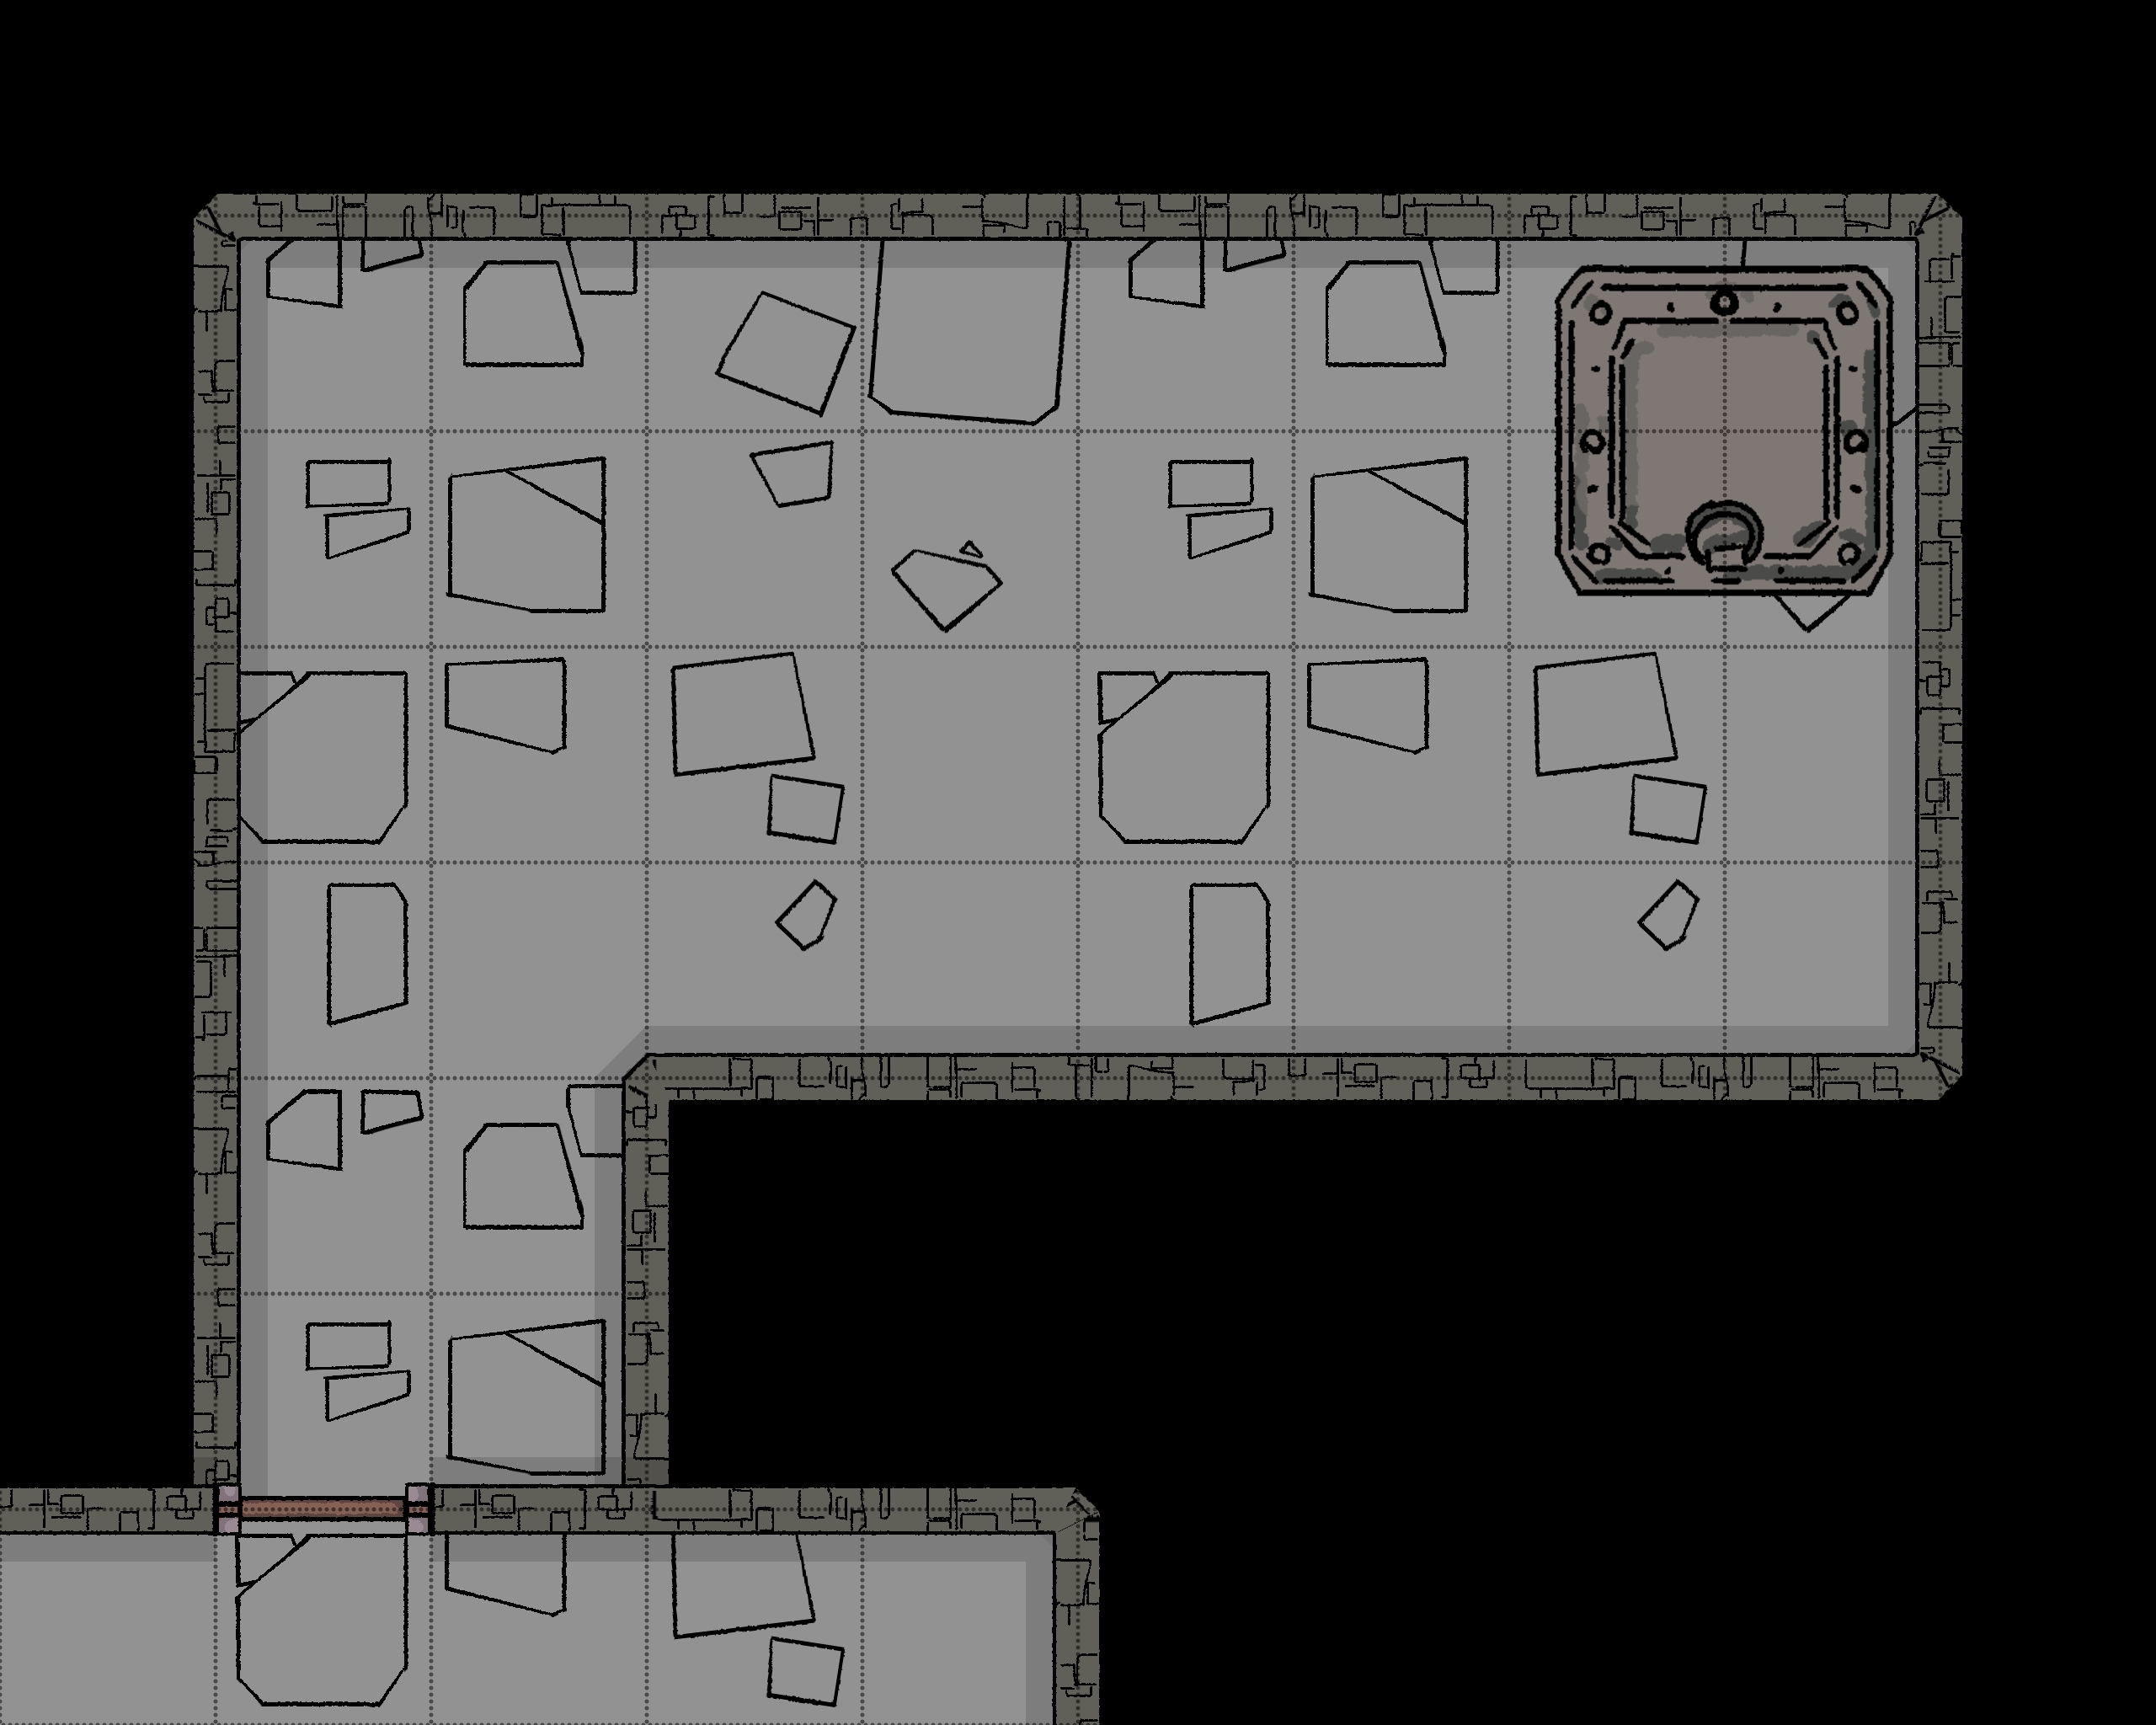
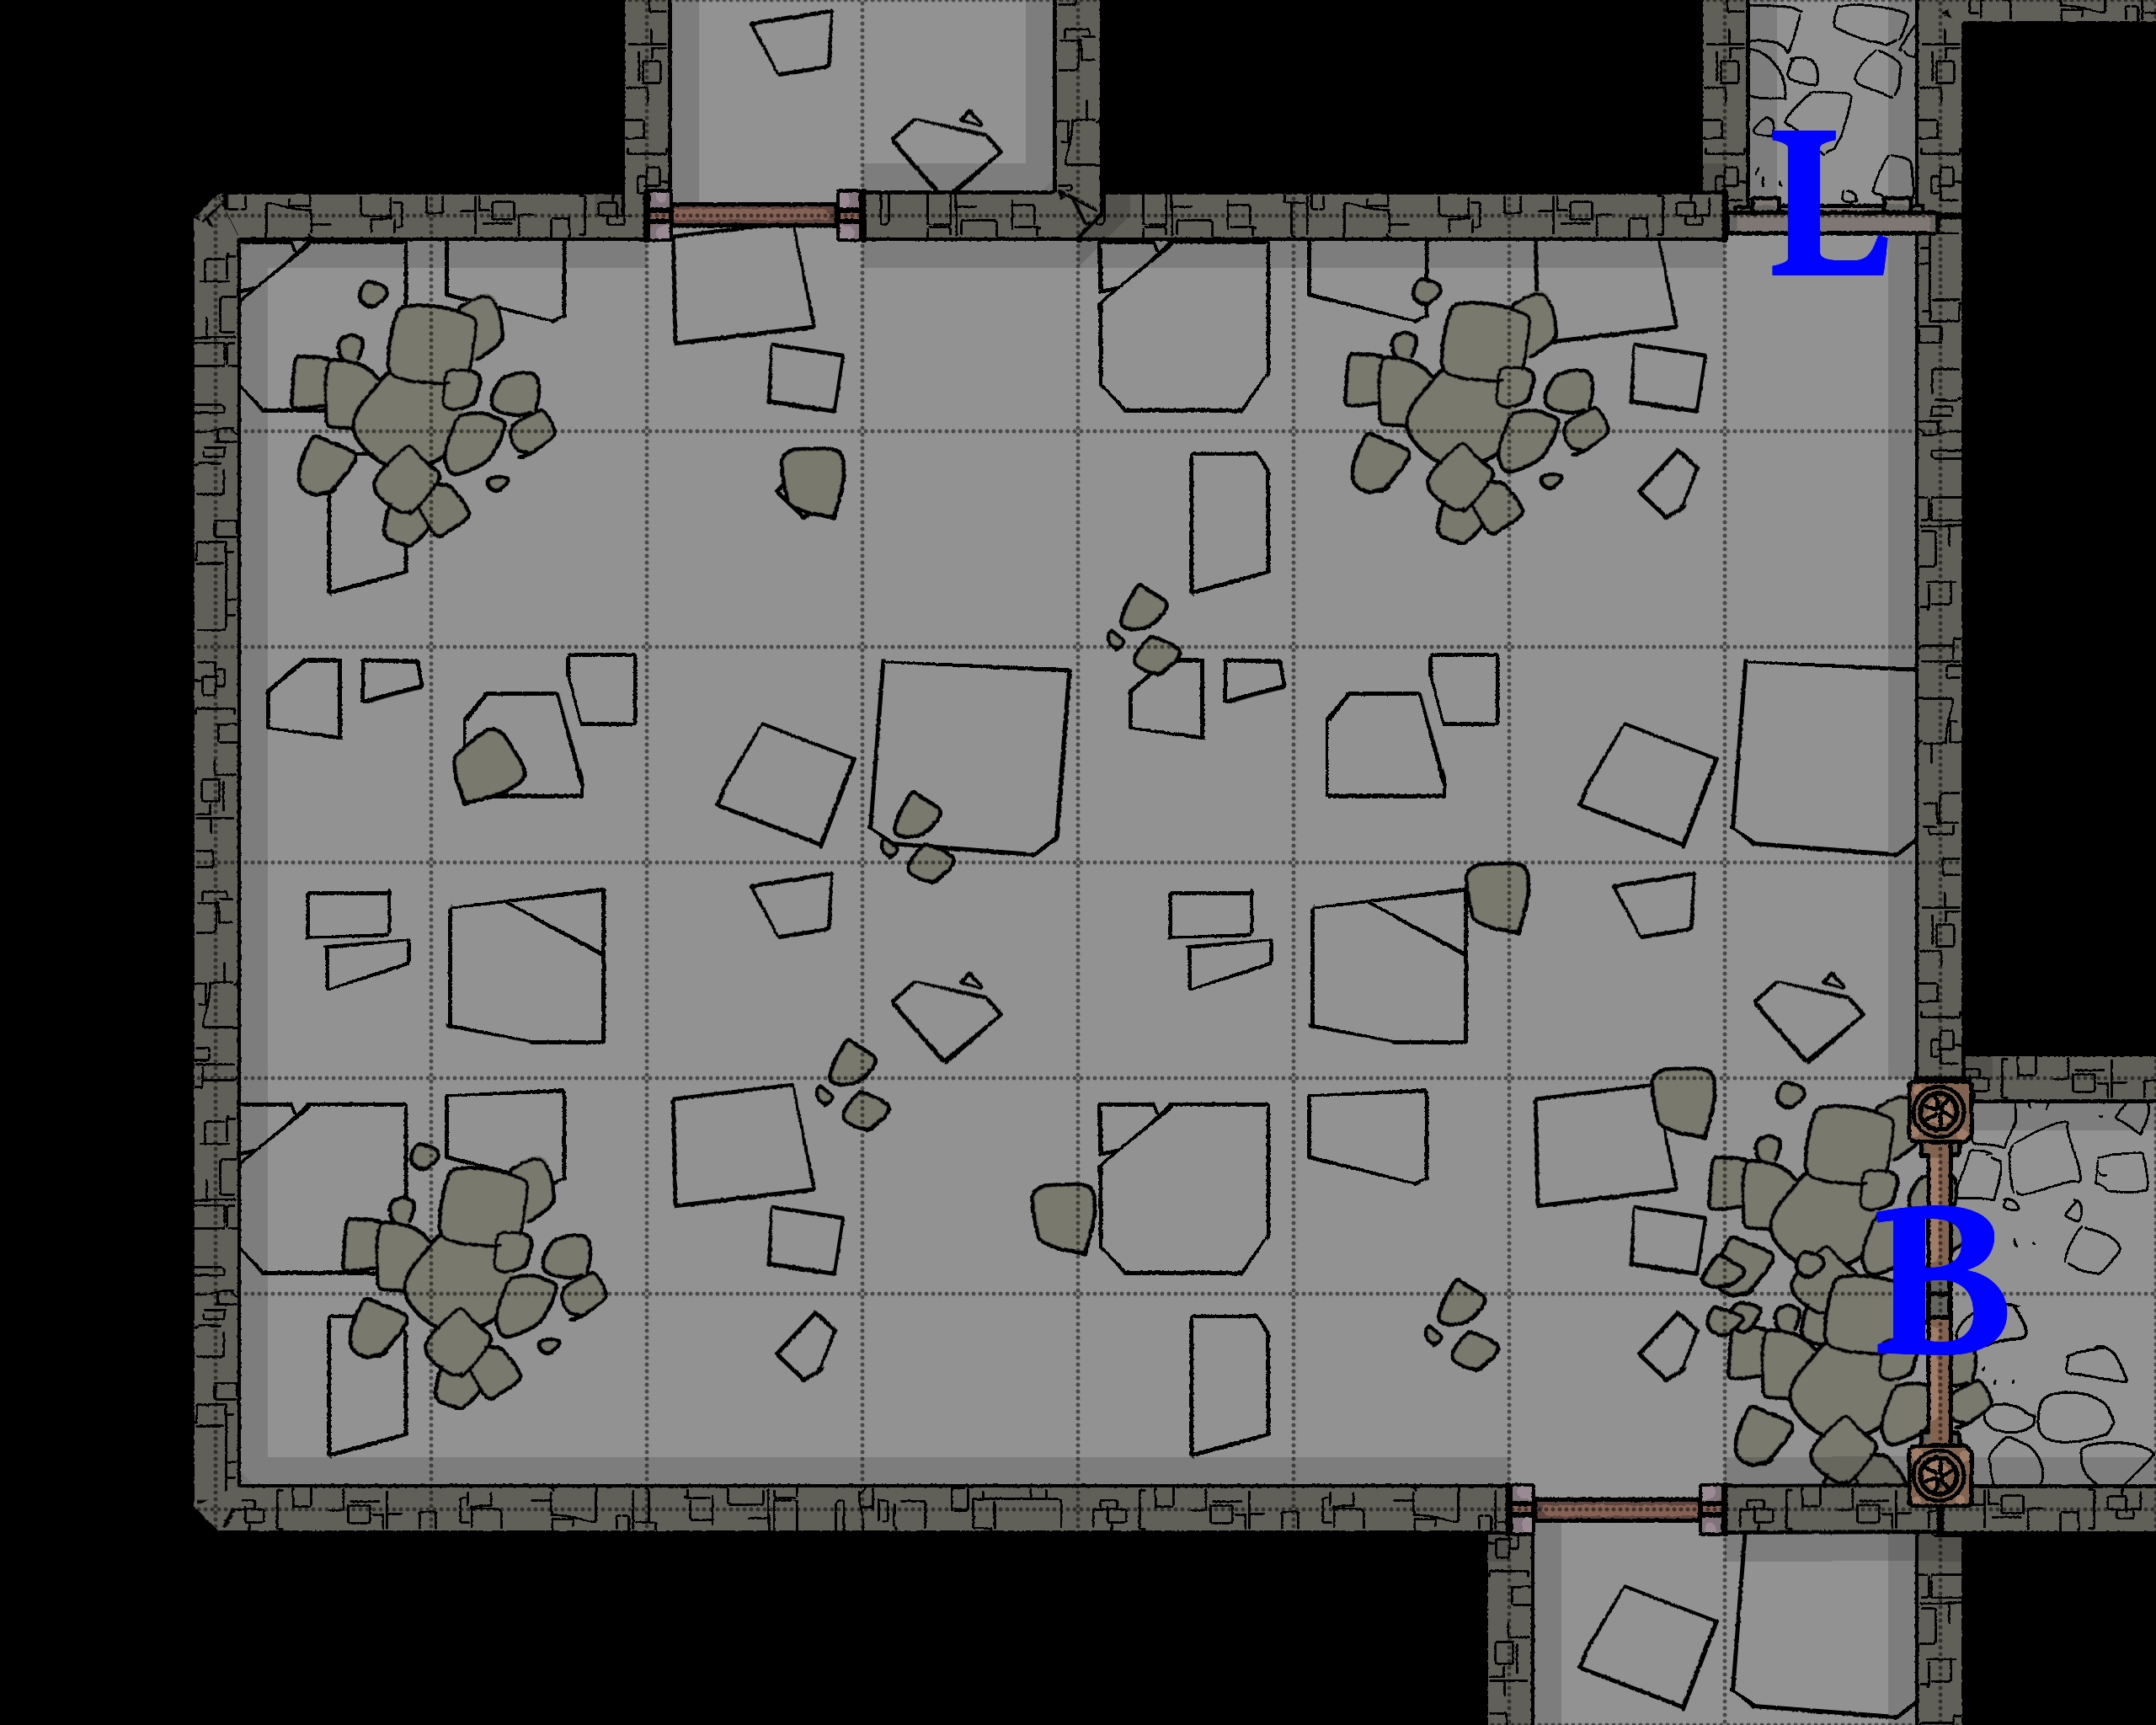
This large, open grand lobby is now a shadow of its former self. Its wallpaper is now just flakes of white on dark stone walls, the floor covered in mud from centuries of travel. Water drips from the walls and ceilings due to trapped moisture.
Skeleton Statue
In the centre of the room is a large brass statue of a skeleton. This skeleton is decorated with jewellery attached to its rib cage by delicate chains. This is a statue of The Lord of the Tower, but to most, it's just a well-decorated skeleton. Its arms are outstretched in a welcoming gesture, creating an ominous look with the dimly lit candles surrounding it. A stone tablet rests against the legs of the statue, which states: First section In Common states:
Please wait to be seen. If you require power, sit on the blue chair. If you seek answers, sit red. The second section is in a long-lost language that can only be understood through magical spells or using the entrance warning (1-1) as a Rosetta Stone. Deciphered it reads: "You are smart. Sit on the black chair".
The statue's toe is also more polished/clean than the rest. If someone kisses it, they must save vs paralysis or be paralysed for 1d4 minutes, but they also gain Corruption resistance for 1d4 hours. (Roll these two d4 separately)
Coloured Sofas - TRAP
Four studded leather sofas are positioned around the room, all are the same design but different colours. These are all enchanted and provide a magical effect when sat on.
Red Sofa - When sat on, Save Vs Spell or see a vision. You find yourself floating around a tower, which looks like the one you are inside, but it's much shorter. You see the sun shooting through the sky, setting and rising again, rapidly representing time flying by. You see armies, fire and death attacking the tower, but it just keeps growing. Until it looks like the tower you entered. Everyone else sees the person's eyes go dark, and then they stand up once the vision has completed.
Blue Sofa - The stone surrounding this sofa is marked with scratches and blood splatters, evident signs of a struggle. Once anyone or anything touches this sofa, it's instantly transported to 10-1. Consider this person dead, unless they are high-level. The Union uses this to get rid of prisoners. Any player who dies via this chair will start appearing as Crawling Zombies throughout the dungeon.
Black Sofa - This is a sofa of annihilation. It provides no shadow, its edges look fuzzy and gives off a strange static hum when listening close to it. This will instantly destroy anything that comes into contact with it.
Brown Sofa - This sofa is unlike the rest; it looks like it's falling apart, one side is resting on the floor, and it's covered in mould. It's the only sofa that reflects the room's age. Sitting on it will reveal the hidden doors.
Hidden Doors
There are no doors visible from this room. There are open corridors out of the room, but they are masked with intangible illusions of the wall continuing over them.
Connected Rooms
East - Illusionary doorway - Connecting corridor to 1-10 and 1-35
South - Open archway - 1-1
West - Illusionary doorway - 1-11
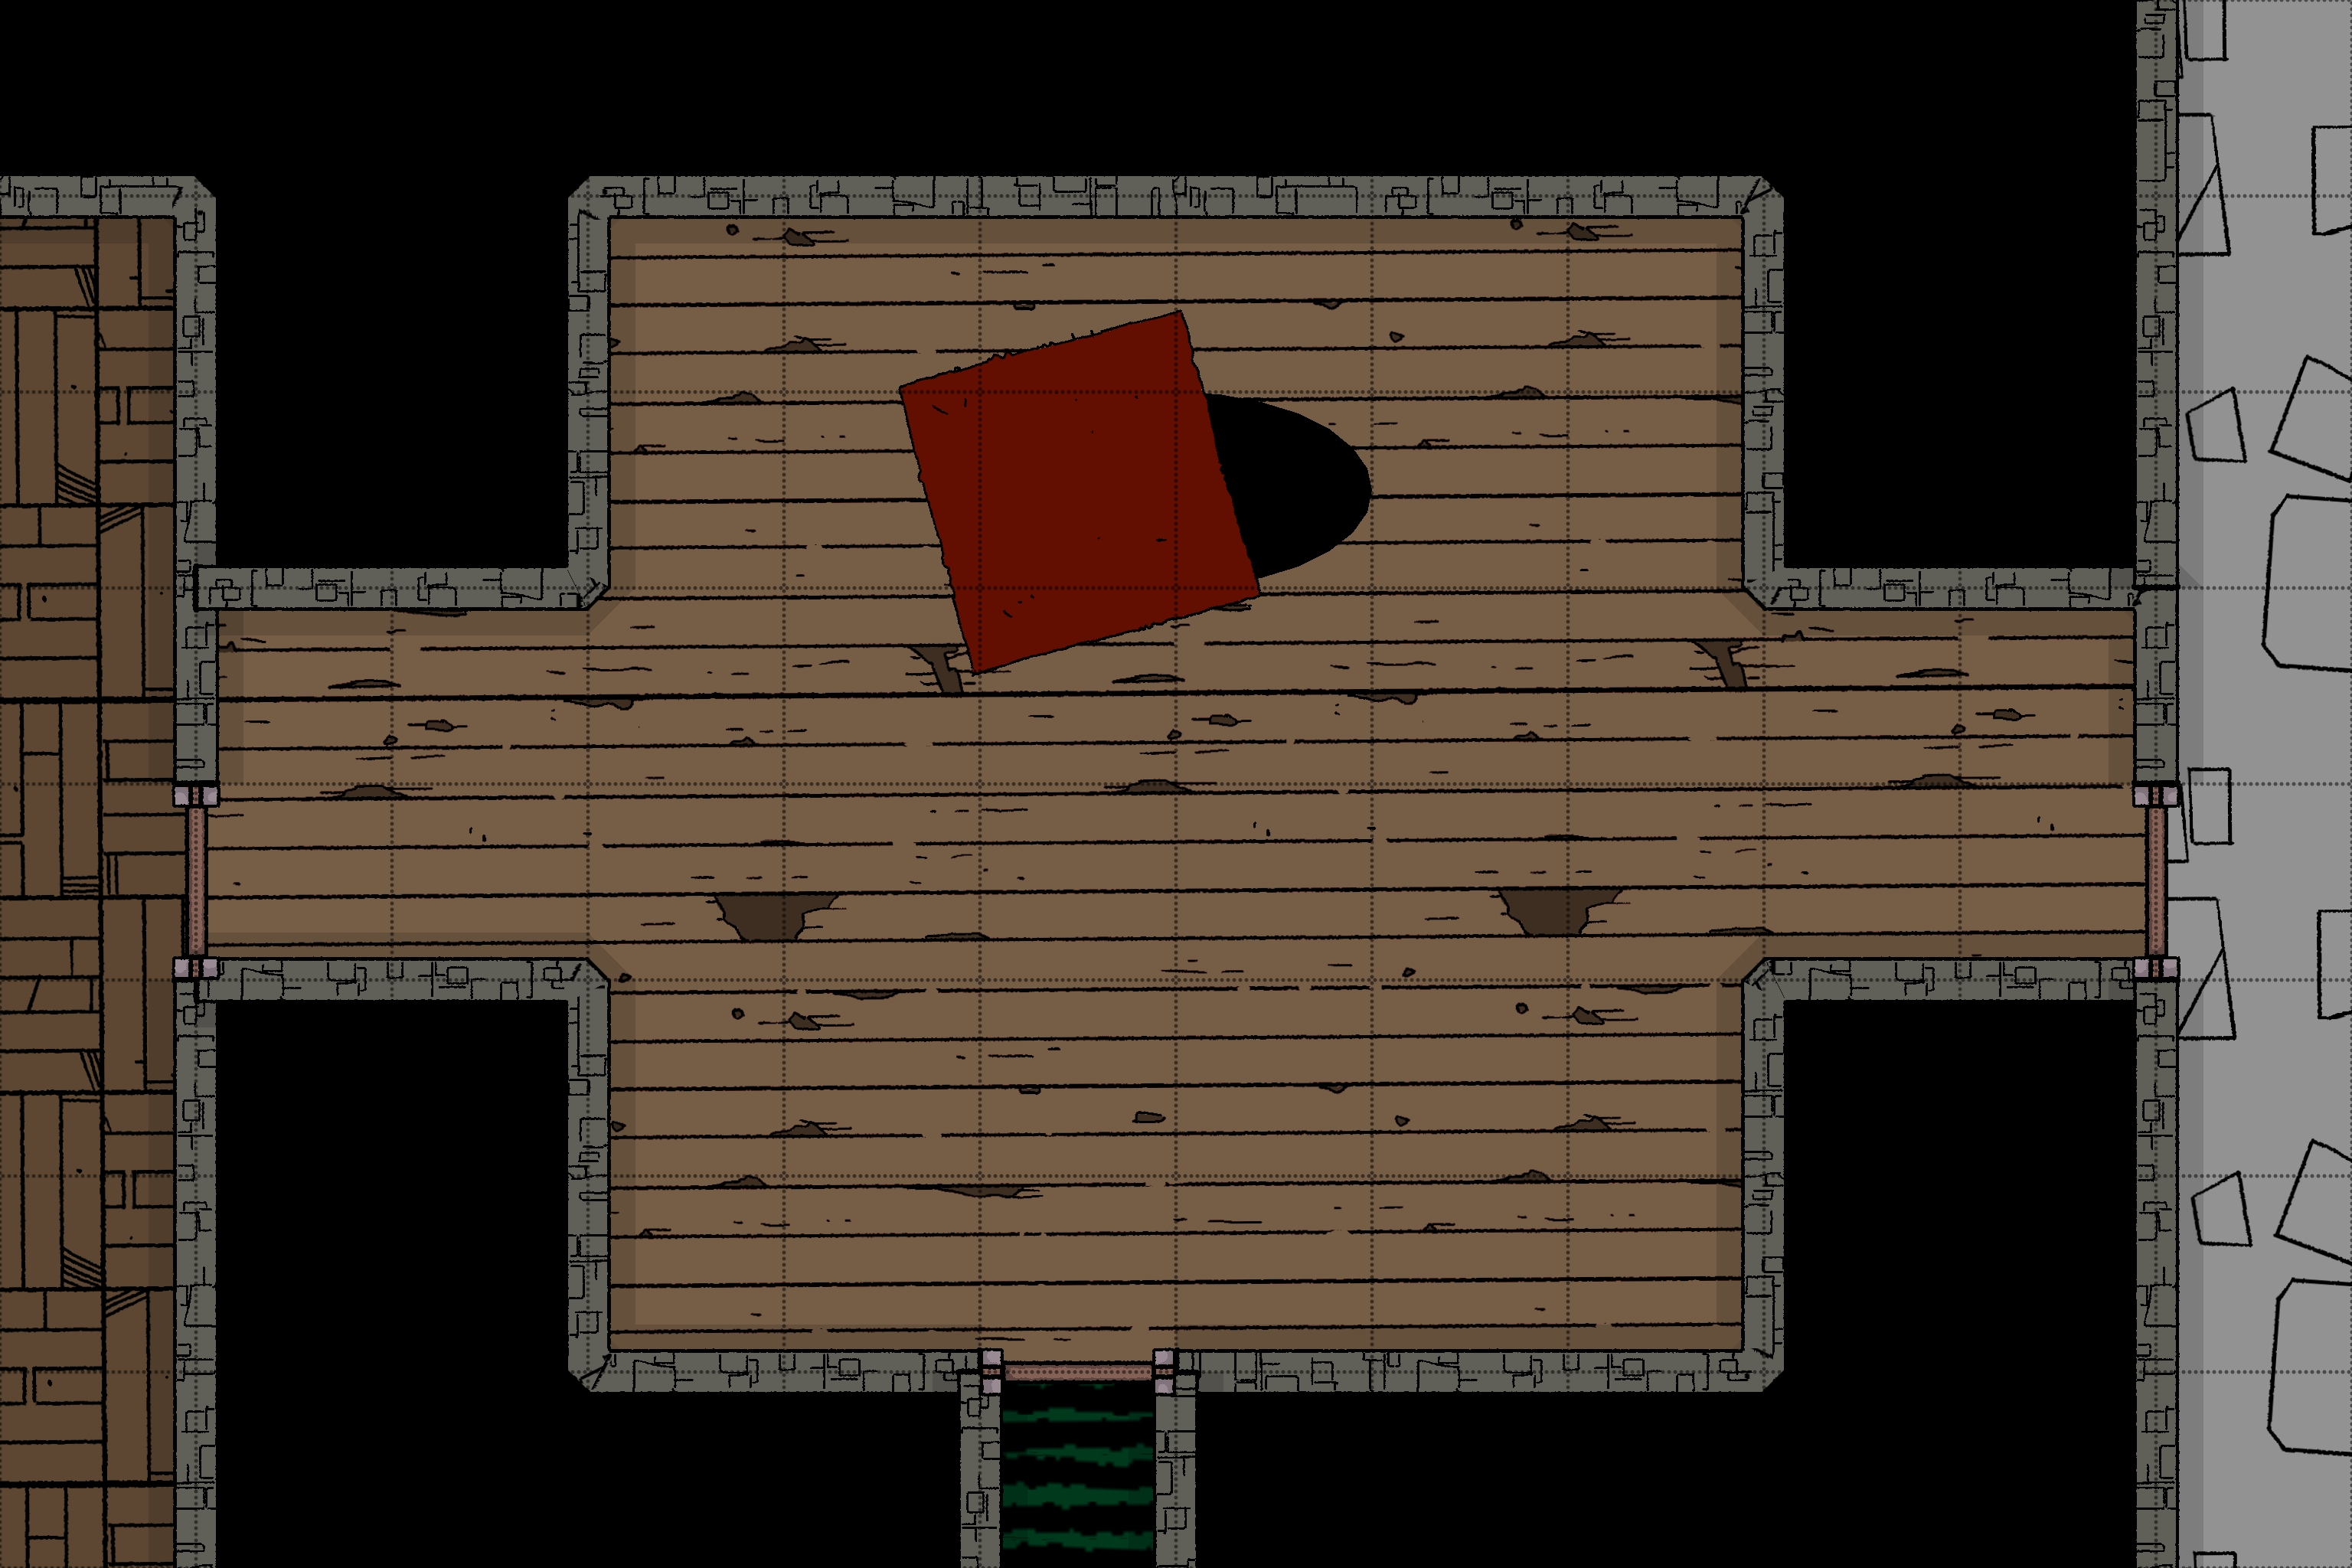
Painted Living Room - 1-3
Room Type: Trap (Down)
Light Level: Dark
This room was once painted to look like a living room; the painting was incredible, and from the south entrance, it would have been a persuasive optical illusion. Time has passed, however, and this trap looks tired and destroyed by time.
Treasure Trap
Painted on the north wall is a treasure chest spilling with gold and treasure. This is not convincing to most creatures; Kobolds would be interested if it were spilling with copper.
In front of this painting is a large hole that connects to the prison cells in B1-10. The connecting tube is slick and would be very difficult to climb. The hole was initially covered with a large, rich carpet, but it's half stuck down the hole, covered in grime and muck. The other half of the carpet is attached to the floor so that it won't fall. This trap can be reset easily; not sure who it would fool.
Connected Rooms
Down - Hole - B1-14
East - Wooden door - Connecting Corridor
South - Metal door - 1-10
West - Wooden door - 1-28
Magnet Hallway - 1-4
Room Type: Trap
Light Level: Dark
The dark corridor opens into a larger space, but the corridor floor continues over a significant drop into darkness. The floor looks stable but there are platforms 10ft to the left and right. The right hand side wall 20ft away is covered in large metal spikes of different lengths. Listening below the sound of flowing water and a slight hum of something mechanical.
Magnet Trap
Both walls can be made magnetic, but the west wall is by default; the lever can change this in a small alcove north of this room. This magnet is powerful and gets its energy from The Heart of The Tower. These magnets will pull anyone stepping into the room to the powered side if they have magnetic armour or are holding a weapon.
Left Side: The walls are covered in large metal plates, apart from a section that leads into 1-6. Any metal object hitting this wall will create a lot of noise, alerting 2d6 crawling zombies to investigate.
Right Side: This wall is lined with metal spikes that will inflict a range of damage depending on how the creature/player is thrown into the spikes. For Example, 2d6 damage for an individual in chainmail dragged into it. A small section to the north of this wall is non-magnetic and serves as a secret door.
Falling off the platform will send you down 40ft into cold water, B2-1, just by the pier. The fall is into deep water infested with crocodiles that come here to eat the falling undead.
Connected Rooms
Down - Drop - B1-15
North - Wooden Door - Connecting corridor
East - Secret Door - 1-5
South - Corridor continues
West - Open Archway - 1-6
Cults Hidden Highway - 1-5
Room Type: Empty
Light Level: Dim Light
This simple stone room is very plain, as if it were never meant to be seen by anyone except the staff. Large stone blocks make up the walls and floors; the only standout feature is an enclosed spiral staircase built into the corner of the room. This staircase is the quickest way to travel between Floor 4 and Basement 2, but is always heavily guarded by The Cult of the Tower.
Guards and Procedure
Each floor of this Hidden Highway has 1d6 cultists who can often be found around a table playing cards or relaxing. They don't usually get visitors. If anyone outside the cult comes in through the secret doors, they will be killed. This secret passageway can't be discovered, as it leads directly to the cult's home. Once combat starts, they have a procedure:
- Engage the invaders
-
Shout up and down the stairs to alert the floors above and below.
- These floors then shout up and down again.
- Every floor will then go up to the 4th floor, fighting any invaders along the way.
If the invaders survive and learn of this secret passage, the cult will utilise its Magic Users to lock the highway entrances with Wizard Lock (Level 3). They then use a secret knock to gain entrance through these doors.
Connected Rooms
Up - Spiral staircase - 2-32
Down - Spiral staircase - B1-42
South - Corridor continues - (W)1-4 and (E)1-38
West - Back of secret door - Corridor
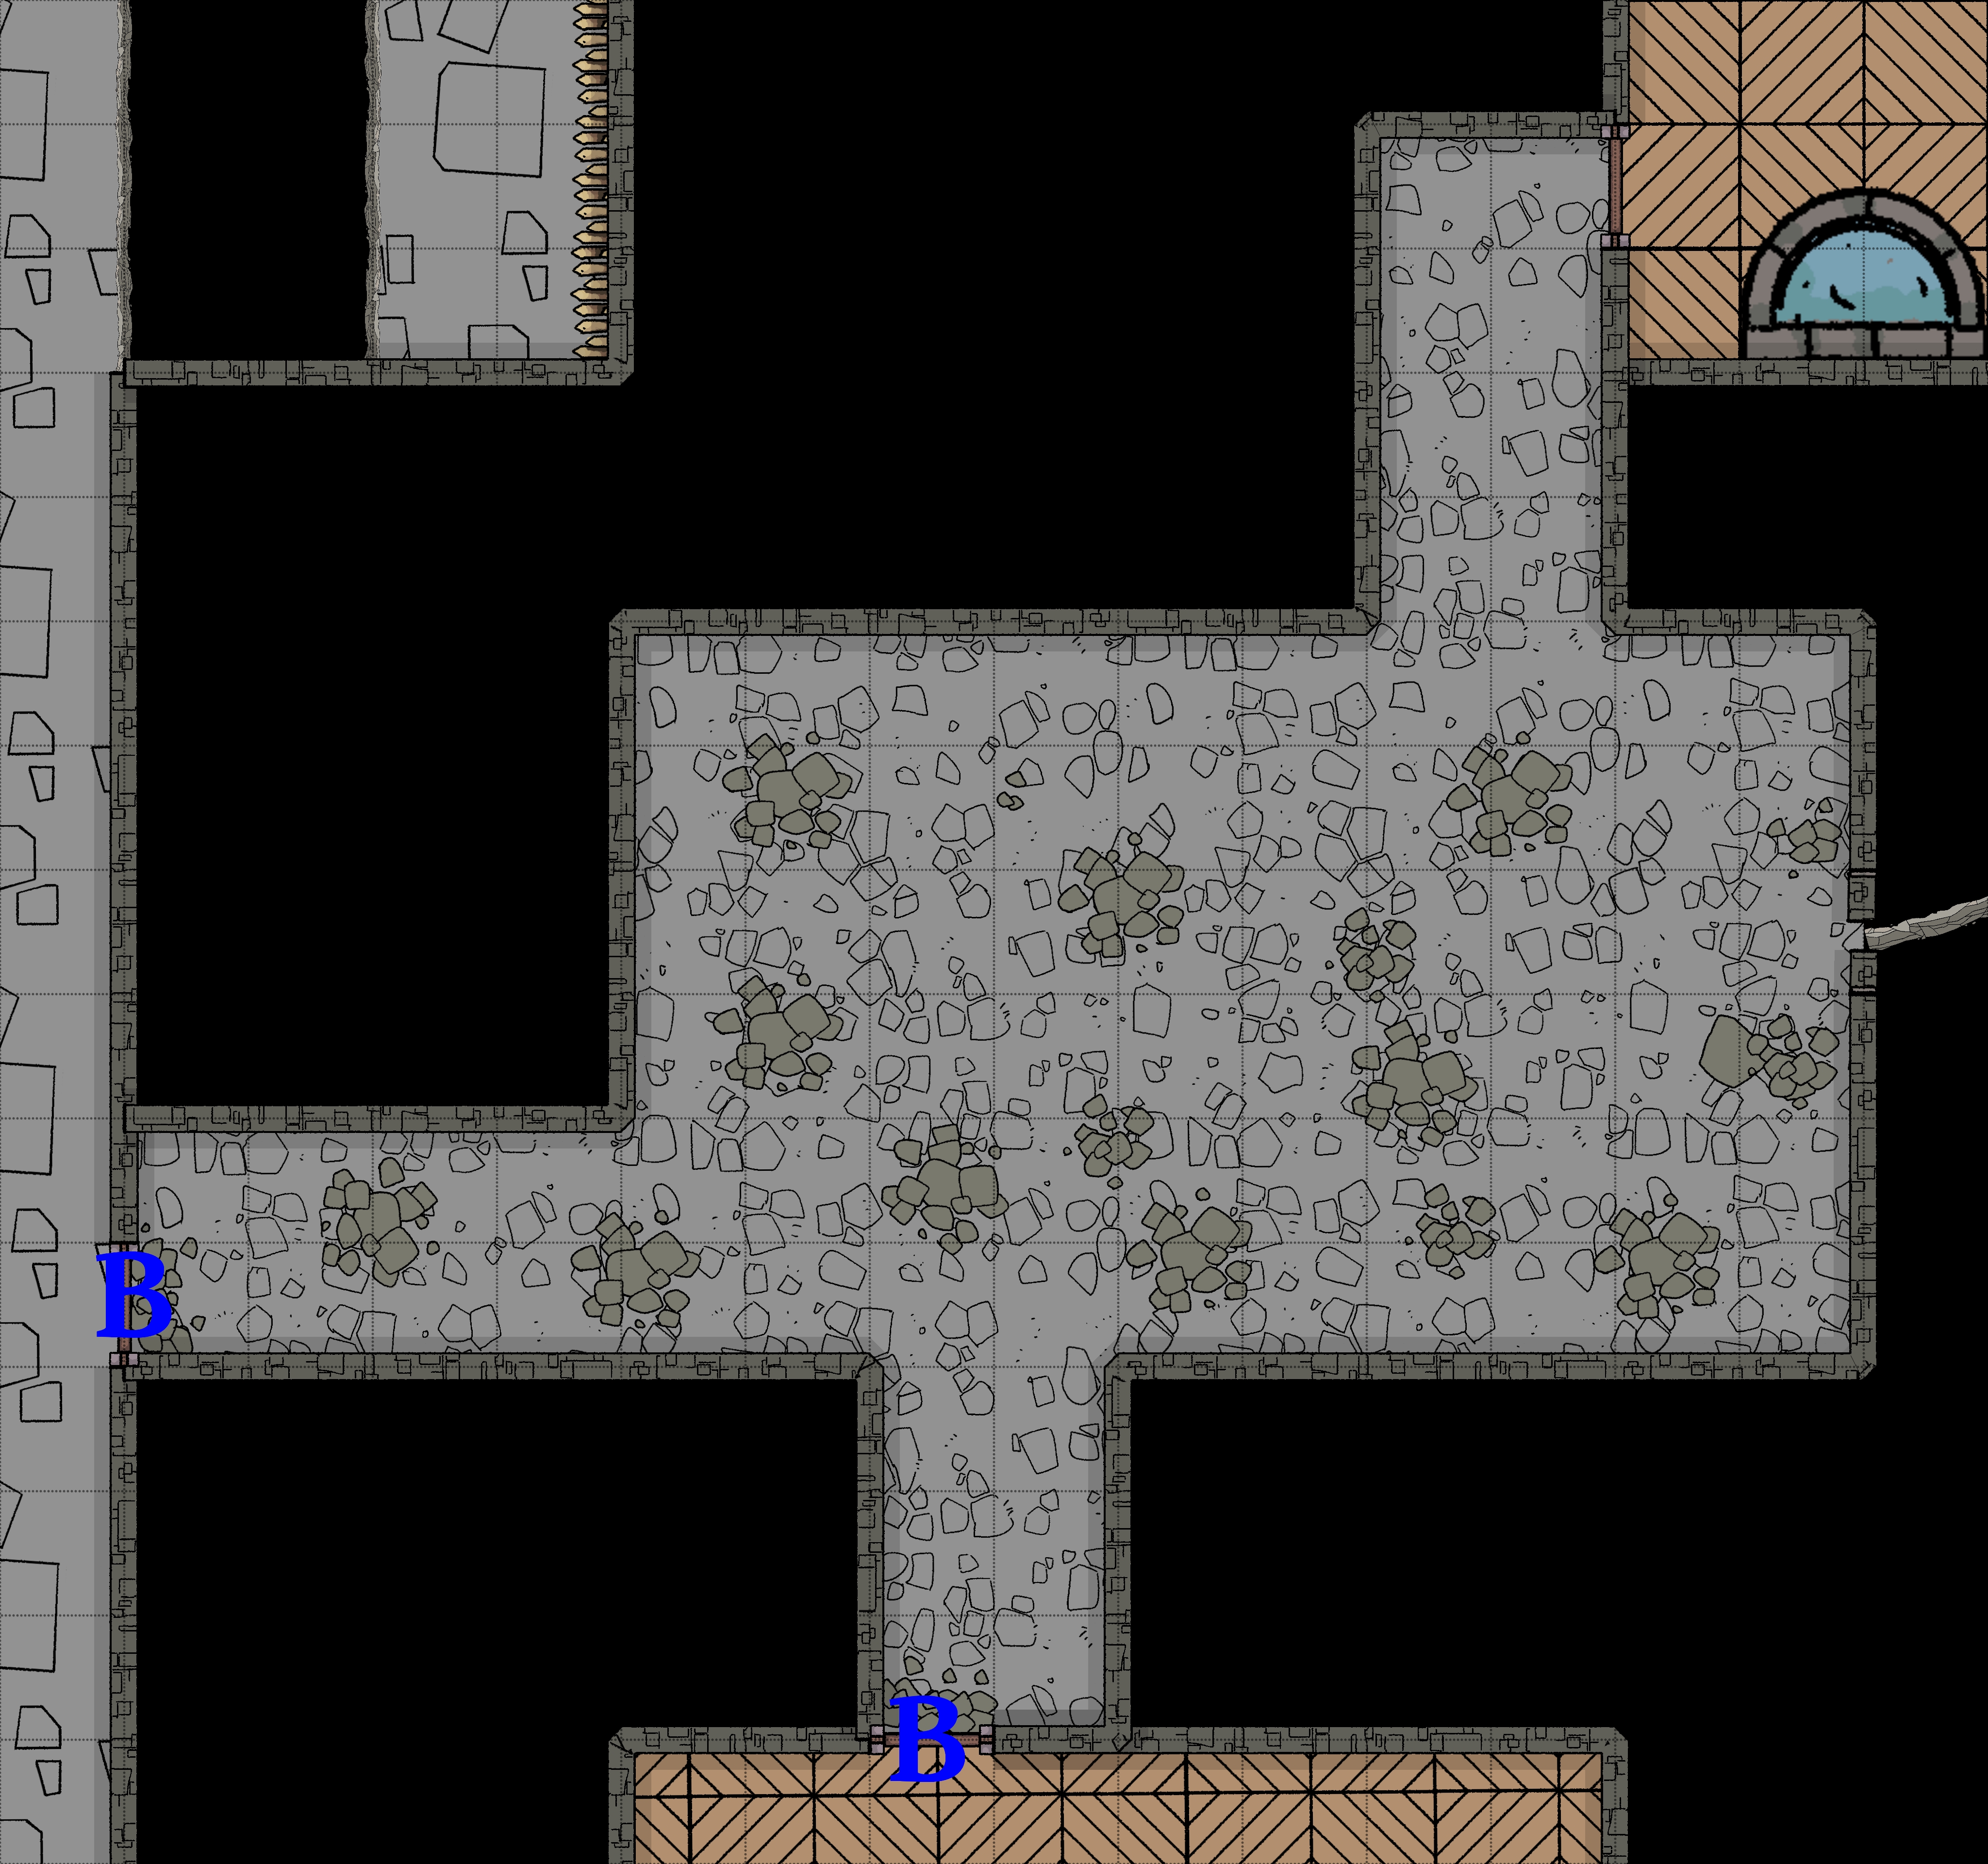
The Bell Tower - 1-6
Room Type: Empty
Light Level: Dark
This vast central room is lined with dark stone that absorbs torchlight. The centre of the room contains a gigantic, bell-like brass structure, its surface covered in detailed reliefs of skulls and magical sigils, an ominous work of art.
The air is thick with the stench of death, and every other round there is a deep hunting tone that comes from the bell. The floor is covered in corpses of dead Crawling Zombies 3d10 of which are just playing dead.
There are four small entrances into the central bell, small enough to crawl through 1-7. There is, however, a constant flow of crawling zombies emerging from each entrance.
Connected Rooms
North East - Open Archway - 1-38
East - Barricaded Door - Corridor
South East - Open Archway - 1-26
South - “Airlock” - 1-29
West - Open Doorway - 1-8
North West - Open corridor
The Bell Tower - 1-7
Room Type: Lair
Light Level: Dark
Inside this giant brass bell, you are at the bottom of The Drop on Floor 10. The floor is made of a dark metal, raised in sections into a flat pyramid. These all fit together in a grid pattern. There is a constant cycle of people falling from above, screaming before hitting the floor, shattering their legs, and eventually turning into Crawling Zombies.
Zombie Lair
This is where all Crawling Zombies come from in the dungeon. Clones are created on Floor 10 and fall to this room, where they die and become zombies. They then crawl out and venture into the rest of the dungeon.
This room is always full of corpses, most of which are Crawling Zombies. 4d10
Loot!
There is a single, very well-made boot amongst the corpses, Boot of Spider Climbing (need to find the other 3-1)
Connected Rooms
Up - The Drop - 10-7
North - Crawlspace - Corridor
East - Crawlspace - 1-6
South - Crawlspace - 1-6
West - Crawlspace - 1-6
Staff Basement Entrance - 1-8
Room Type: Empty
Light Level: Dark
Large open space once used for storage is now scattered with debris and the undead. The floor is thick with muck and debris, mostly from Crawling Zombies crushing everything in this room over the years. A clear path through this muck leads from the passage to the east down the stairs.
The smell of rot is in the air from all the zombies leaving behind parts of themselves as they drag themselves down the stairs. A sound of wind whistling can be heard from gaps in the stone in the north wall. This whistling is what's attracting the zombies towards the stairs.
Stairs go down to Basement 1.
Connected Rooms
Down - Stairs - Basement 1 Corridor
East - Open doorway - 1-6
West - Blocked reinforced door - 1-30
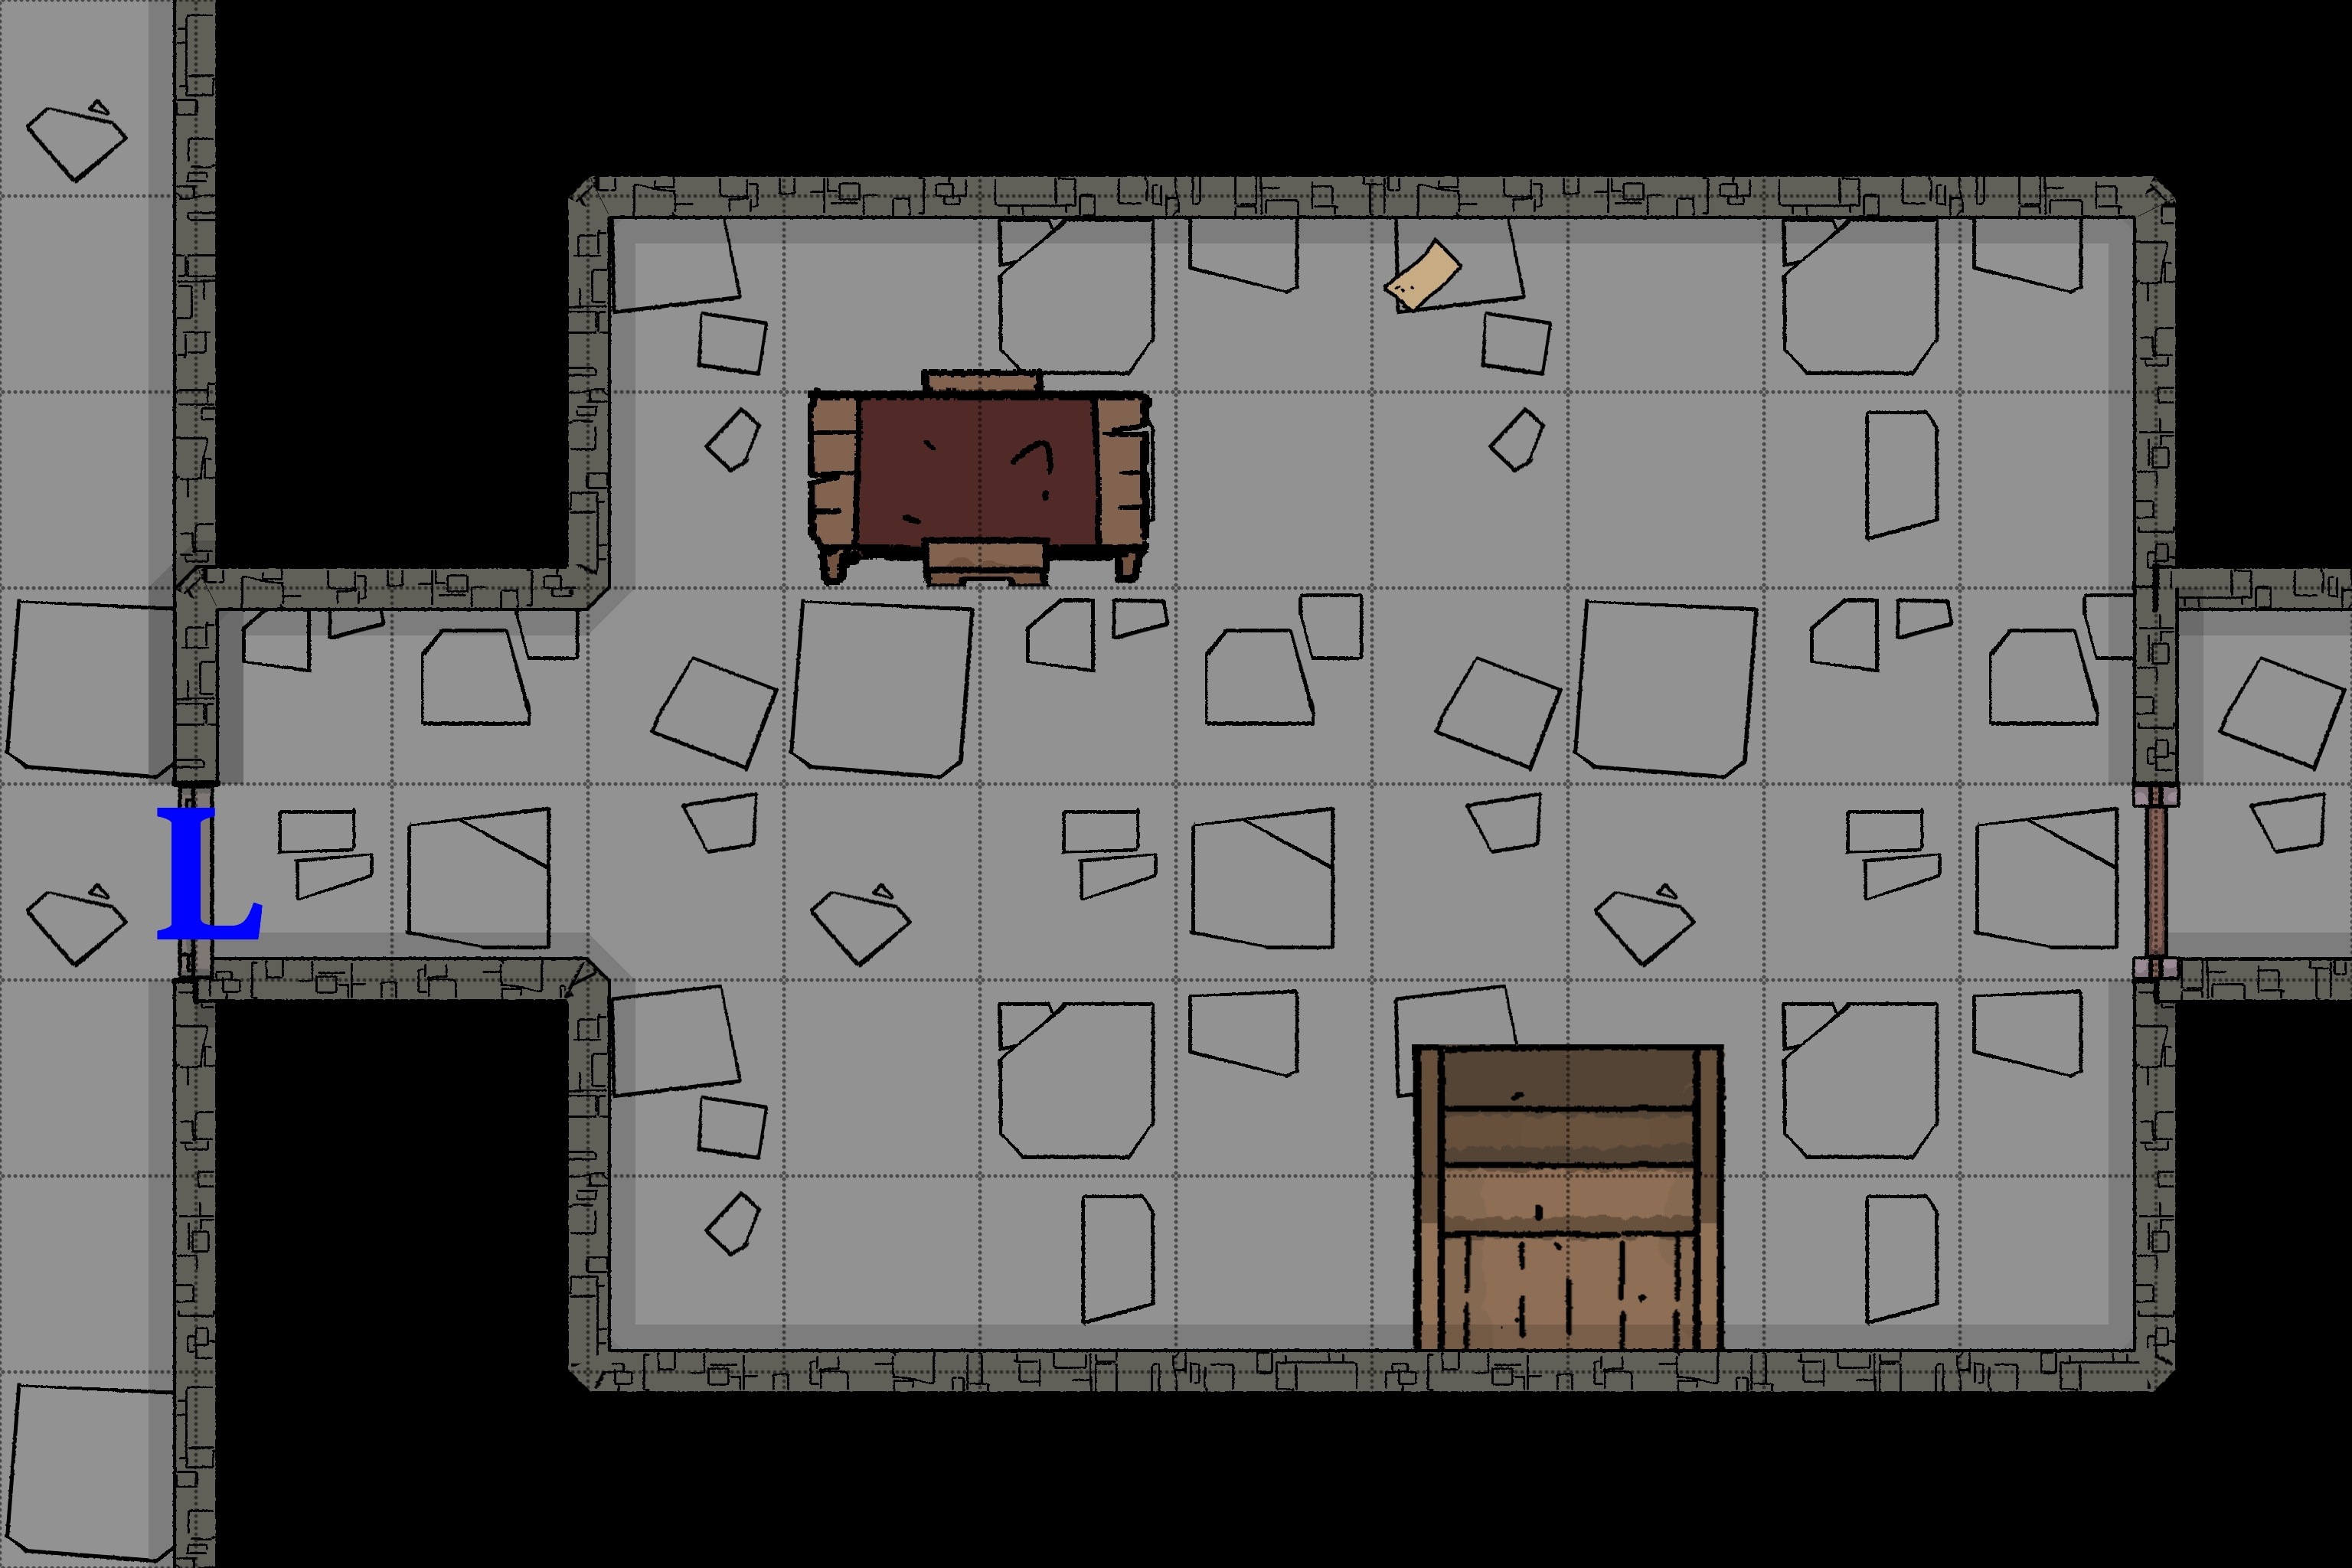
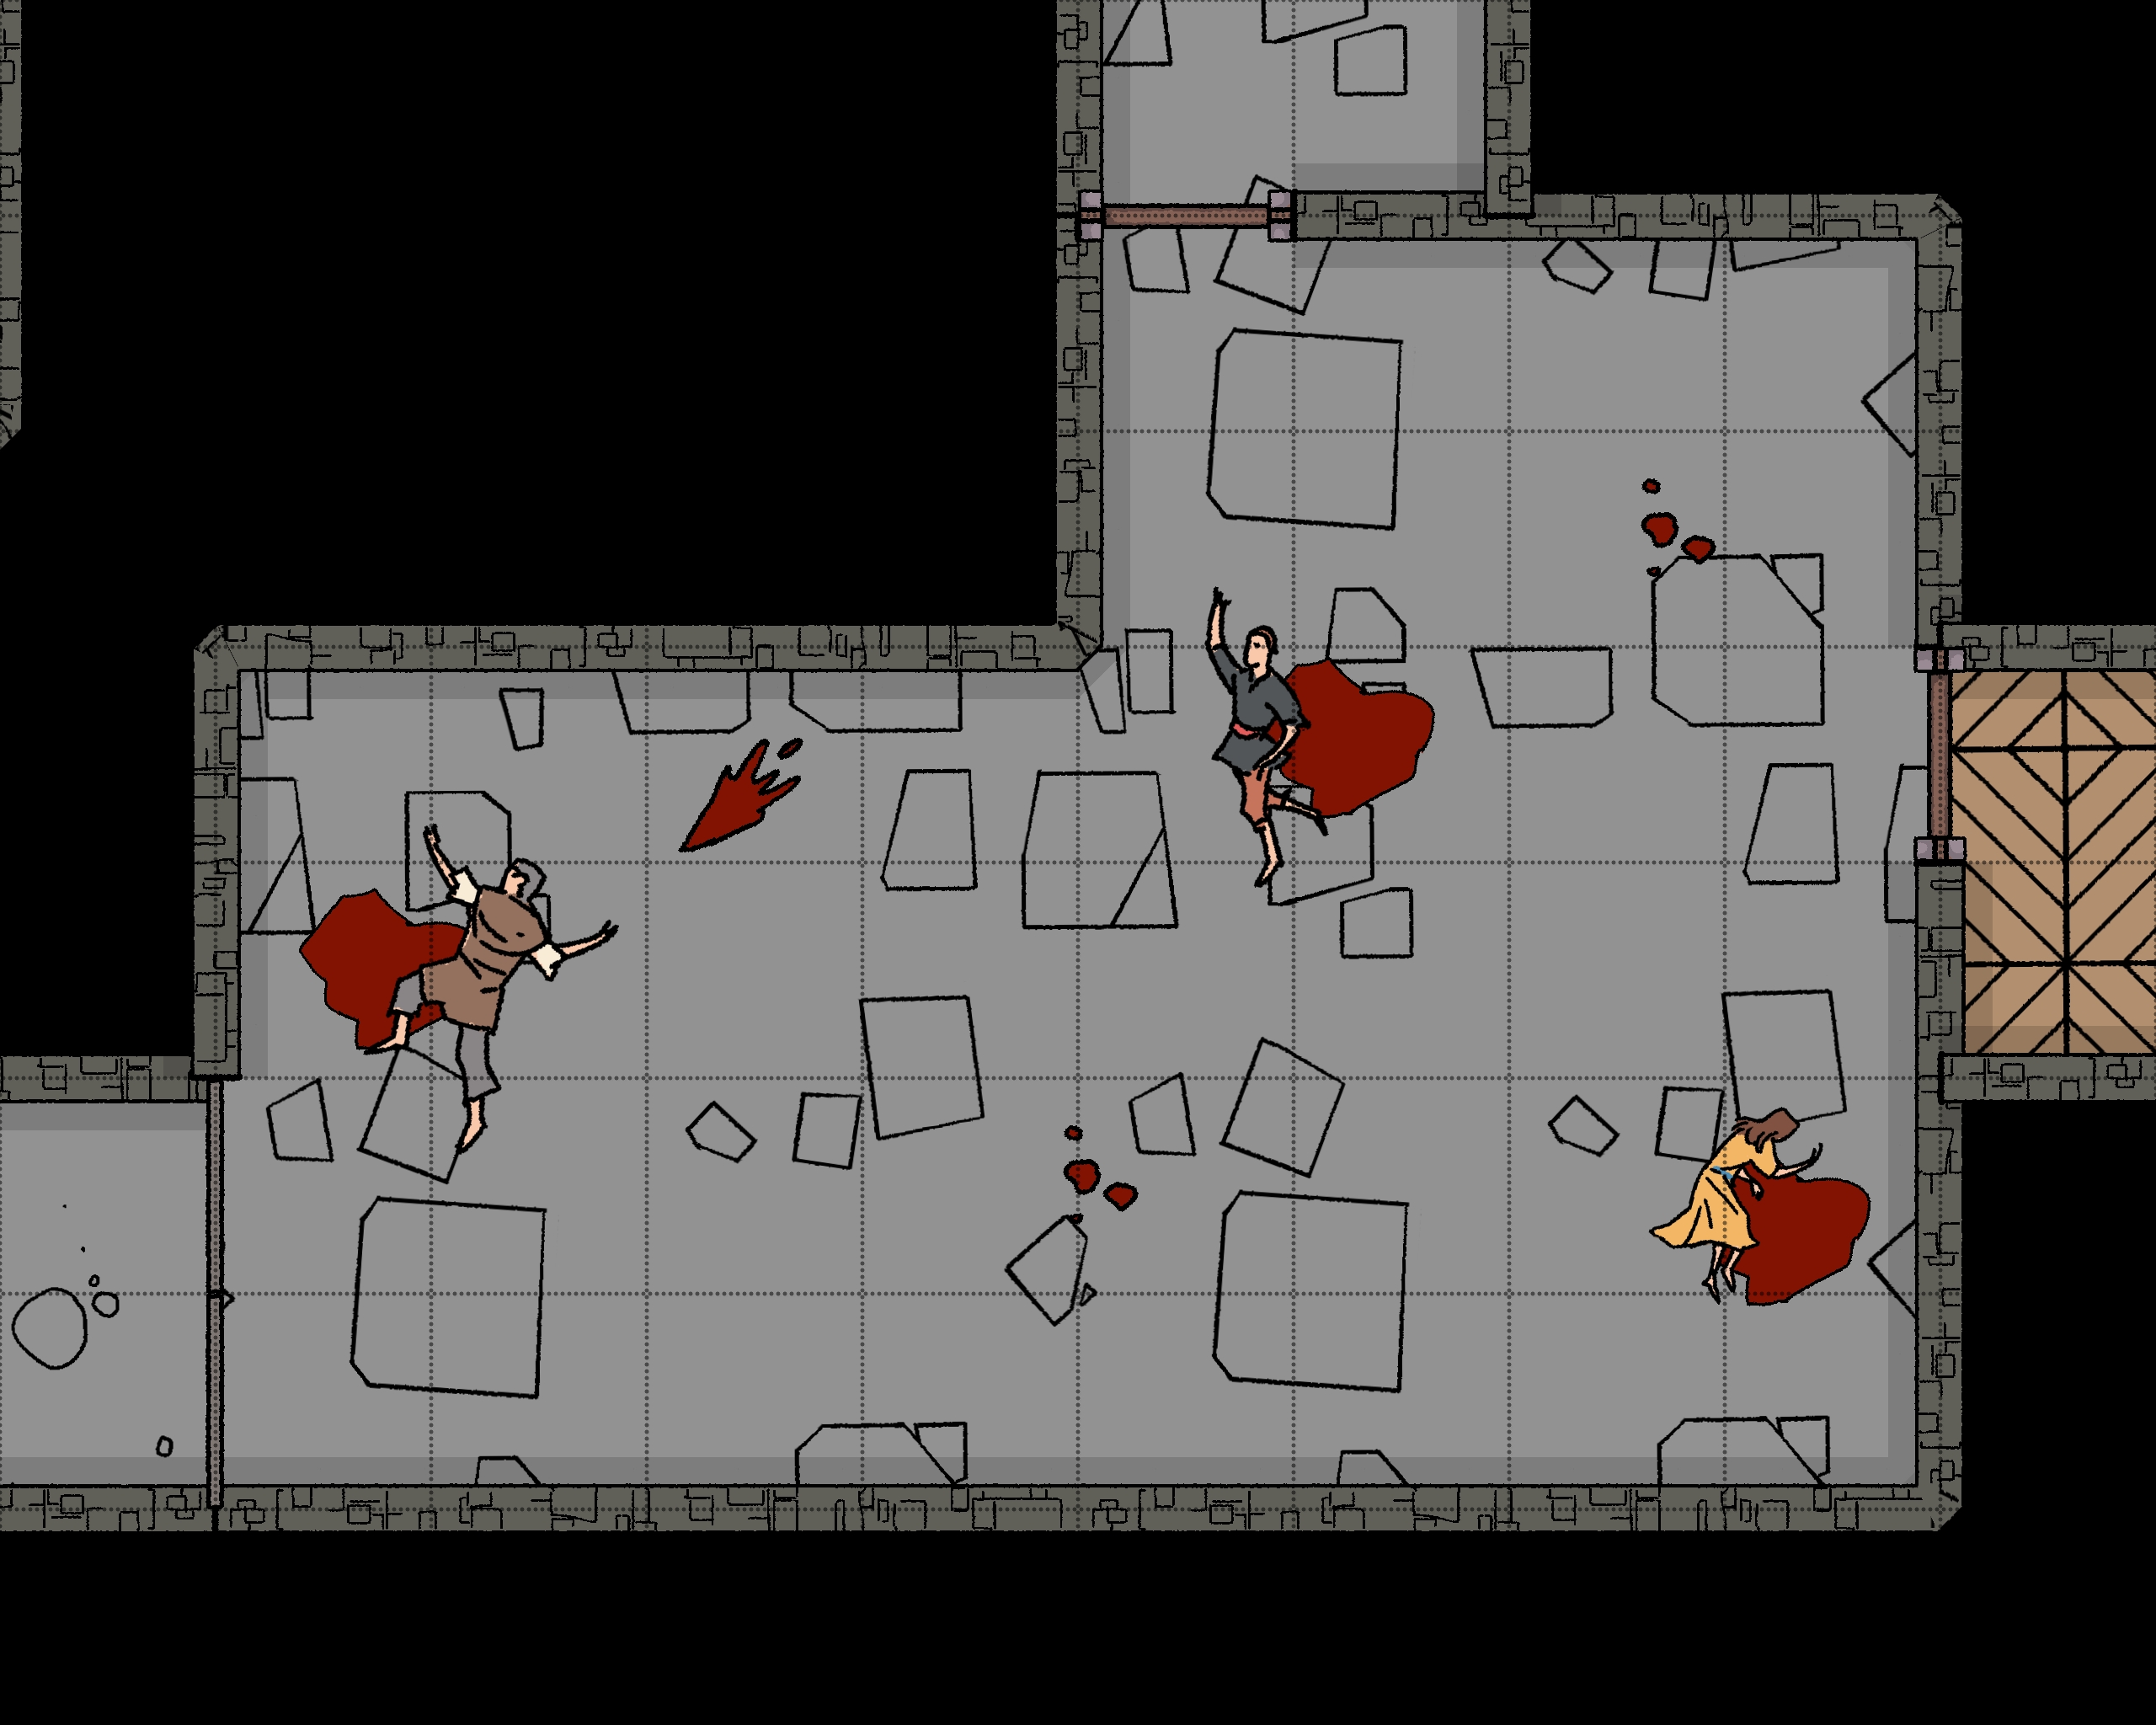
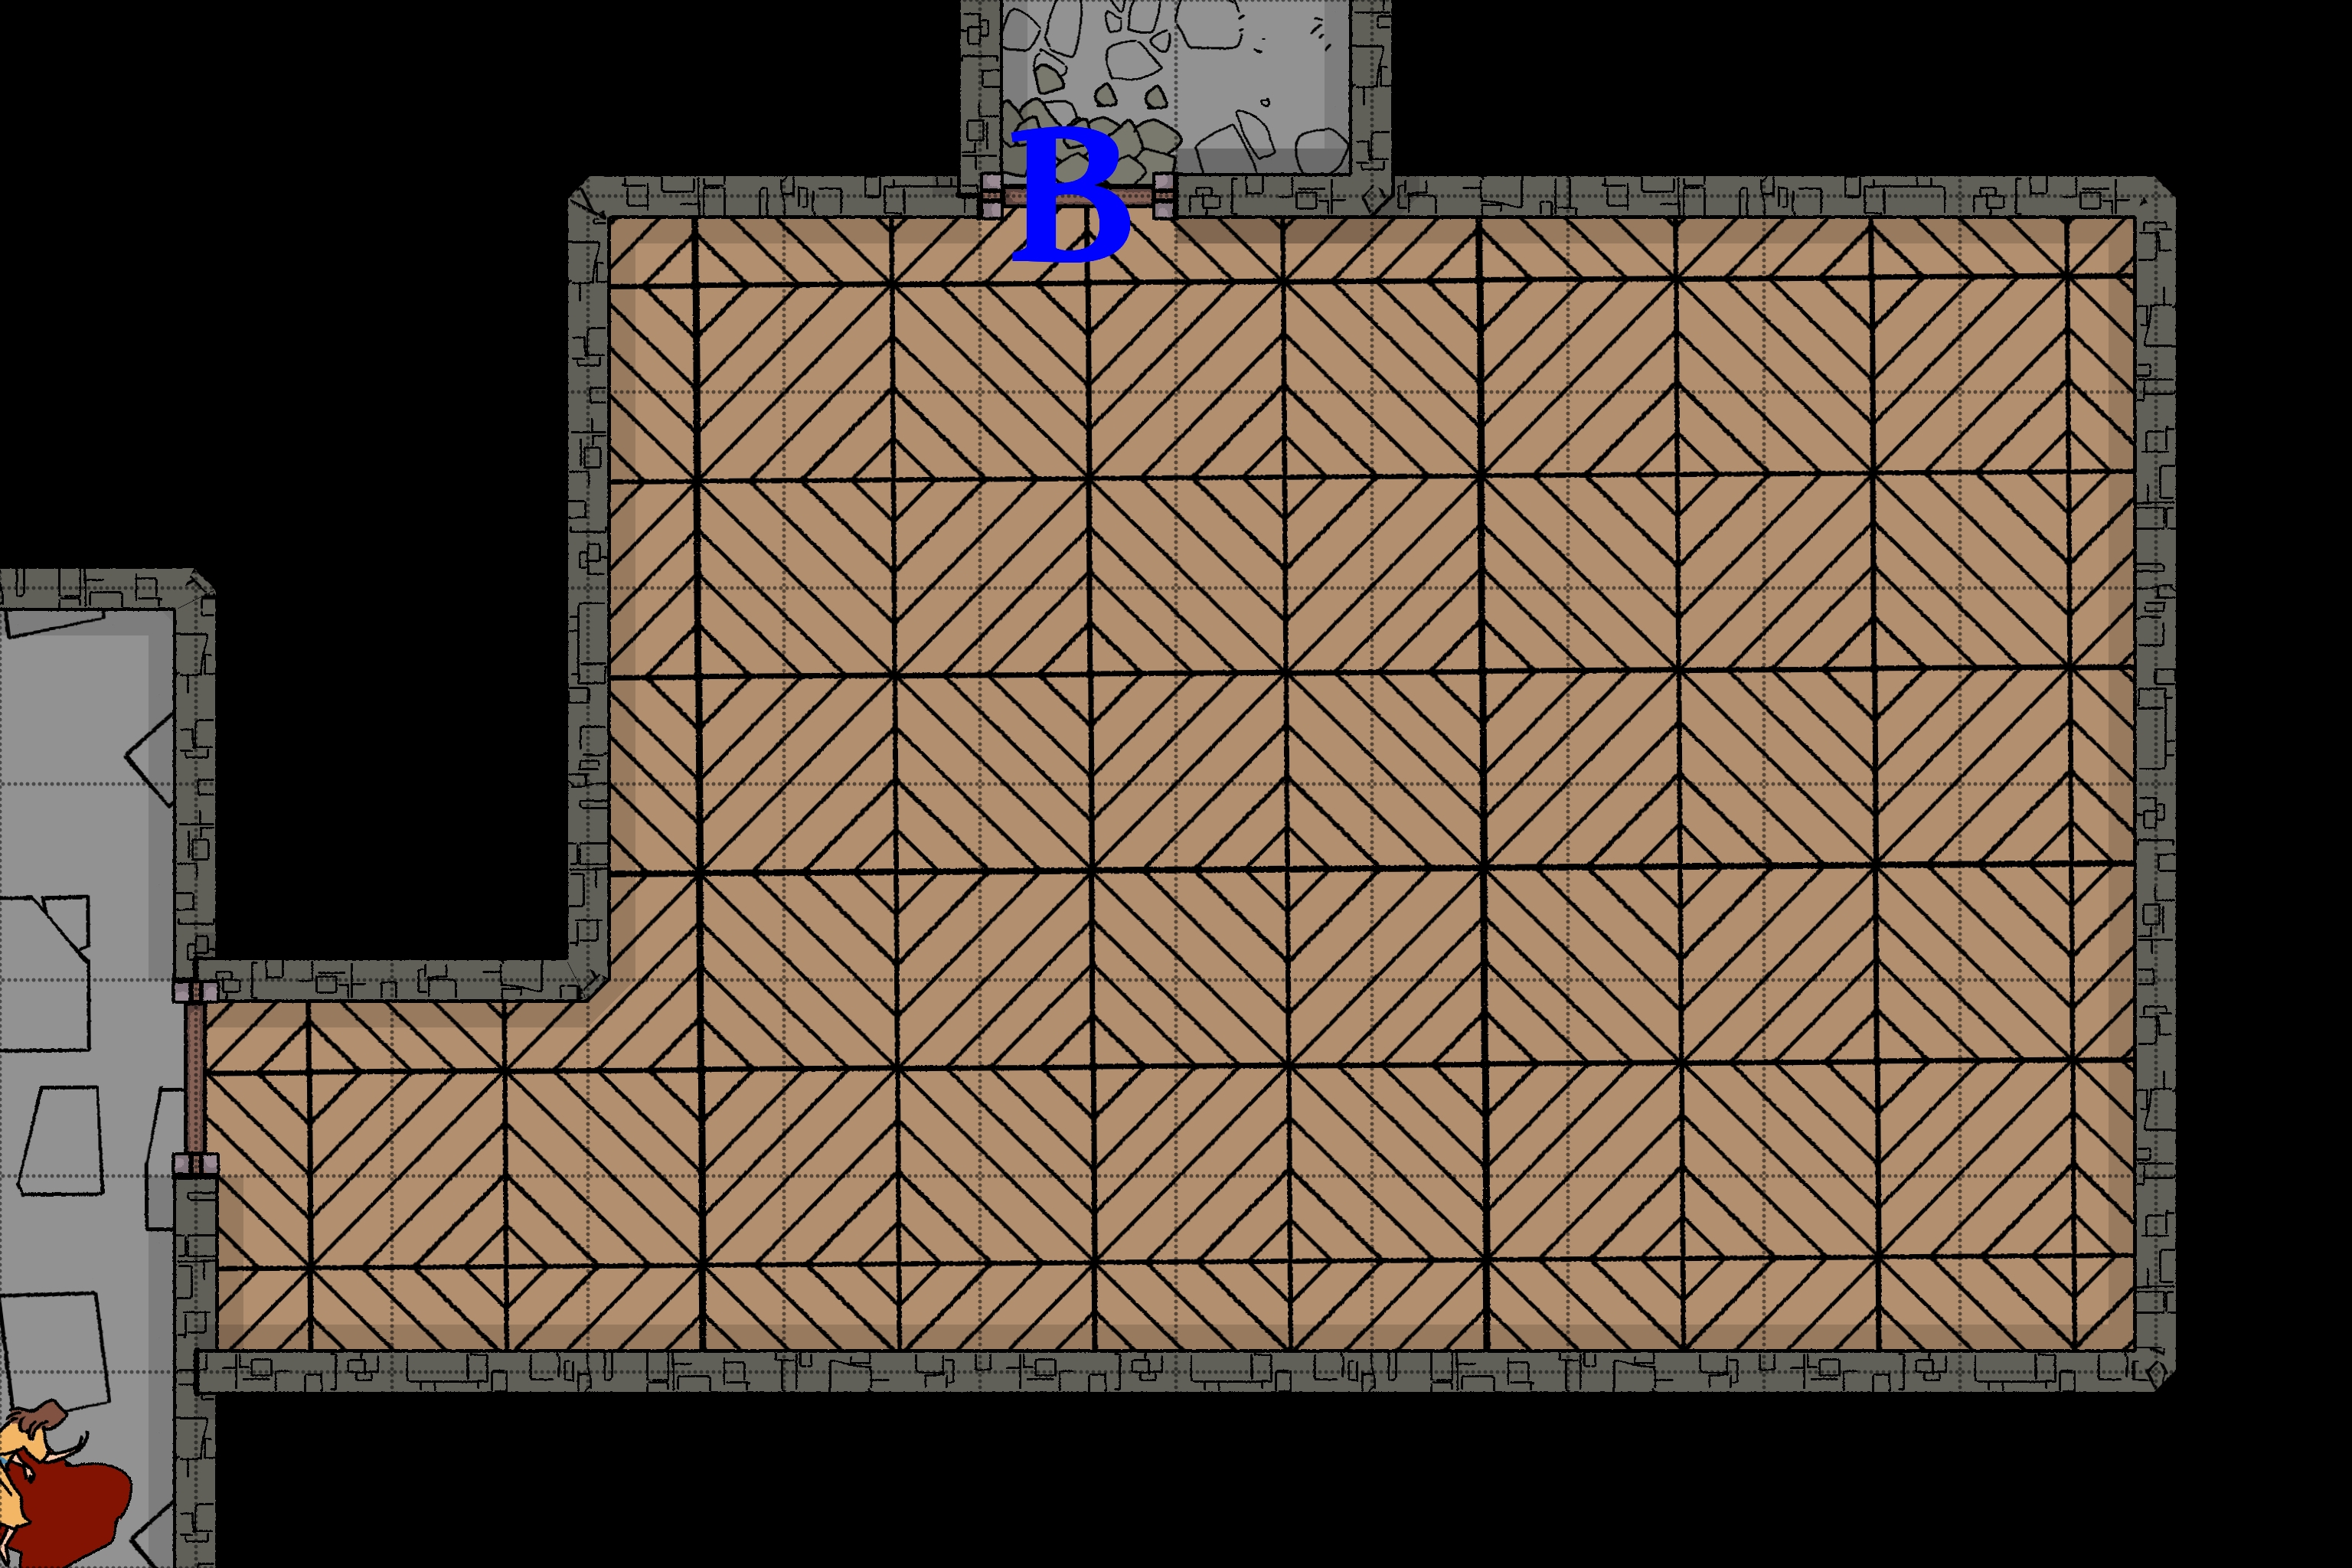
The Grand Ballroom - 1-9
Room Type: Trap
Light Level: Well Lit
This grand ballroom has polished white marble floors, walls panelled in beautiful stained wood, and large, decorated pillars flanking each side of the room. A large central staircase on the north wall goes up to floor 2-1. This grand room would be a sight for sore eyes if it were not for the corpses that litter the floor of this room. Dancers that are wasting away dance atop their fallen partners with twisted smiles on their face as a band plays a magical tune.
Dancers
Feel free to add or remove who is dancing, but this is what I would suggest:
- 2 Reforged
- 3 The Cult of the Tower
- 5 Union Members
- 20 Ghosts
TRAP: The Cursed Performance
Against the south wall, there is a wooden raised stage with a single zombie dressed in a fine tuxedo playing the Violin of Eternity. This zombie is unlike the others found in this part of the tower; its legs are not broken, it's fully clothed, but it is missing its ears.
Anyone or anything listening to this performance, Save Vs Spell on a fail will join in the dancing until they die from exhaustion, they then rise again as ghosts and continue dancing.
Dancing Ghosts
Once the music stops, the ghosts will be dragged down into the Heart of the Tower, as most souls would. They might even thank the party before being dragged down; some have been trapped for a long time.
LOOT!
The room has six pillars, three down each side. These pillars feature detailed engravings of corpses at the bottom and souls rising around them. This morbid artwork is decorated with gold inlay and small jewels to catch the light. Scraping the gold is time-consuming, but it can be looted.
Each pillar provides:
- 100gp worth of gold flakes
- 1 slot of gemstone powder 300gp (will need a container)
4 Everglowing Lamps light the room; they are attached to the walls evenly spaced between the pillars.
Connected Rooms
Up - Grand staircase - 2-1
East - Corridor
West - Corridor
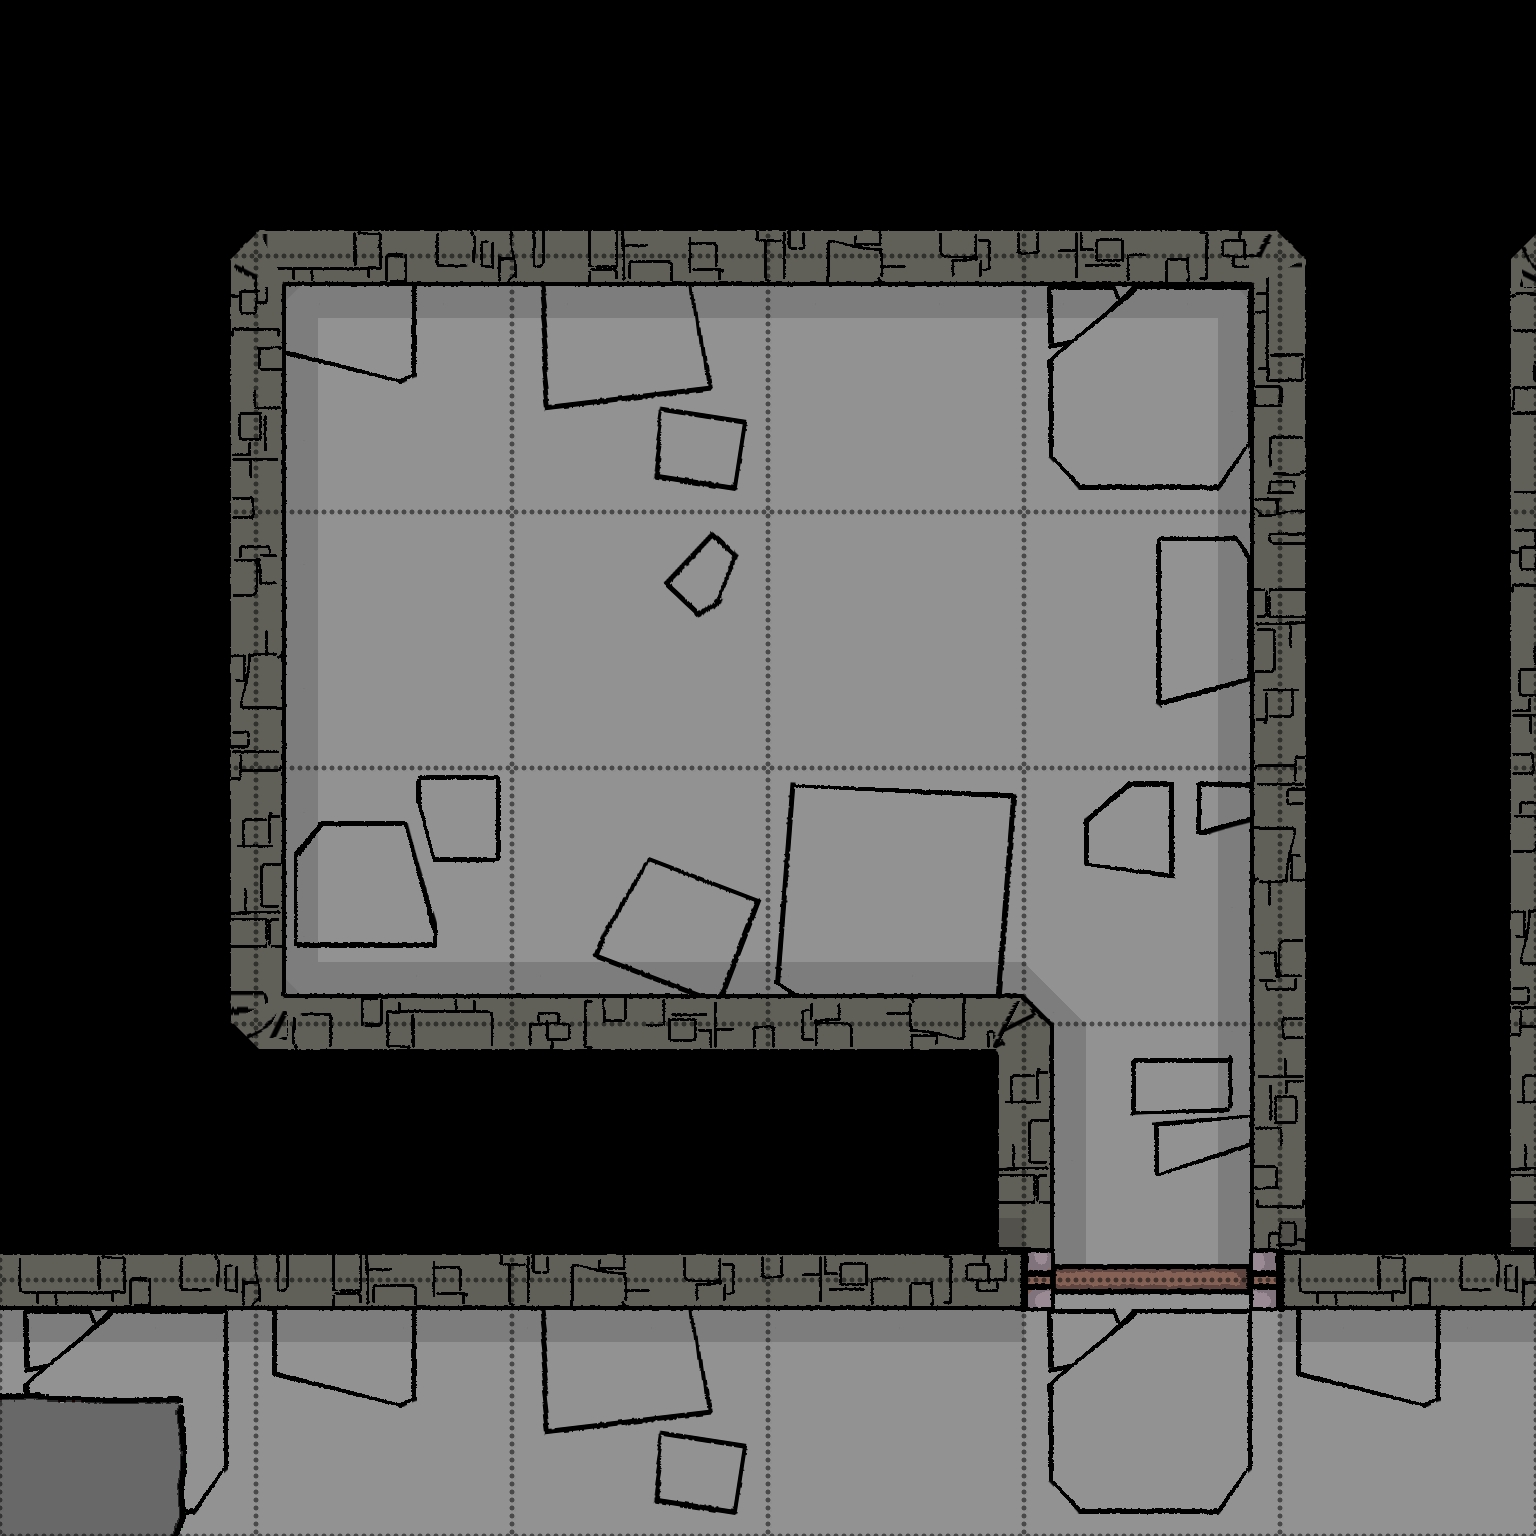
Grated Hallway - 1-10
Room Type: Special
Light Level: Dark
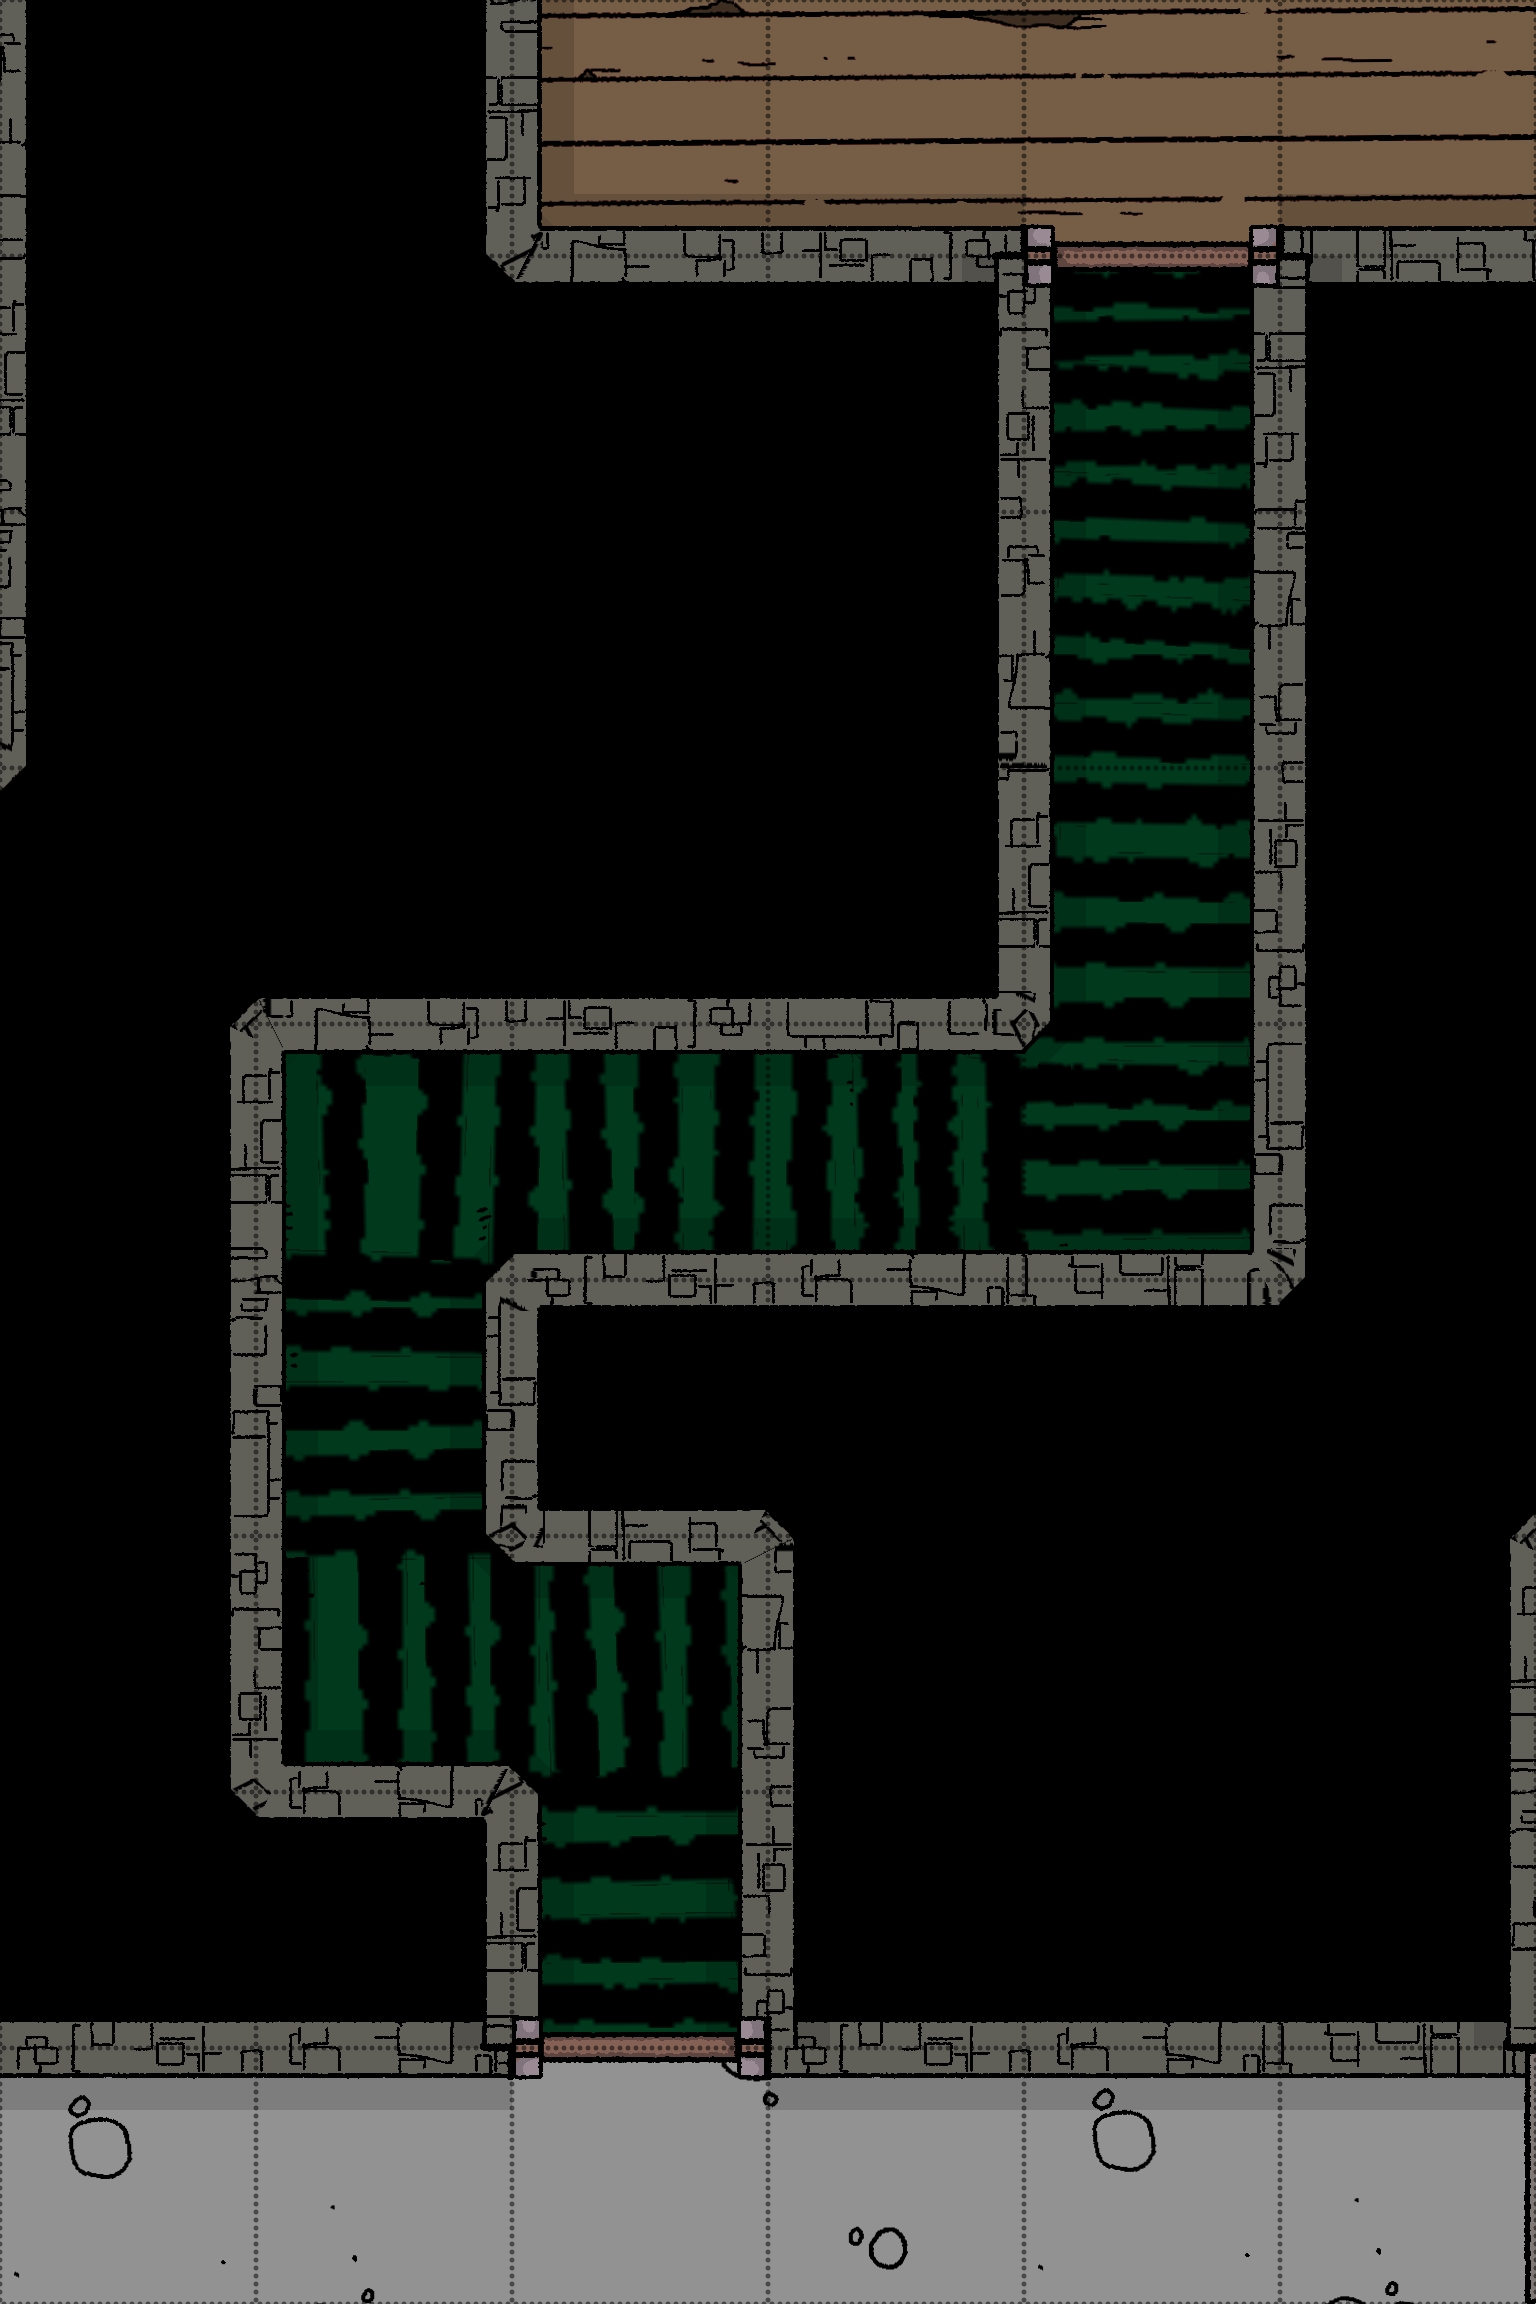
This tight hallway floor is a series of metal bars set up like a cattle grate. The walls are made of dark stone blocks, providing barely any support. The gaps in the grates are wide enough for a leg to fit through, but most people with bulky packs would get stuck. 2 feet below the grates is a dark, thick black acid resting in a pool.
If travelling through this room at a slow pace, then there is no need for a check to not slip through the gaps. If travelling in the dark or in a rush, a roll under Dex check is made.
The acid deals 1d4 damage per round and must be washed off; otherwise, it will continue to burn.
Connected Rooms
North - Strong Metal Door - 1-3
South - Strong Metal Door - Corridor
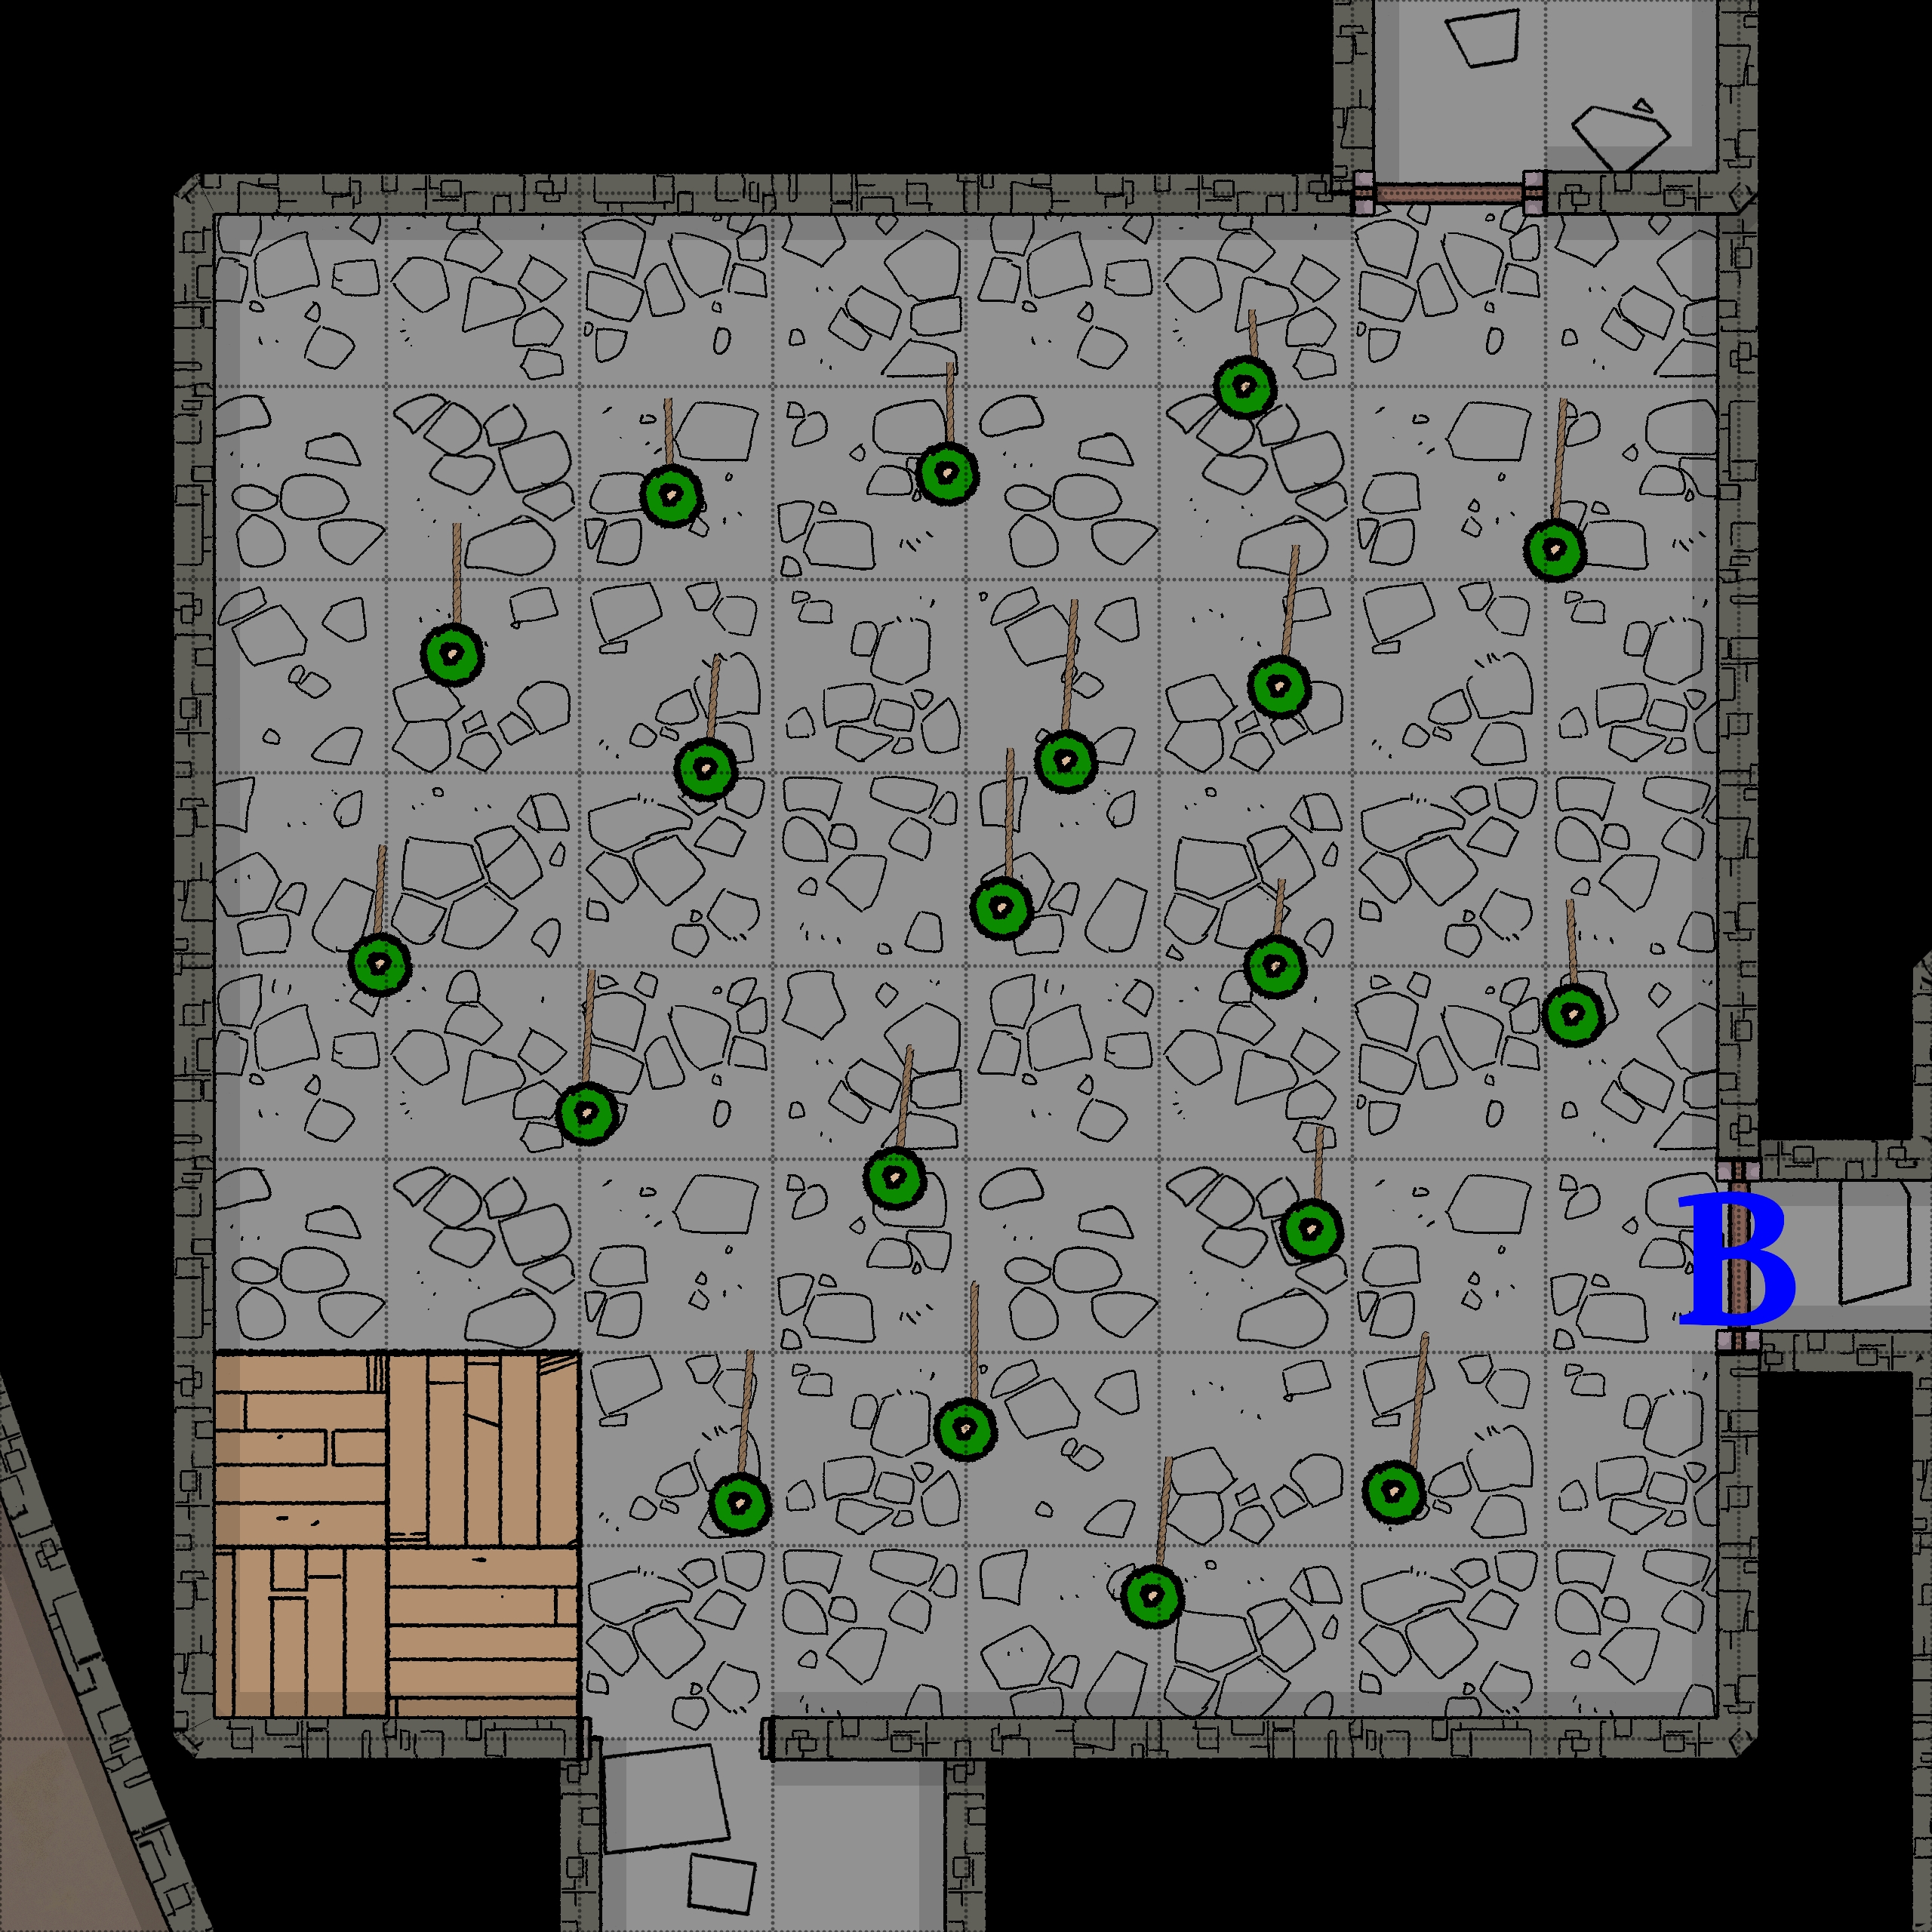
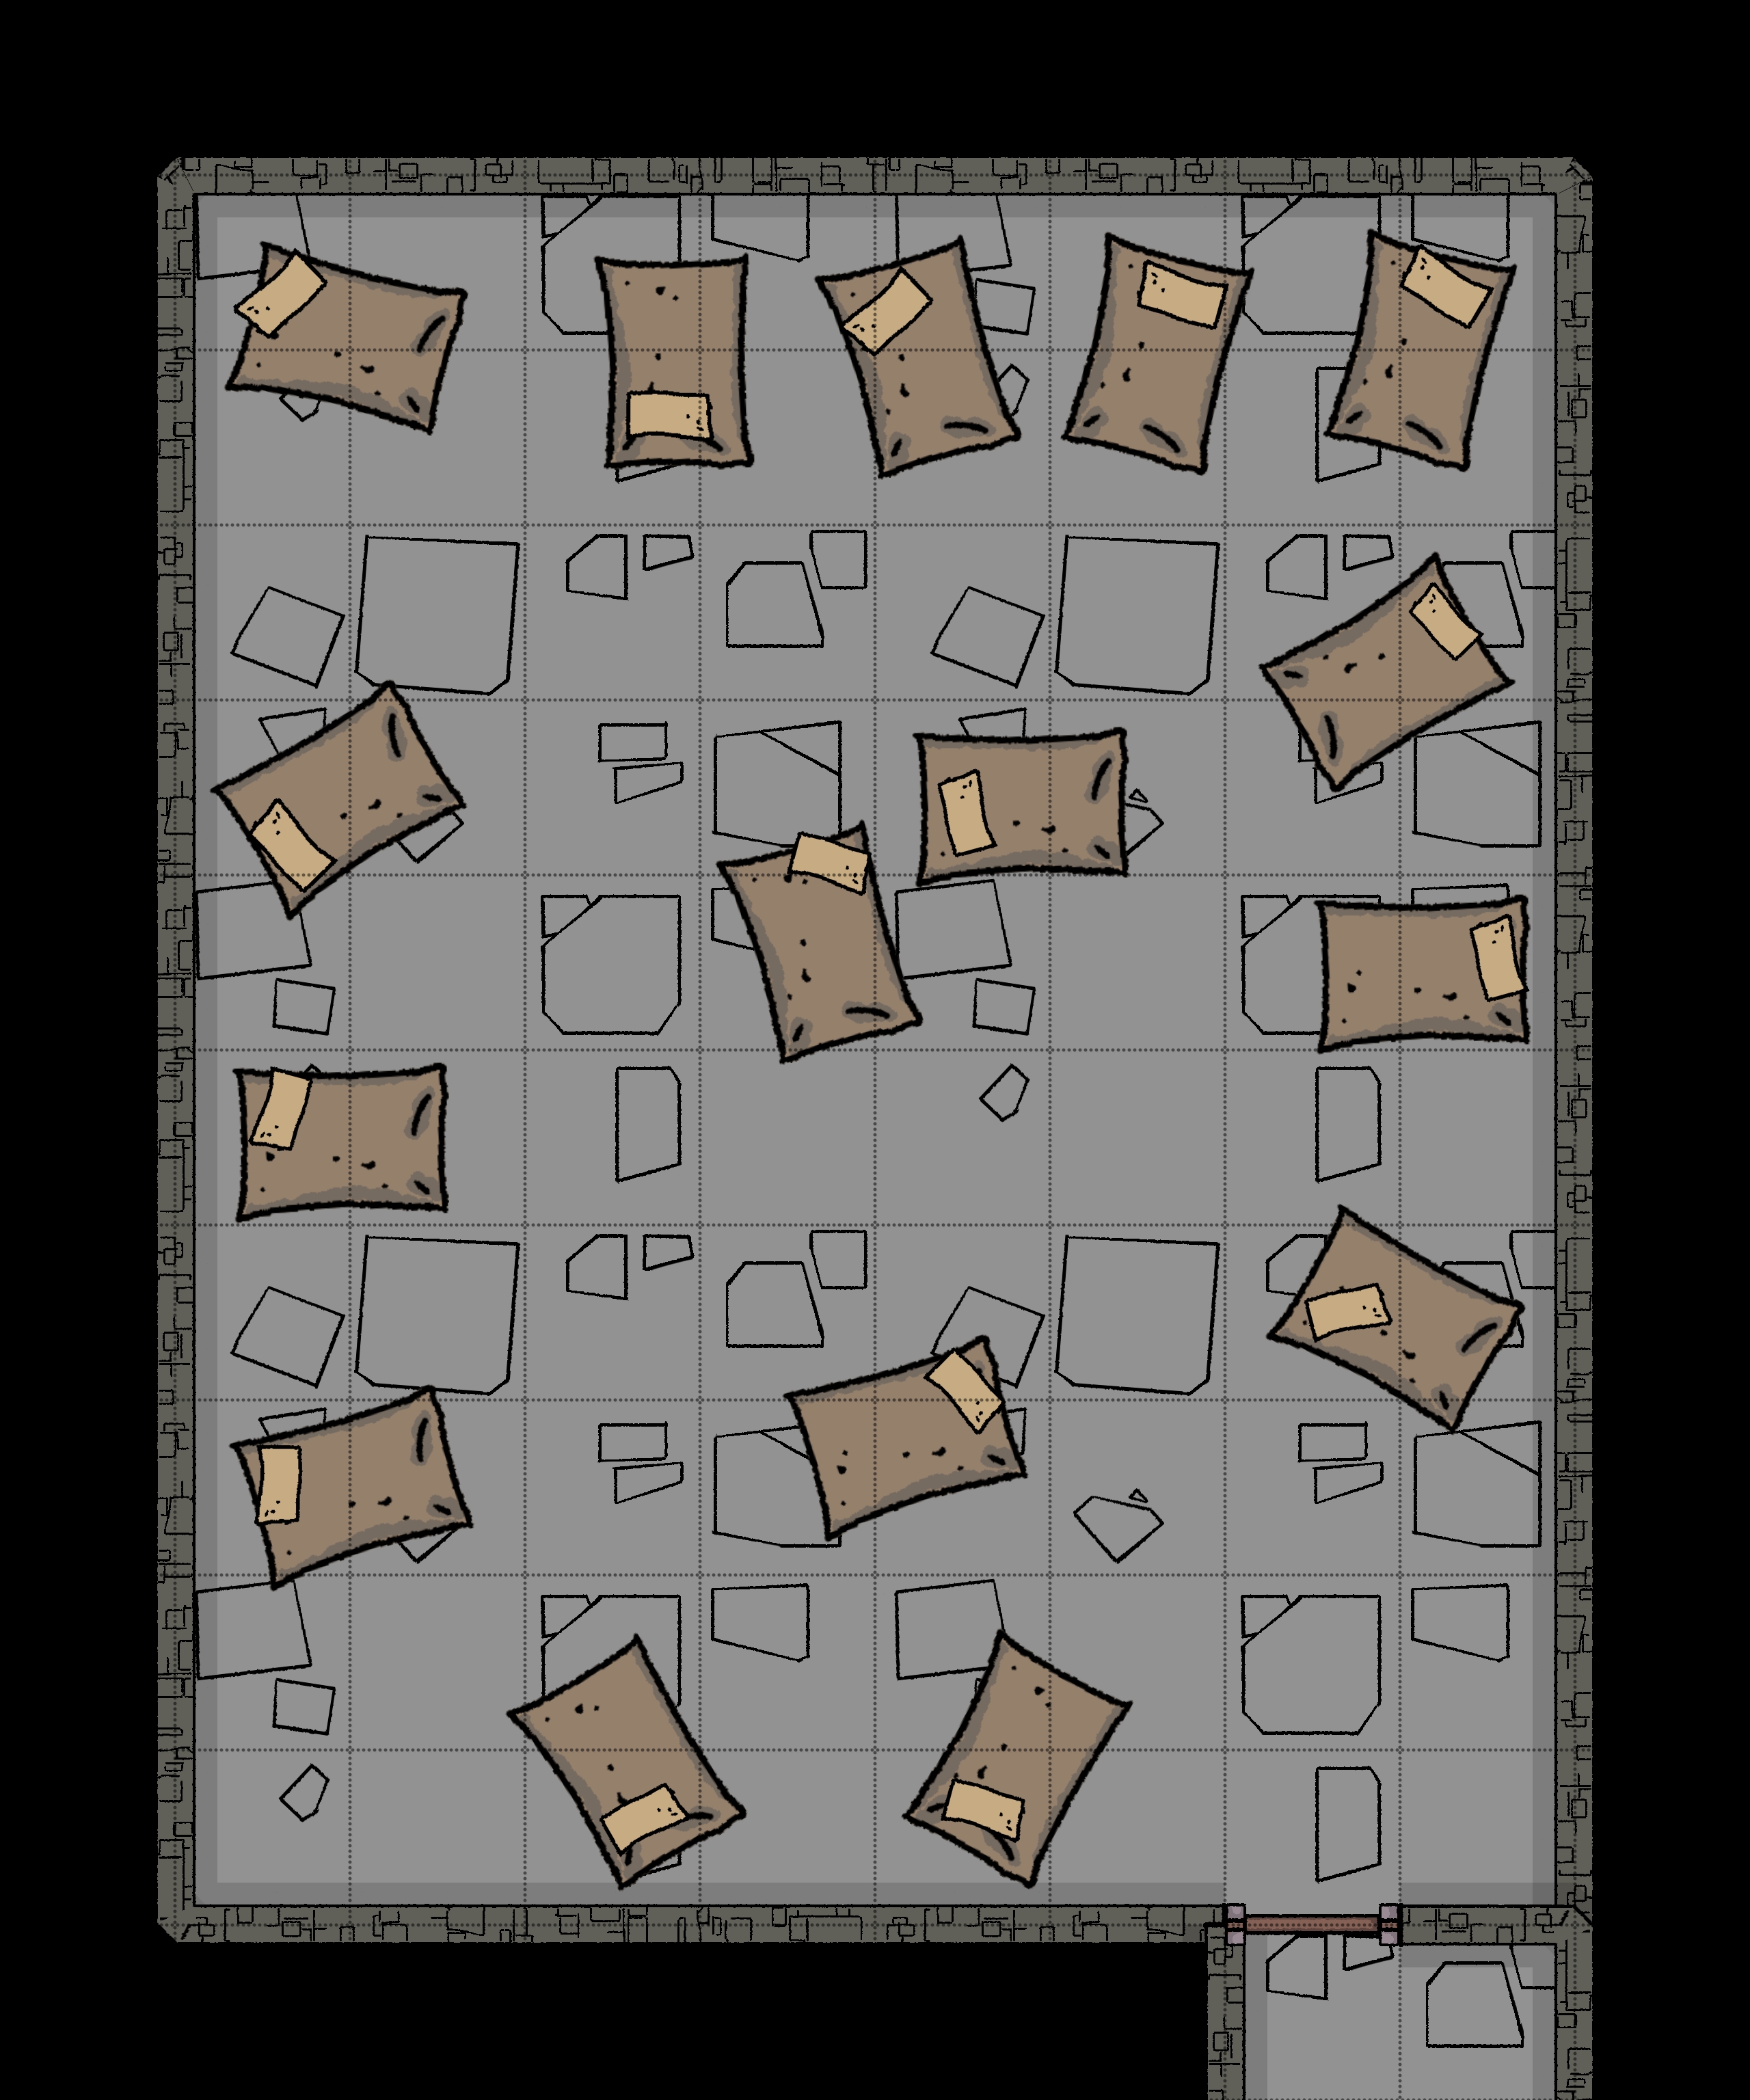
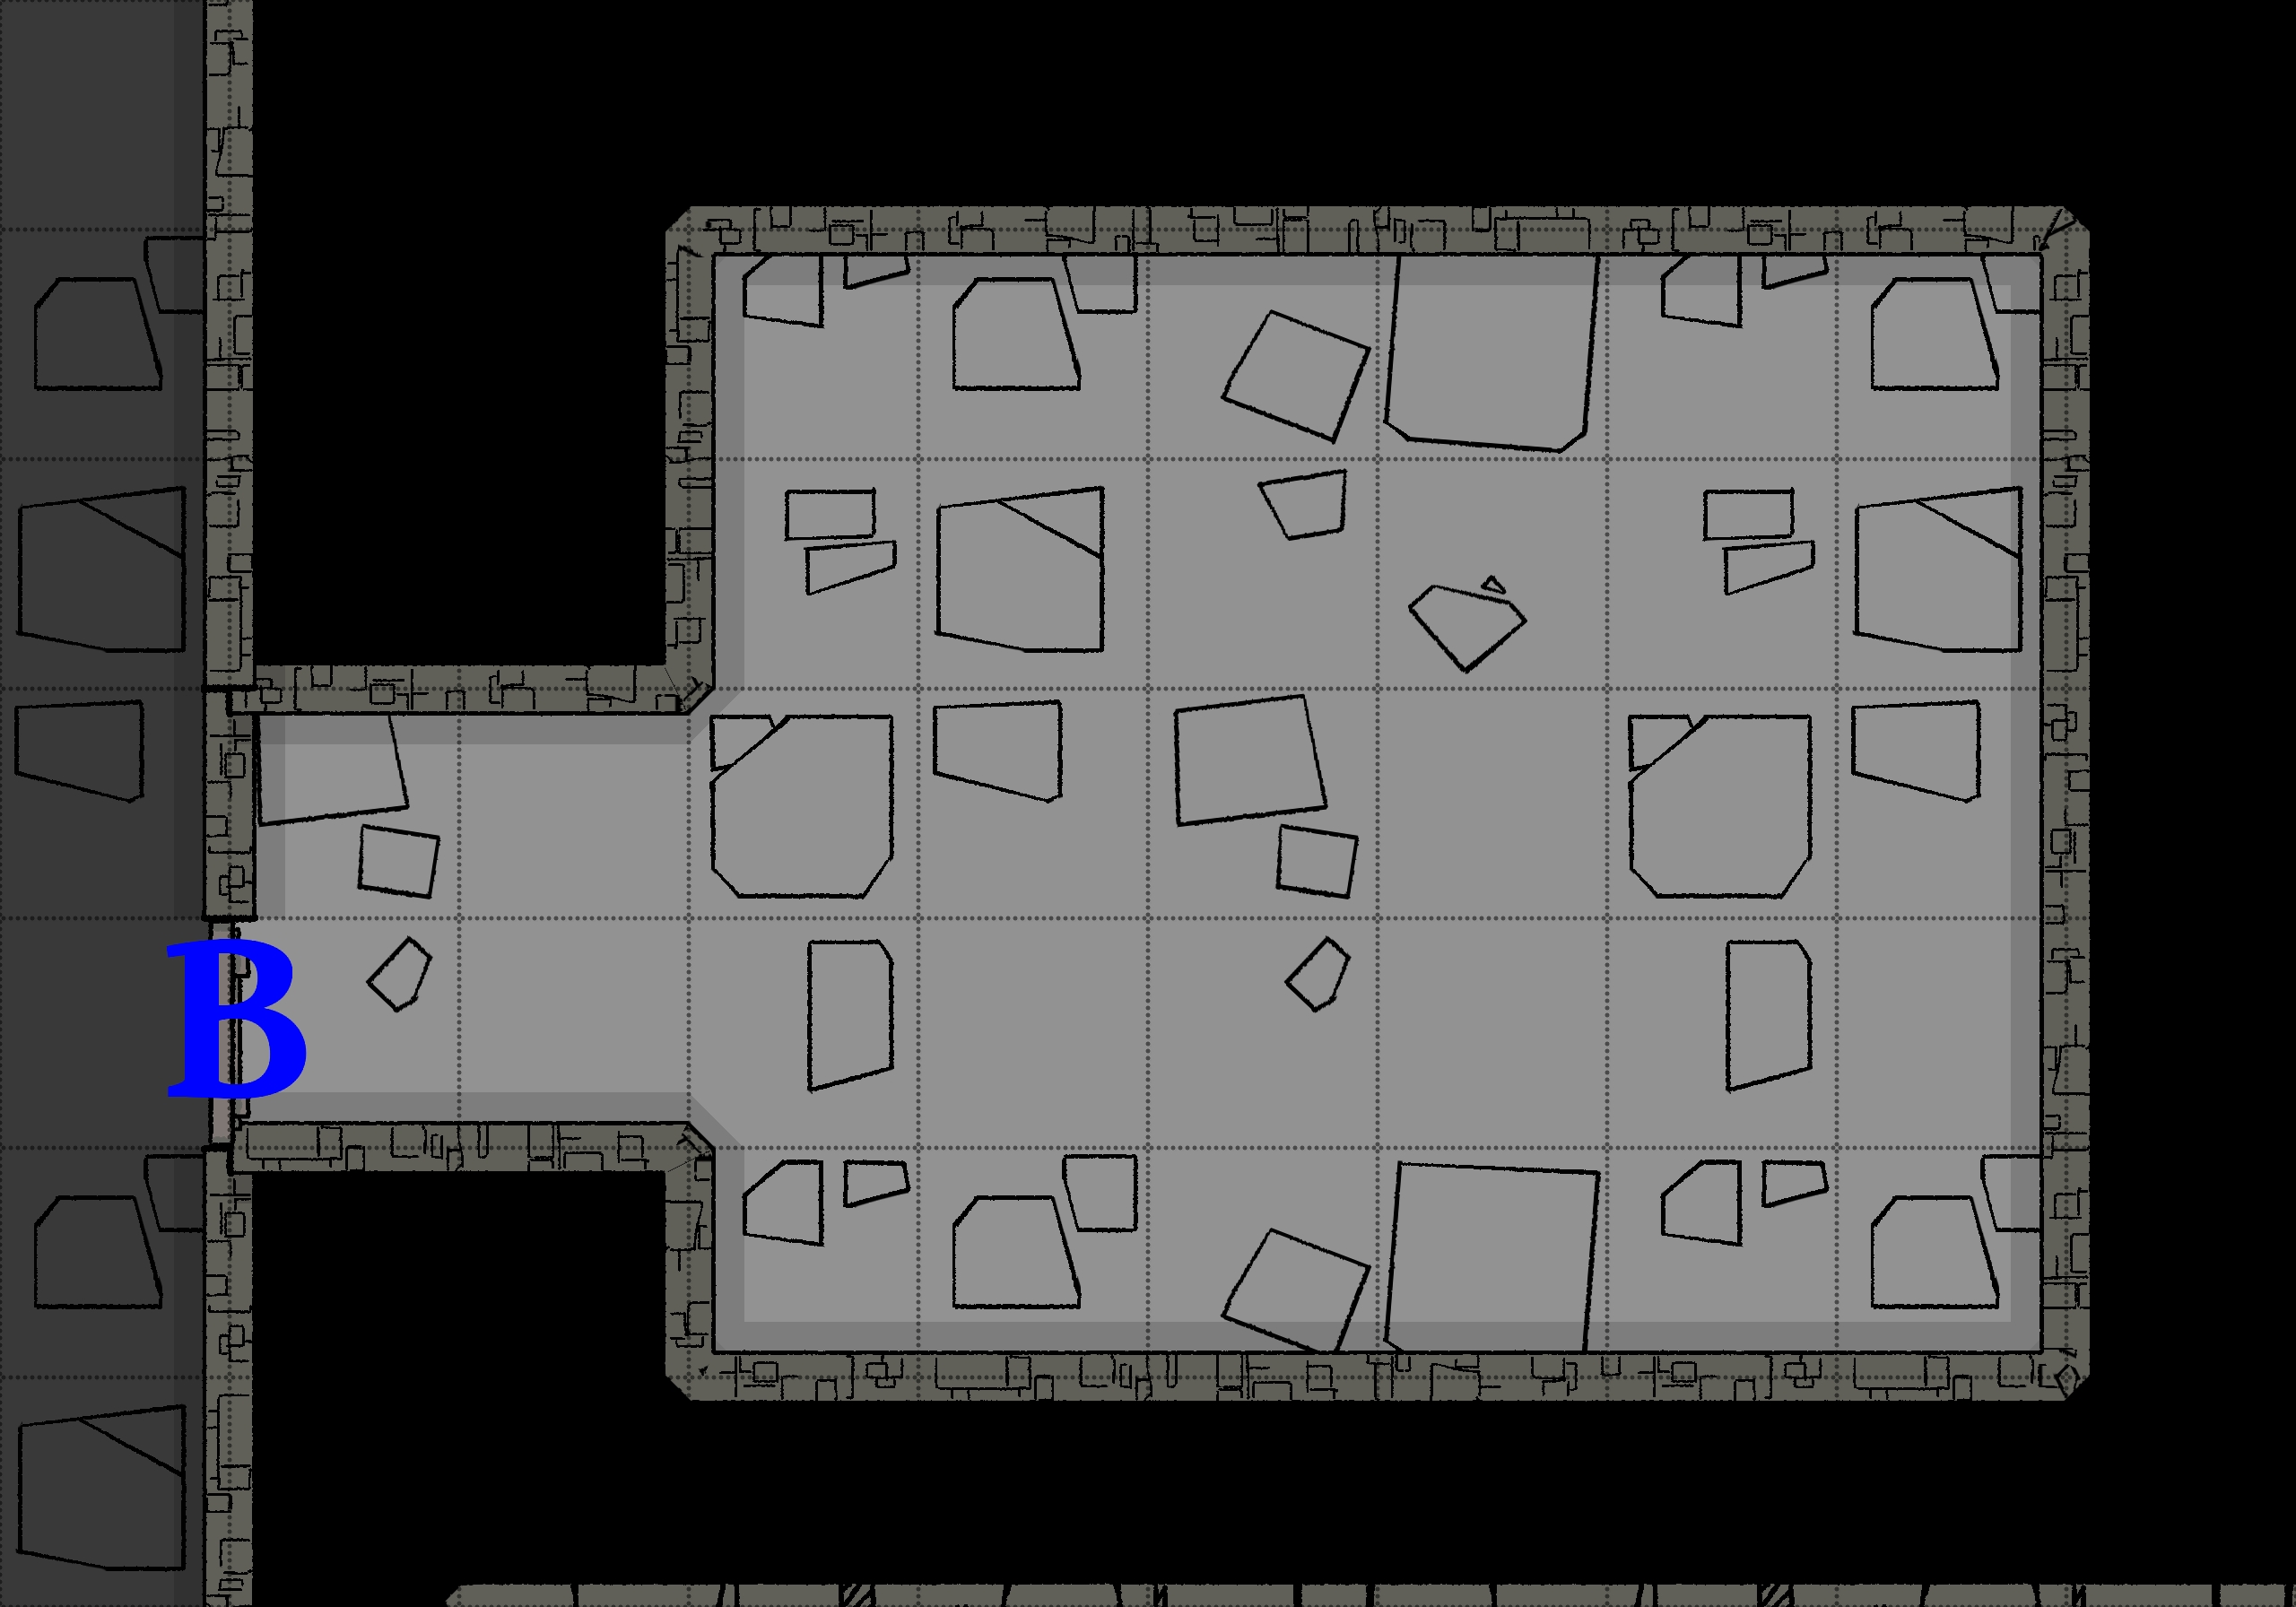
The Unions Lounge - 1-11
Room Type: Lair
Light Level: Dark
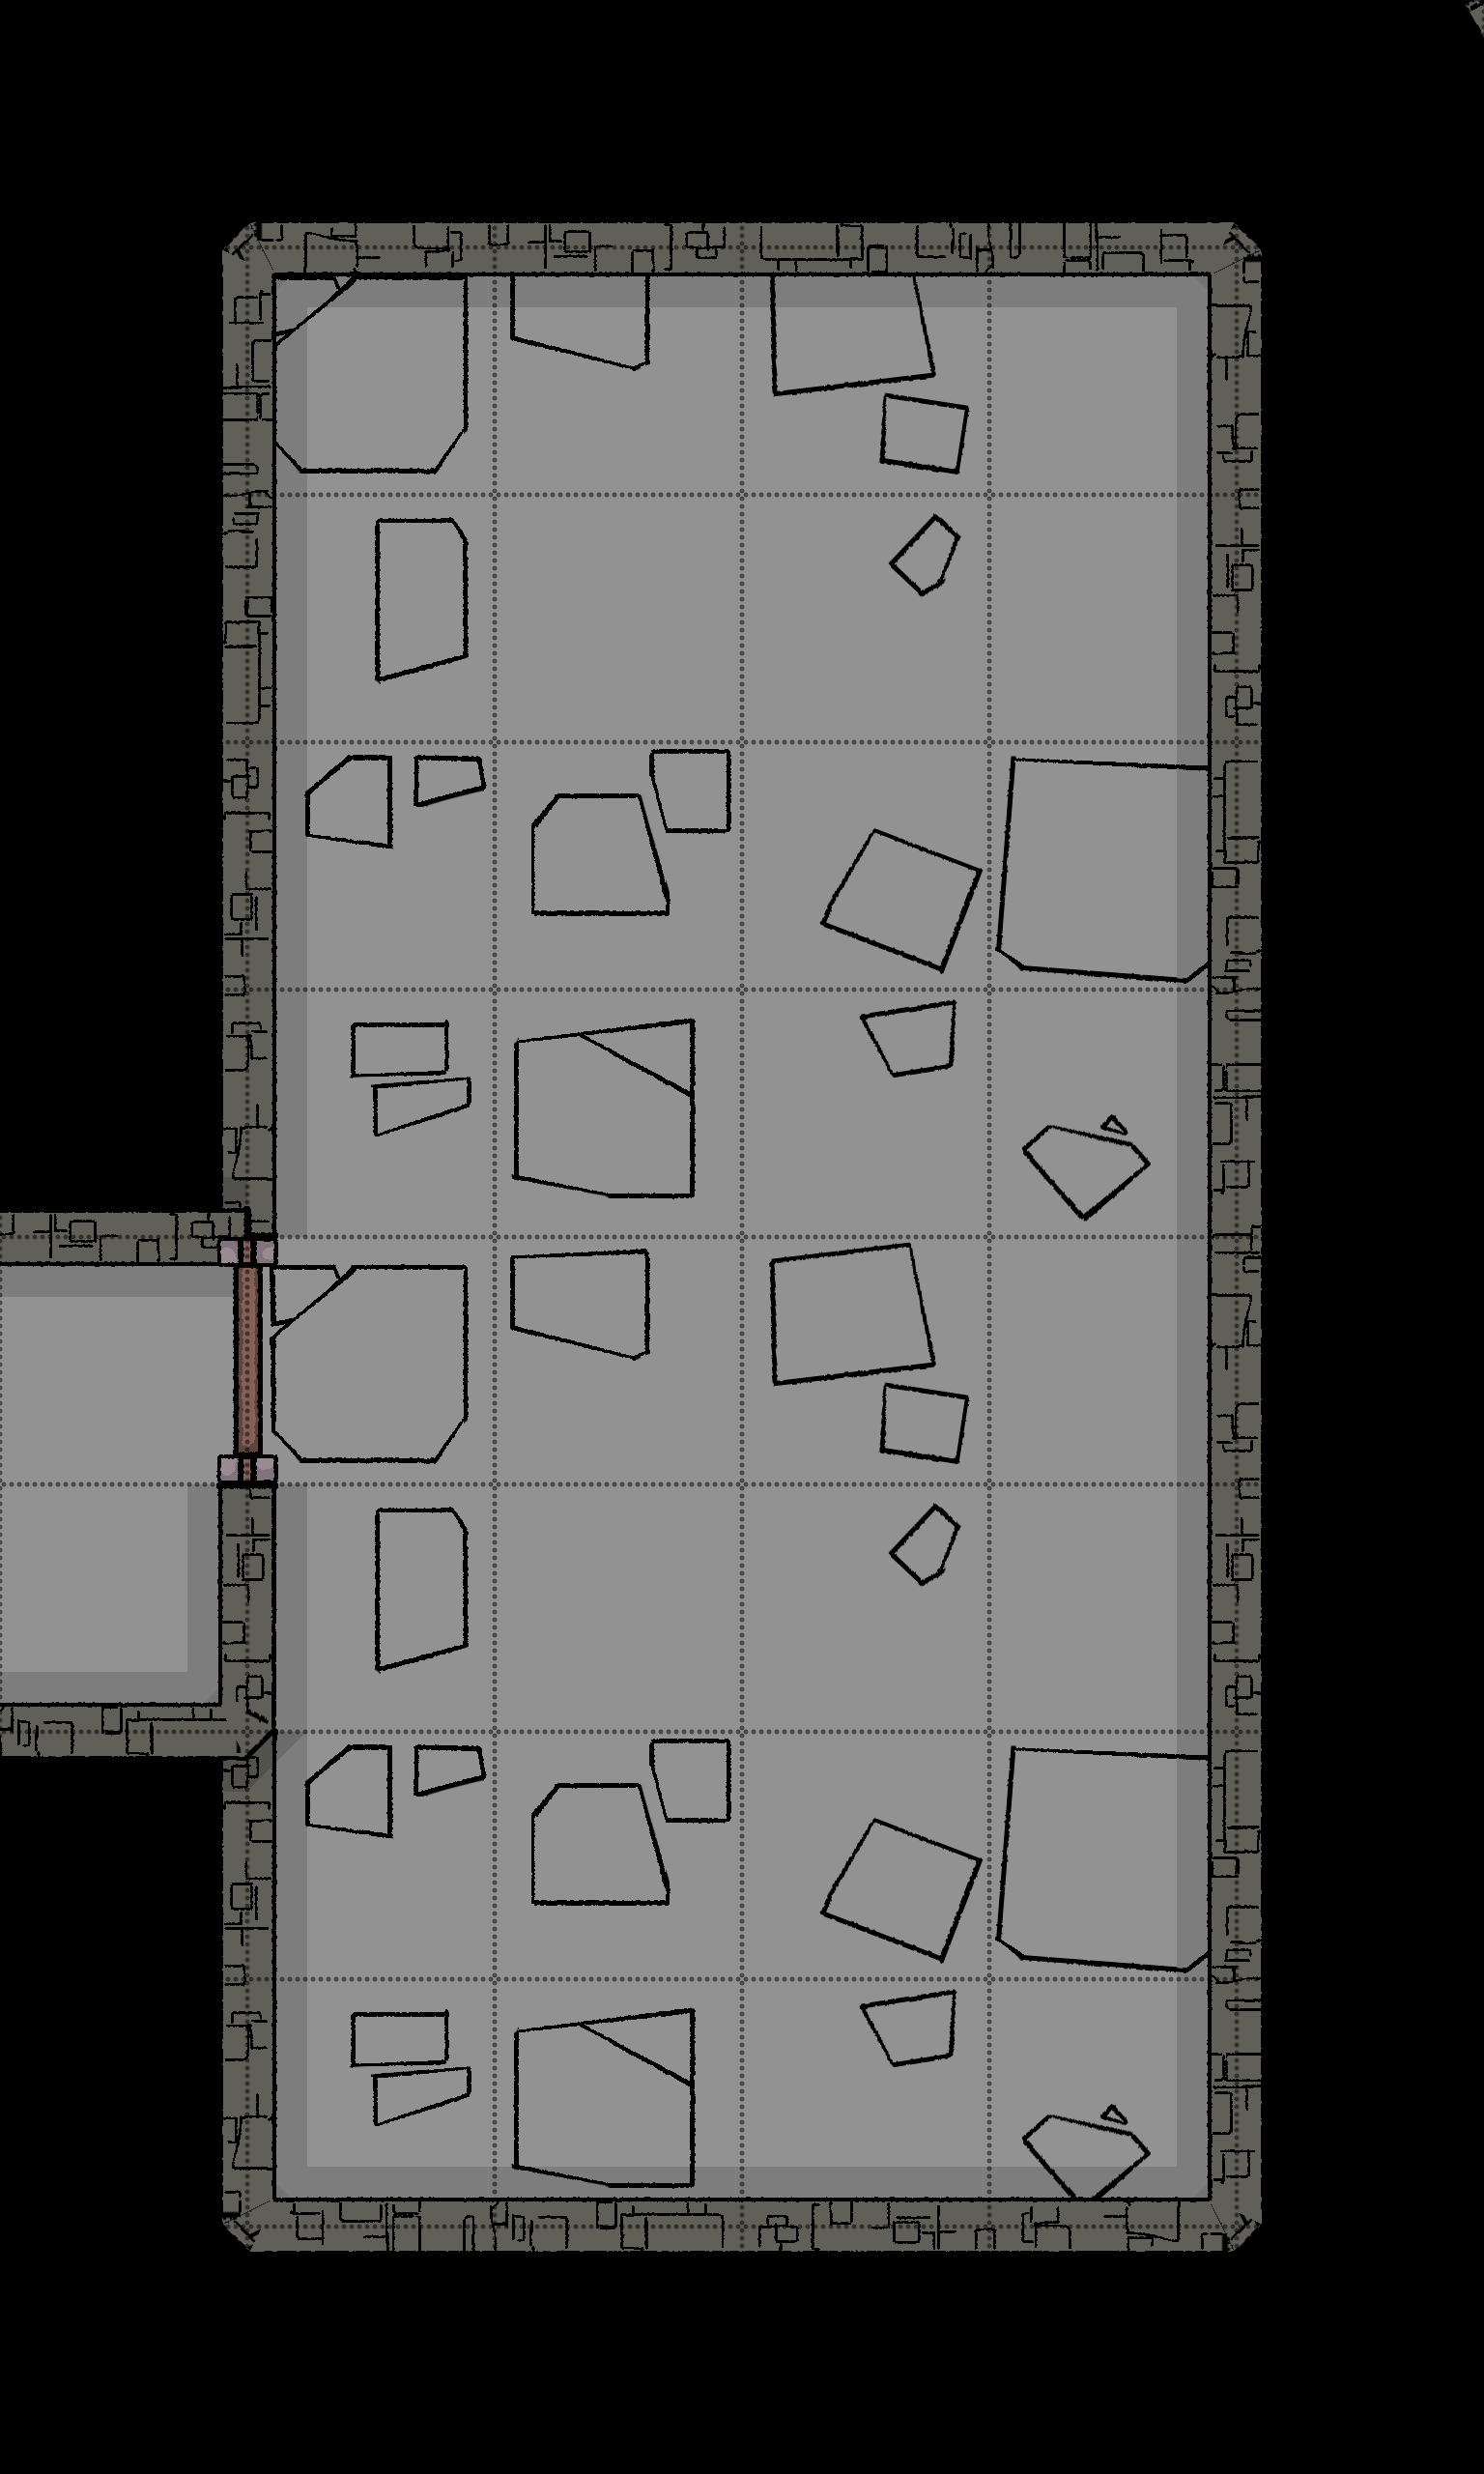
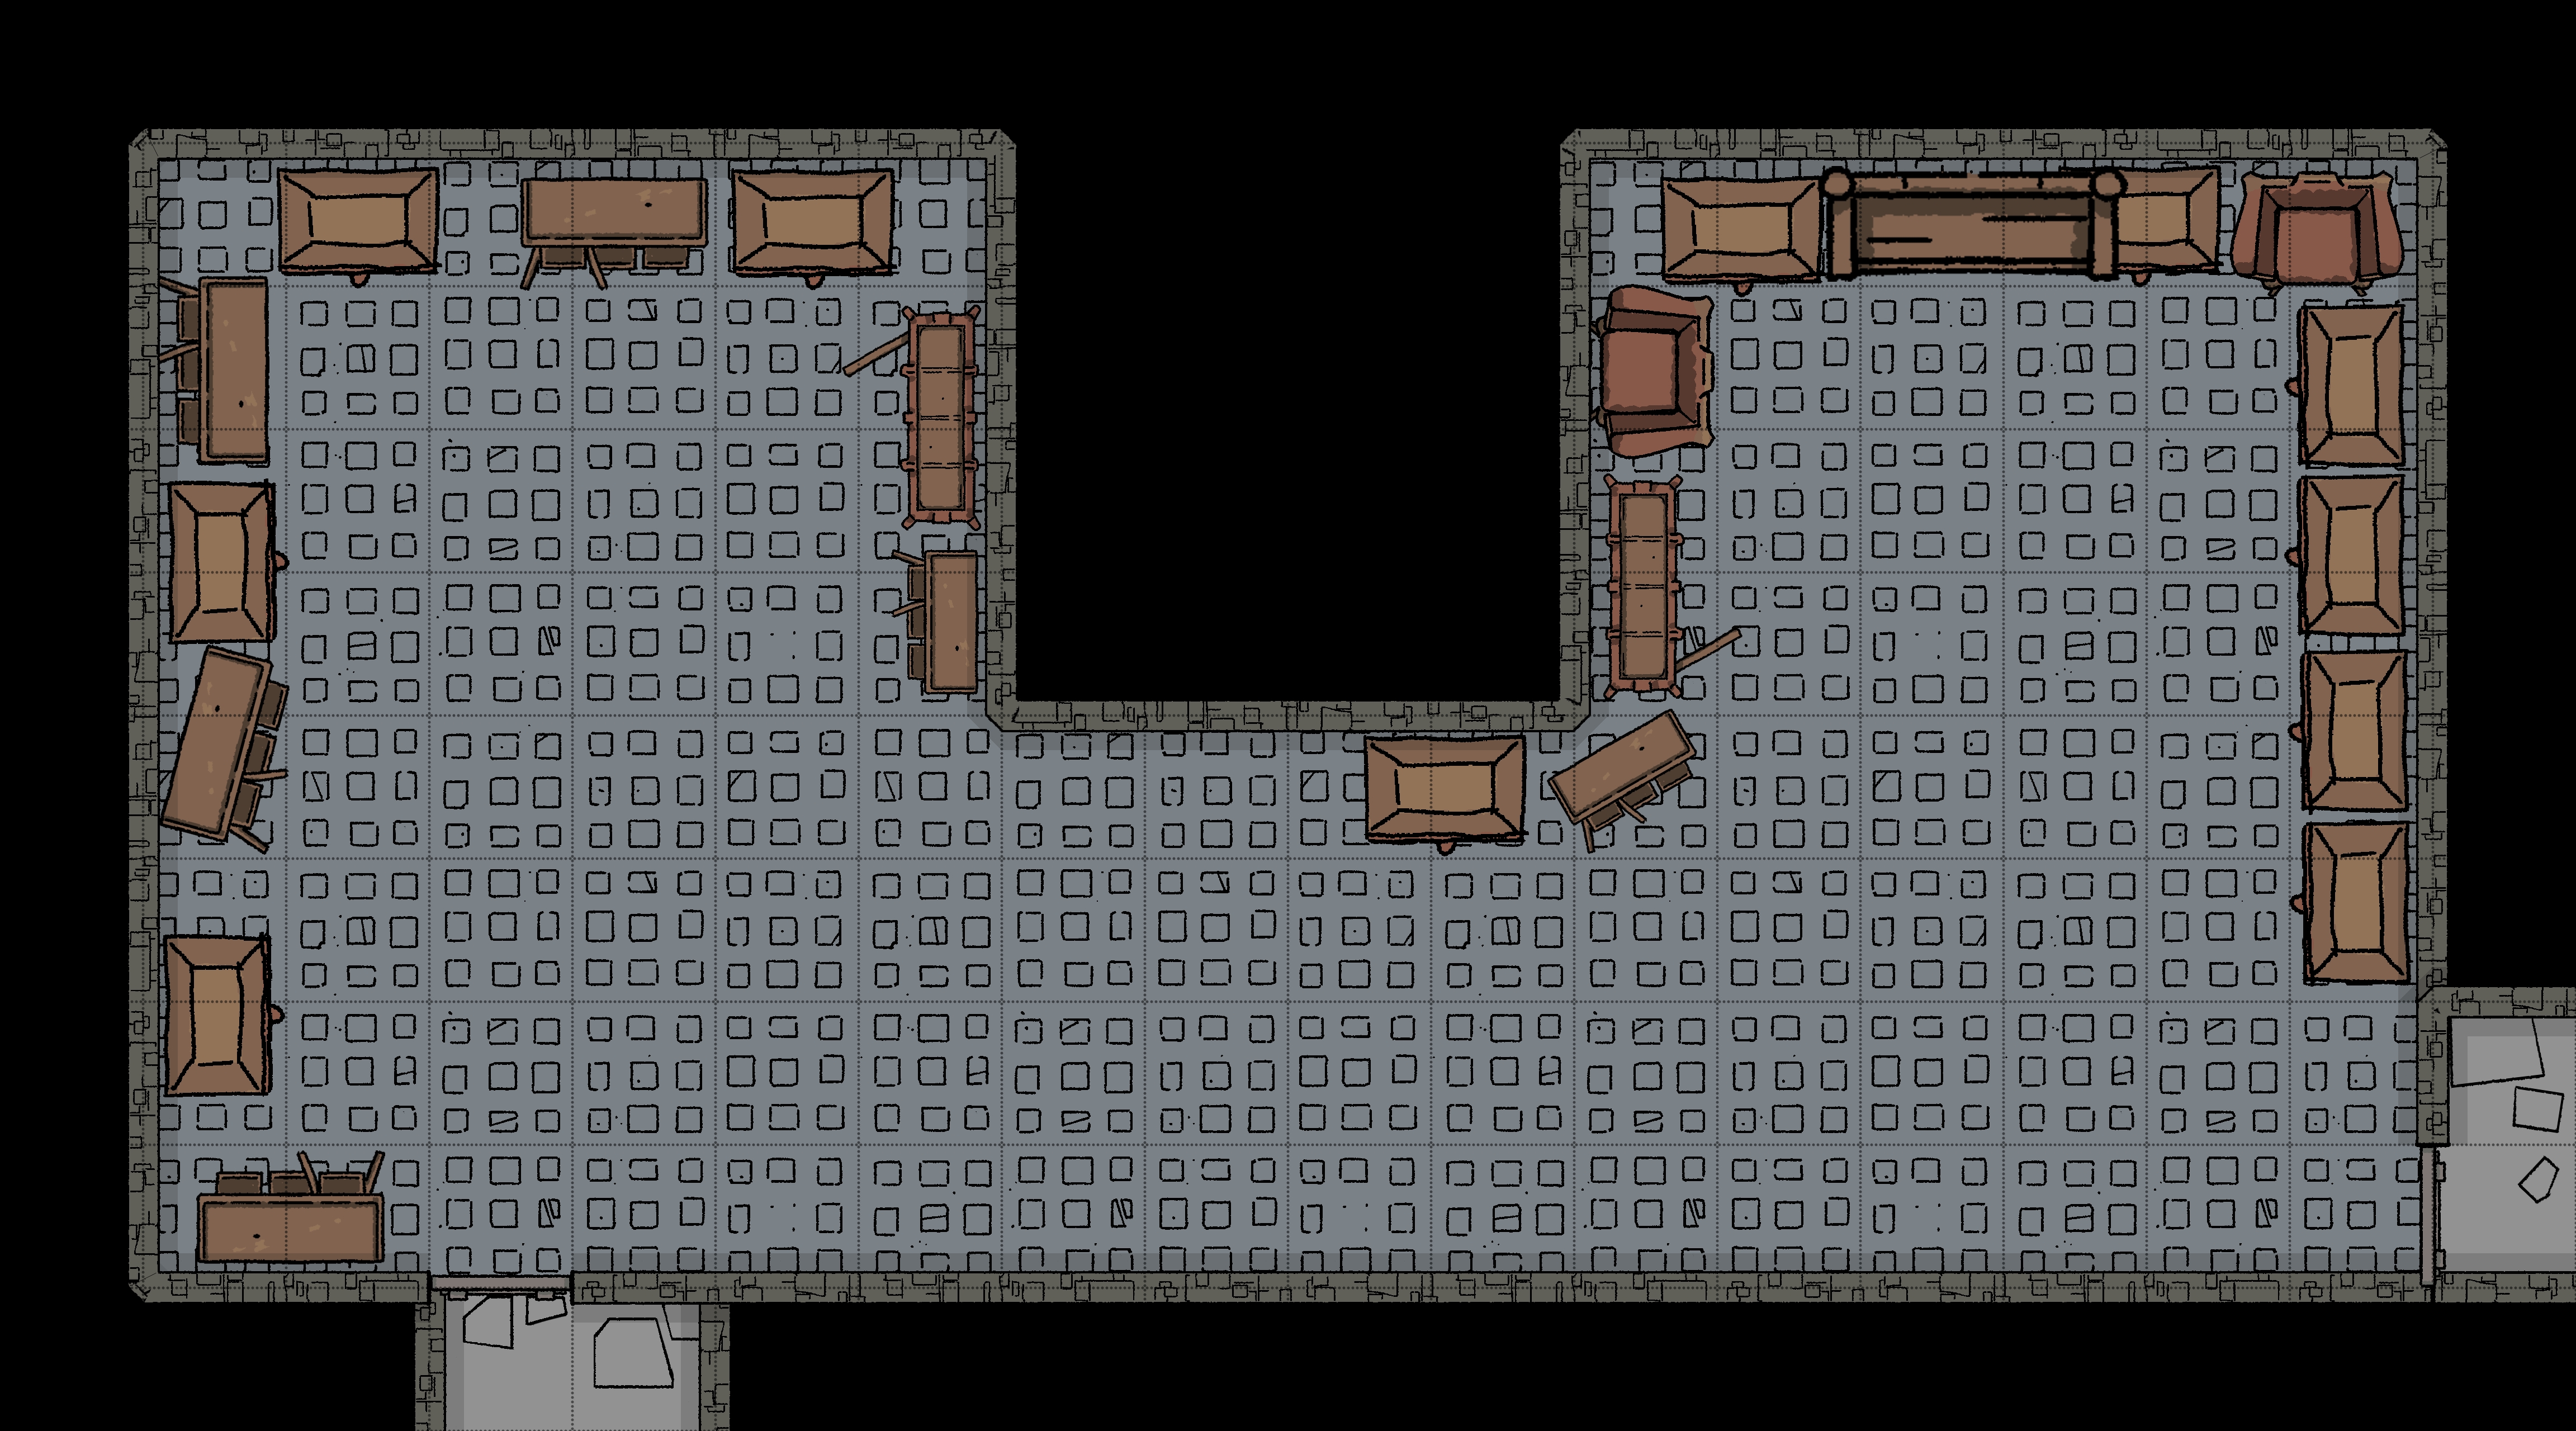
Once a grand lounge filled with artwork and lovely sofas to admire from now, the frontlines for the Kobolds. Floors are large, polished obsidian stone, and a grand chandelier hangs darkly over the centre of the room. There is no furniture left in its original place in this room; most of it has been smashed to make a great trash wall barricade. This is barely a wall but provides some cover for The Union's guards waiting in ambush.
2d10 Guards are always here. They will call for backup.
The Ambush
One of the first things you notice when close to this room is the smell of lamp oil, which burns the nostrils. Two large rugs have been soaked in lamp oil and rest waiting in the middle of the room. When intruders attack, the Kobolds of The Union will throw lit oil flasks at the rugs to create an inferno, hopefully hurting the attackers.
This is next to the main entrance of the tower and the main entrance of The Union's home, they will fight to protect this.
Connected Rooms
North - Wooden door - 1-34
East - Illusionary doorway - 1-2
West - Fancy wooden double door - Union corridor
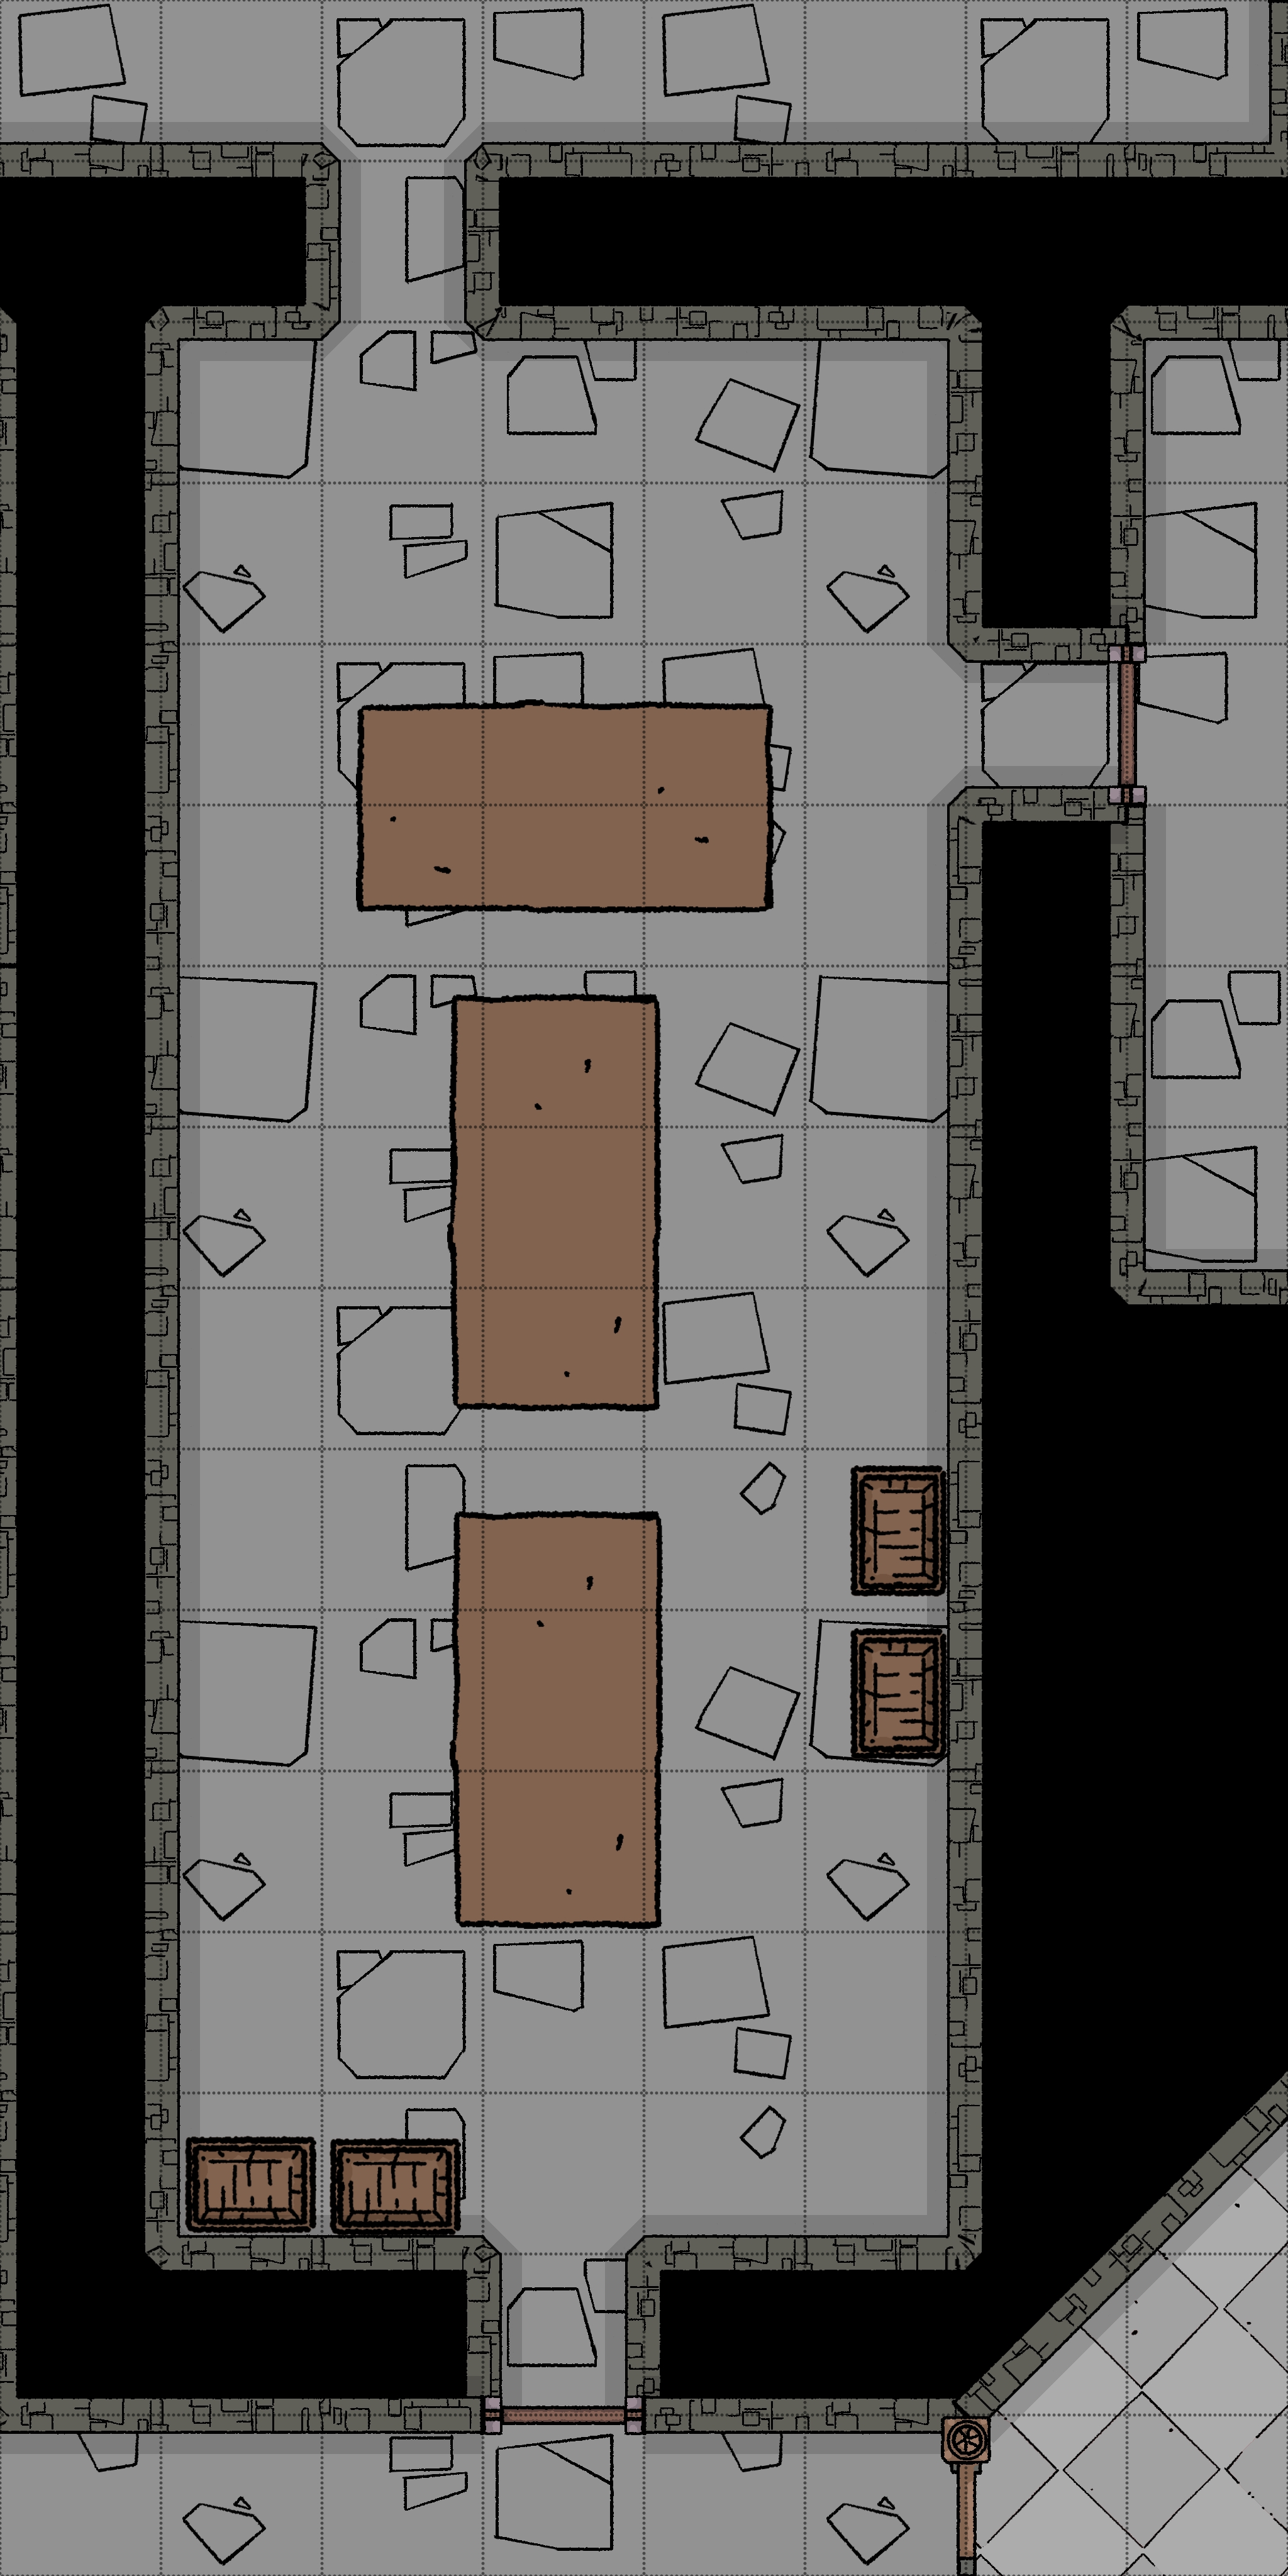
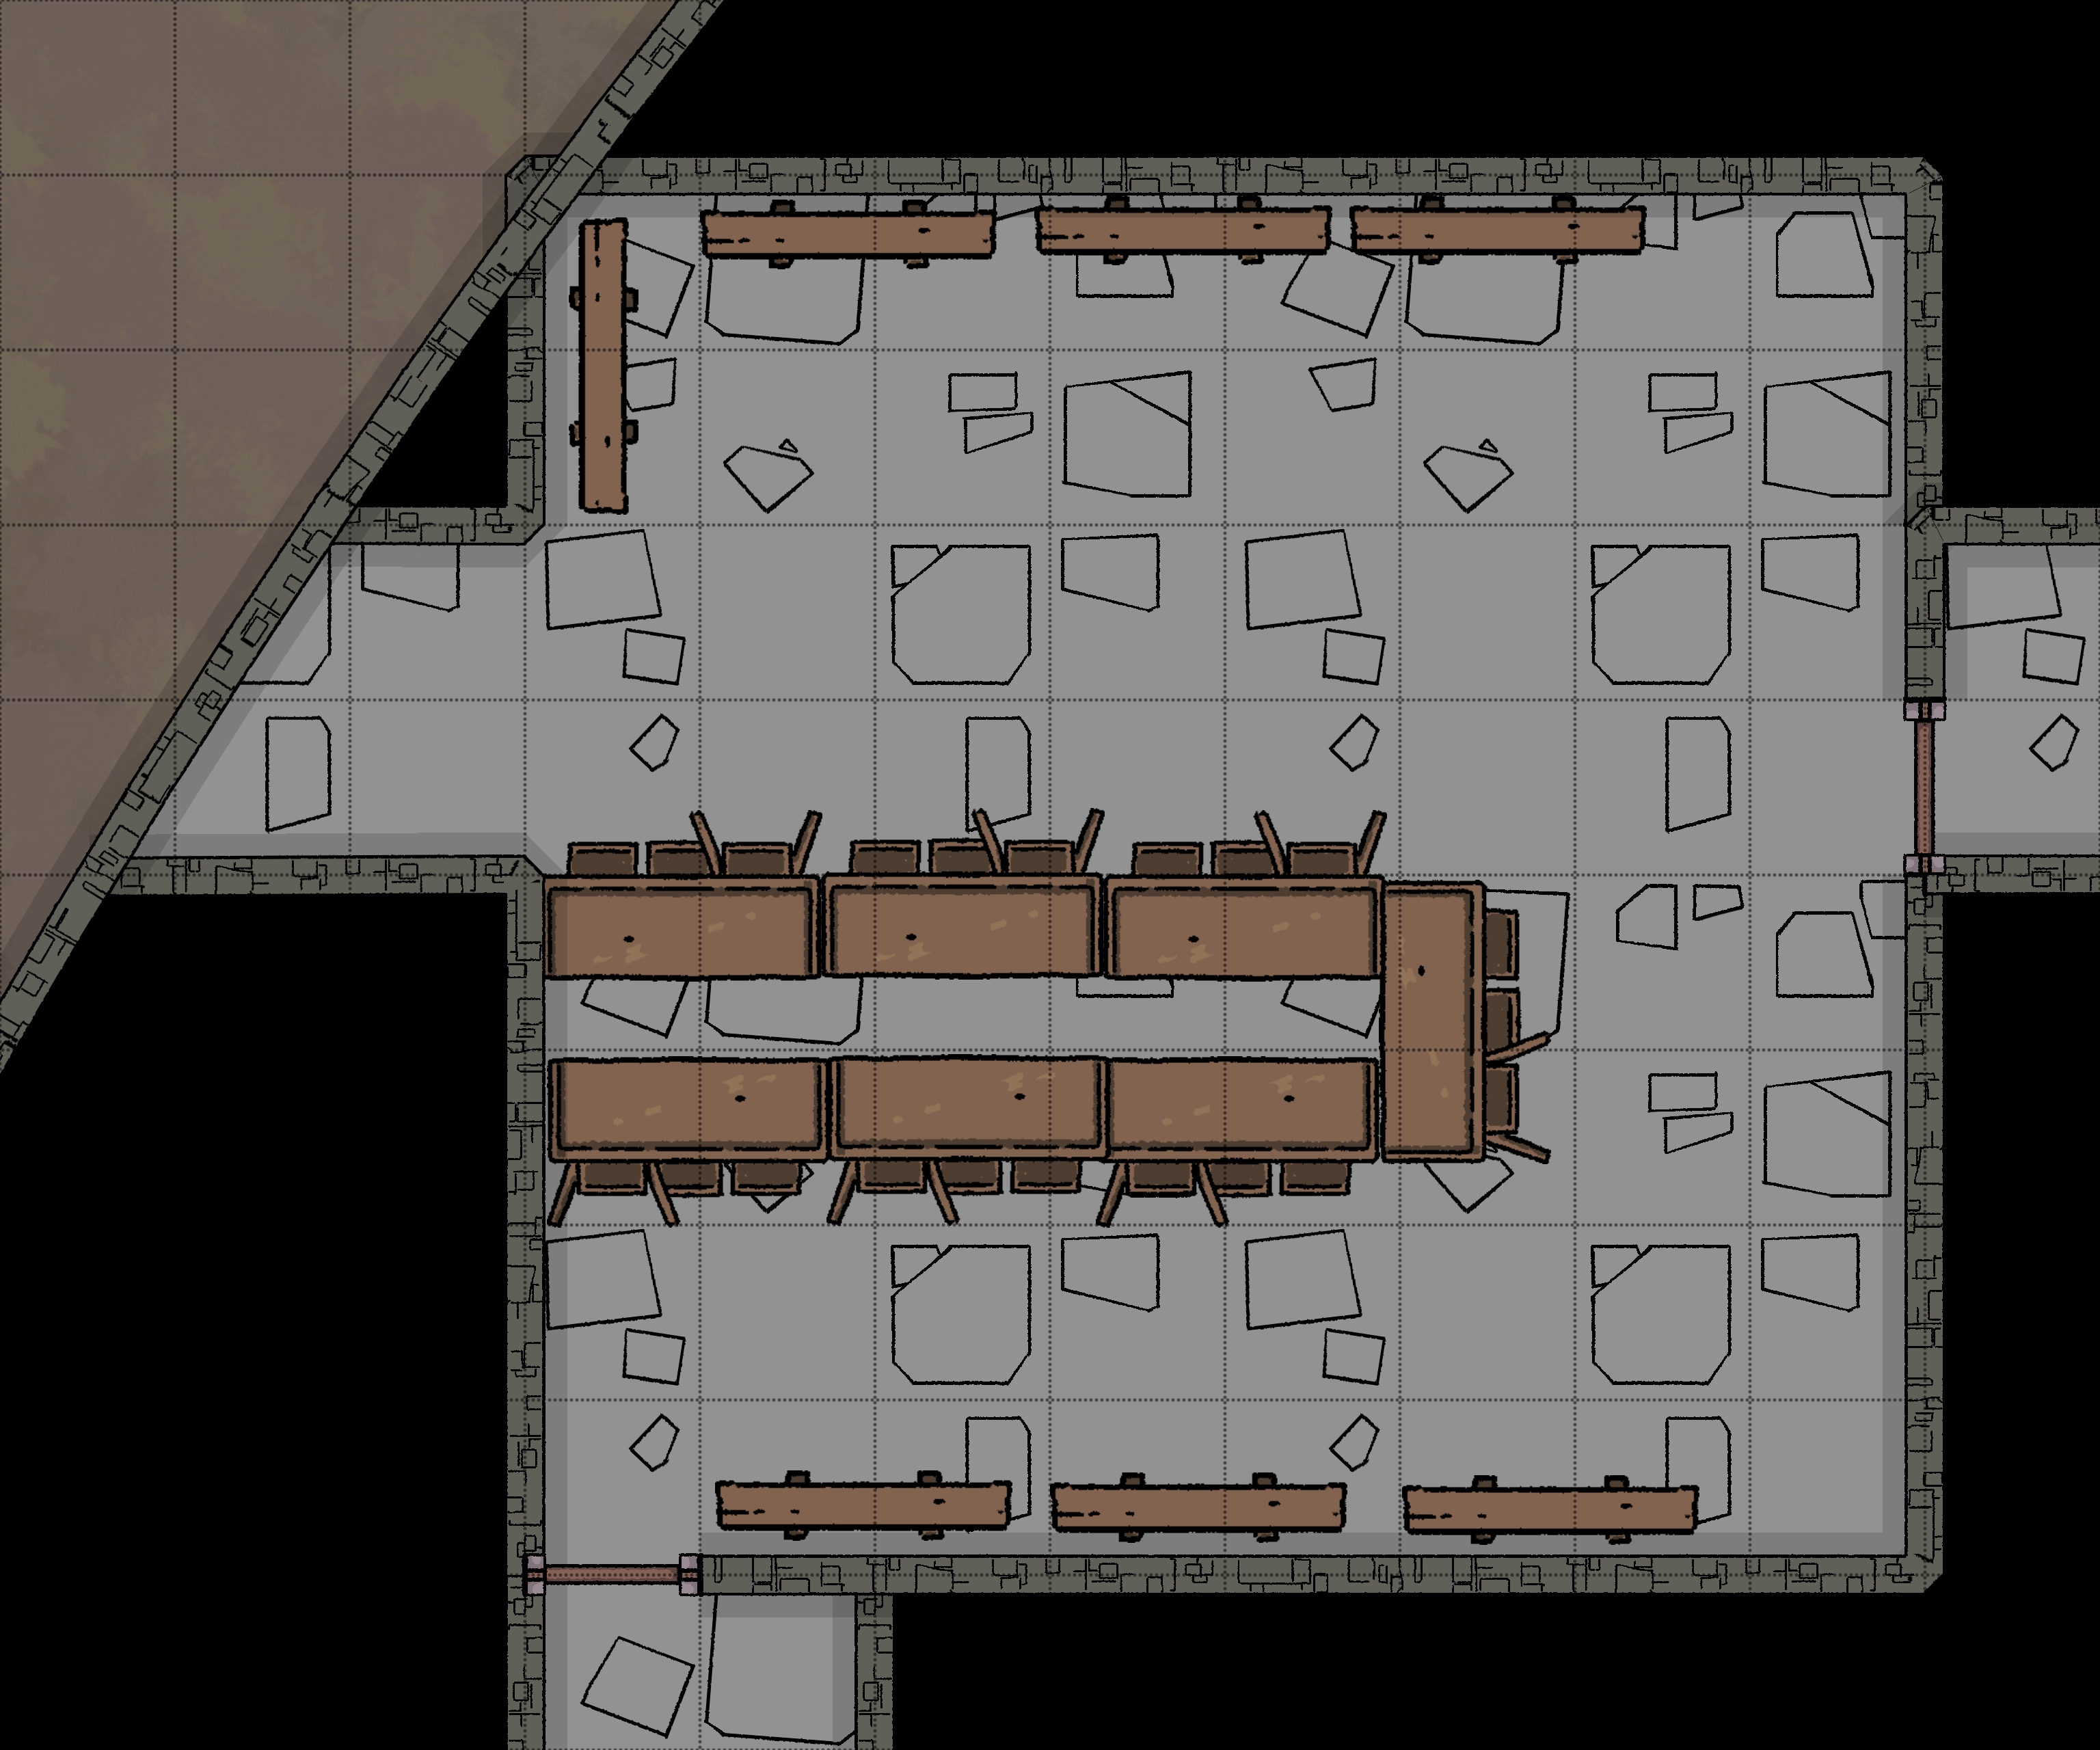
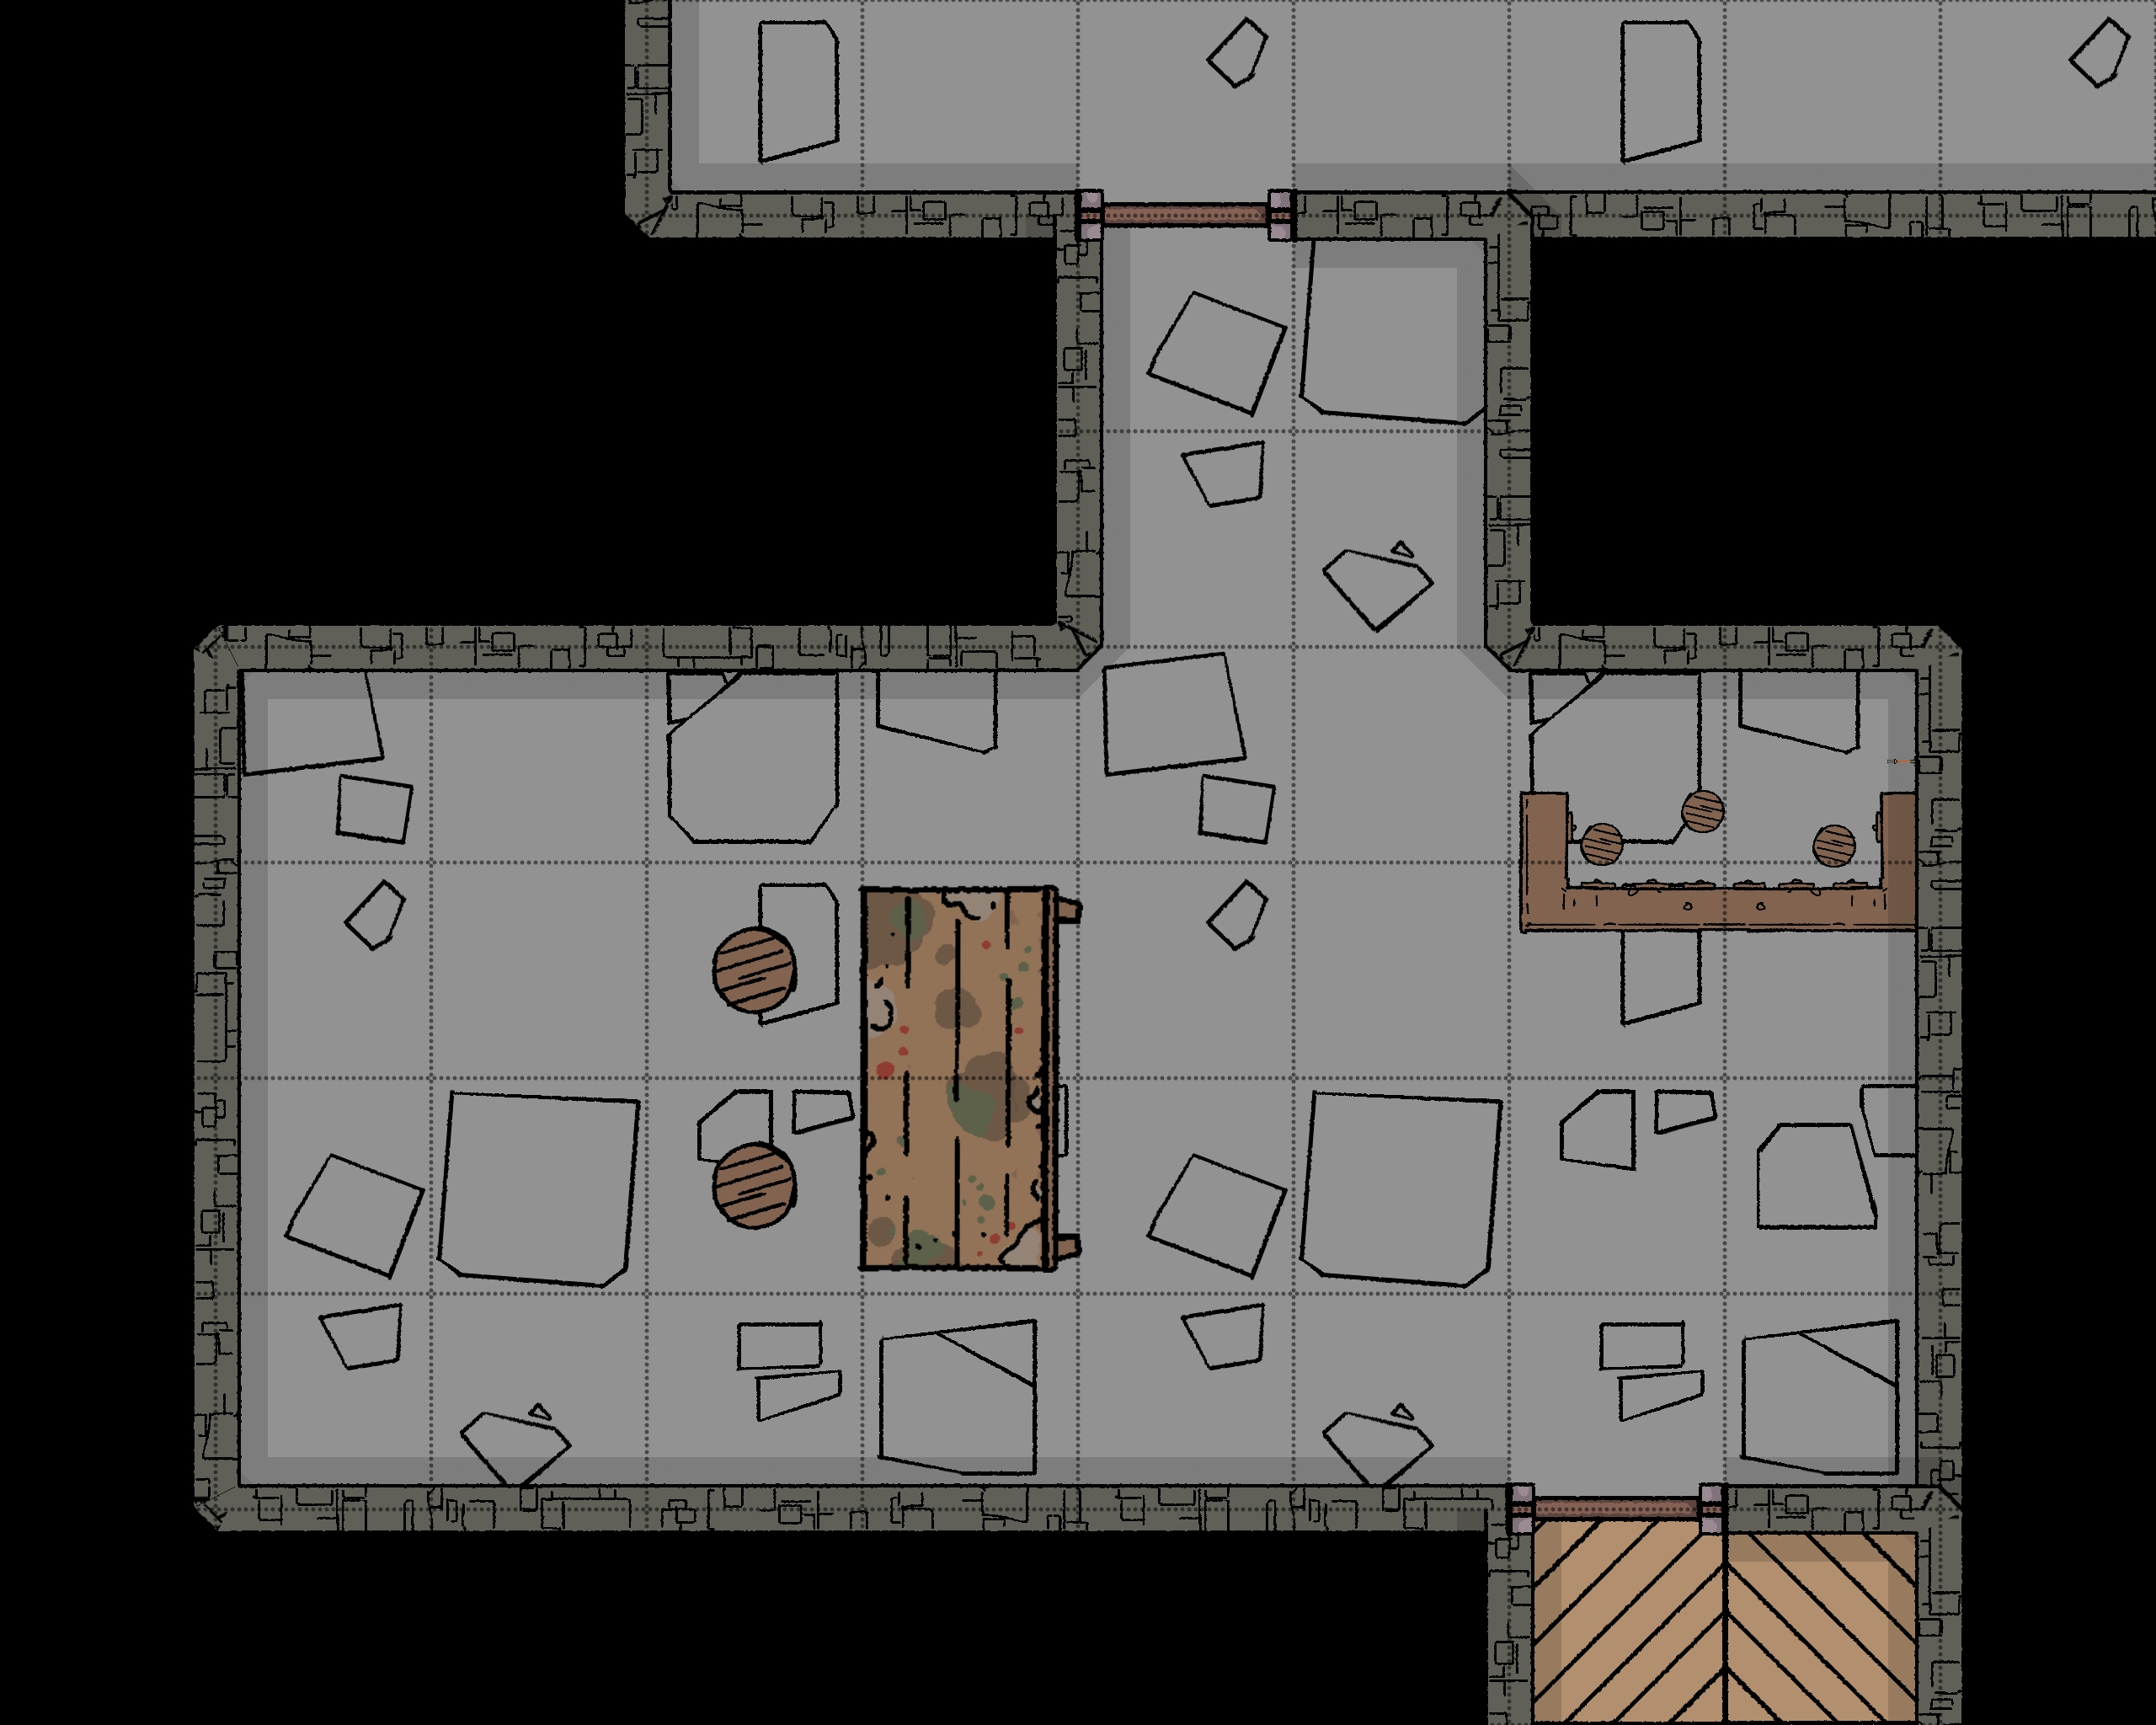
The Union Hall - 1-12
Room Type: Lair
Light Level: low light
This old dining room has been converted into one of The Union's main meeting spaces. This room has had all its beauty stripped away by its occupants, with the floor covered in a slick layer of grime and the walls dark with soot. Large tables fill the centre of the room with a hoarder's mess, taking up most of the leftover space. The room is lit by crude candles stuck to the table,s dangerously close to scraps of paper and other junk the Union finds useful.
This room is always filled with Kobolds, mostly just moving through the space. The hallways between the Unions rooms are also filled with sleeping and resting Kobolds.
Loot!
This room is filled with junk that might be treasures to a Kobold but the only thing is real use is a Clockwork Gnome that is toppled over in the corner of a room covered in muck. Now and then, a kobold kicks it as it walks past.
This is one of the main rooms for The Union's.
Connected Rooms
North - Open doorway - 1-14
East - Split door/shop window - 1-13
South - Wooden Door - Union corridor
The Union Shop - 1-13
Room Type: Lair
Light Level: low light
A broken door is now a shop front for The Union. The room behind was once some sort of storage space, now holds all of the faction's food, weapons and anything valuable to them. Kobolds scavenge for things and then trade them here for other things they might need. They do accept coins, but only copper, which they consider as valuable as silver.
The Shop
No set list of products, just never anything helpful. The shopkeeper does not have quality daggers or swords, but might have shivs or individual bolts.
Connected Rooms
West - Split door/shop window - 1-12
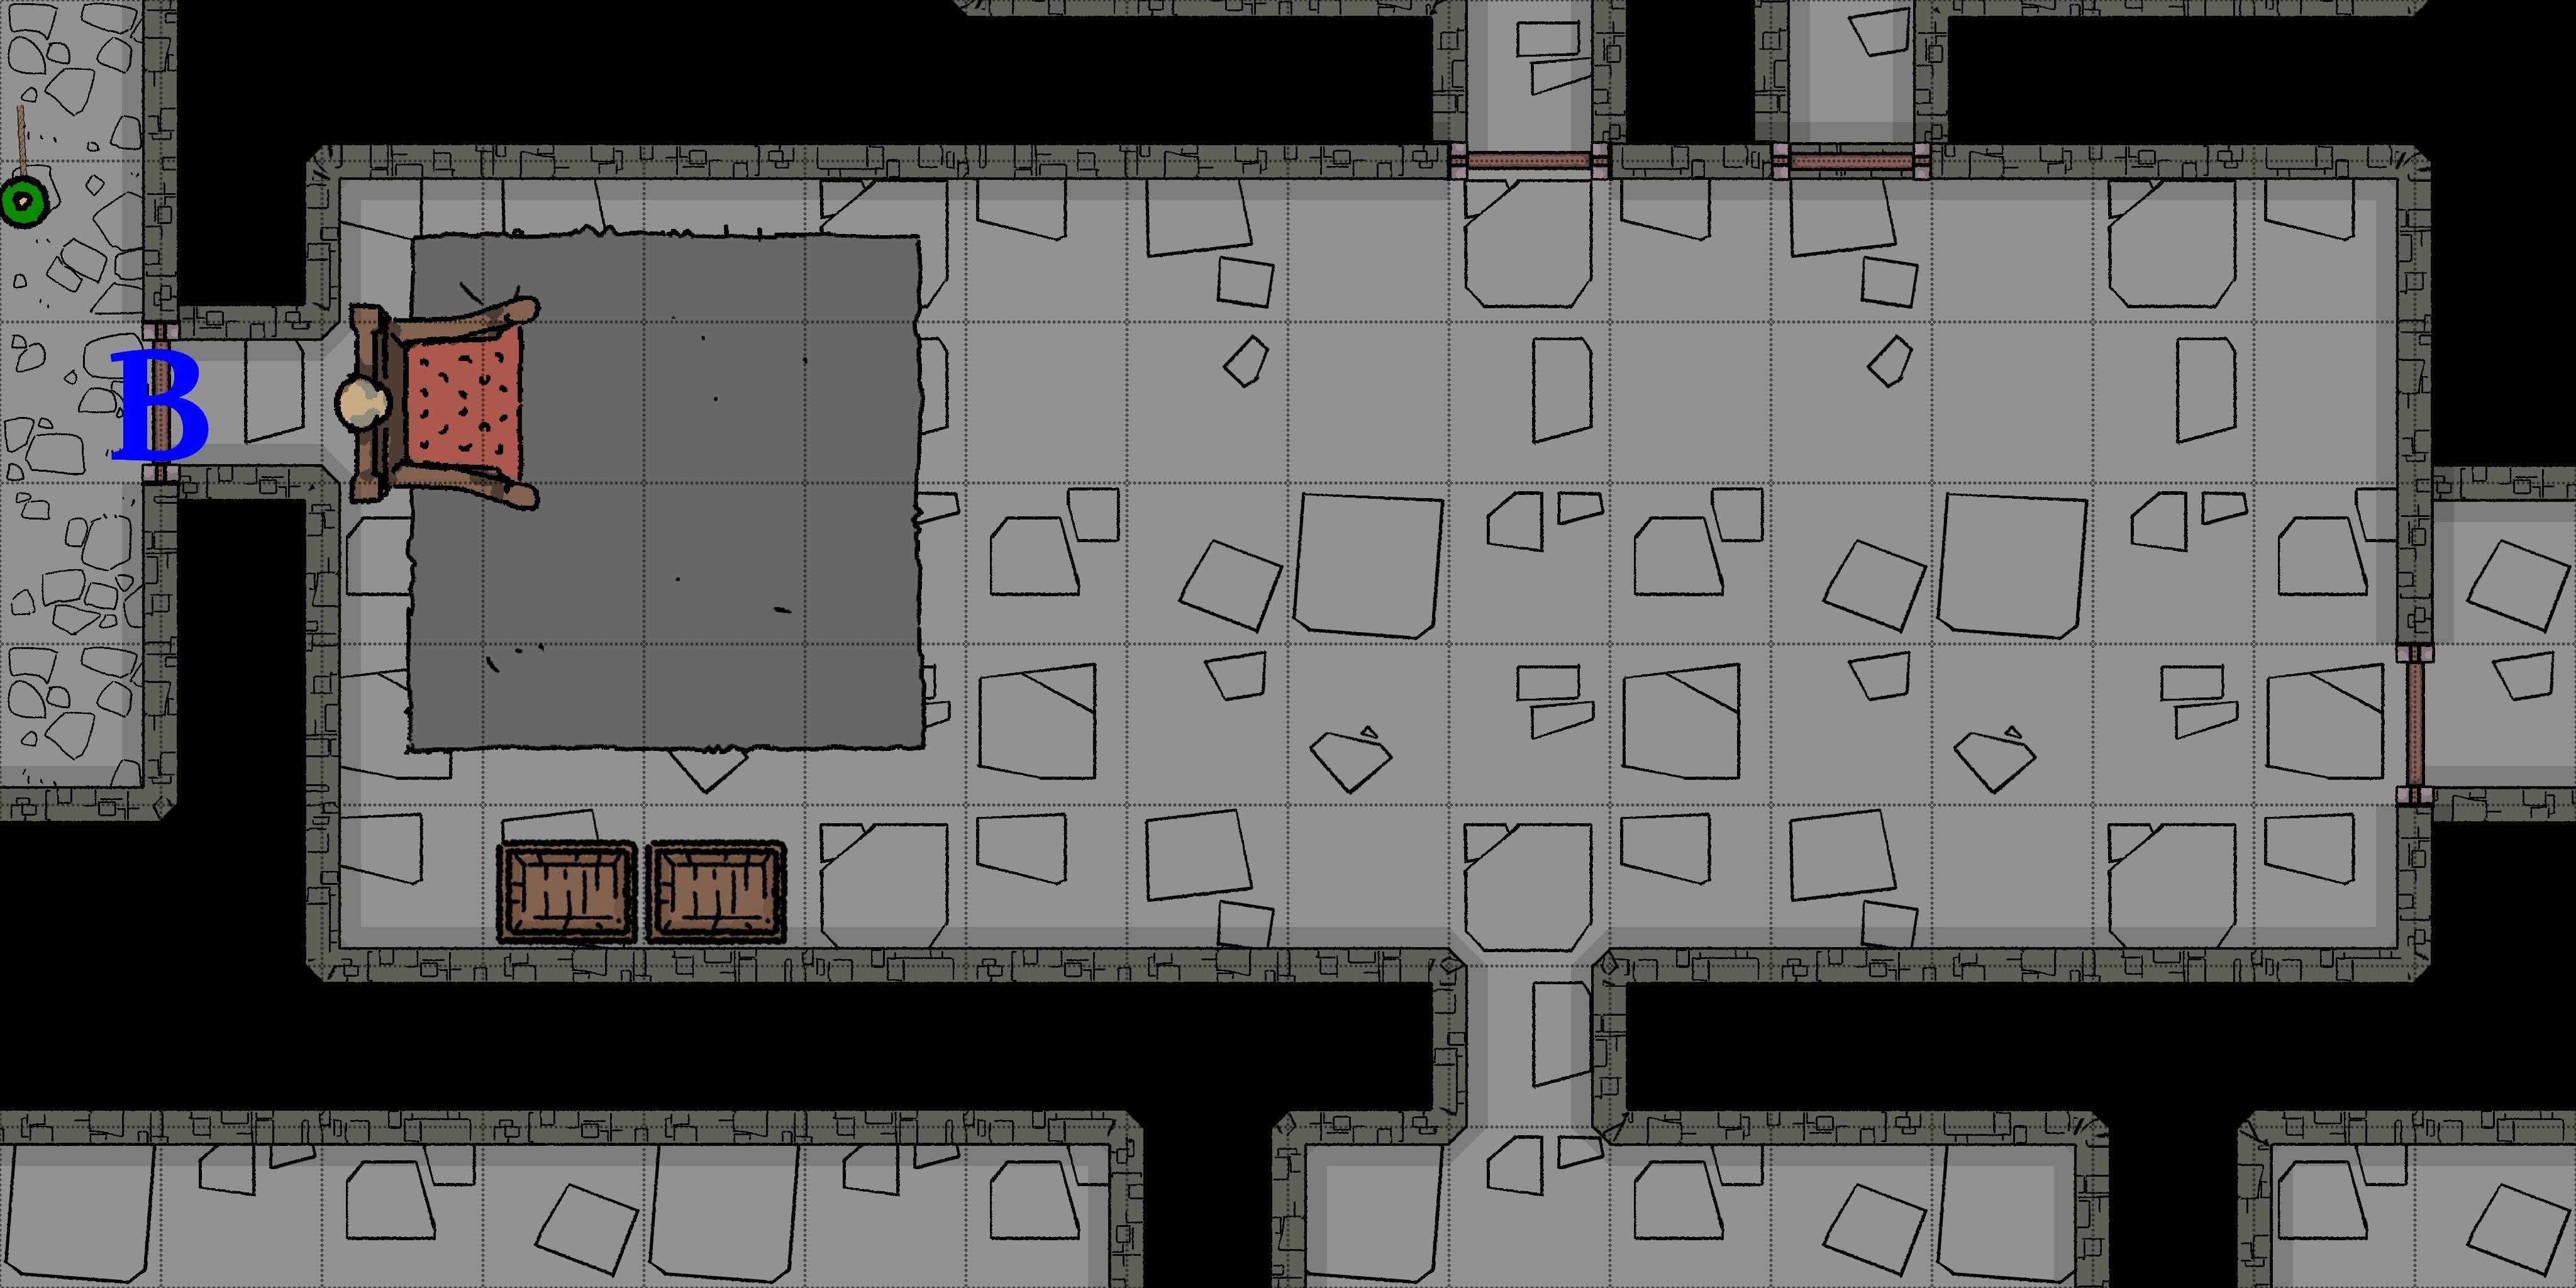
Union Throne Room - 1-14
Room Type: Lair
Light Level: Well lit
This room was once a simple space for tower staff and has been transformed into a Kobolds throne room. There is a central threadbare red carpet leading up to a large wooden throne that, upon investigation, is a fancy wooden commode. This is where the Union King spends his time.
The Throne is pushed up against a doorway blocking and hiding it, can be used as an escape route if the King is in danger.
The remaining ⅔ of the room is occupied by furs and scraps of fabric, forming sleeping spots for kobolds. This is a communal sleeping area for whoever needs to rest.
Loot!
The hidden section of the commode is full of copper coins.
- 250cp
Connected Rooms
North - Open doorway - 1-16
North East - Reinforced wooden door - 1-15
East - Wooden Door - 1-17
South - Open doorway - 1-12
West - Door blocked by throne - 1-18
King Tum's Room - 1-15
Room Type: Lair
Light Level: Dark
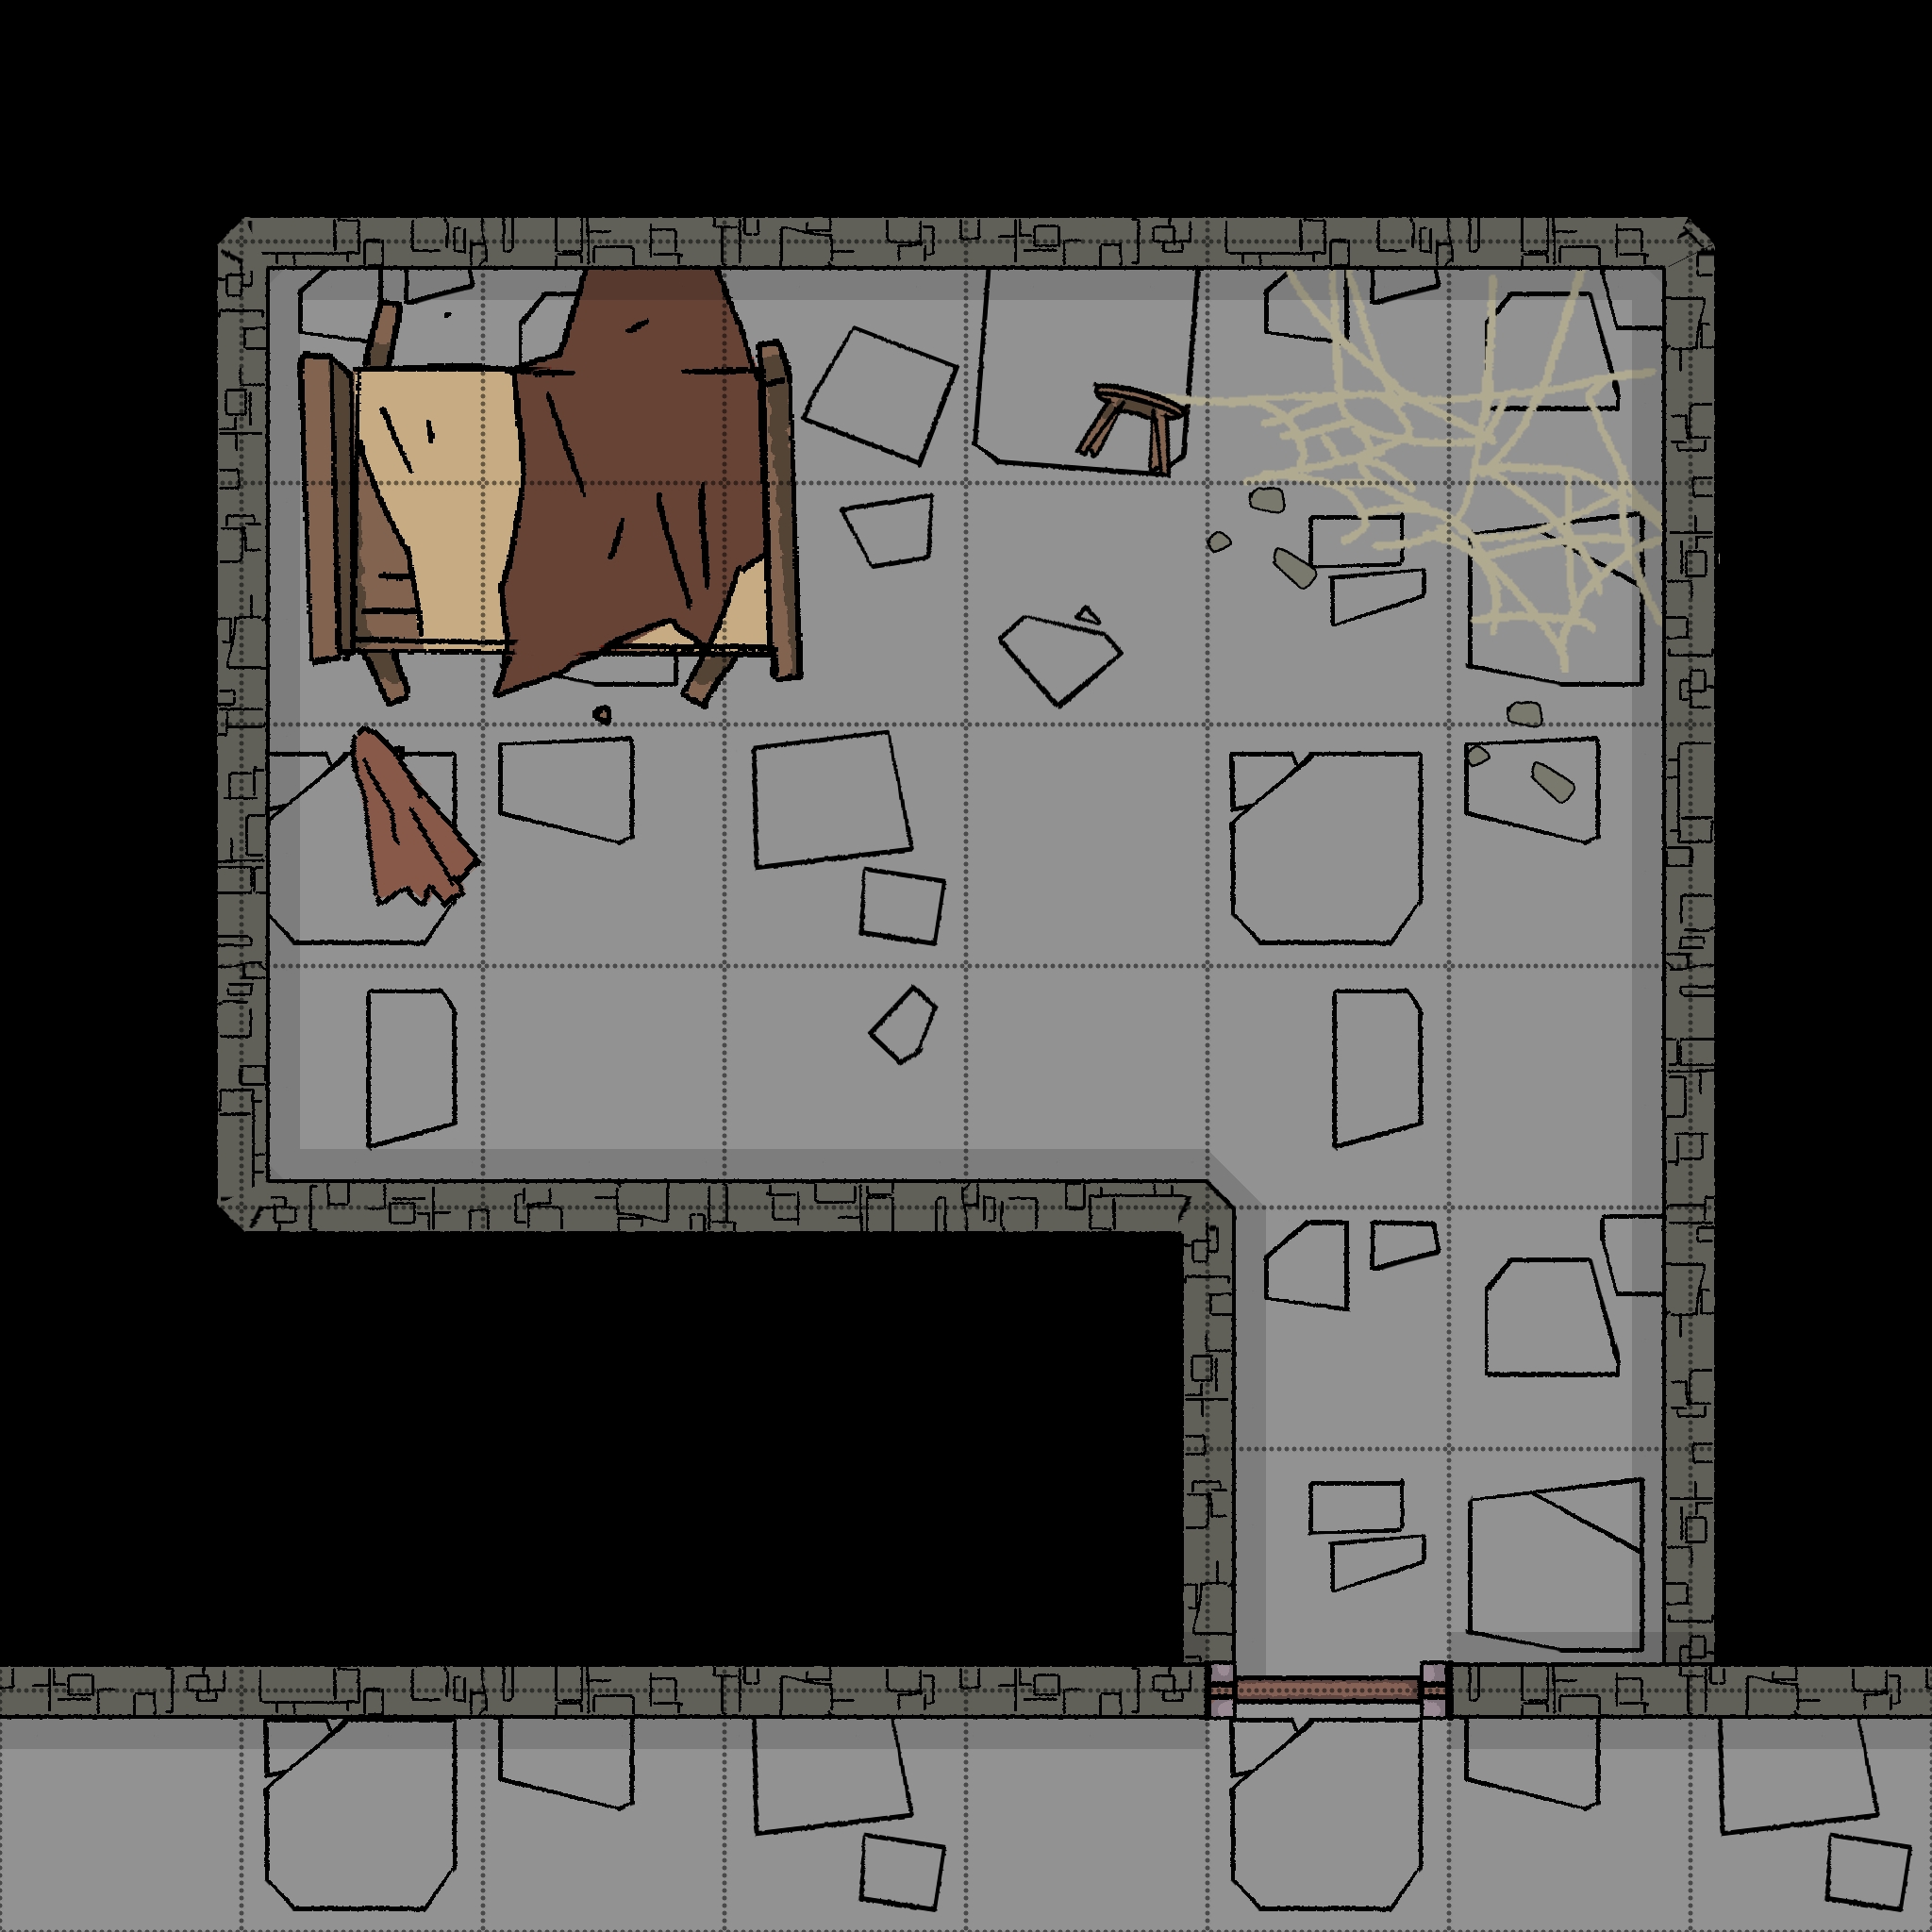
This is the private room for the current Union King; the tower's staff once used it for storage. This room has the classic dark stone walls of one of the undecorated rooms, but now features a large double bed in surprisingly good condition. Its now covered in hides and scavenged fabric and the legs of the bed seem to have collapsed from the weight of the bed.
There is also a small writing desk in the corner of the room that has collapsed on one side, now used as storage with a locked drawer and a place for his crown.
Loot!
The mattress has a large cut in it used to stash the king's horde.
- 3000cp
Inside the locked desk drawer is a small paper packet containing yellow powder.
- Haste Powder - Paper packet containing powder when thrown casts haste spell. Spend the first round coughing uncontrollably.
Connected Rooms
South - Reinforced wooden door (can be locked from this side) - 1-14
Union Sleeping Chamber - 1-16
Room Type: Lair
Light Level: Dark
Simple space for Kobolds to sleep, stinks of sweat and rot. The floor is covered with furs and scraps of rugs clearly taken from other rooms. This communal space might have personal possessions for the kobolds living here, but nothing of value to adventurers.
The Union has many members, and whilst some are out scavenging, others will be in here sleeping.
Connected Rooms
South - Wooden Door - 1-14

The Union's Secret Way Up - 1-17
Room Type: Lair
Light Level: Dark
This is one of the entrances into The Union's territory, a hole between floor 1 and 2-5. Crude tools slowly chiselled away this hole, and it is not very wide, but not a squeeze for Kobolds. The Kobolds use this entrance to explore floor 2, and will always keep this area heavily guarded. The Kobolds use a makeshift ladder to go up and down between the floor and remove it when no one is exploring.
Connected Rooms
West - Wooden Door - 1-14
Union's North Entrance - 1-18
Room Type: Lair
Light Level: Dark
This room is one of the main entrances into The Union's territory; unlike the other entrances, this is set up as an ambush rather than being heavily guarded. The south door is held open at a 90-degree angle with a simple wooden platform built on top, this is where the only Kobold guard hides in ambush.
The rest of the room is filled with many vials hanging from the ceiling, each containing a green slime. When an intruder enters the room, the guard will shoot a vial with his crossbow, freeing the slime and aiding with the fight.
The floor is covered in broken glass, and the stone is bleached white in sections.
Connected Rooms
North - Wooden door - 1-30
East - Blocked wooden door - 1-14
South - Stuck open doorway - Union corridor
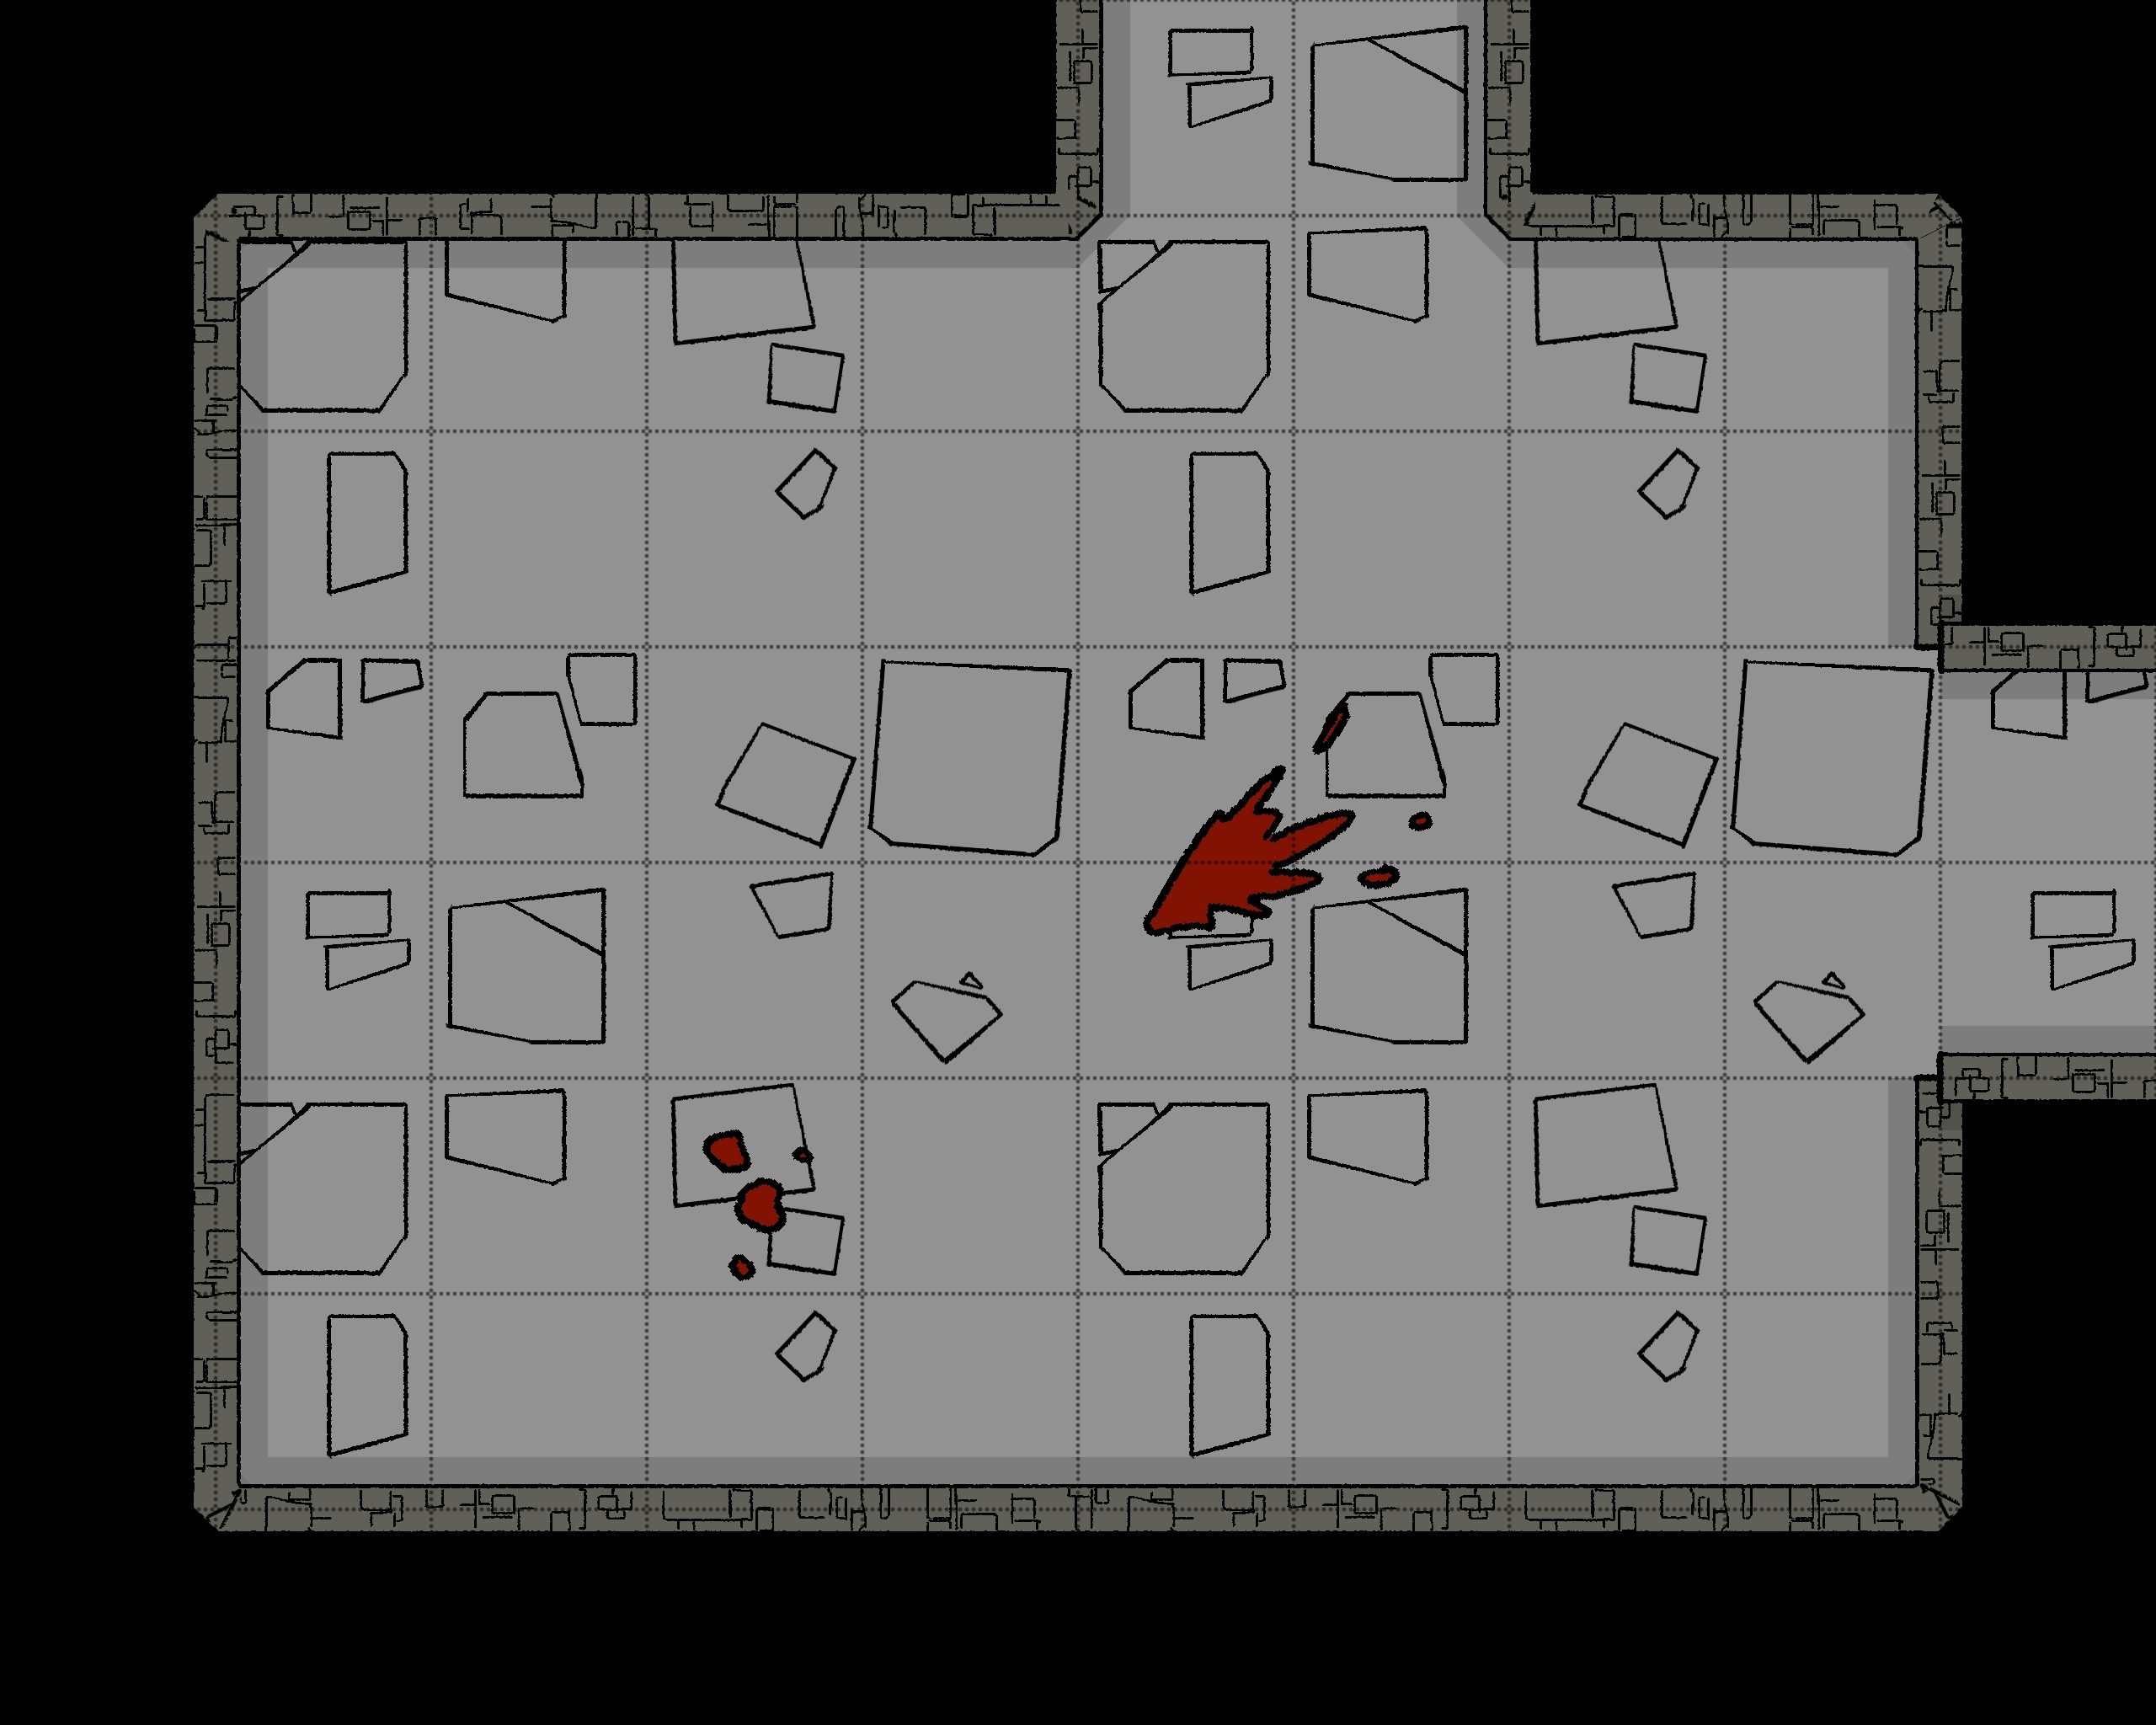
The Smaller Drop - 1-19
Room Type: Empty
Light Level: Dark
Peeling wood-panelled walls show the room was once grander than it is now. This room is now empty apart from a strange contraption attached to the ceiling and blood stains on the stone floor beneath it.
The contraption on the ceiling is the underside of a drop trap in 2-2. When someone steps on the trapdoor, it folds away, sending them hurtling down towards the hard stone in this room.
Encounter Idea
If you roll an encounter in this room, why not have it fall through the trap door into the room? It might hurt the creature, but it might also create a fun, chaotic fight.
Connected Rooms
Up - Bottom of trapdoor - 2-2
North - Open doorway - Corridor to 1-9 and 1-32
East - Open doorway - Corridor
The Better Union Main Entrance - 1-20
Room Type: Lair
Light Level: Low Light
This is the main entrance to The Better Union's territory. The room is simple with only a long table and mismatched chairs for decoration. The room is always guarded with the watch split between the west door and the open stairs up to Floor 2 hallway.
The Better Union has not been around very long, so it has not had a chance to build complex defences; they primarily rely on numbers.
Connected Rooms
Up - Wooden staircase - 2-2
East - Wooden door - 1-21
West - Metal locked door with hatch (Lock this side) - Floor 2
Invisible Trapped Hallway - 1-21
Room Type: Lair/Trap
Light Level: Dark
This corridor is inside The Better Union's territory and is used as a trap to stop intruders but existed before they got here. The hallway narrows at this point, and in the middle is a bear trap. The trap is changed to a metal loop embedded in the ground.
Just past this trap to the north is another embedded metal loop, along with a large sapphire the size of an apple nearby. When investigated its clear that the sapphire is slightly floating off the ground and that's because its bait for a invisible bear trap. The chain attached to this bear trap is also invisible and 5ft long.
Bear traps will do 1d6 damage and only have 5ft of chain attached. They are hard to pull apart especially alone.
The Sapphire is worth 500gp, but the Kobolds of The Better Union don't see its value.
Connected Rooms
North - Open corridor - Corridor
South - Open corridor - Corridor
West - Wooden door - 1-20
The Better Union's Way Down - 1-22
Room Type: Lair
Light Level: Dark
This is a room controlled and heavily guarded by The Better Union. The room looks like the back of a tavern or inn with large racks against the north wall made for holding casks. There is a staircase going down that has a large, heavy metal grate laid over it. A crank can be used to lift one side of the grate up to gain access to the stairs. This is heavy, not locked.
The stairs lead down to B1-40
Kobolds in this room are armed with spears to poke through the grate.
Connected Rooms
Down - Heavy grate over stone stairs - B1-43
South - Wooden door - Corridor
The Better Union's Storage - 1-23
Room Type: Lair
Light Level: Dark
This dark storage space is actually being used for its intended purpose; the Kobolds have filled the existing shelves with things they need. Mostly food and weapons. Very low on the food side.
Kobold weapons are crude, so they would not be very useful for adventurers.
Connected Rooms
West - Wooden door - Corridor
The Better Union Kings Chambers - 1-24
Room Type: Lair
Light Level: Dark
A dark storage room has been decorated to suit the king of The Better Union. Some simple furniture has been brought in, most of which is in working condition. A bed of furs and carpets has been made in the corner of the room.
Loot!
- Pinned to the wall with pitons is some damaged chainmail, clearly from a foe of the Union King.
- Under the king's bed are some loose stones which can be lifted to show the king's horde of 4000 loose copper coins.
Connected Rooms
South - Wooden door - Corridor
The Better Union's Barracks - 1-25
Room Type: Lair
Light Level: Dark
This long, dark room is full of sleeping members of The Better Union. This dank room is the faction's communal sleeping area; kobolds rest where they can, stashing personal possessions in various hidden spots. The floors are covered in furs and old sections of carpet used as sleeping spots; some other scavenged fabrics hang from the ceiling, creating some privacy.
Some personal possessions include:
- 300sp
- 50gp
- 2 scroll cases on a dead spell caster kobold:
- Case 1: detect magic (mu), protection from normal missiles, water breathing.
- Case 2: polymorph self, esp
Connected Rooms
South - Wooden door - Corridor
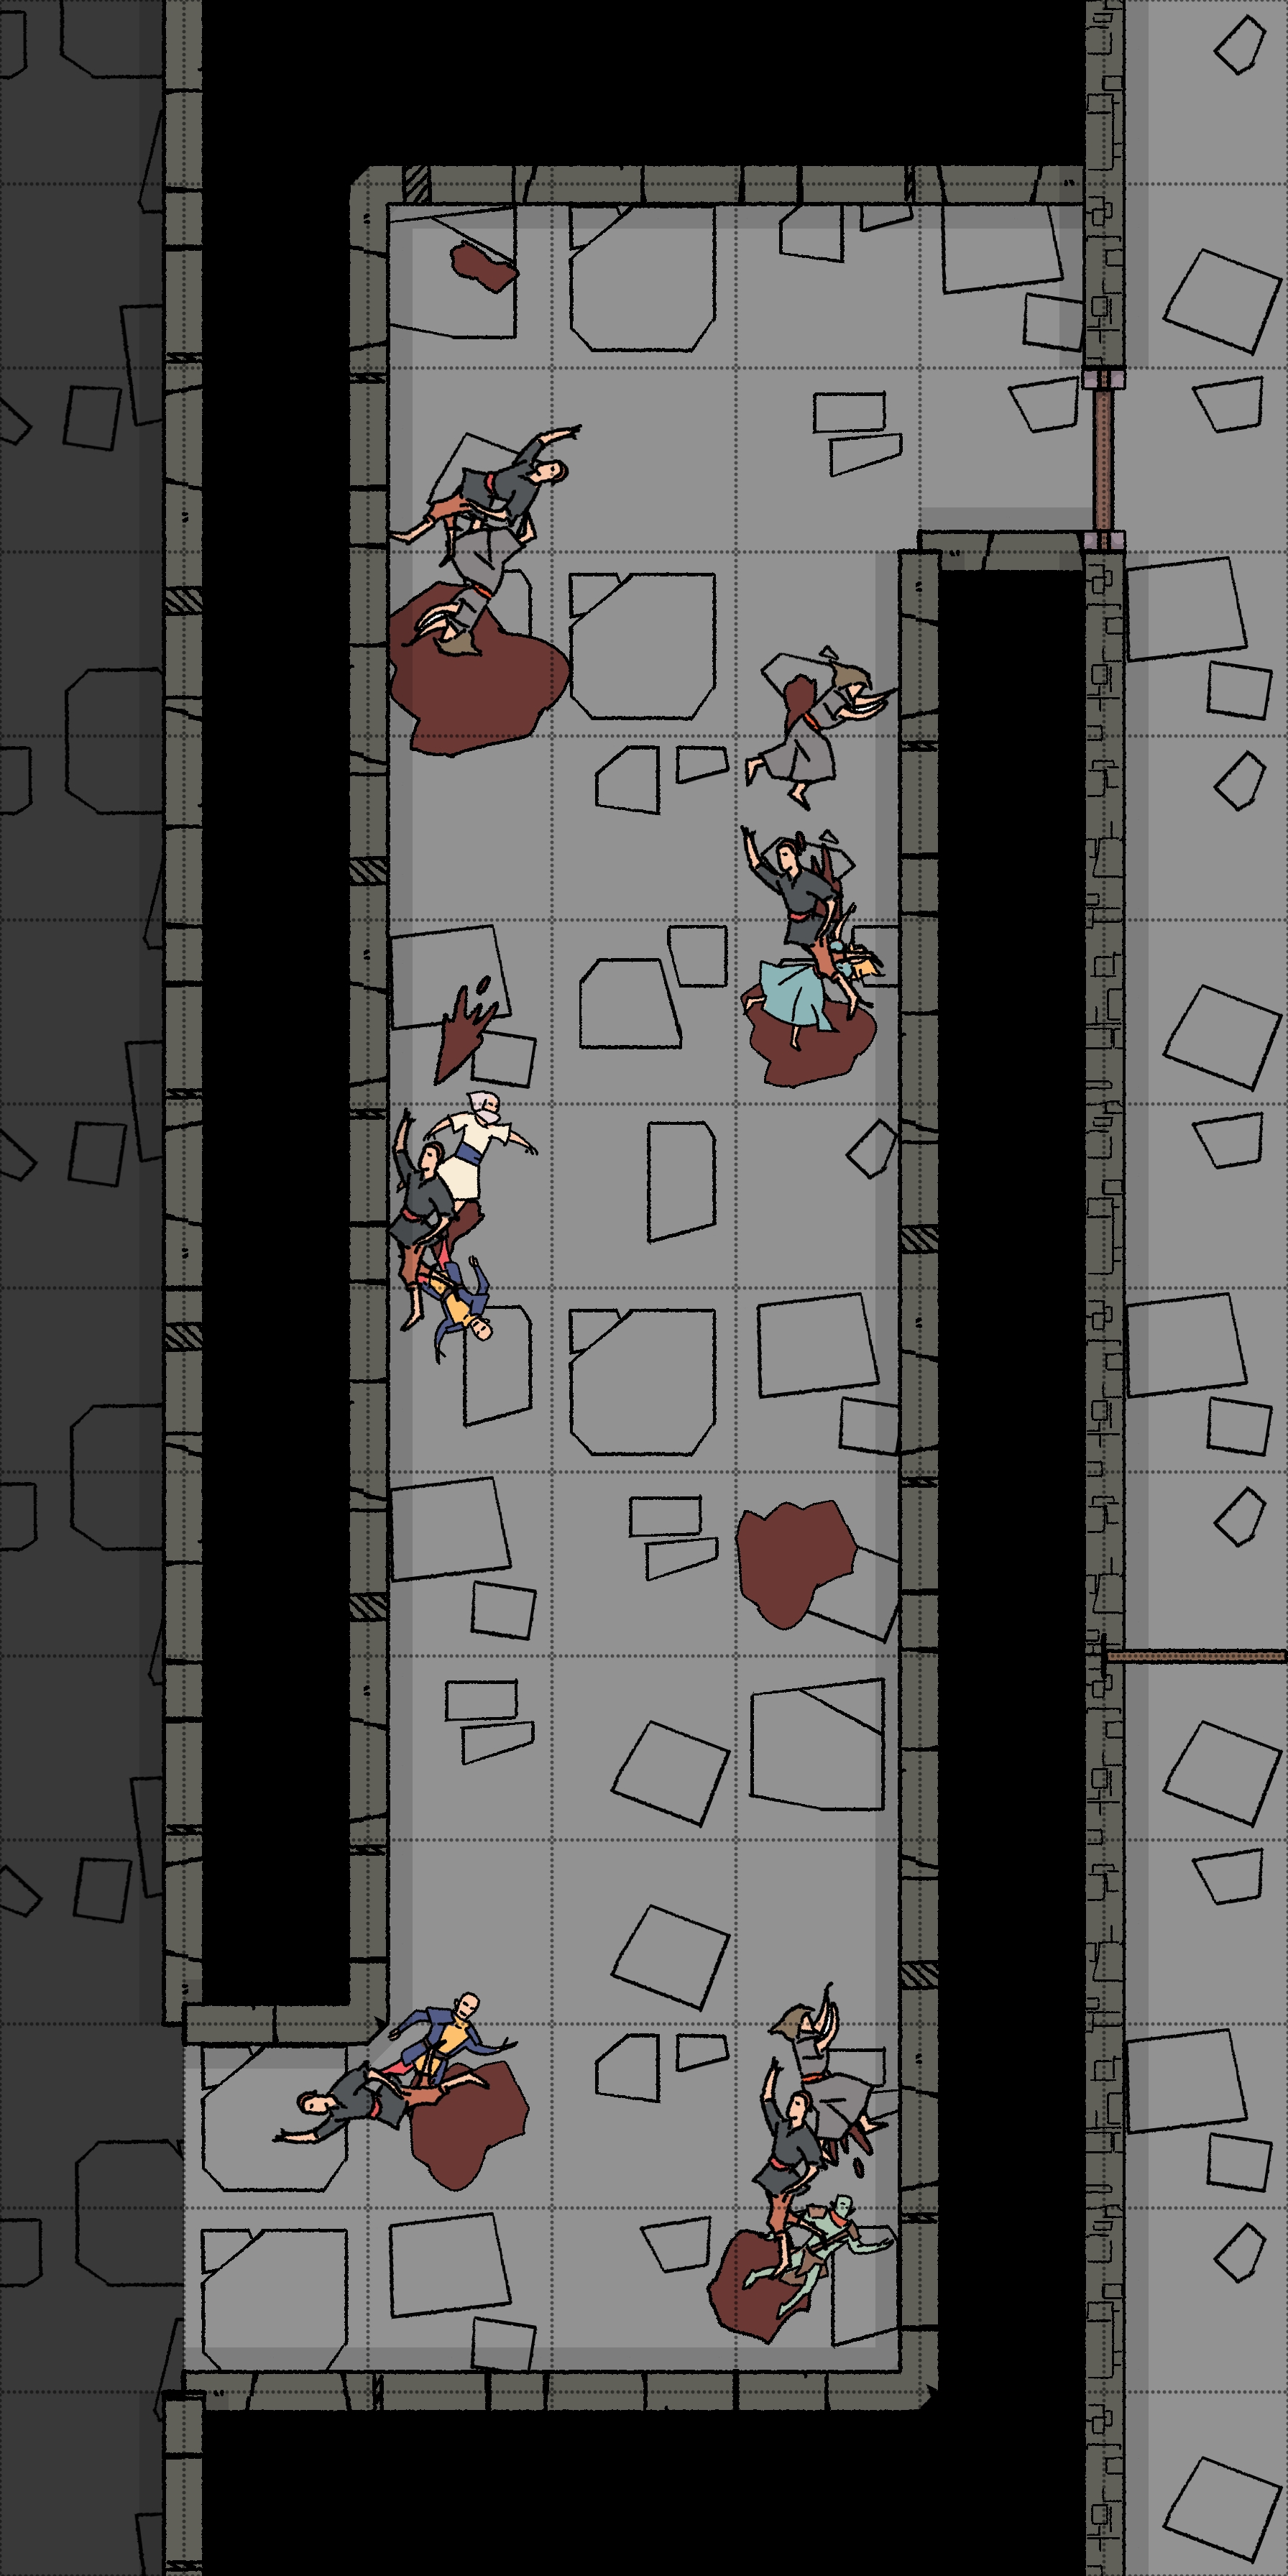
Dead Hallway - 1-26
Room Type: Lair
Light Level: Dark
This long hallway was once full of art, and some of the rotting works can still be seen hanging on the walls. It's now a horrific sight with countless bodies covering the floor, some are dead adventurers, but most are the Crawling Zombies. Walking through the room without stepping on a body is very difficult.
Creating any noise will awaken 1d10 Crawling Zombies from the piles of corpses; they are indistinguishable from the dead until they start moving. Any further noise will draw more from room 1-6
Connected Rooms
East - Wooden door - Corridor
West - Open corridor - 1-6
Servants Entrance - 1-27
Room Type: Special
Light Level: Dark
This room was once used by staff to get ready before starting their day in the tower. The room has many benches, storage lockers, and racks, all long abandoned. The room is in reasonably good condition, with most of the wooden furniture in working condition but empty.
Back Door
On the west wall, several strange, magical sigils intersect around a door handle. Using the door handle activates the magical sigils, turning the wall into a thick stone door. This door leads to the outside of the tower and is very light compared to the amount of wall it moves. After 1 minute or if the door is closed, the wall returns to its original state. There is no sign that there is a magical door here from the outside, even a detect magic spell would not highlight the dormant sigils.
Loot!
Hanging up next to this magical exit is a horse saddle, Quick Getaway.
Connected Rooms
East - Wooden door - 1-31
South - Wooden door - 1-33
West - Magical door - Outside the tower
Raised Room - 1-28
Room Type: Special
Light Level: Dark
The Children of the Tower have modified this room to limit the spread of the crawling zombies. A 3ft high raised platform has been built from old furniture and scavenged wood from Grimrest, created to divert the dead towards a hole in the floor that leads down to B1-13, then eventually to B2-1. The dead can't easily climb onto this platform and will most often just fall into the hole.
On the platforms are a few simple training dummies with some simple weapons around them.
- Crossbow with five bolts
- 2 Spears
- 3 daggers with hilts that look like a shorter version of the tower.
Connected Rooms
Deadlock - 1-29
Room Type: Empty
Light Level: Light
Square room with every surface covered in small white marble tiles, most of which are shattered. An unknown source lights the room; every wall seems to emit a gentle light, casting no shadows. This room was used as an early lab but has been abandoned a long time ago.
The two doors to the north are mostly glass and act as an airlock for the dead. Only one door can be open at a time. The glass on the doors is magically enchanted to be very strong. To destroy this glass, it must be dispelled or attacked with magical weapons.
Connected Rooms
North - Large glass airlock style sliding doors - 1-6
East - Missing door - 1-28
West - Wooden door - 1-34
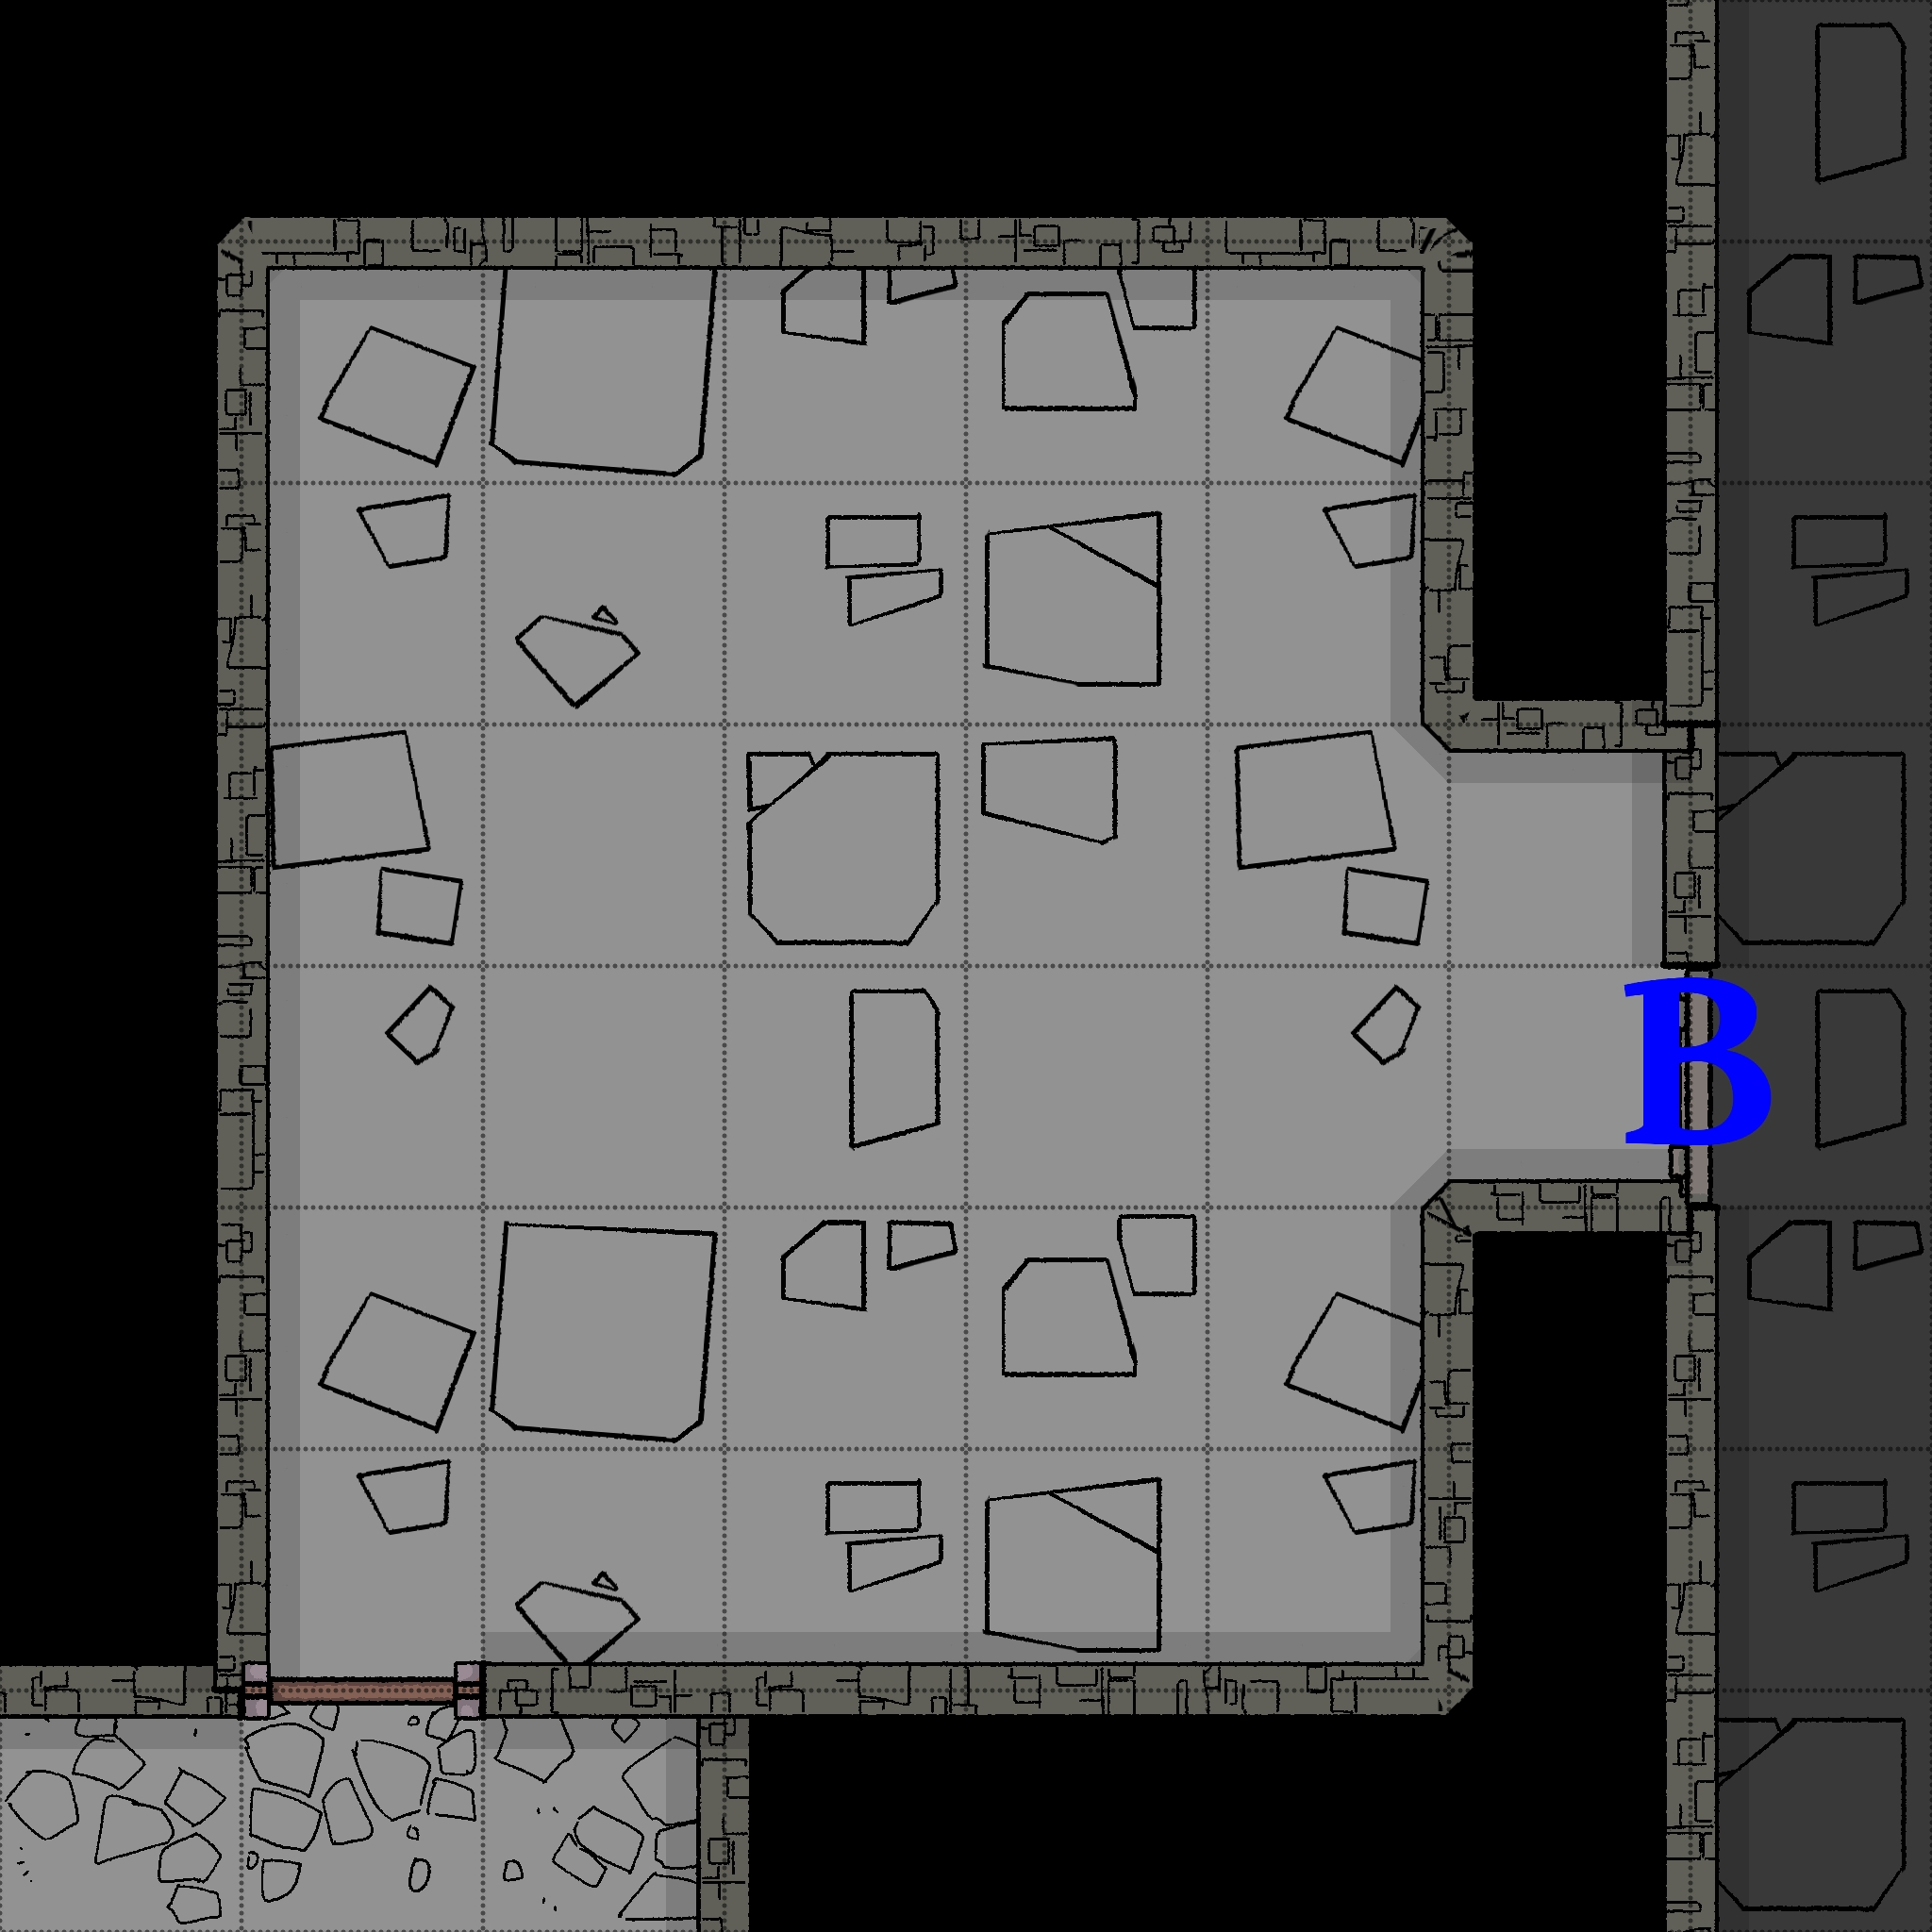
Rubble Room - 1-30
Room Type: Empty
Light Level: Dark
This room is empty but shows signs of extensive fighting over the years; the floor has long-dried bloodstains, and the walls are heavily damaged. Stone rubble and old furniture have been piled up against the east door to keep the Crawling Zombies out.
Any noise causes thudding and groaning from the east door; they won't be able to break through, just make noise.
Connected Rooms
North - Wooden door - 1-33
North East - Locked reinforced wooden door - 1-40
East - Large wooden double door blocked with rubble - 1-8
South - Wooden door - 1-18

The Handsey Hallway - 1-31
Room Type: Trap
Light Level: Dark
The hallway walls give way to robust cages holding back hundreds of Crawling Zombies. Behind these cages connect to 1-6, providing nearly unlimited zombies to man this trap. Walking through this corridor will cause zombies to attempt to grab you; they can't reach the middle of the hallway.
Travelling through this room is not an issue; the actual challenge arises when an encounter occurs here, limiting movement.
Connected Rooms
North - Wooden door - Corridor towards1-32
East - Flimsy decorative wooden double doors - 1-9
South - Open corridor full of zombies - 1-6
West - Wooden door - 1-27
Mimic Nursery - 1-32
Room Type: Trap/Lair
Light Level: Dark
Large metal doors that lock from the outside guard the rest of the dungeon from the 100s of mimics that inhabit this room. This strangely shaped room has dark stone floors and walls devoid of decoration. Piles of furniture are strangely stacked around the outside of the room; each is a mimic waiting in ambush.
If the doors are left open, mimics will be on every floor's encounter table.
Connected Rooms
East - Reinforced Metal Door (Locked) - Corridor
South - Reinforced Metal Door (Locked) - Corridor towards 1-31
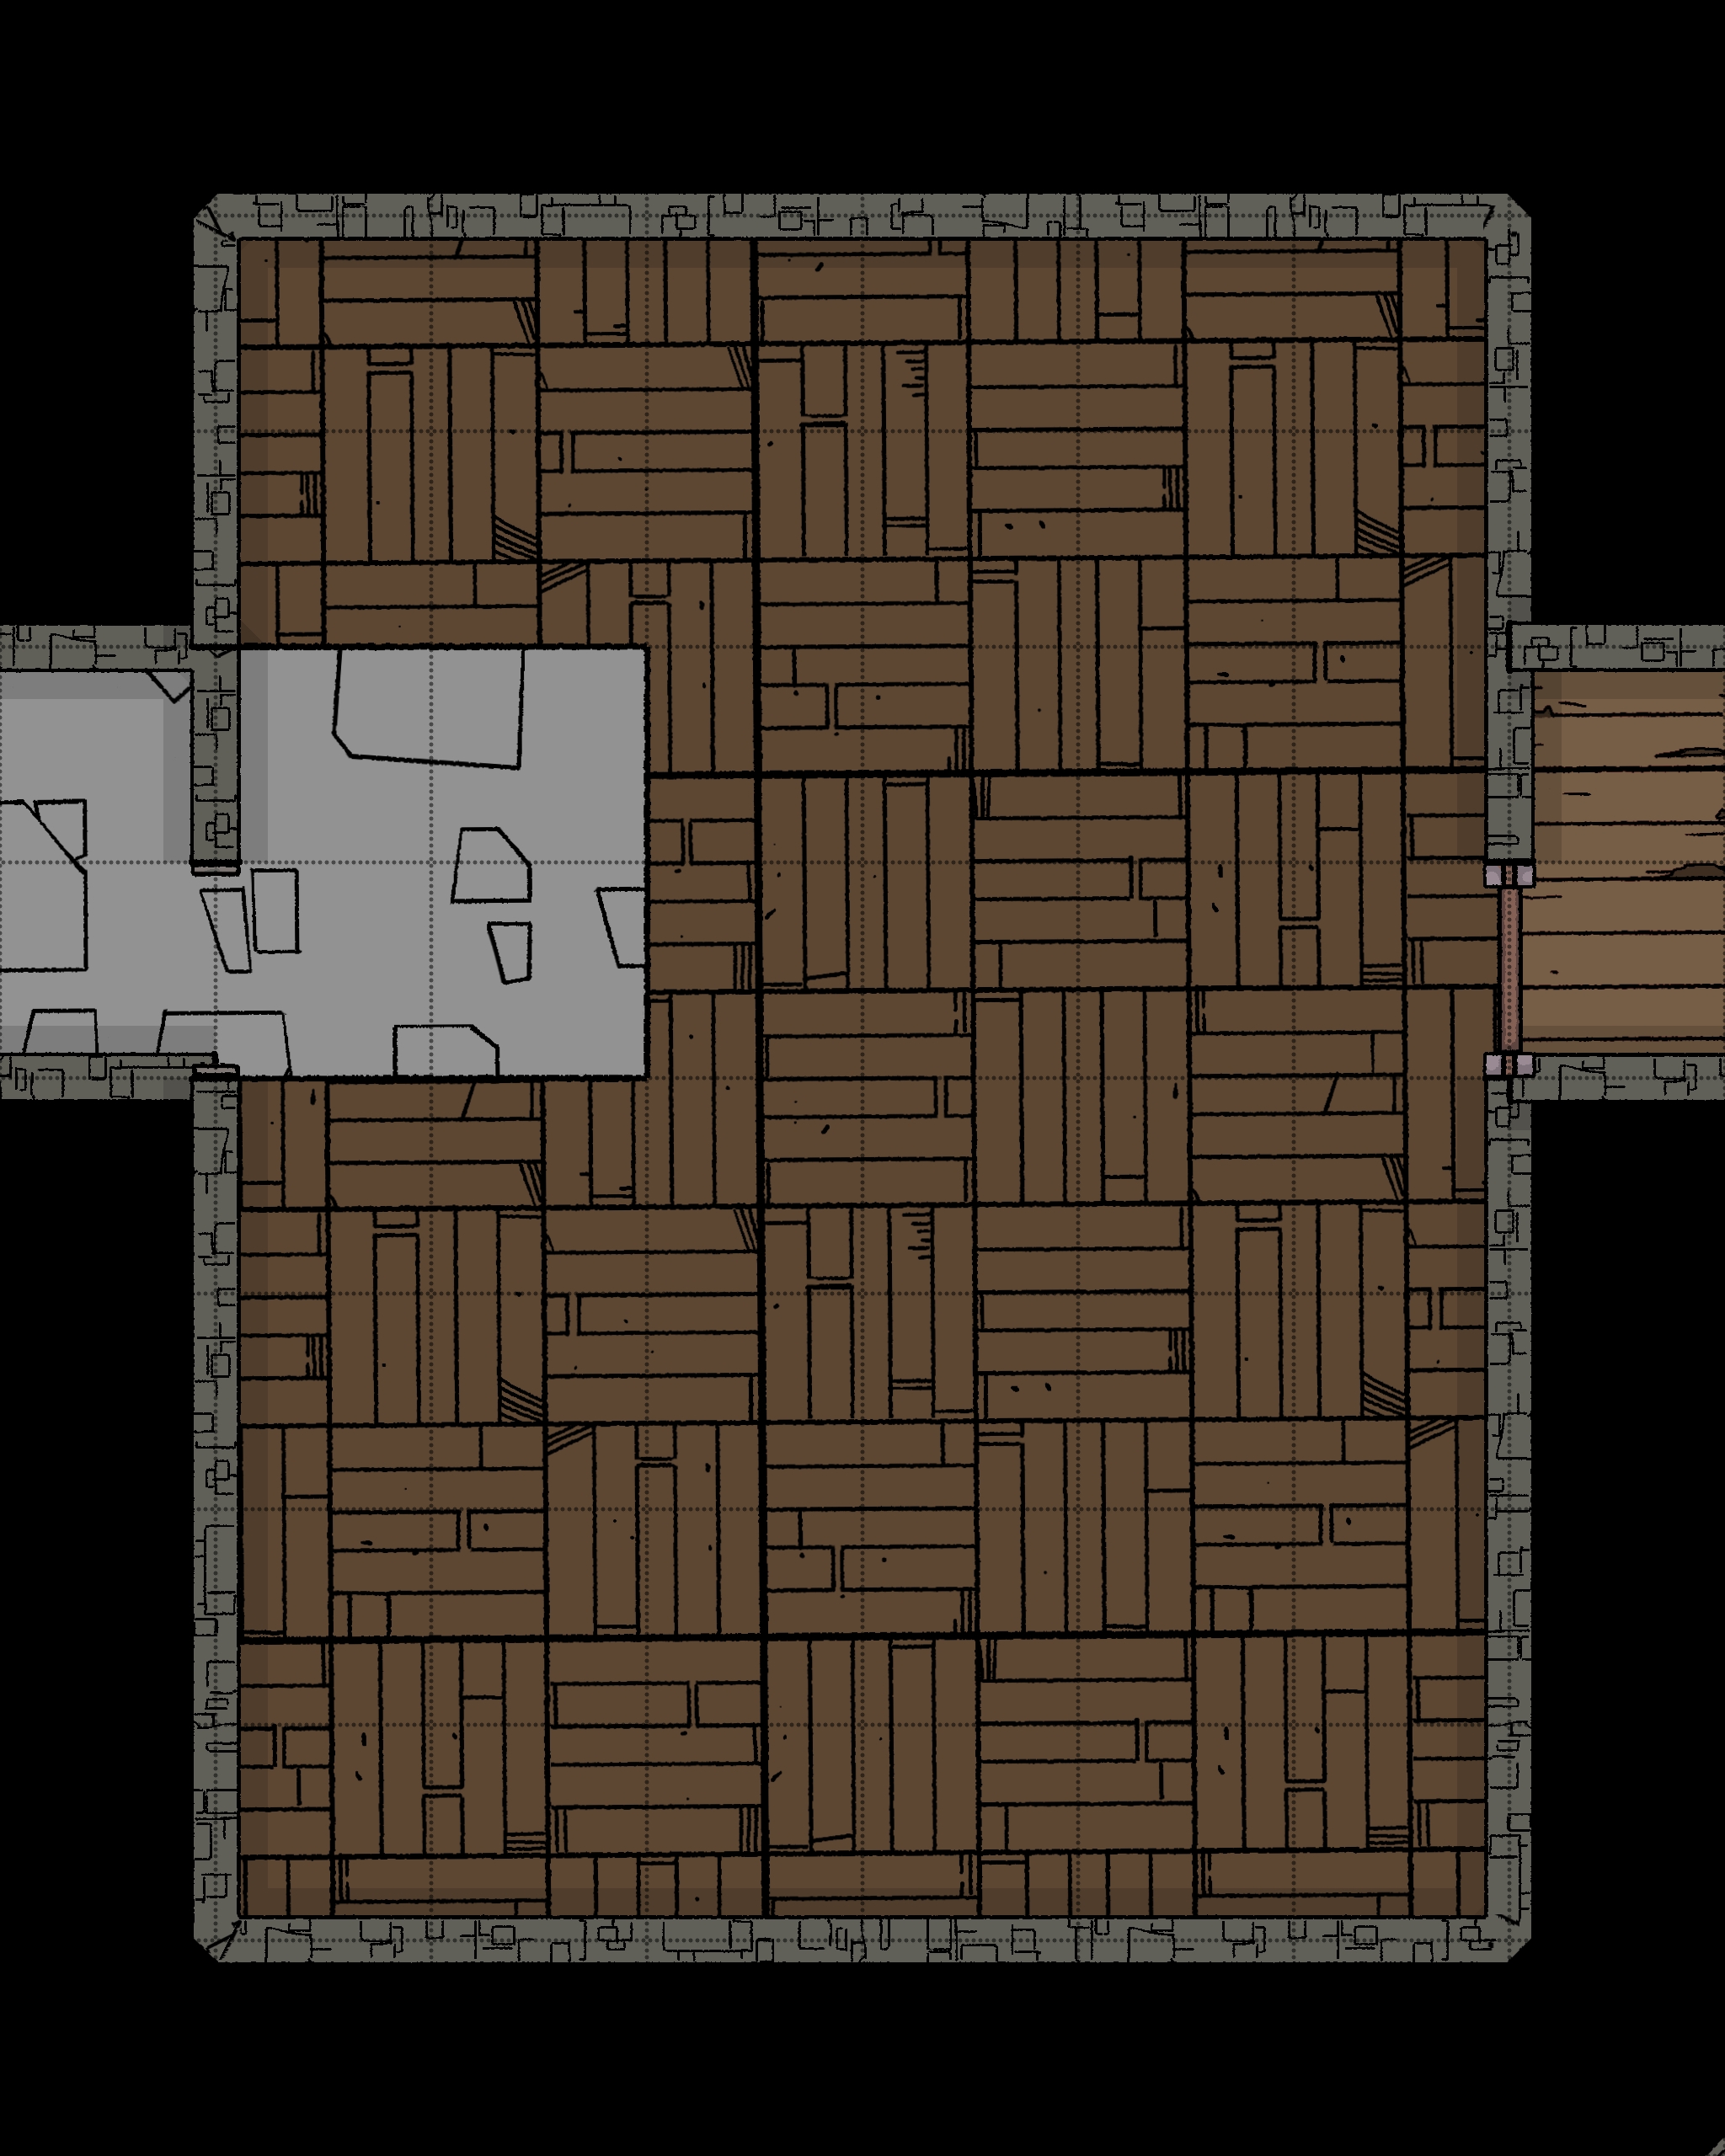
Yellow Mould Room - 1-33
Room Type: Trap
Light Level: Dark
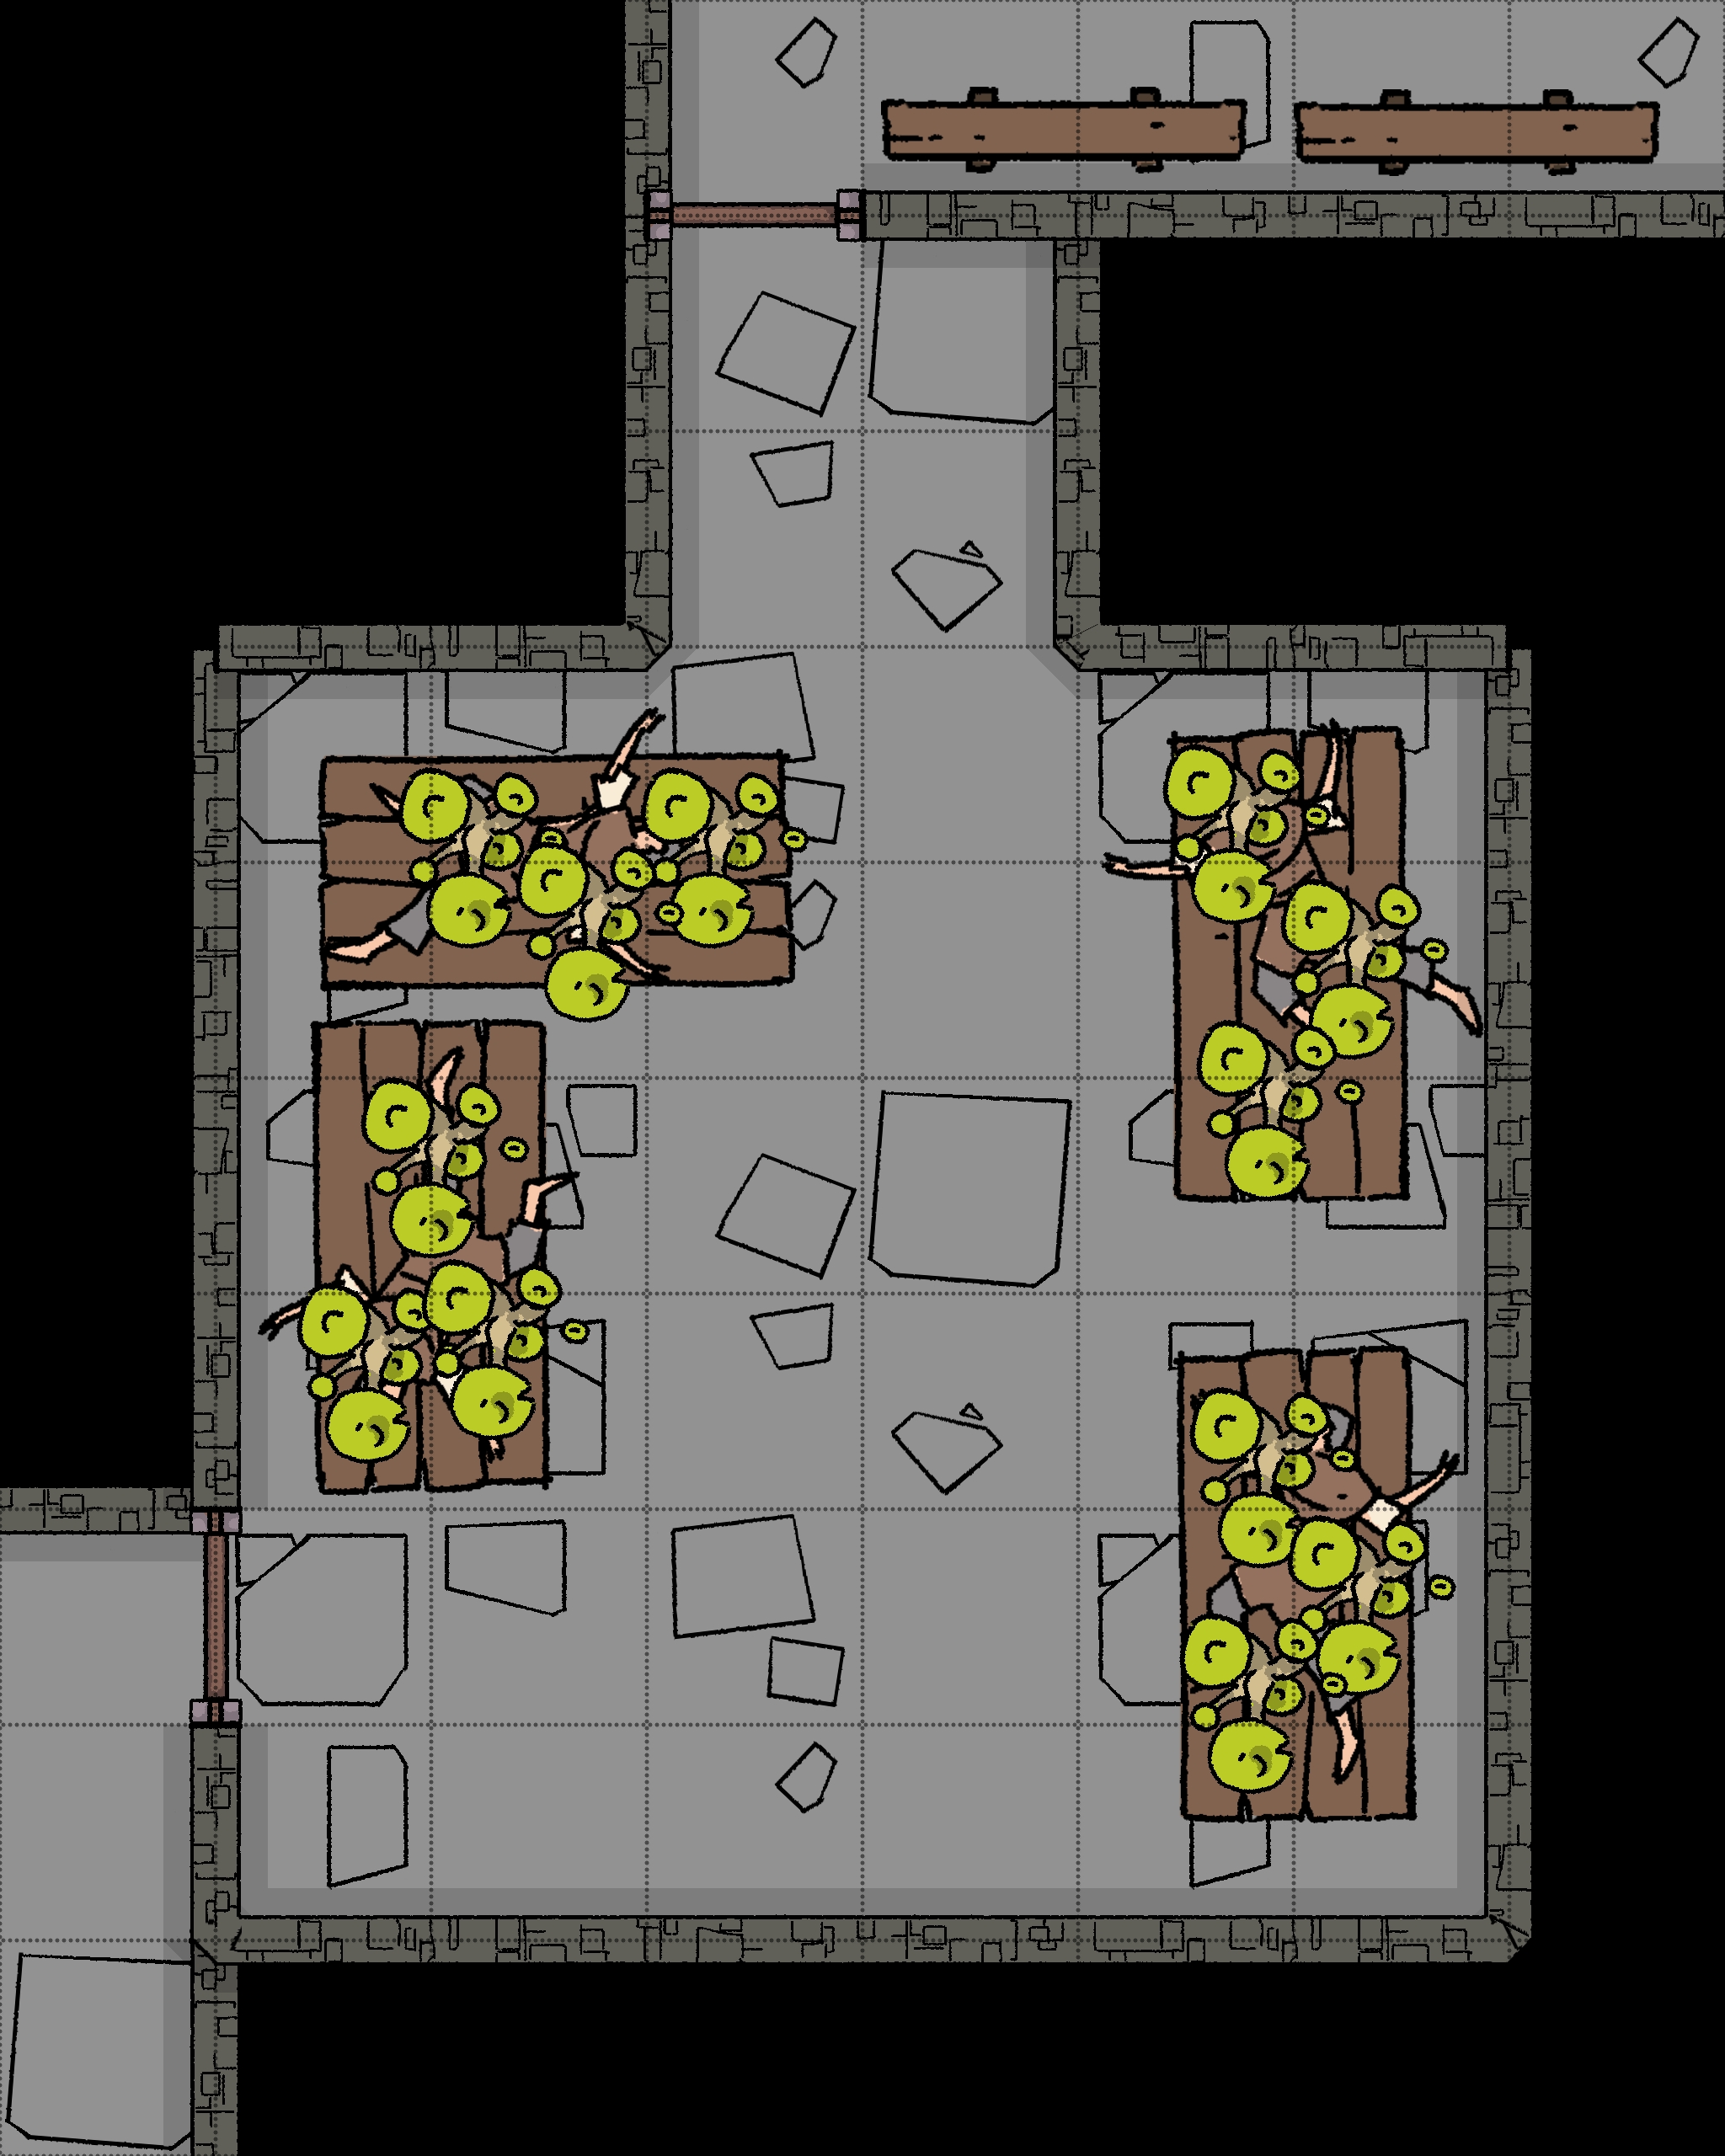
The room is set up as a makeshift hospital with tables used as beds around the outside edge. Half-decayed bodies on these tables are covered with a vibrant yellow mould, slowly dissolving them and the tables as well. The room stinks of rot, and small particulate can be seen in the air.
Hitting a table has a high chance of causing it to collapse, triggering the mould. All the infected bodies add up to around 3 Yellow Mould in the room.
Connected Rooms
North - Wooden door - 1-27
West - Wooden door - Corridor towards 1-30
Reverse Pit Trap - 1-34
Room Type: Trap
Light Level: Dark
This room is trapped. Splitting the room down the middle, north to south, are many magical sigils carved into the stone floor. These sigils are made up of carvings and powdered gemstones that reflect light, making them reasonably visible. Above these sigils are large metal spikes protruding from the ceiling, with a corpse of an adventurer impaled on them.
Putting any pressure on these sigils, such as stepping on one or chiselling too hard, will cause them to activate, creating a wave of reverse gravity that pushes the victim into the spikes. This trap causes 1d6 fall damage and 1d10 piercing damage.
Loot!
The sigils contain some gem dust that can be carved out; worth 500sp. Just make sure they are careful not to put too much pressure on the sigil whilst chiselling.
The body stuck on the ceiling spikes has a simple ring worth 40gp. All the other gear has been taken over the months it's been there.
Connected Rooms
One-way Door Chamber - 1-35
Room Type: Trap
Light Level: Dark
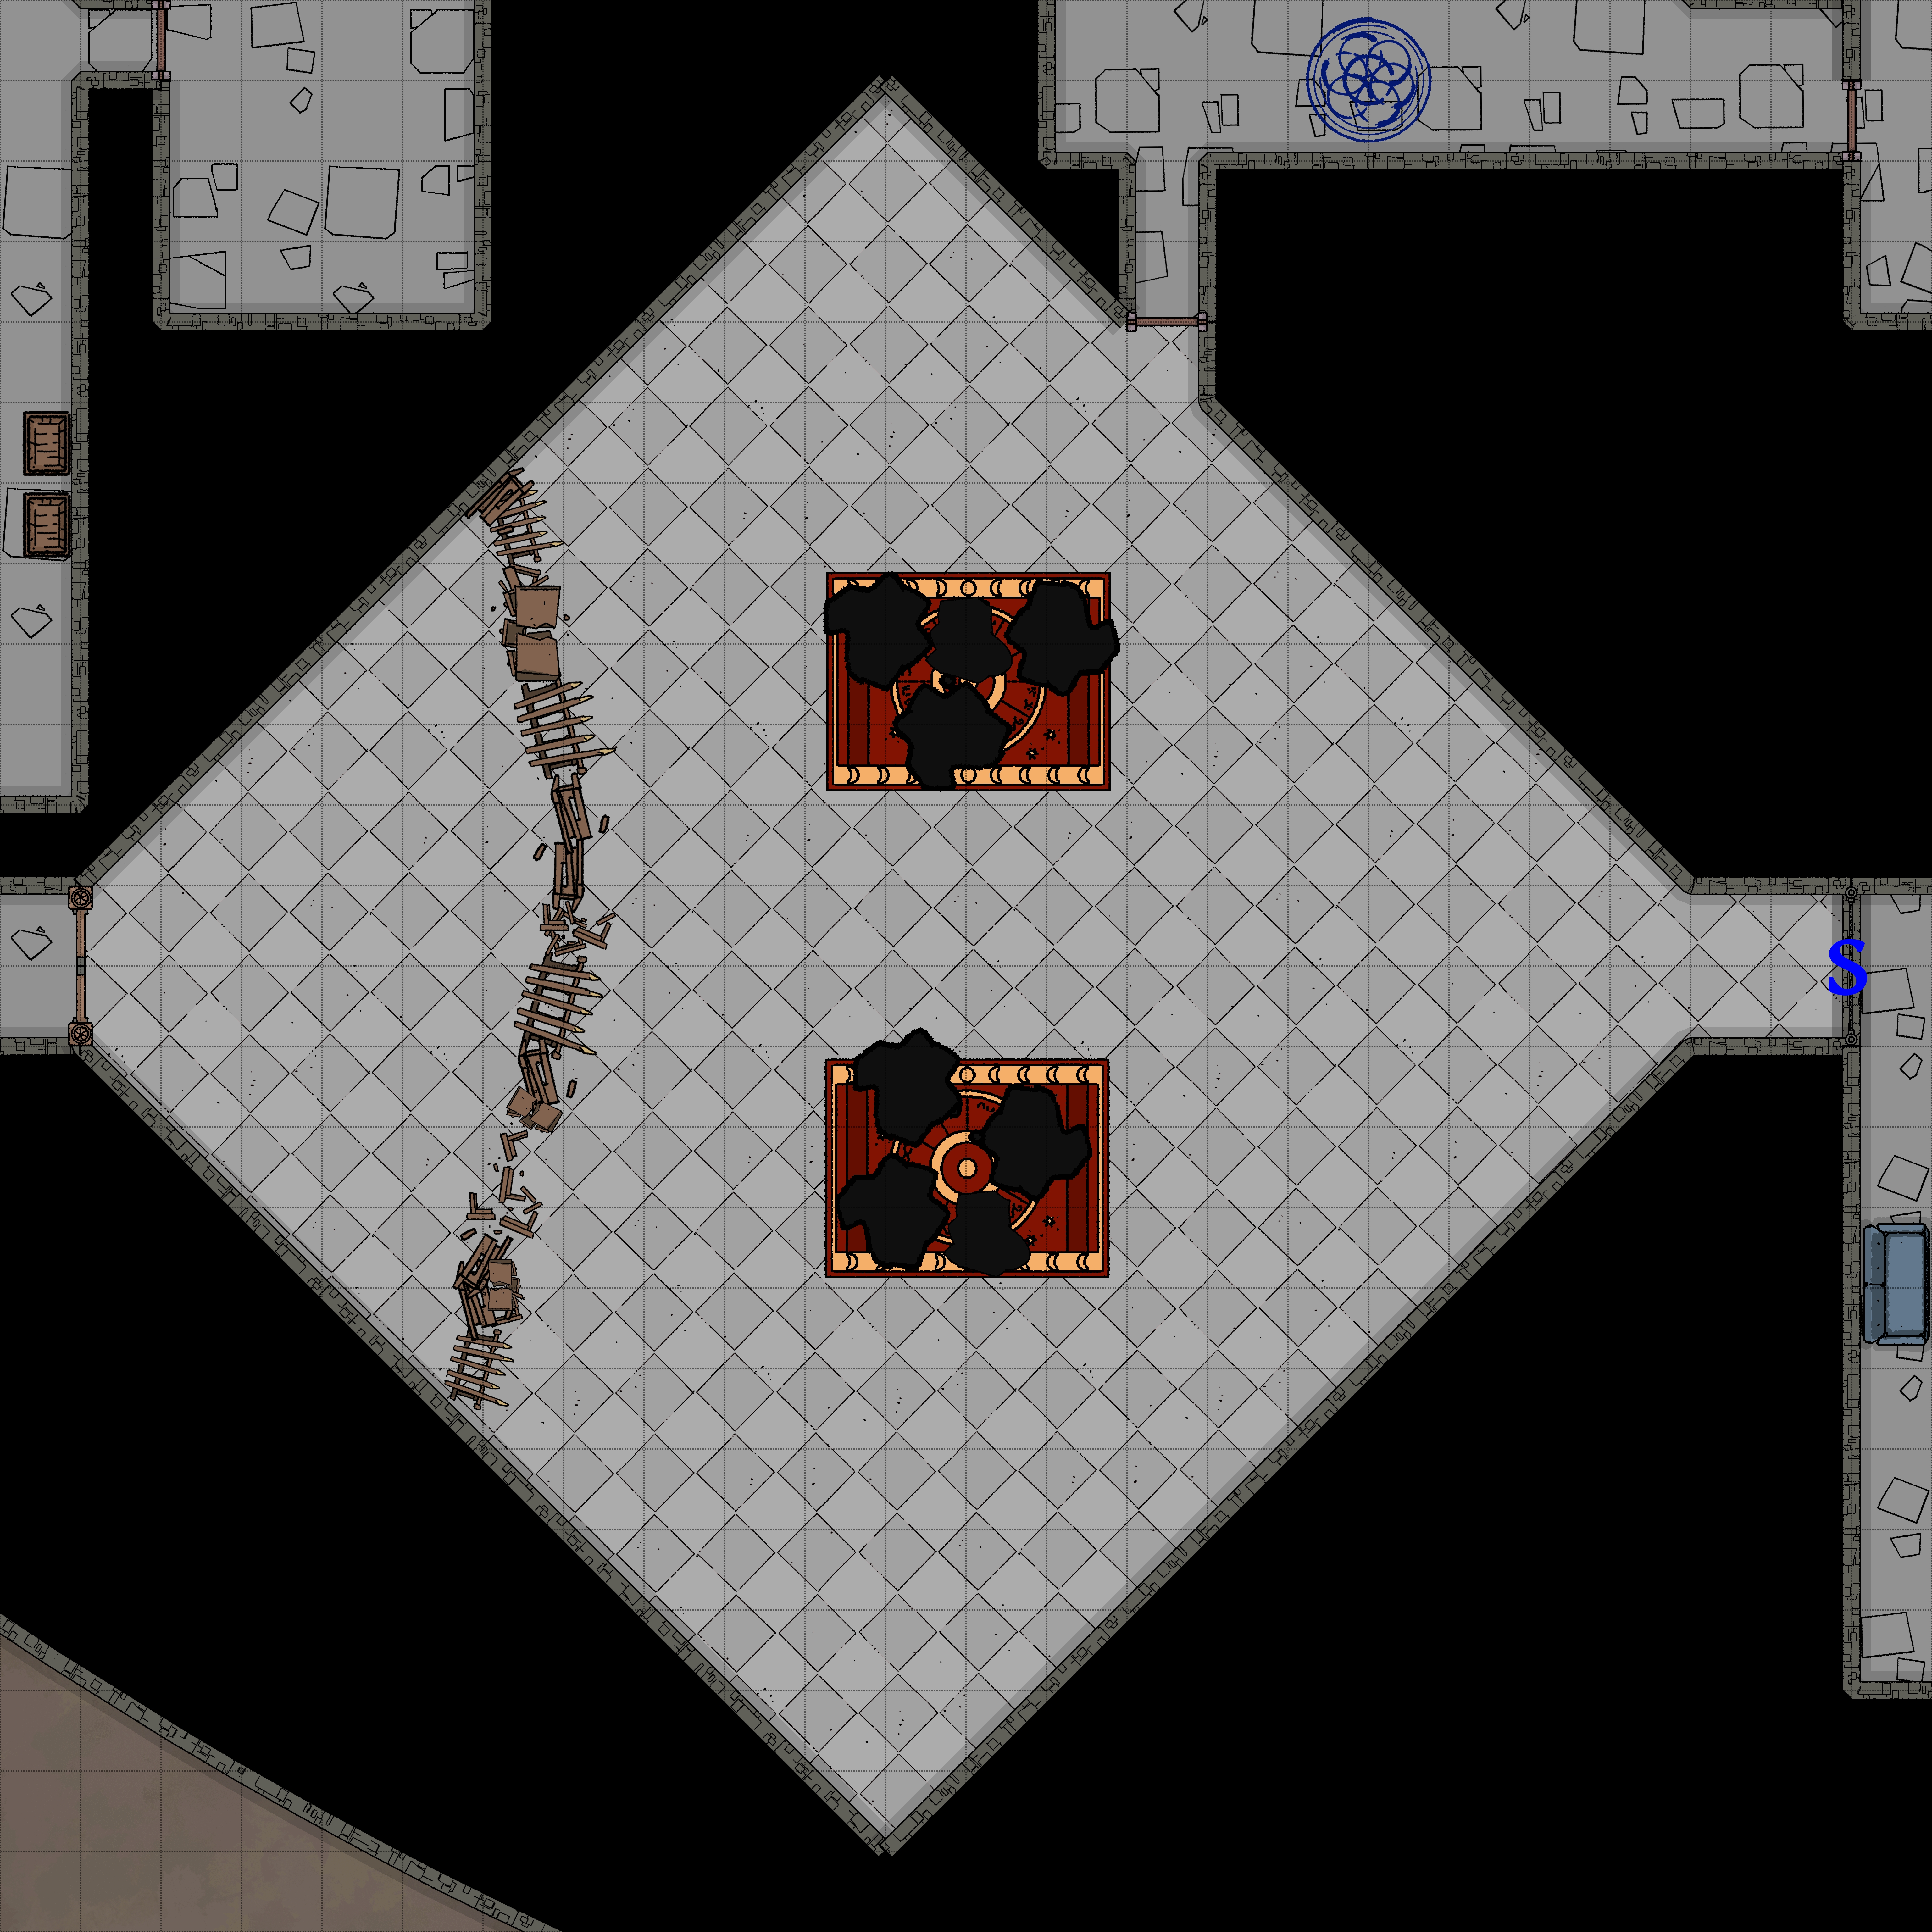
This room looks simple with dark stone walls and floors, very similar to the corridors of this floor. The room stinks of death and rot. Dead adventurers lay on the floor surrounded by naked bodies with broken legs and pelvises. It looks like a battle has taken place with no winners.
1d10 Crawling Zombies are waiting in ambush, indistinguishable from the dead. Some survived the previous ambush and are now waiting for the next travellers to come through.
The West door is like a drawbridge; pushing weight into it lowers it. When nothing is holding it down, it will reset to a sealed state. From the outside of the room, the door looks like a stone wall.
Loot!
- Chainmail x2
- Leather Armour x2
- Polearm
- Sling
- Spellbook - Charm Person, Shield, Locate Object
- 2 Large sacks
Connected Rooms
North - Wooden door - Corridor
East - Fancy wooden door - 1-36
West - One-way door - Corridor
Tower Gallery - 1-36
Room Type: Special
Light Level: Light
Well-lit, simple gallery showcasing three different murals that are painted on the walls. These murals simplistically depict the tower's history. The room is lit magically from several floating orbs of light that slowly orbit the ceiling. These lights are immaterial and can only be dispelled.
Mural 1
Landscape with a simple village similar to Grimrest being attacked by flying spell casters, creating fire and destruction. (before the tower)
Mural 2
Same landscape but now with a tower six floors high, guards on top of its defences attacking these flying wizards. (Tower first stage)
Mural 3
Tower at its full height with no defenders, armies are clambering up the side with looks of fear and hopelessness in their eyes. (Completed tower)
Connected Rooms
North - Blocked fancy wooden door - 1-37
West - Fancy wooden door - 1-35
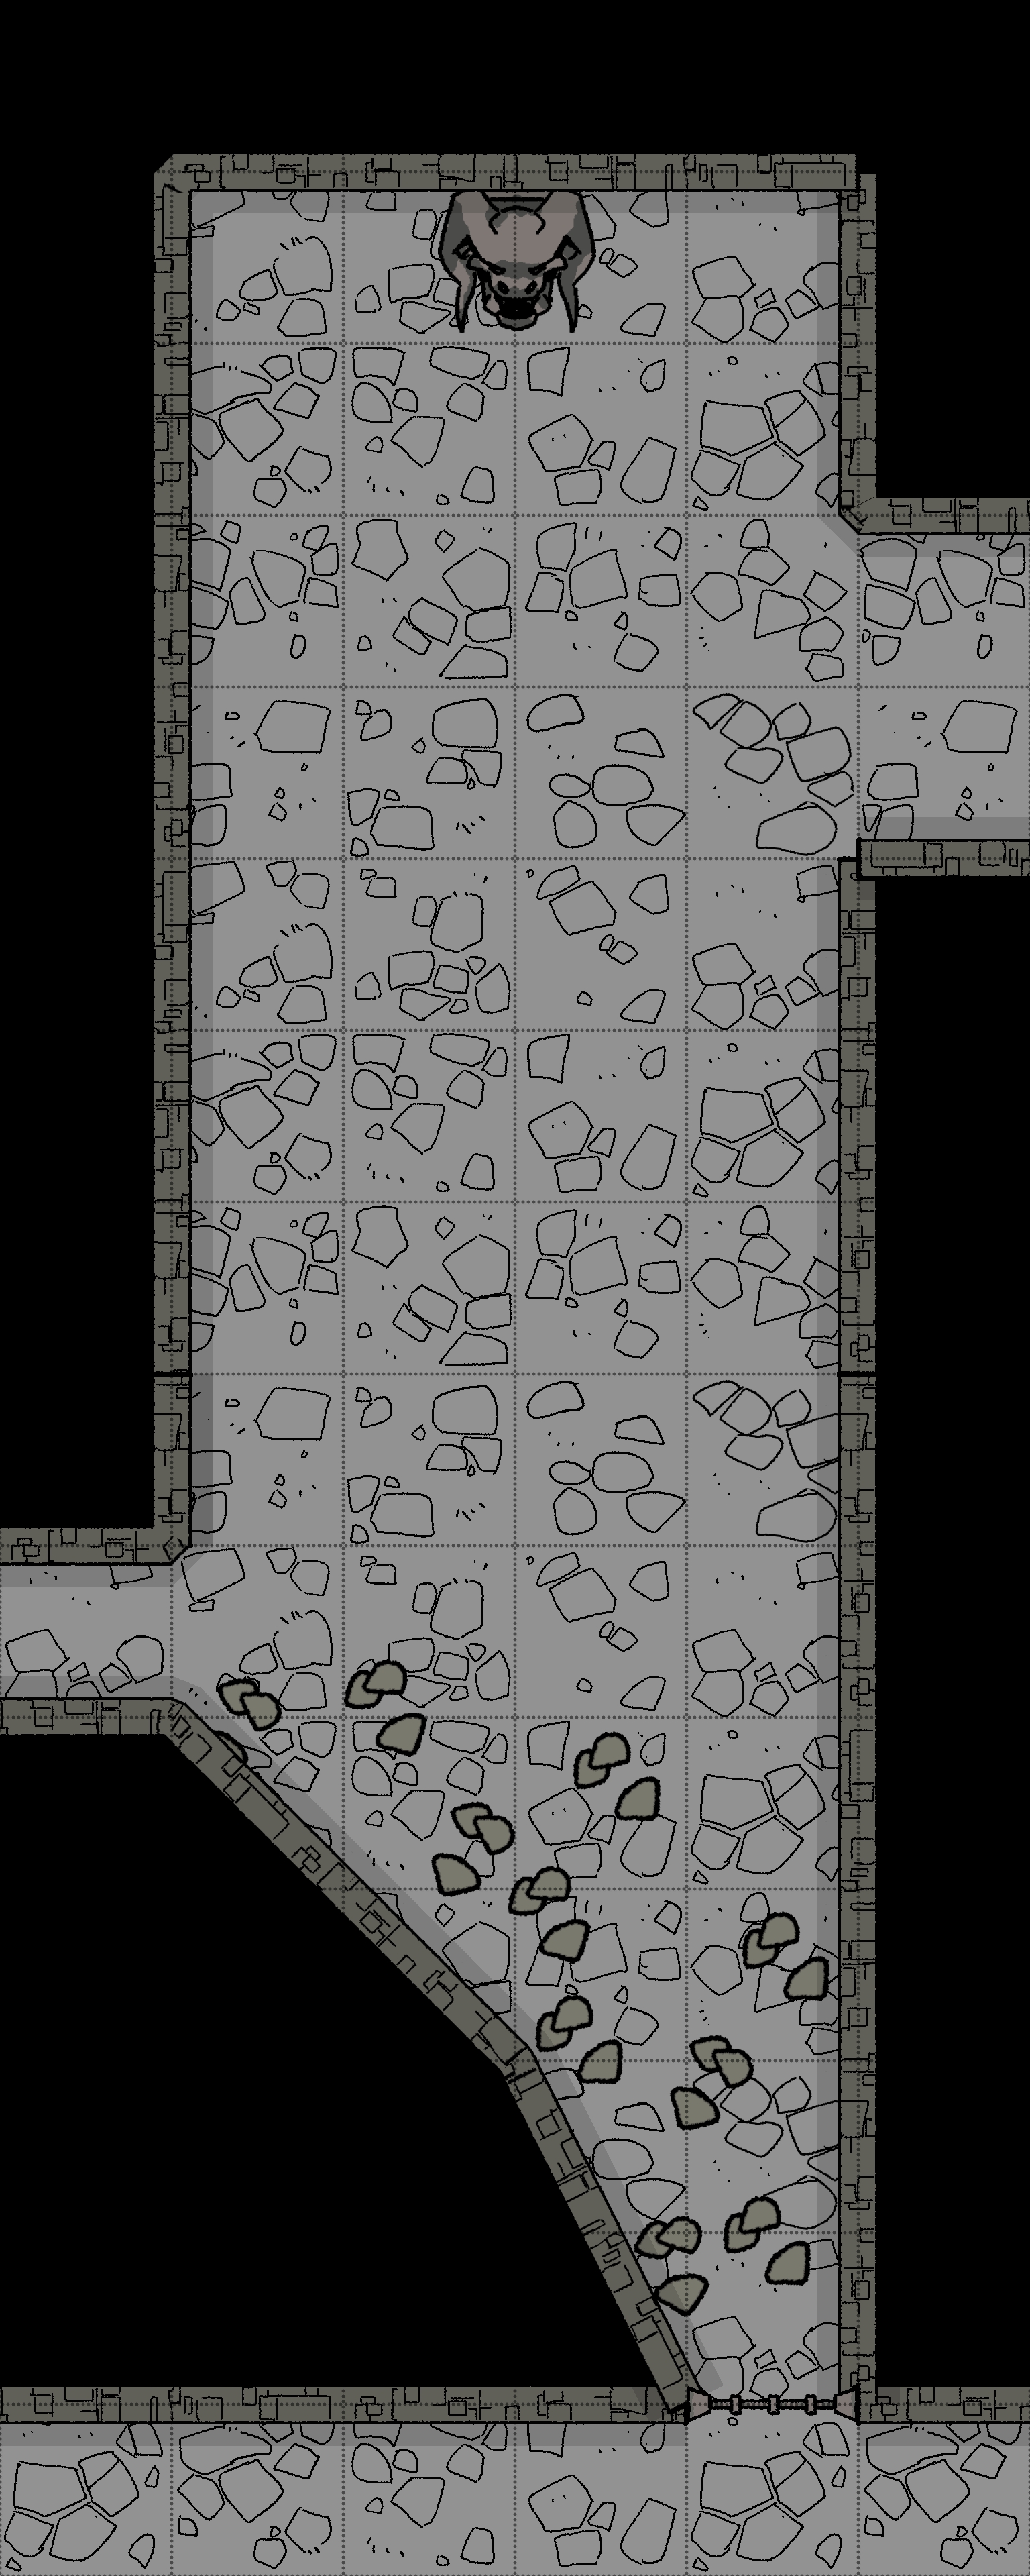
Giant Shrew Lair - 1-37
Room Type: Lair
Light Level: Dark
This room is covered with debris and dirt, causing doors to grind open. On the east wall is a small cave entrance leading into tight tunnels. The room smells of wet dog and animal waste.
1d8 Giant Shrews attack anyone entering the room normally alerted to the grinding doors.
Loot!
Inside the shrew's cave is one dead adventurer, mostly eaten. They have:
- Platemail full of gore (Still good)
- 3 gems worth 10gp each
Connected Rooms
North - Wooden door - 1-38
South - Fancy wooden door blocked with rubble - 1-36
West - Fancy wooden door blocked with rubble - Corridor
Drinking Fountains - 1-38
Room Type: Special
Light Level: Light
Room set up like a small library with empty bookshelves and a warn leather chairs around the edges. The room has a smell of fine wine and old wood.
To the south edges of the room are two elaborate water fountains depicting a large naked devil pouring drinks that cascade down the 3 tiers of the fountain, each tier provides a place for someone to fill a glass. One provides a very nice red wine and the other provides a strong ale. This is magically refilled from the brewery on floor 17.
Kobold footsteps can be seen between the north door and the fountains.
Connected Rooms
North - Wooden door - 1-39
South - Wooden door - 1-37
West - Secret door - 1-5
Better Union Guard Post - 1-39
Room Type: Lair
Light Level: Dark
This room was set up like a tavern for some staff, but now is a guard post for The Better Union. There is a simple wooden bar and a few mostly standing tables. Kobold guards sit behind a bar that faces the south door. Guards are always going to the room to the south to drink.
Kobolds have set up a simple trap. Pulling a lever by the bar shoots a hidden crossbow at the door. The crossbow is attached to the ceiling, with darkness hiding it.
Connected Rooms
North - Wooden door - Corridor
South - Wooden door - 1-38
Windy Path - 1-40
Room Type: Special
Light Level: Dark
This passage is empty but loud; a strong wind, created by a magical rune on the north wall, pushes everything towards the south. Rubble from sections of wall and old furniture clutter the south end of the room.
Trying to walk north requires a roll under strength, and the wind will extinguish any torches, etc.
Over time, the wind has damaged the south wall, now creating a small hole that looks into room 1-8 and produces a loud whistling noise.
Connected Rooms
East - Wooden door - 1-41
West - Locked reinforced wooden door - 1-38
Barred Room - 1-41
Room Type: Empty
Light Level: Dark
This simple room is filled with long decayed corpses, all are naked except one, slumped in the corner with simple druidic robes. The druid died from their injuries due to the zombies and sealed the room with heat metal before they died.
The door to the east has several metal bars melted into the door frame, sealing it shut. It can be removed with time and effort, and it is much easier to do from this side.
The only loot in here is an old, battered quarterstaff.
Connected Rooms
East - Sealed Reinforced Metal Door - Corridor
South - Wooden door - 1-40
Forgotten Chamber - 1-42
Room Type: Empty
Light Level: Dark
This simple dark room has a corpse of an adventurer slumped against the door, trying to block any of the dead coming in. They have a sack of loot and some simple equipment.
The individual has wounds and clearly died from them a long time ago.
Loot!
- 200sp
- Jewellery - gold chatelaines with gemstones worth 160gp
- Theives tools
- Simple dagger
Connected Rooms
West - Reinforced Metal Door - Corridor