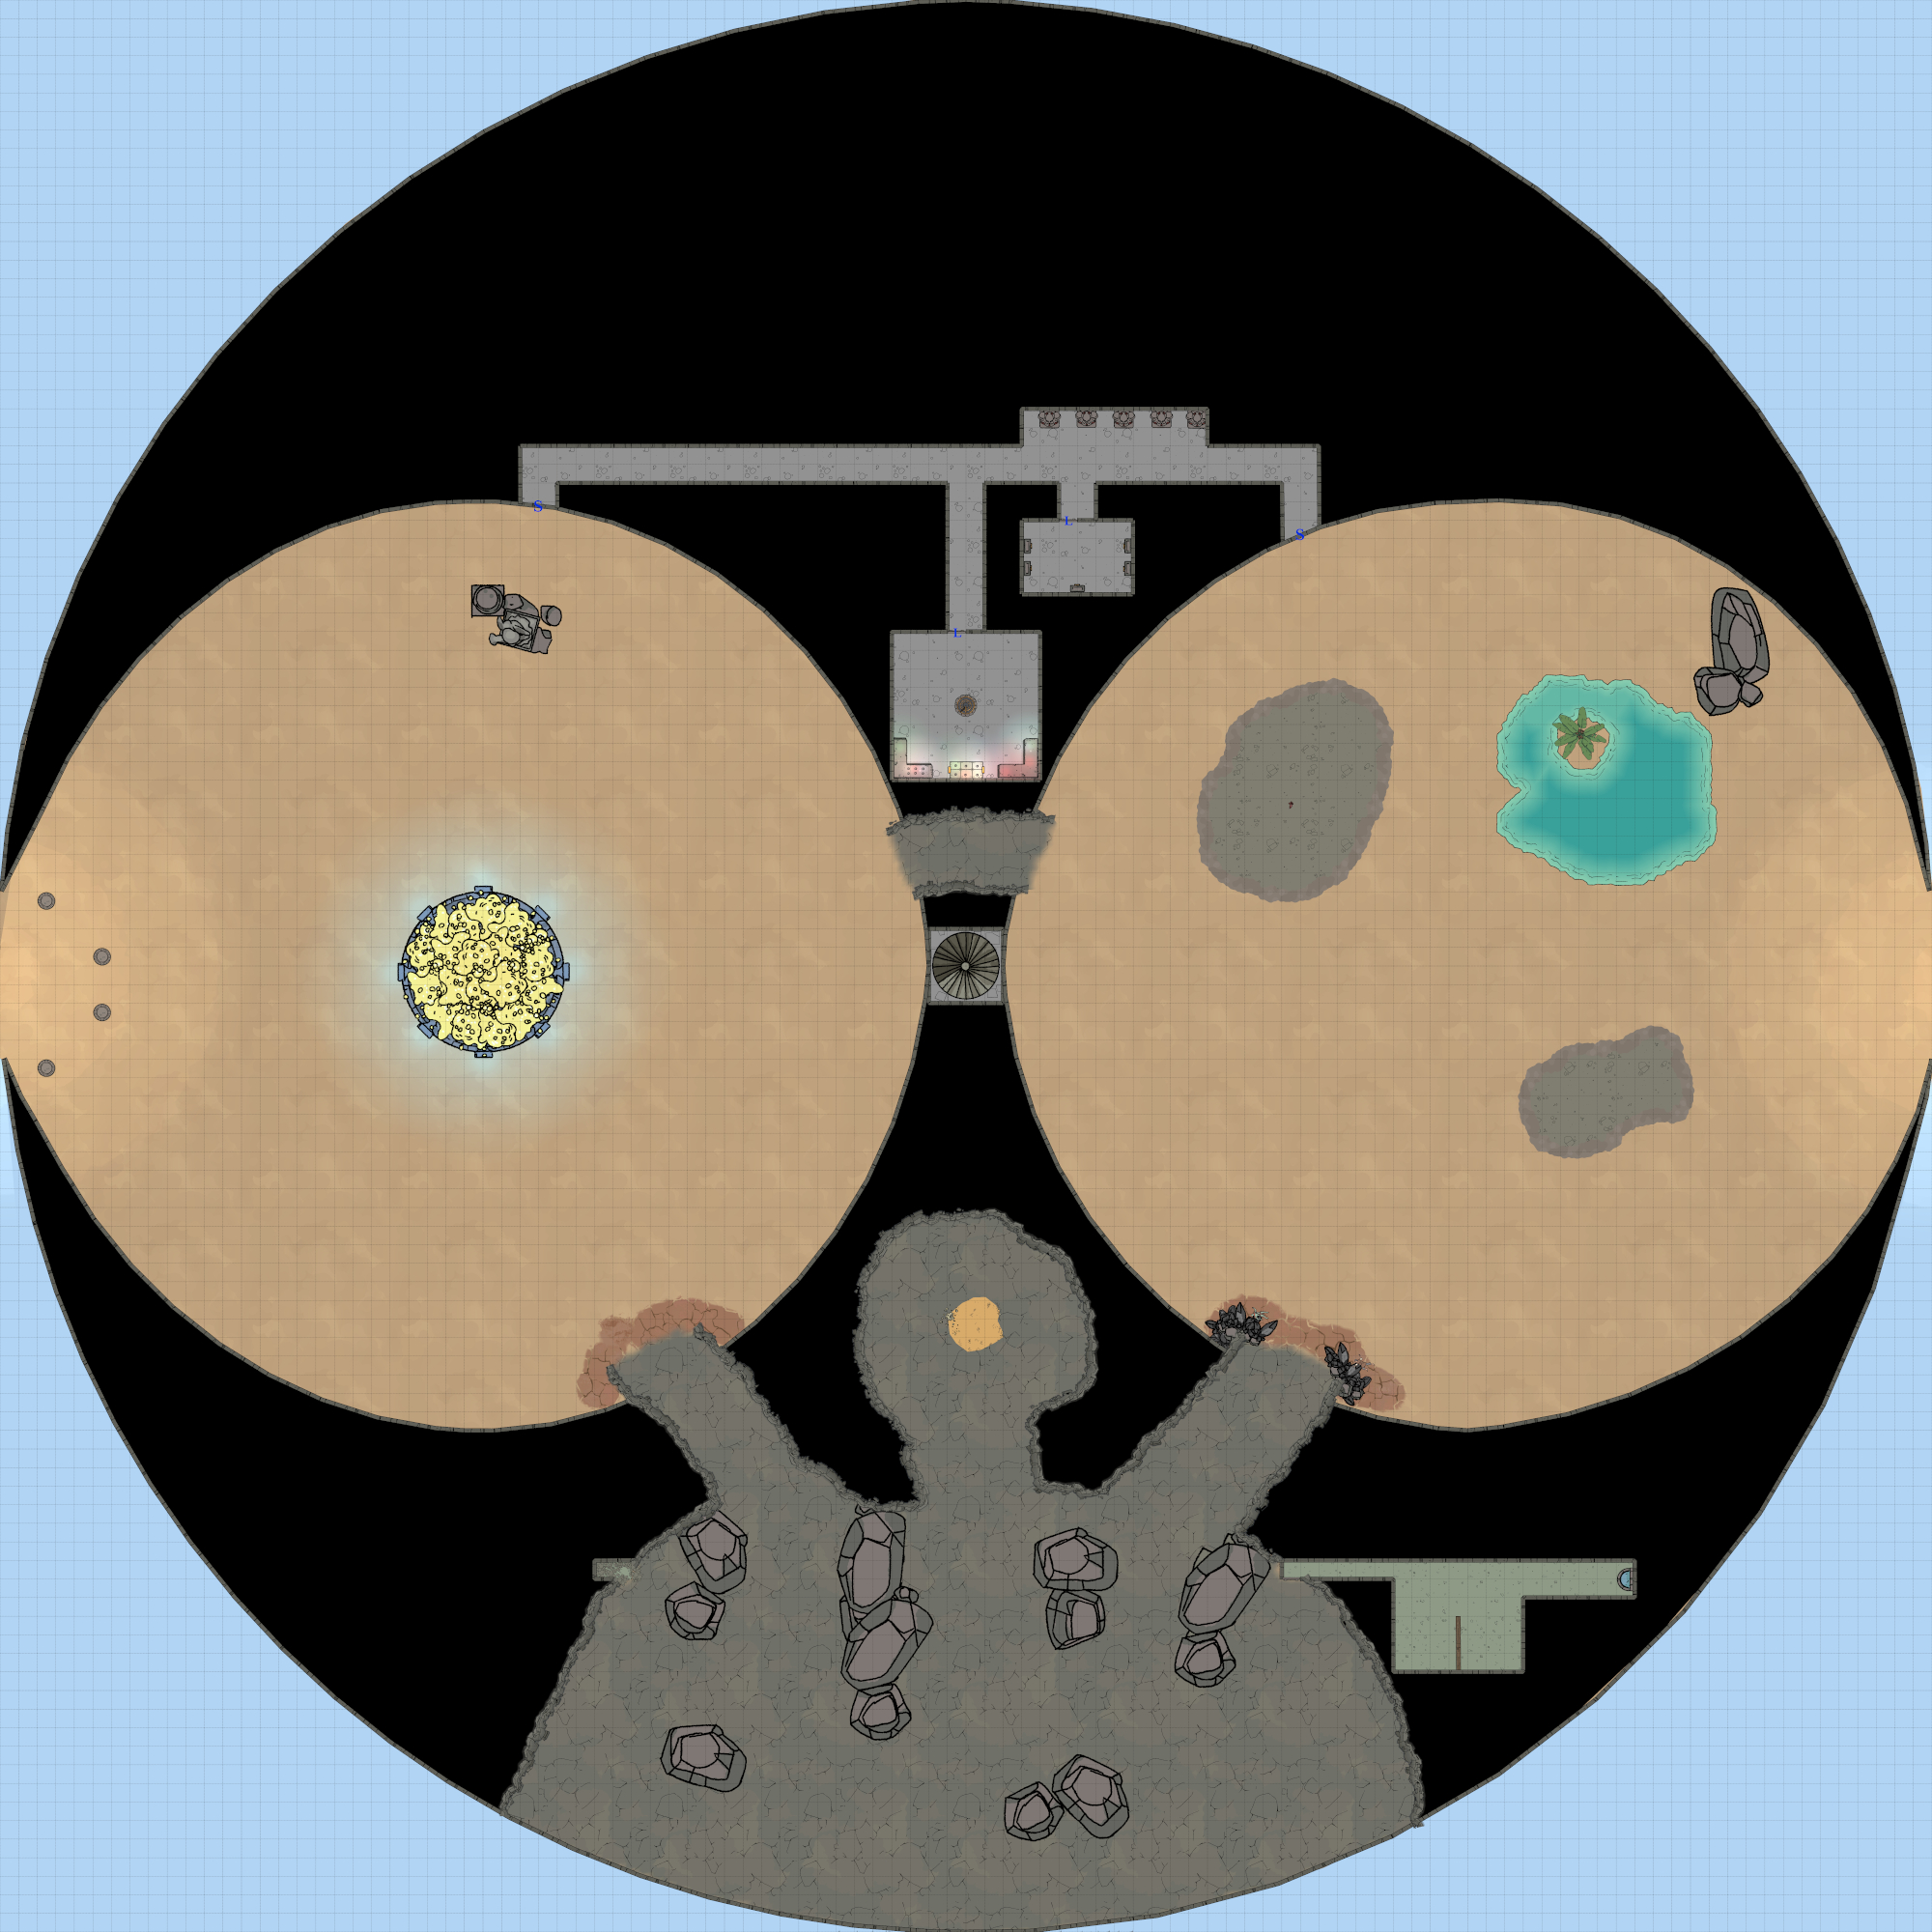
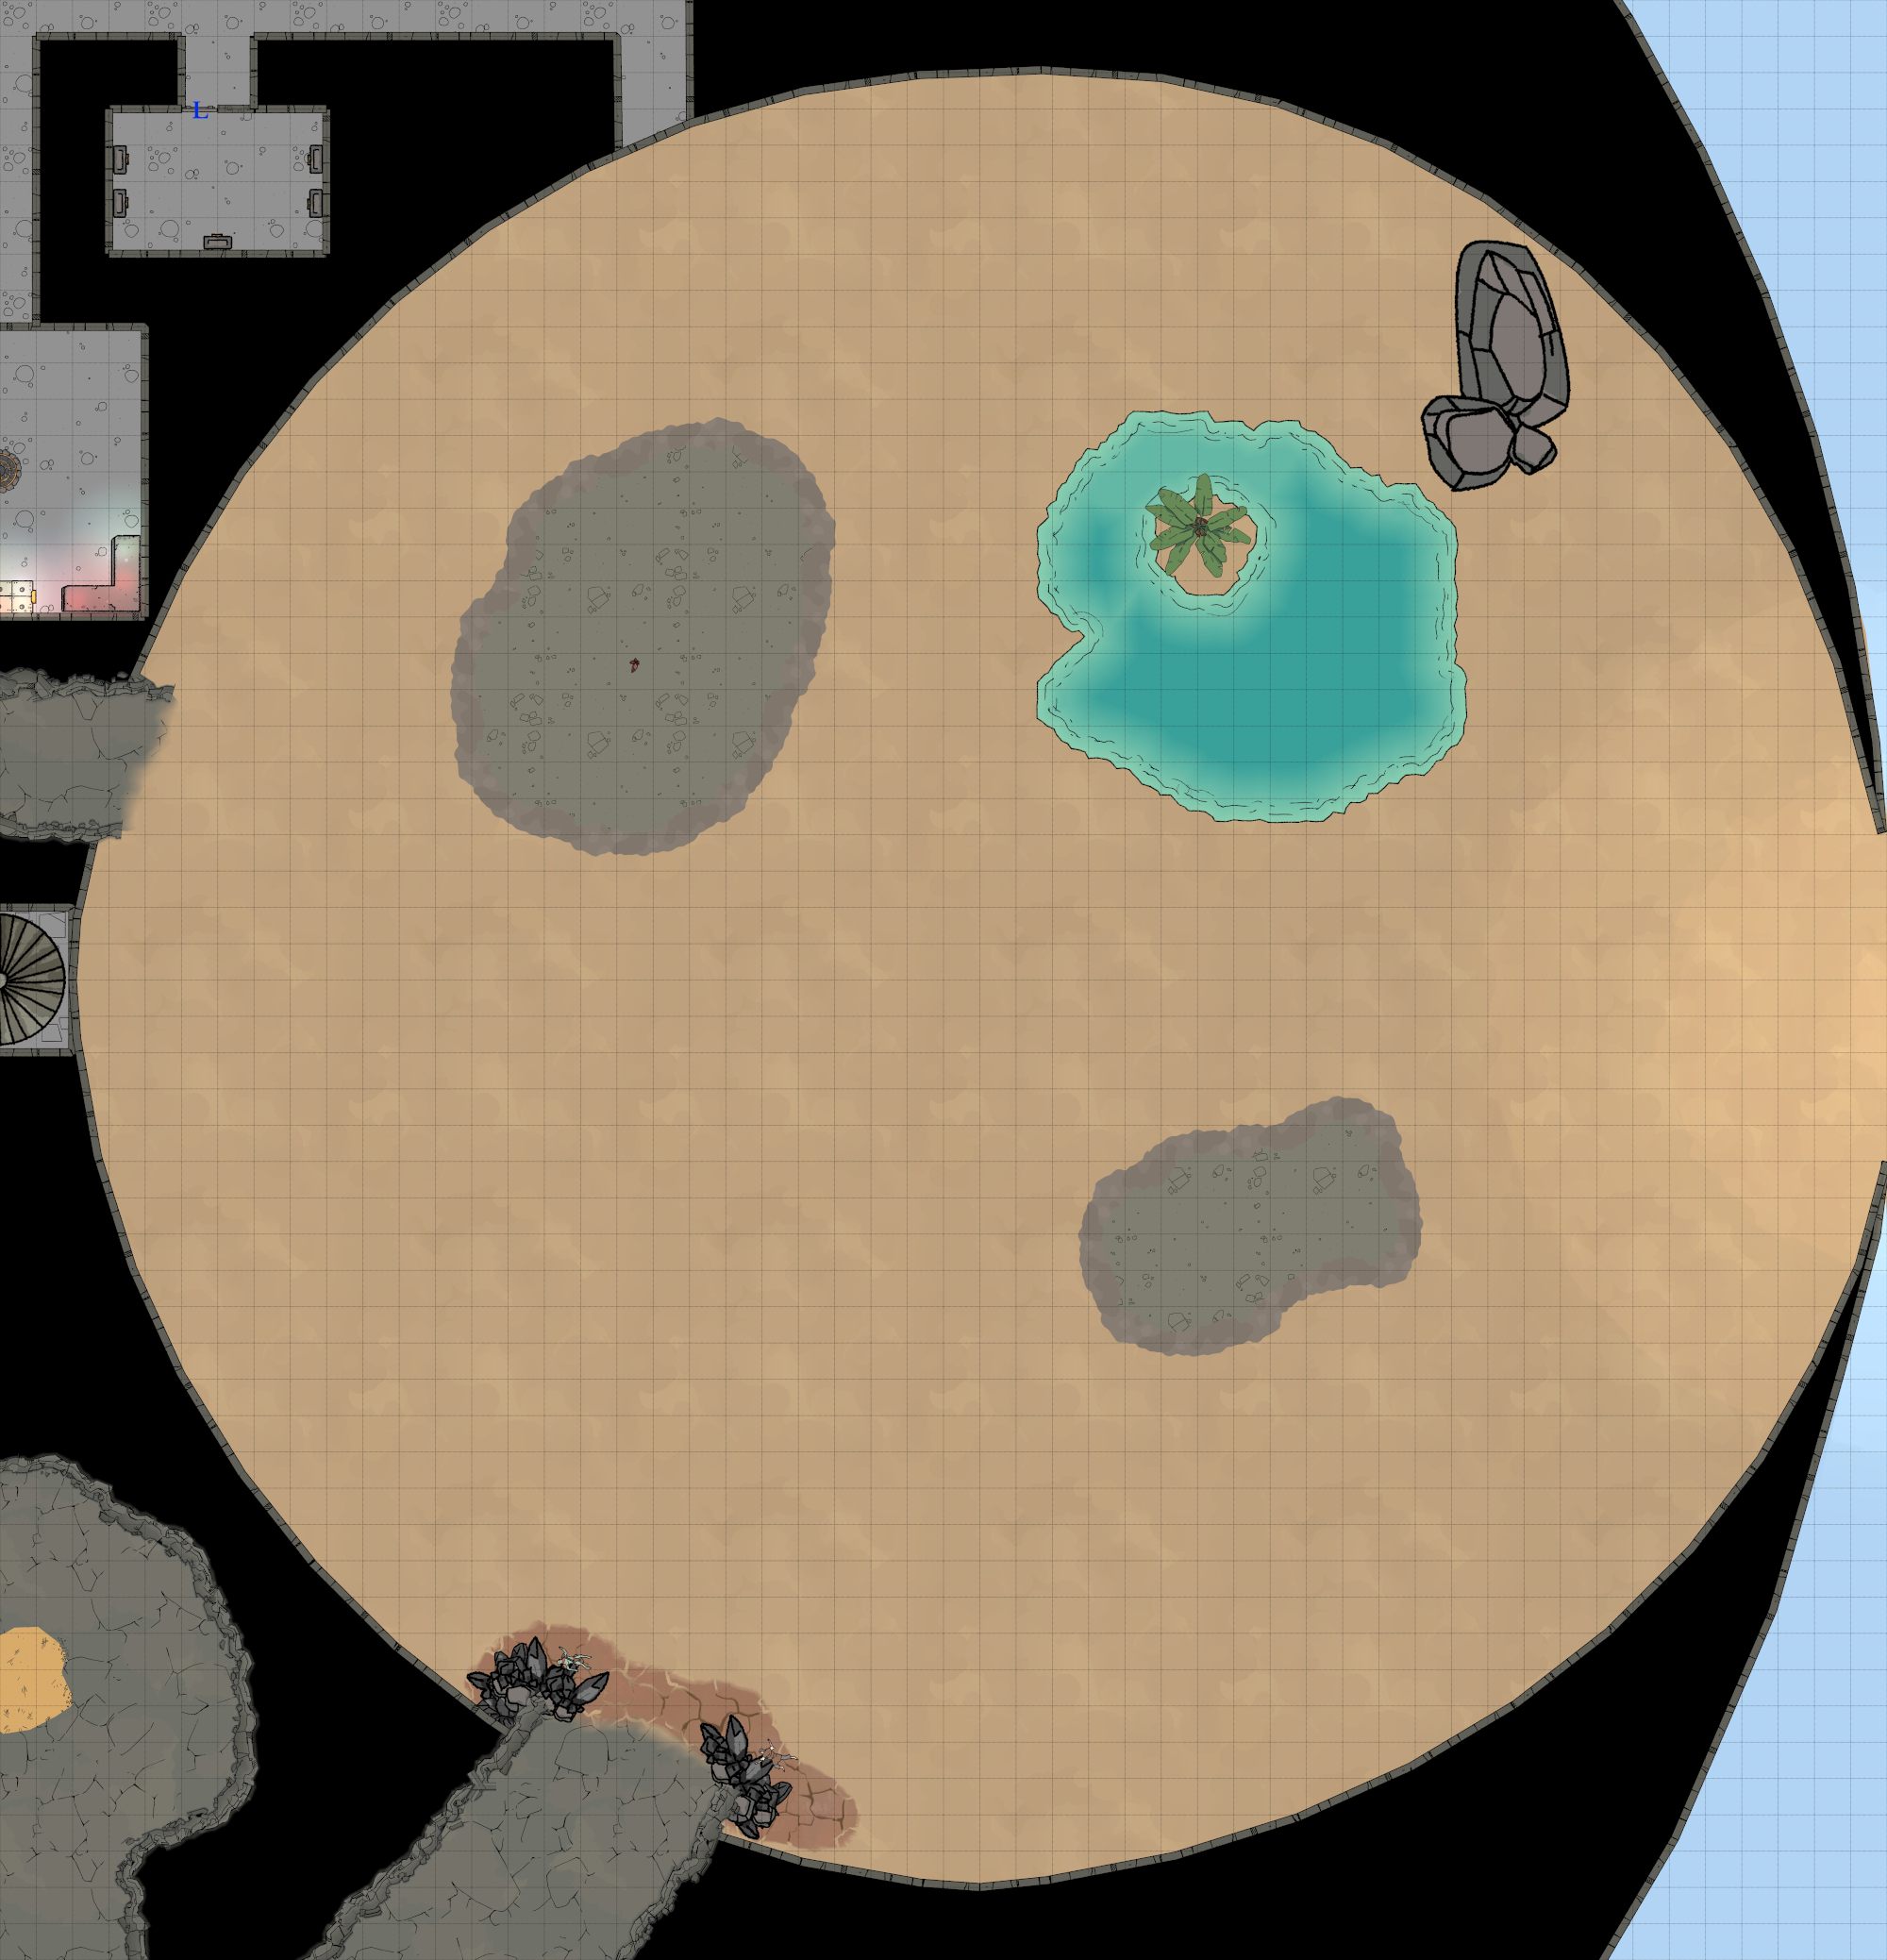
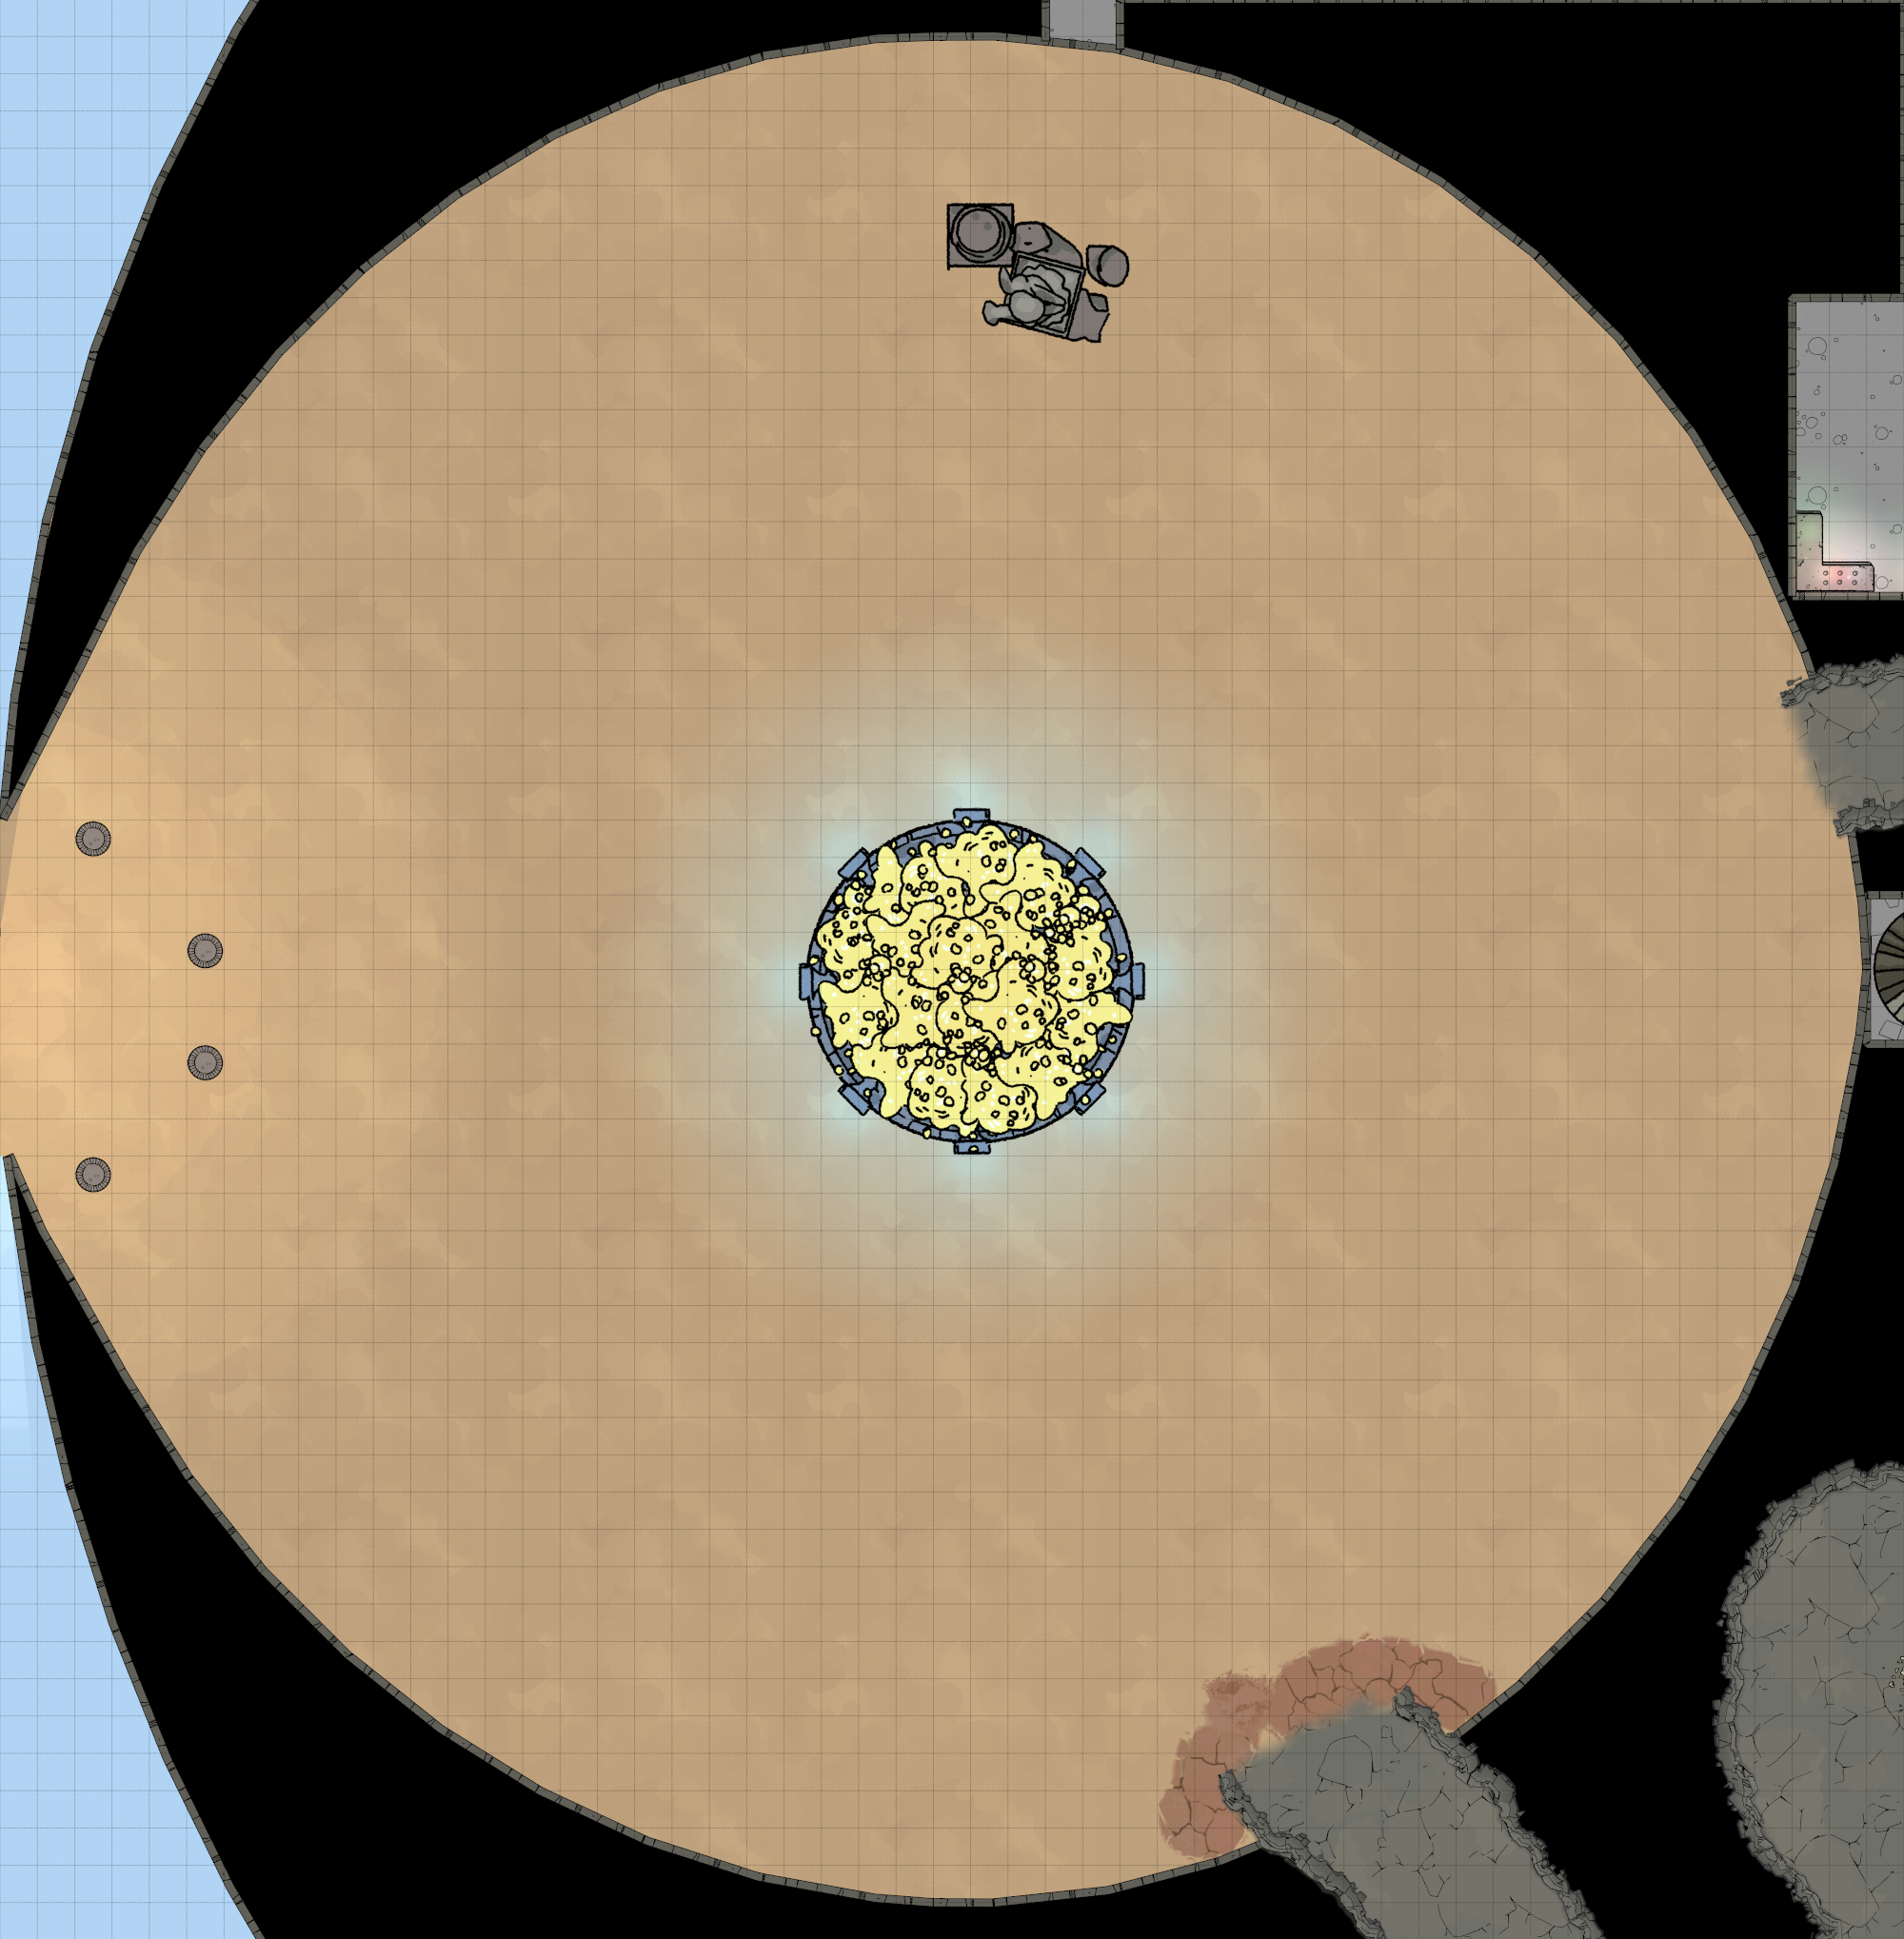
East dome - 29-1
Room Type: Lair
Light Level: Sunlight
This large open space is filled with sand, clearly designed to look like a desert. The walls are made of metal that curves into a dome, and a number of thick windows are set into it, providing sunning spots throughout. The metal walls have faded paint of a blue sky and distant trees, a strange mismatch to the dunes below.
The sands in this room shift slowly over time, providing different dunes each day. These deep sand also halves movement speed for any non-dragon travelling through this space.
The large archway to the east provides stunning views of the surrounding area and serves as the dragon's dumping ground for waste. Looking into the opening, a thick metal door can be seen, ready to drop and close the entrance. There does not seem to be any controls for this “blast door”.
Connected Rooms
East - Open archway - Outside (Bone Pile)
South West - Cave entrance - 29-2
West - Sand-covered tunnel - 29-4
North West - Secret door - 29-7
Inside - Inside this room - 29-3
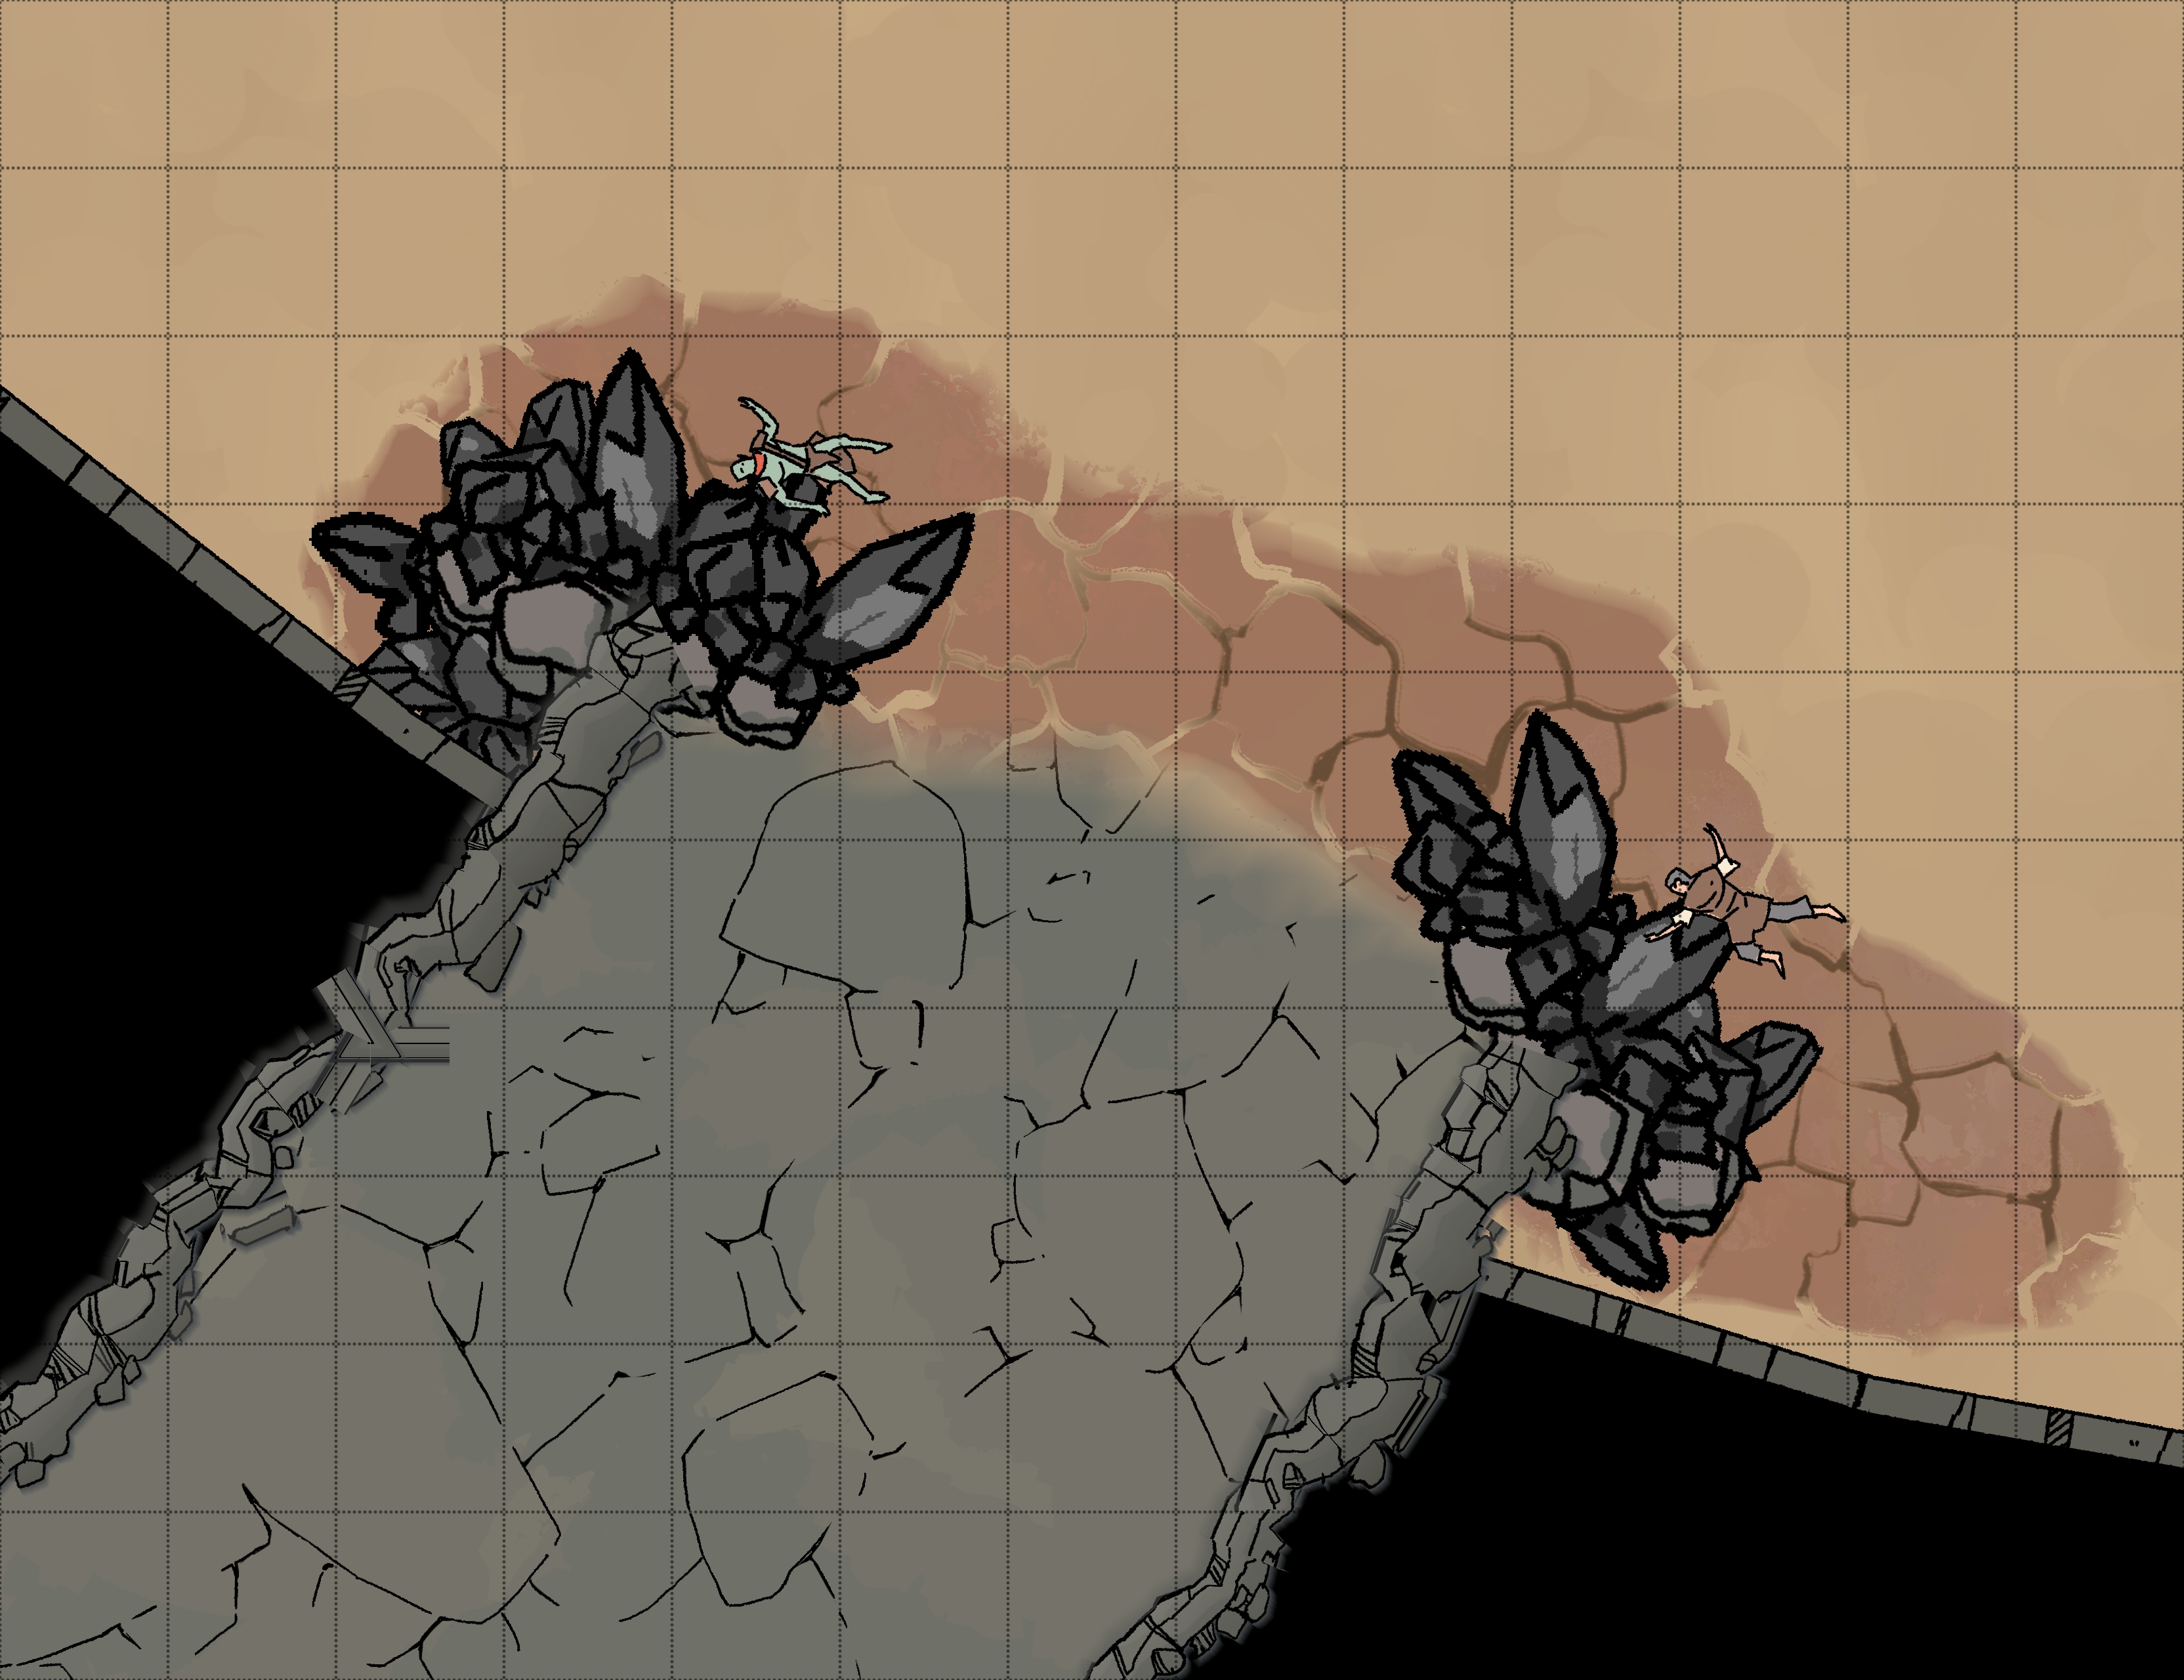
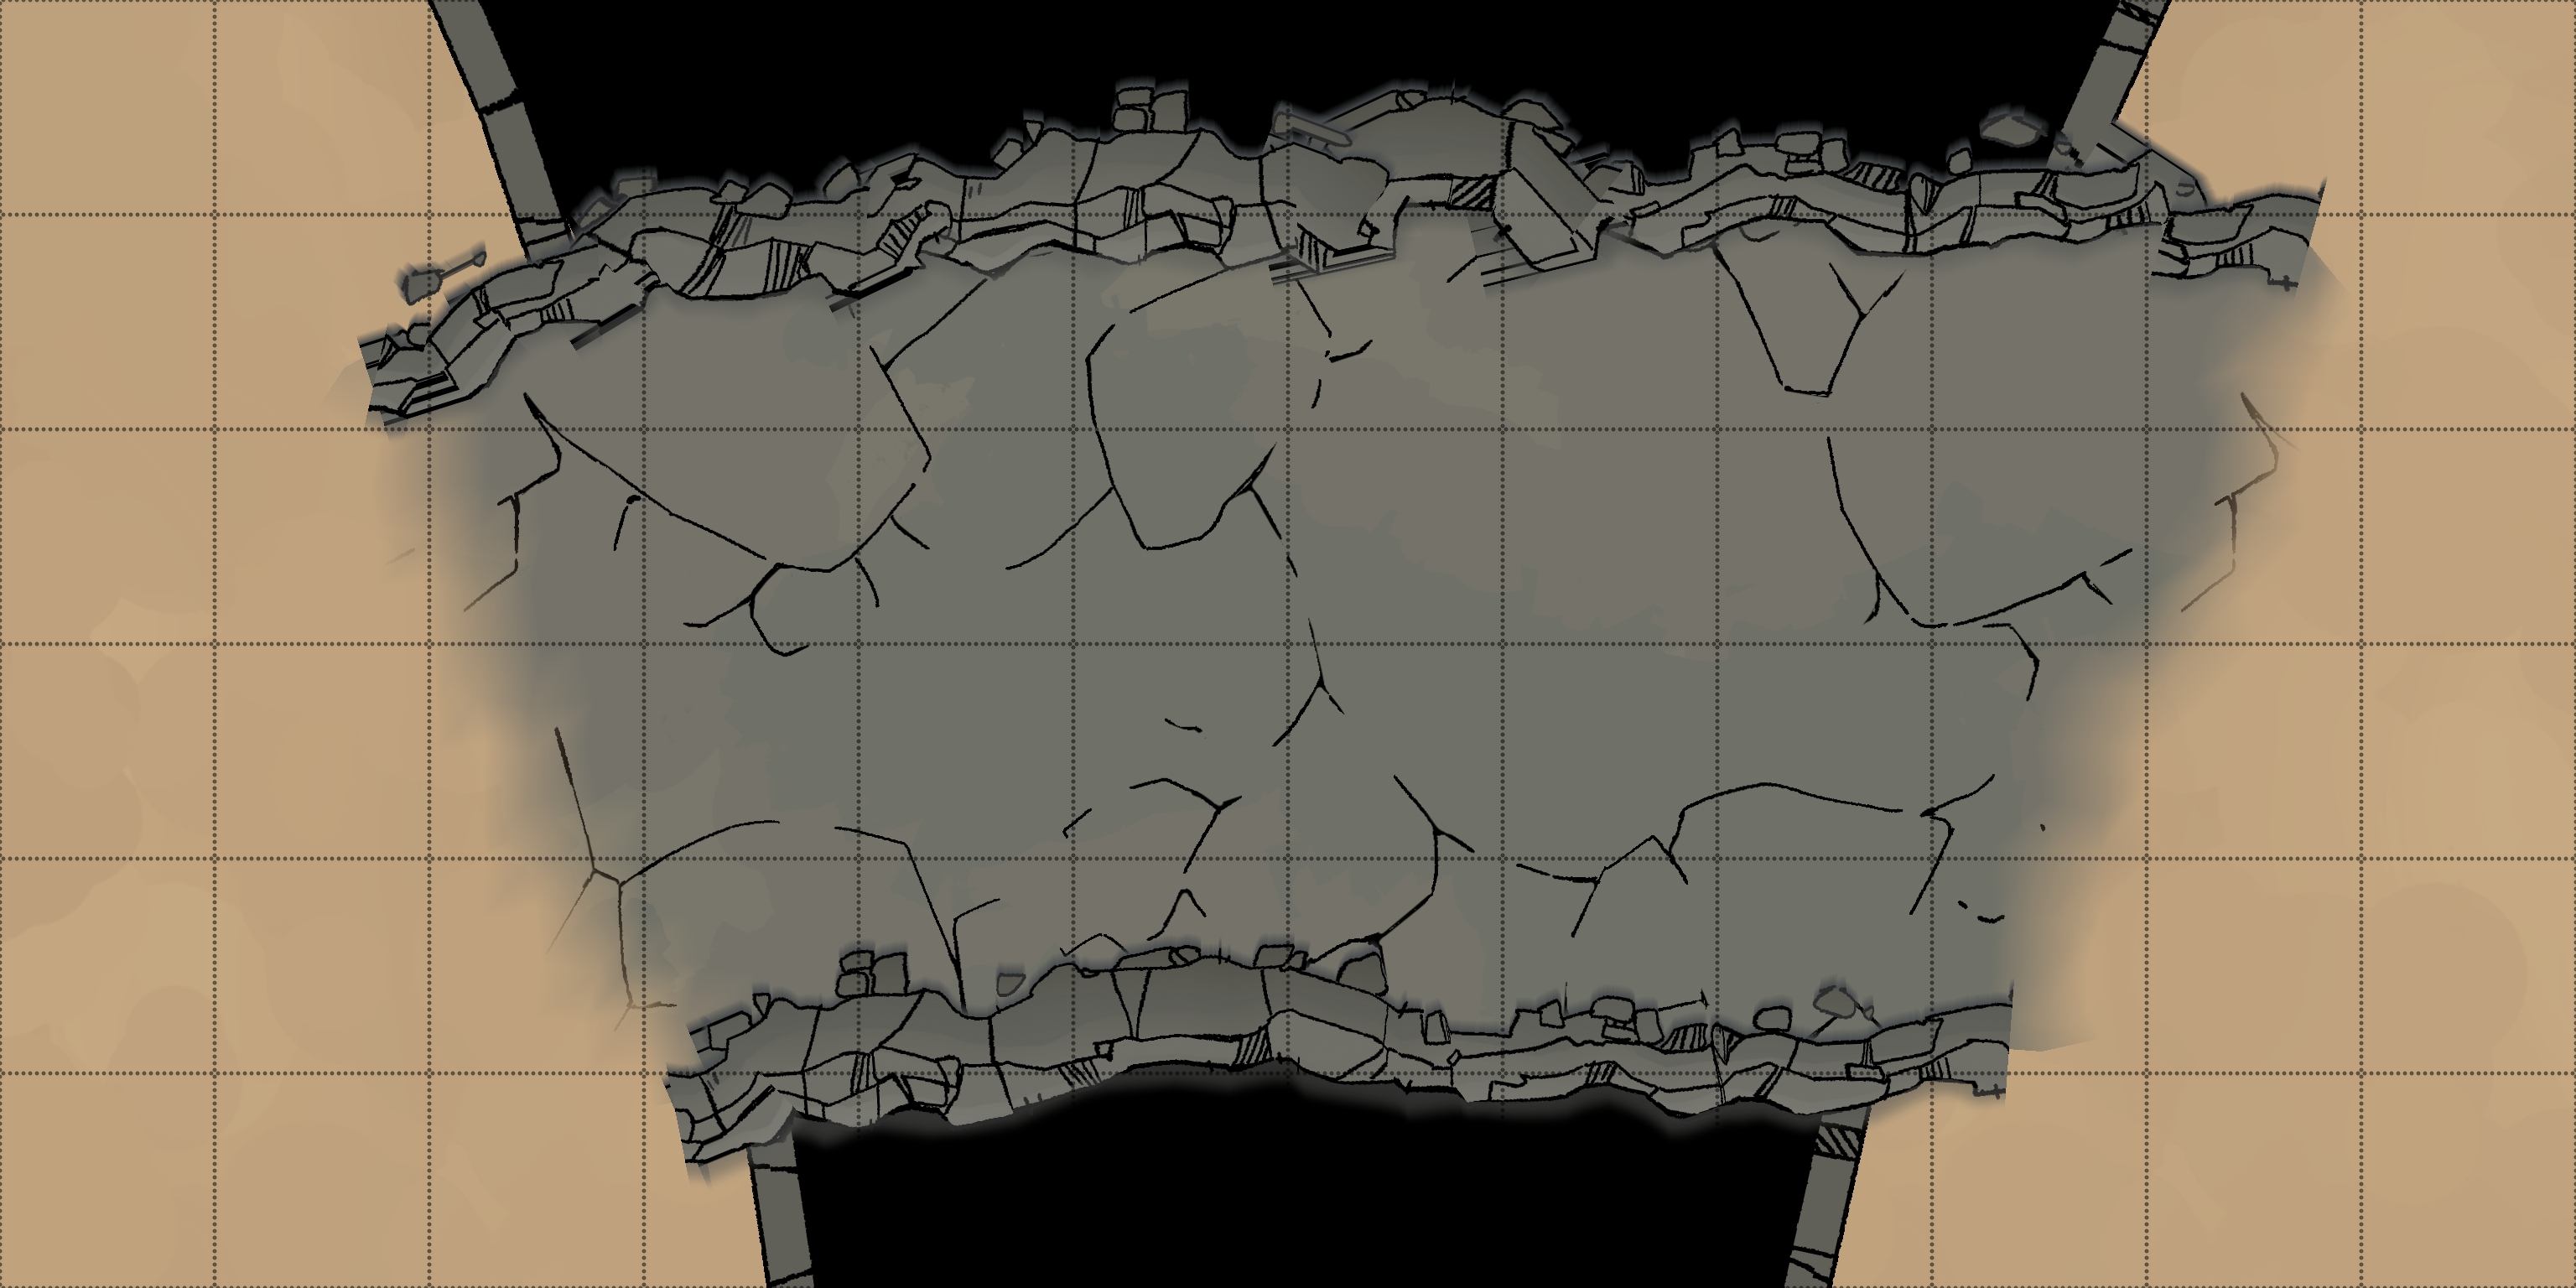
Glass gate - 29-2
Room Type: Lair
Light Level: Sunlight
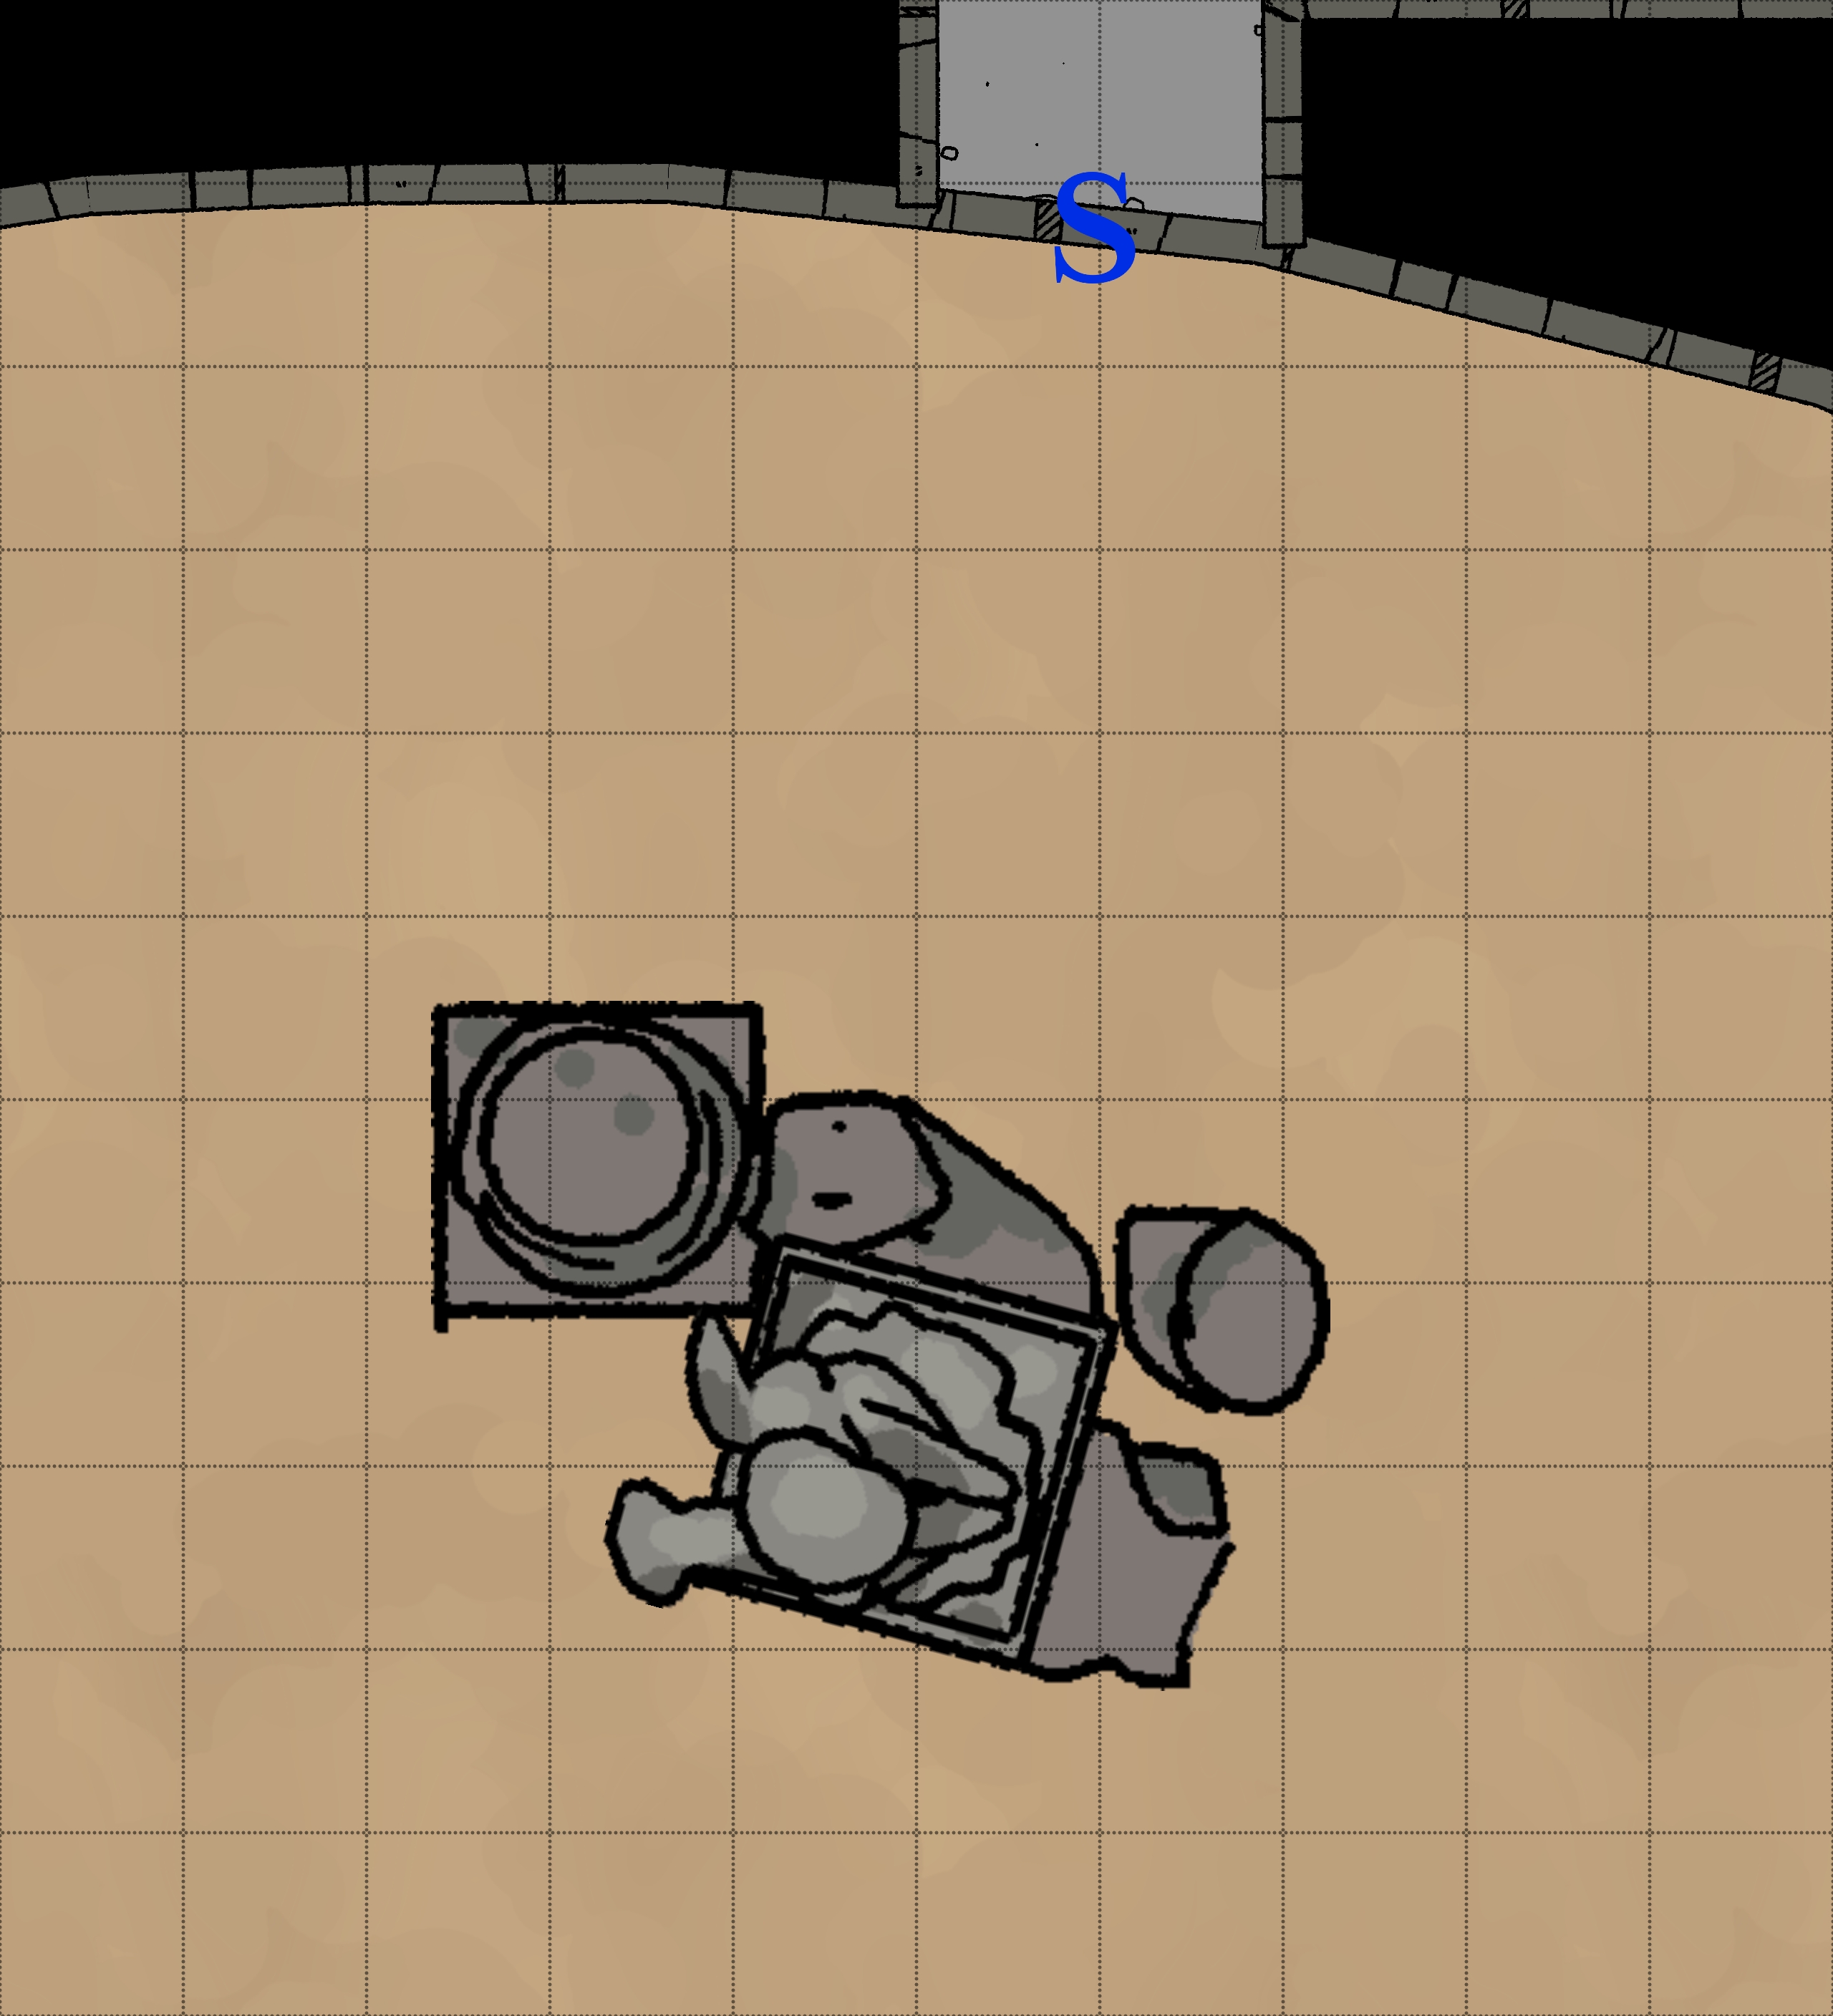
The metal walls give way to a rocky cave that appears natural but is part of a well-designed habitat. What is far from natural, however, are the large, dark, jagged glass spikes that surround the cave's entrance. These spikes were made by melting the sand with dragon's breath. A few bodies have been spiked into this glass as a message to outsiders. The spikes are pointing inwards, creating a difficult point to manoeuvre for larger creatures. The broken glass shards on the floor are only a hazard to those without shoes.
Loot!
Figure in dark robes impaled on glass:
Dragon Cleric impaled on glass:
- Bracers of Armour
Connected Rooms
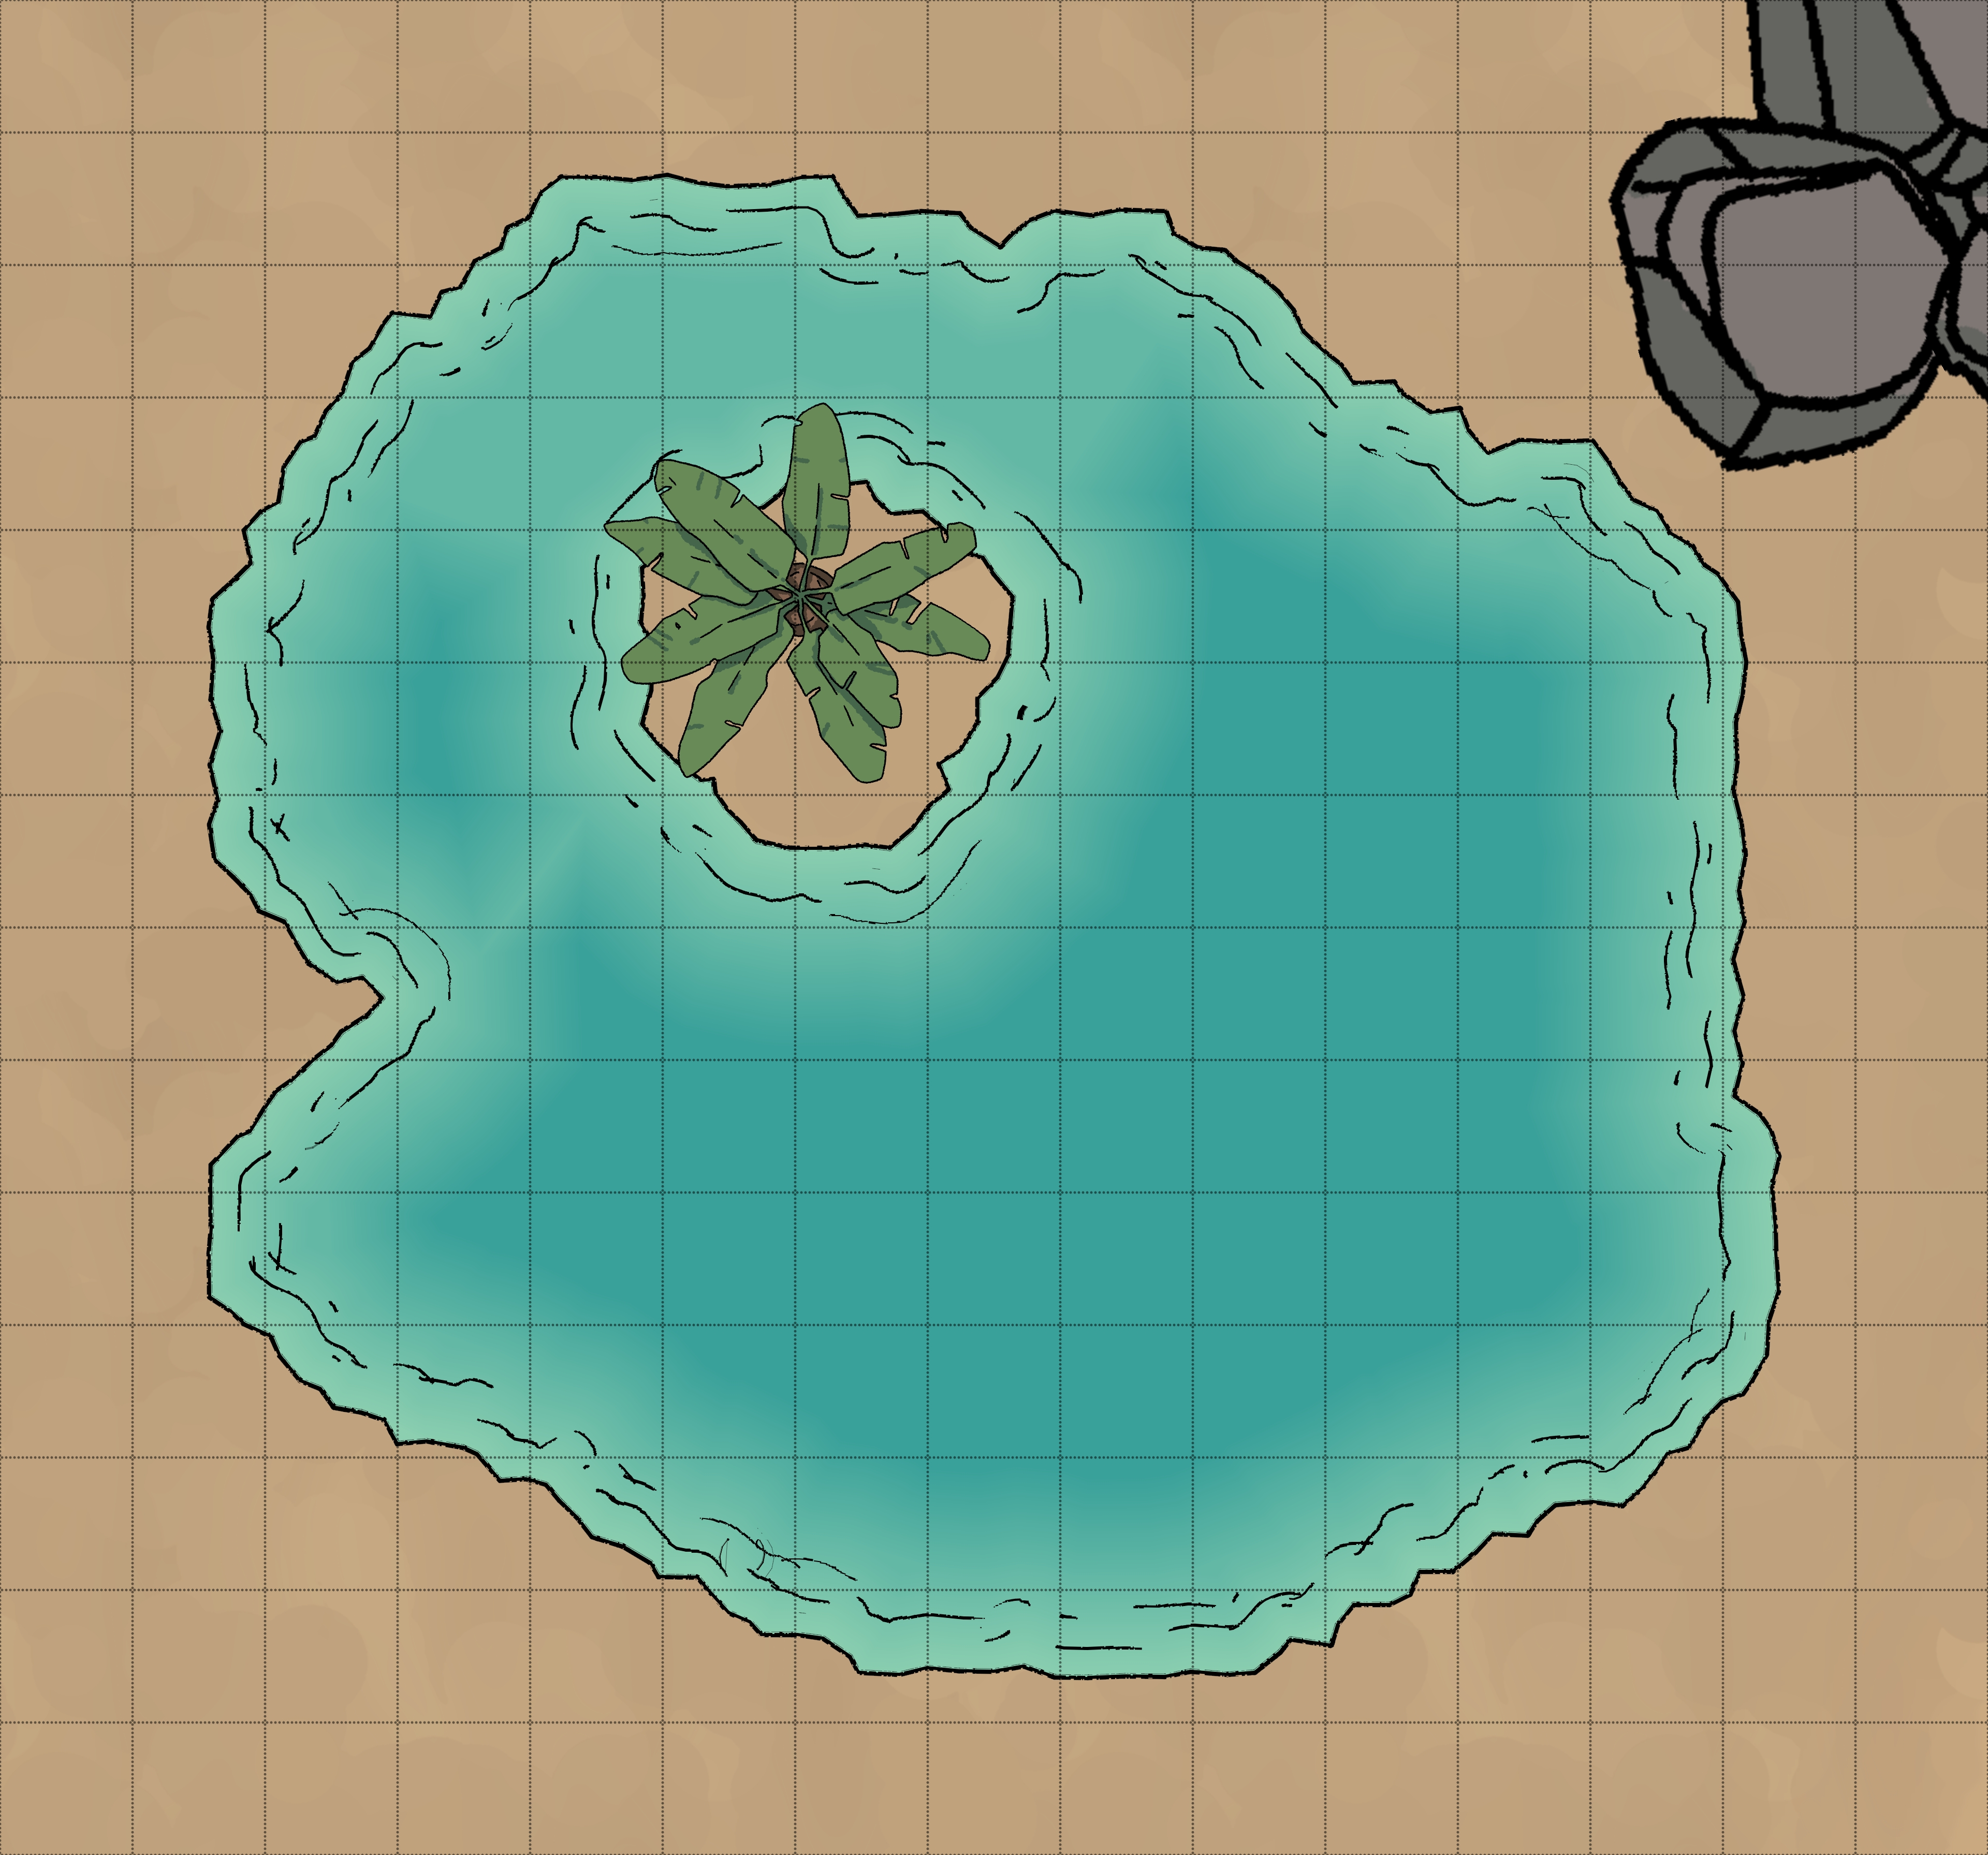
Oasis - 29-3
Room Type: Lair
Light Level: Focused Sunlight
Inside the East dome is a small pool of water fed in from the water tank (Floor 14) and a tiny island in the middle with a single palm tree. This tiny oasis is a safe place for the dragons to get water and to bask in the sunlight. The water is shockingly deep to allow dragons to submerge themselves.
Strangely, the palm tree always has coconuts available.
Connected Rooms
Inside of - 29-1
Dune door - 29-4
Room Type:Lair/Empty
Light Level:Dark
This connecting tunnel is slightly shorter than the others, creating a snug area for dragons to feel safe in. This tunnel has been blocked at both ends by sand, which hides it incredibly well. Dragons like to use this as an ambush spot if they know someone is coming.
This tunnel is made from very strong, electrically conductive metal that is very hard to break through.
Connected Rooms
East - Sand blocked tunnel - 29-1
West - Sand blocked tunnel - 29-8
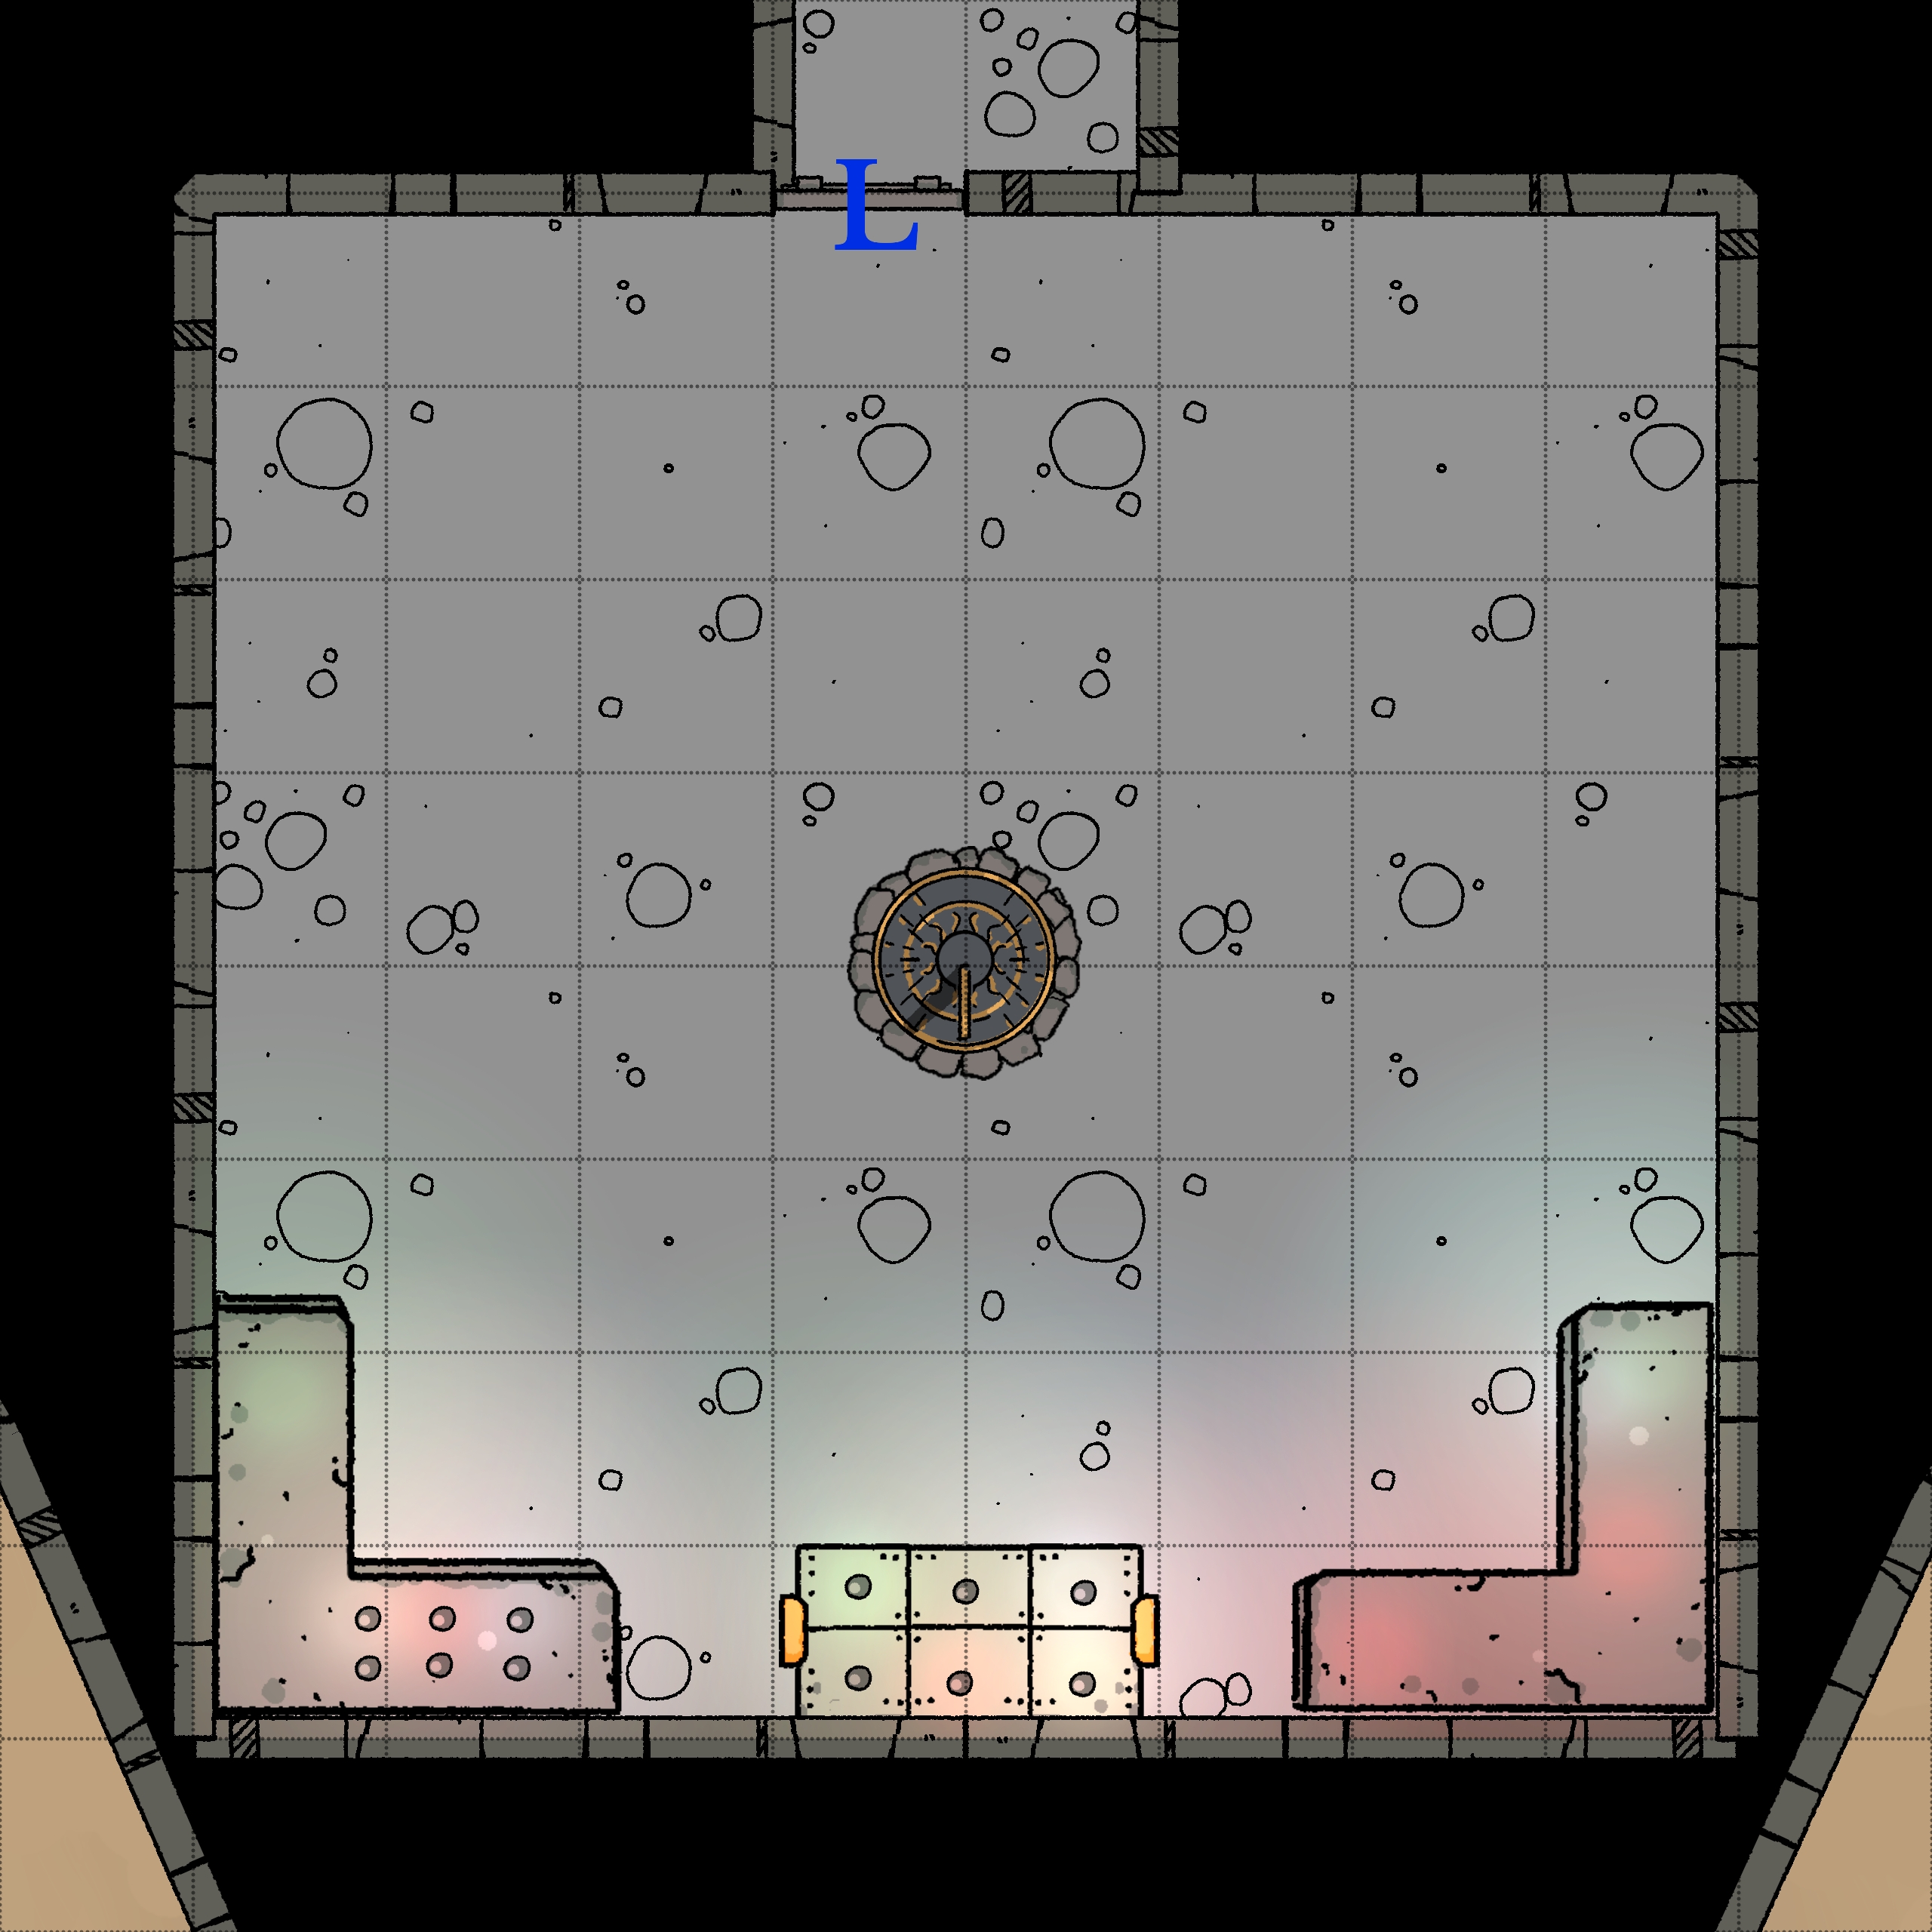
Keepers control room - 29-5
Room Type: Special
Light Level: Dim light
This large room is dark, except for the soft glow of multicoloured lights from metal tables, reflecting off the metal walls and floors. This room is used to manage the aviary and the occupants.
The south wall is lined with metal tables that are attached to the floor. They have a number of levers and buttons, each labelled. There is no display, just indicator lights showing the current status of different things, such as:
Door Controls:Leavers are available to close the doors and cover the windows with blast doors individually or all together. By default, all are open.
Golem Control:There are indicators for each set of golems in 29-7. Lights show the status of each a number of controls are available:
- “Dragon Cull”: all golems wake up and kill anything on the floor, including in the back rooms.
- “New Clutch”: leavers are present under each golem group. Black and Blue buttons are already activated. When activated, relevant golems will gather eggs from 29-6 and incubate and defend them until they can look after themselves.
Temperature Control:Temperature can be controlled for each dome, with a separate control for heating the Hatching Chamber (29-12). This ranges from desert heat to tundra's cold.
There are displays providing other information:
Golem Status:
- Red - Ready
- Green - Ready
- White - Ready
- Blue - Blank
- Black - Blank
Egg Status:
- Red - Ready
- Green - Ready
- White - Ready
- Blue - Blank
- Black - Blank
In the centre of the room is an intricate brass contraption that looks like it would hold a globe, but the globe is missing. When approached, the contraption will activate, providing an illusory display. This display provides every dragon location within a mile of the tower. This provides more direction and distance data rather than an exact map location.
Connected Rooms
North - Heavy metal door (Locked from inside) - Secret corridor
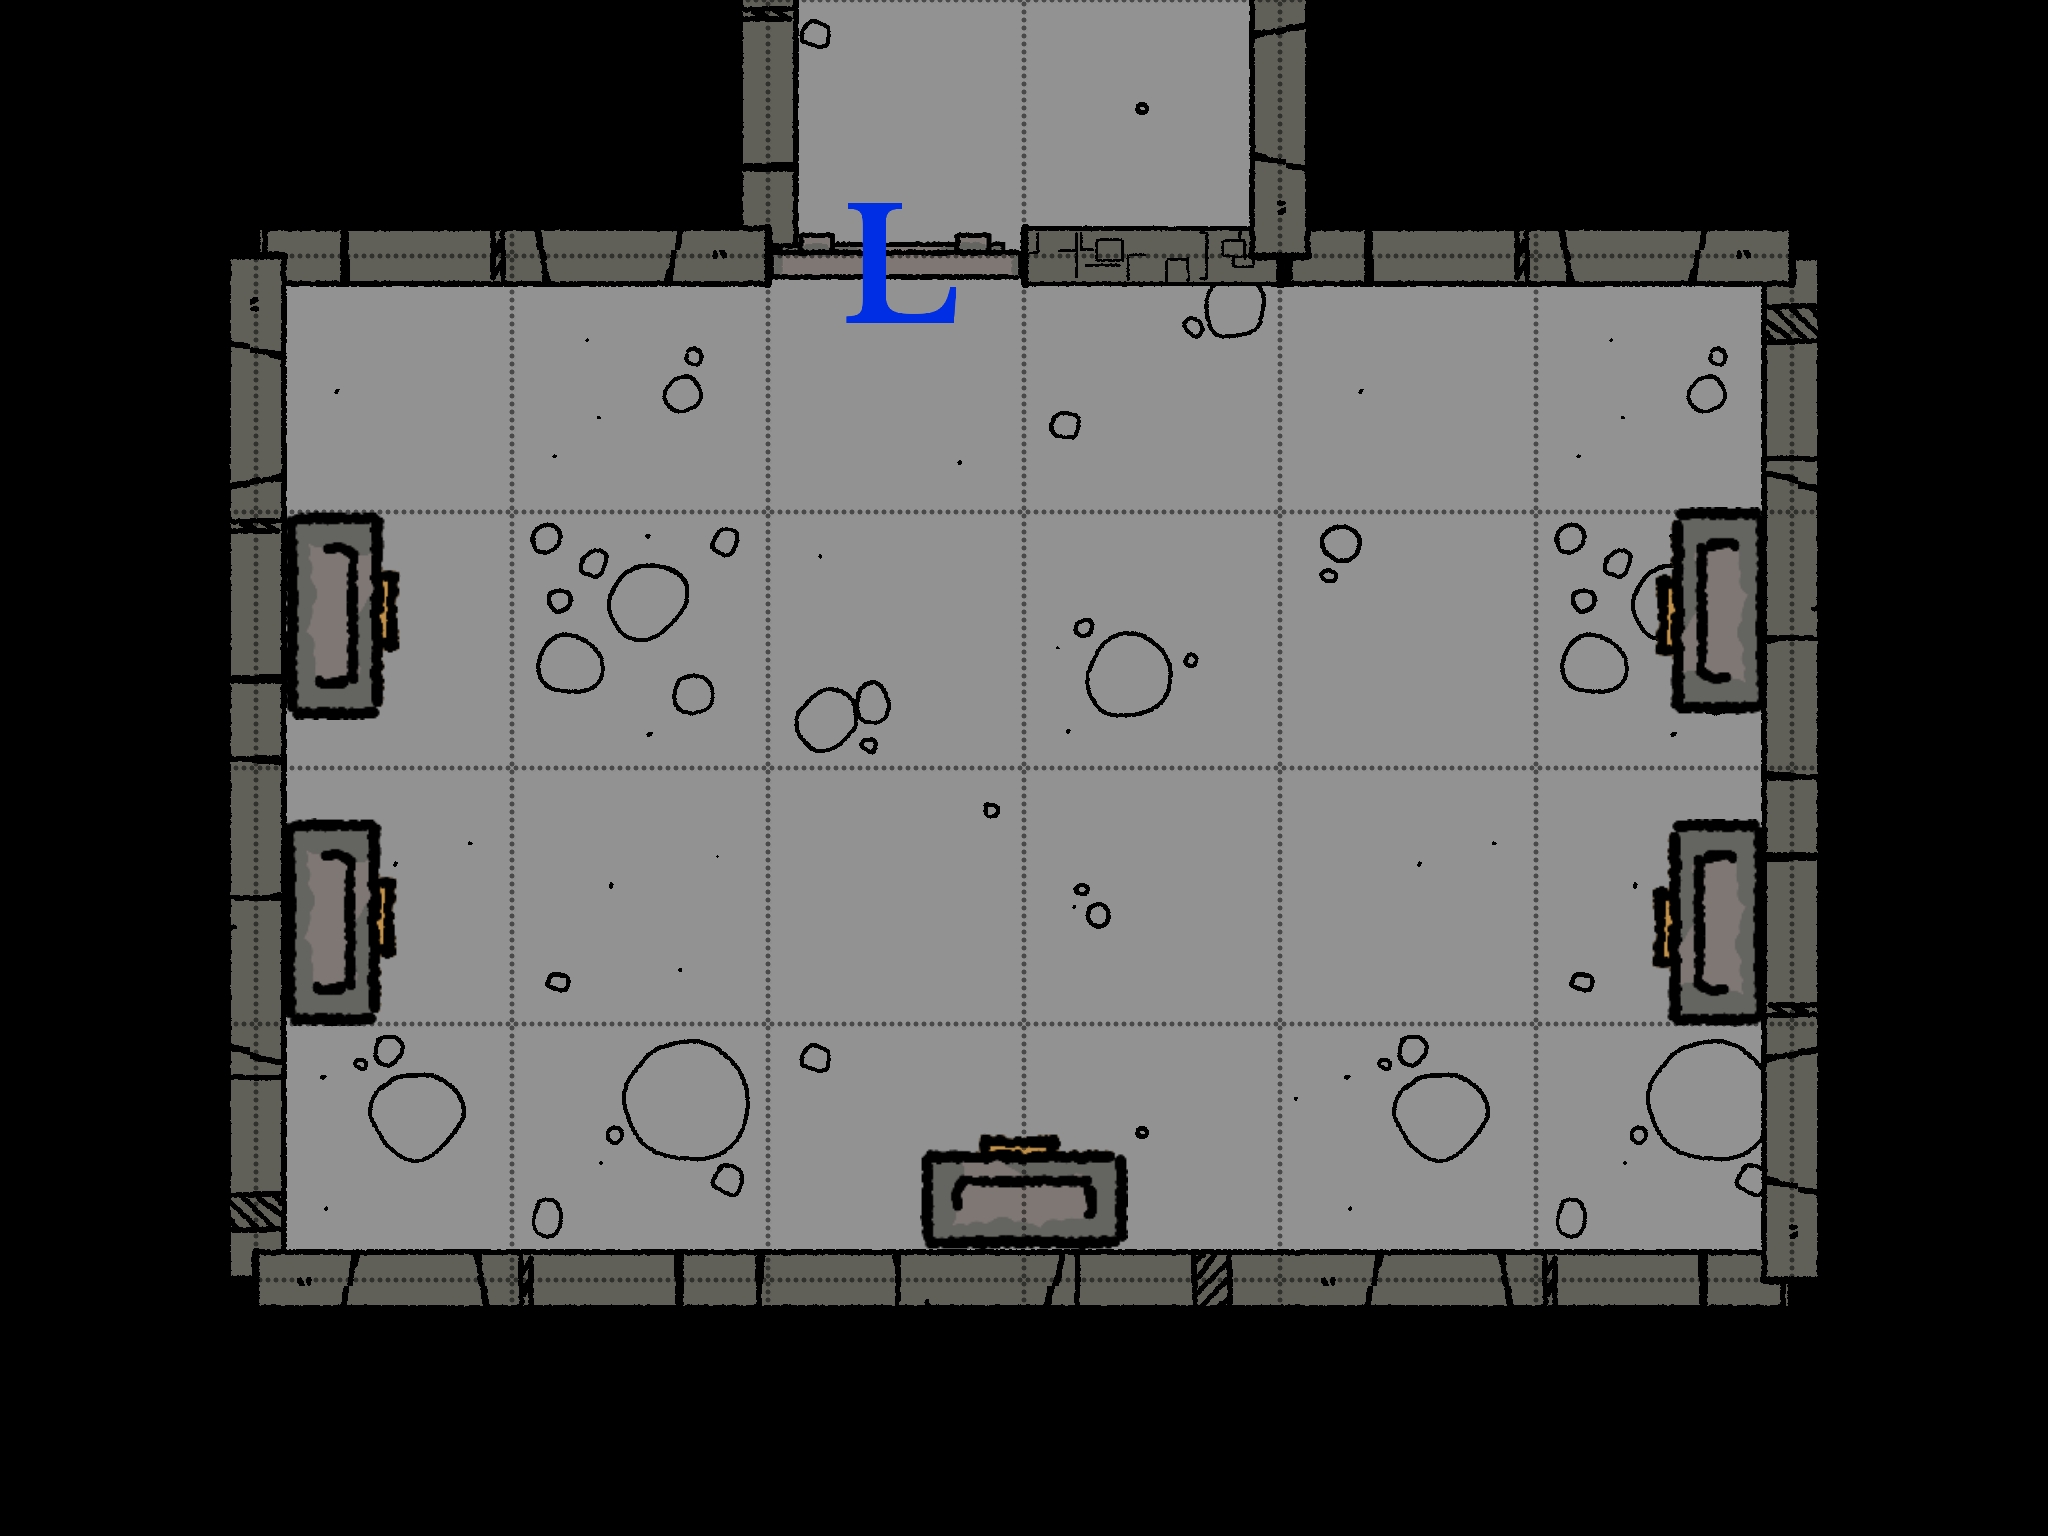
Egg storage - 29-6
Room Type: Special
Light Level: Dark
This bare metal-lined room has no decoration or obvious purpose. 5 large metal boxes are evenly spaced around the outside edge of the room. Two are open, the rest are sealed and locked. Each metal box is built into the floor and cannot be moved.
Each box is a specialised storage container for dragon eggs. They can be stored here indefinitely, ready to be hatched when needed. Currently, the blue and black dragon egg boxes are open. Each full box contains 5 eggs of its labelled type.
The inside of the chests is extremely cold, but the cold does not escape even when they are open. When you put your hands inside the box, there is an exact line where the cold can be felt, and it hurts. 1d4 damage per round with limb inside the box, 1d10 per round being trapped inside the box. The only exception is the white dragon egg box, which substitutes fire for cold.
Boxes:
- Flame box (locked): 5 Red dragon eggs
- Poison drop box (locked): 5 Green dragon eggs
- Snowflake box (locked): 5 White dragon eggs
- Lighting box: Empty, still cold
- Black bubbling liquid box: Empty, still cold
Connected Rooms
North - Locked metal door - 29-7

Caretaker storage - 29-7
Room Type: Special
Light Level: Dark
This hidden backstage corridor opens up to display a range of constructs waiting in formation. Each has a reinforced metal urn as a chest and a porcelain mask painted with a dragon's face. These are the Caretaker Golems that will raise the next generation of Tower Dragons.
There are 3 Caretaker Golems for each colour type of dragon. They wait here perfectly still, waiting to be activated. Each is resistant to the relevant breath weapon of the dragon it will care for. They are intended to protect and raise the dragons until they can look after themselves.
The different coloured Caretaker Golems available:
- Green
- Black - Heavily damaged with claw marks and melted sections. One golem is missing.
- Red
- Blue - Slight claw damage, mostly seen on painted sections
- White
Connected Rooms
South East - Back of secret door - 29-1
South - Locked metal door - 29-6
West Dome - 29-8
Room Type: Lair
Light Level: Sunlight
This dome is filled with deep sand, forming rolling dunes that shift slowly over time. Similar to the East dome, there are large windows and an open archway, providing ample light. In a number of areas, large curved mirrors attached to the ceiling catch light from the windows and focus it onto a floating platform 29-9. This focused light provides sun spots for the dragons to rest in.
Connected Rooms
Up 20ft - Floating platform - 29-9
North - Secret door - Secret corridor
East - Sand-covered tunnel - 29-4
South East - Cave entrance - 29-11
West - Open archway - Outside)
Floating Platform - 29-9
Room Type: Lair
Light Level: Focused daylight
Floating 20ft above the shifting sands is a large stone platform. This is Syrindrax's lair and horde. Attached to the underside of the platform are blue crystal groathes that glow and provide the levitation.
As the dragon moves about on this platform, it wobbles slightly under the weight, and coins topple off into the sand below.
Loot piled onto the platform:
- 86,000sp
- 20,000gp
- 14 x cracked and flawed gems (10gp)
- 17 x Sizable gems, including bloodstone, clear quartz, etc. (50gp)
- 22 x Well-cut gems, including topaz and citrine, etc. (100gp)
- 8 x Large clear aquamarine gems (500gp)
- 5 x Large perfectly clear sapphire gems (1,000gp)
- 2 x pieces of jewellery (600gp)
- Simple gold torque
- Well-made silver necklace
- 2 x pieces of jewellery (700gp)
- Matching gold bracelets featuring dwarven artwork of a feast
- Piece of jewellery (800gp)
- Gold circlet decorated with small gemstones
- 3 x pieces of jewellery (900gp)
- Heavy gold chain with a tower clasp (mayor's chains of office)
- Silver inlaid belt set with polished agates
- Worked gold earrings with dangling pearls
- 5 x pieces of jewellery (1000gp)
- Gold signet ring featuring a tower (Alistair's old ring)
- Jewelled dagger pommel
- Necklace of garnets and gold links
- Coaks' clasp, shaped like fighting dragons, one made of sapphire, the other of ruby
- Silver tiara set with moonstones
- 2 x pieces of jewellery (1100gp)
- Dwarven gold armband set with a single large opal
- Filigree necklace with alternating sapphires
- 4 x pieces of jewellery (1200gp)
- Dwarf gold and silver chalice
- Platinum ring with etched runes
- Jewelled phoenix brooch
- Unicorn ivory comb
- 3 x pieces of jewellery (1300gp)
- Half a crown from a distant land
- Heavy gold necklace with a very large ruby
- Decorative manica made from platinum scales
- 2 x pieces of jewellery (1400gp)
- Twin decorative daggers with jewelled hilts and gold-inlaid blades
- Javelin Of Seeking +2
- Staff of Dispelling
- Ring of Fire Resistance
- Piece of jewellery (1700gp)
- Platinum necklace holding a flawless emerald the size of a thumb
Connected Rooms
Down - Sands below - 29-8
Storm Totems - 29-10
Room Type: Lair/Trap
Light Level: Sunlight
Evenly spaced around the entrance to the West Dome, 29-8 are 4 twisted pillars of melted weapons and tools protruding from the sand. These pillars have been enchanted by the blue dragons as an early defence.
If a blue dragon uses its breath weapon against a pillar, it will arc between any pillar next to it. Anything within 5ft of a pillar under this effect will need to make a save vs breath or take the full breath weapon damage.
This energy can't bounce back to another pillar.
These pillars are the first line of defence against intruders. Dragons will often wait for them to be used as cover before attacking.
Connected Rooms
Inside - 29-8
Cave Vivarium - 29-11
Room Type: Lair
Light Level: Dark
This cave section of the floor is designed to provide a dark, safe space for the dragons. Its twisting caves are ideal for lairs for most types of dragon. Given that it's completely artificial, it feels like an actual cave. Digging through the rock will eventually lead to brickwork.
Along the south wall in draconic text is a poem that acts as a pact between Alistair and the dragons. He knows this won't always keep them in line, but it should help them realise their purpose in his plans.
"Hear now, Wyrm, this covenant true:
Guard the Spire, and skies stay blue.
Hunt the trespassers, scorch the foe,
And Mortayne's shadow shall never grow.
"Wings may falter, claws may fade,
But tower's shelter shan't degrade.
Stray beyond, take foreign throne?
Your bones join those beneath the stone.
Eggs await in frozen sleep,
Should Wyrm faith prove cheap.
Keep our pact - both strong, both wise
Dragons rule here... till all time dies."
Connected Rooms
North - Open cave tunnel - 29-12
North East - Open cave tunnel - 29-2
East - Metal door built into stone - 29-14
West - Collapsed tunnel - Destroyed Kobold Quarters
North West - Open cave tunnel - 29-8
Azeroth's Lair & Hatching Chamber - 29-12
Room Type: Lair
Light Level: Dark
This dark stone chamber is the location of Azeroth's lair and where the dragons' eggs are hatched. Its floor is made from soft sand, and its walls are domed, providing lots of room for even an ancient dragon. This is one of many lair locations designed as part of the Dragon Aviary, not so much for blue dragons, but this is the best Azeroth will get.
Azeroth is not supposed to have a horde, but does bury coins he can find in the sand. A few scattered coins can be found on the surface, but it's not clear that there is a horde here. His better gems are deeper down.
Azeroth’s Horde
- 210,000cp
- 30,000ep
- 40,000gp
- 18 x gems (10gp)
- Cheap and damaged stone, cloudy agates, chipped quartz
- 28 x gems (50gp)
- Dull garnets and more intact cheap gems
- 29 x gems (100gp)
- Pale blue topaz and green chrysoprase
- 19 x gems (500gp)
- Fire opals and Star rose quartz
- 6 x gems (1,000gp)
- Diamonds and other rich gems that Azeroth has buried deep.
Connected Rooms
South - Open cave tunnel - 29-11
Buried Statue - 29-13
Room Type: Lair
Light Level: Sunlight
Sticking out of the sands in the West Dome (29-8) is a large statue of a dwarven queen. Its dark stone matches that of the nearby mountains. It also has a number of claw marks on its back from being carried by a much larger dragon than the blue ones currently living here.
The crown that the statue is depicted wearing matches that of the Crown of the Mountain Queen.
Unfortunately, this statue serves no purpose other than solid cover!
Connected Rooms
Inside - 29-8
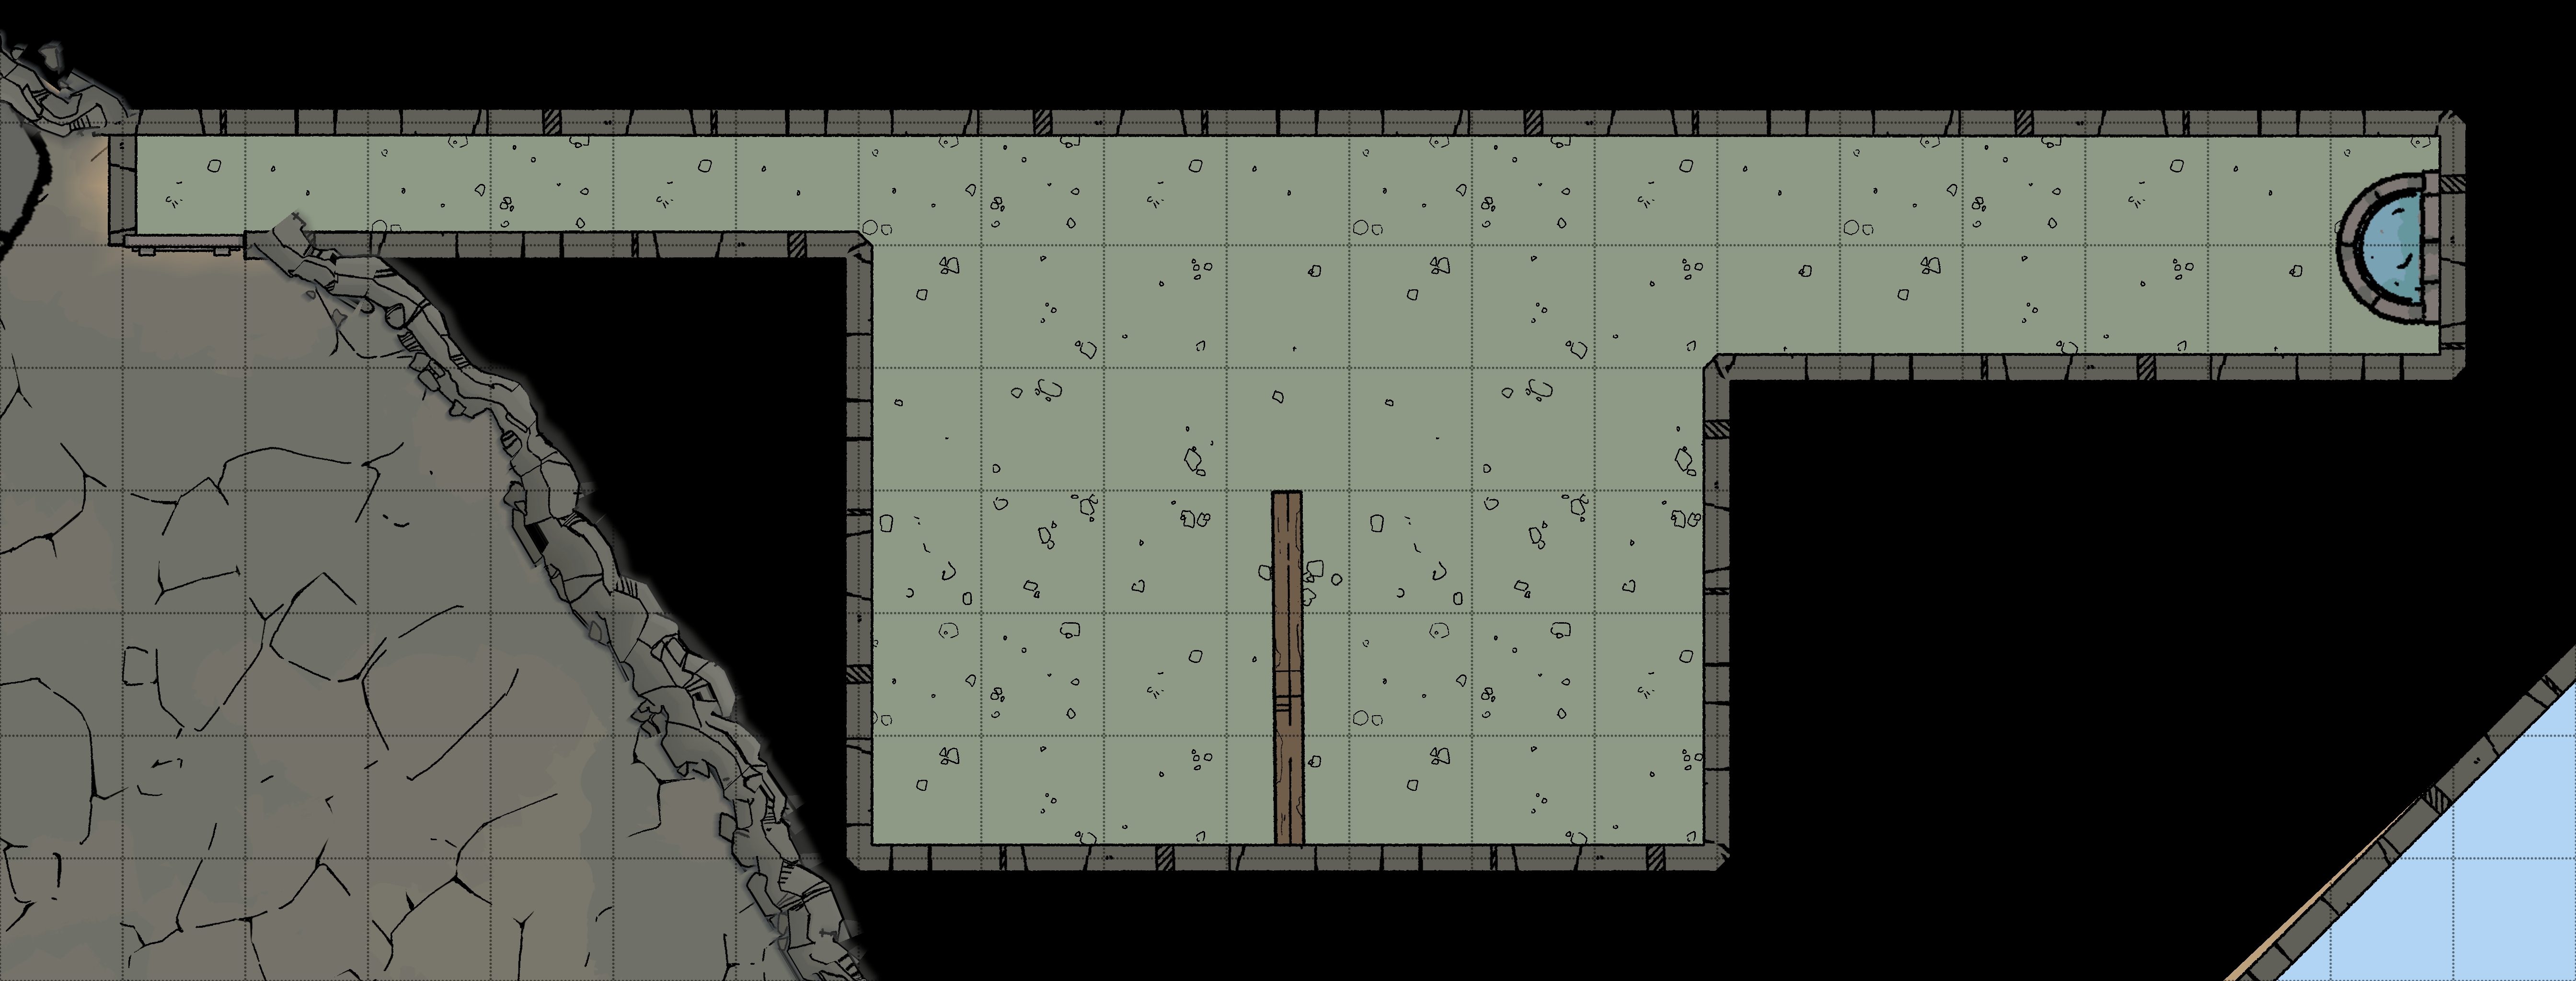
Abandoned Kobold Quarters - 29-14
Room Type: Empty
Light Level: Dark
This dark stone room is the abandoned home of the kobolds that used to care for the dragons. When things got bad under the last dragon, they braved the climb down, and a lucky few made it inside the tower.
The room is empty except for long, rotten furs for sleeping and a water fountain trickling out fresh water. The south wall has a simple segment down the middle to create an illusion of privacy in this cramped space.
Connected Rooms
West - Metal door built into stone - 29-11